投影变换
投影变换矩阵计算函数
cv2.getPerspectiveTransform(src,dst)
src:原始图像坐标(42矩阵,32位浮点型)
dst:目标图像坐标(42矩阵,32位浮点型)
投影变换函数
cv2.warpPerspective(src,M,dsize[,dst,flags,borderMode,borderValue])
src:原始图像。
M:变换矩阵。
dsize:输出图像的尺寸大小。
flags:插值方法。(可选)
borderMode:边类型。(可选)
borderValue:边界值。(可选)
import cv2 as cv
import numpy as np

image = cv.imread("d:/exercise/lusi.jpg")  # 读取图像
h, w = image.shape[:2]  # 获得图像的高和宽
src = np.array([[0, 0], [w - 1, 0], [0, h - 1], [w - 1, h - 1]], np.float32)  # 原图像的4个需要变换的像素点(4个顶角)
dst = np.array([[80, 80], [w / 2, 50], [80, h - 80], [w - 40, h - 40]], np.float32)  # 投影变换的4个像素点
M = cv.getPerspectiveTransform(src, dst)  # 计算投影变换矩阵
image1 = cv.warpPerspective(image, M, (w, h), borderValue=125)#进行投影变换
cv.imshow('image', image)
cv.imshow('image1', image1)
cv.waitKey()
cv.destroyAllWindows()
极坐标变换
线性极坐标变换
dst=cv2.linearPolar(src,center,maxRadius,flags)
dst:输出图像
src:原始图像
center:极坐标变换中心
maxRadius:极坐标变换的最大距离
flags:插值算法
特点:此函数生成的极坐标,θ在垂直方向,r在水平方向。
缺点:一是变换时的步长不可控制,二是只能对整个圆进行变换。
import cv2 as cv

image = cv.imread('d:/exercise/circle.jpg', cv.IMREAD_ANYCOLOR)  # 读取图像
h, w = image.shape[:2]  # 获得图像的高和宽
dst = cv.linearPolar(image, (w / 2, h / 2), 225, cv.INTER_LINEAR)  # 线性极坐标变换
cv.imshow('image', image)
cv.imshow('dst', dst)
cv.waitKey()
cv.destroyAllWindows()
运行结果:

对数极坐标变换
dst=cv2.logPolar(src,center,M,flags)
dst:输出图像
src:原始图像
center:极坐标变换中心
M:极坐标变换的系数
flags:转换的方向
特点:M的值越大,变换后得到的图像信息越多。
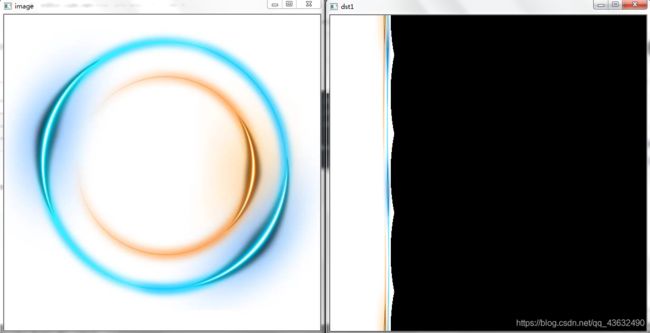
import cv2 as cv

image = cv.imread('d:/exercise/circle.jpg', cv.IMREAD_ANYCOLOR)  # 读取图像
h, w = image.shape[:2]  # 获得图像的高和宽
#设置变换的参数
M1=20
M2=50
M3=90
#实现对数极坐标变换
dst1 = cv.logPolar(image, (w / 2, h / 2), M1, cv.WARP_FILL_OUTLIERS)
# cv.WARP_FILL_OUTLIERS:填充所有输出图像的像素,如果部分像素落在输入图像的边界外,那么他们的值设定为fillval
dst2 = cv.logPolar(image, (w / 2, h / 2), M2, cv.WARP_FILL_OUTLIERS)
dst3 = cv.logPolar(image, (w / 2, h / 2), M3, cv.WARP_FILL_OUTLIERS)
cv.imshow('image', image)
cv.imshow('dst1', dst1)
cv.imshow('dst2', dst2)
cv.imshow('dst3', dst3)
cv.waitKey()
cv.destroyAllWindows()


