2021 OpenCV4.2+Android Studio4.0实现人脸检测以及截取人脸区域(SDK)
2021 OpenCV4.2+Android Studio4.0实现人脸检测以及截取人脸区域(SDK)
- OpenCV在Android中的配置
-
- 整体思路
- 在MainActivity中插入以下代码
- Activity的XML
- AndroidManifest.xml添加权限
- 将Values中的strings.xml修改
- 在menu中添加一个camera_view_menus.xml
- 最后记得添加级联分类器
- 截取人脸区域的函数
- 上一个链接,里面是我上面所述的demo。
初学者记录一下学习过程,同时分享一下结果,希望能让大家少走弯路。
OpenCV在Android中的配置
我用的是OpenCV4.2+android studio4.0做的人脸检测。关于如何在Android中配置OpenCV这篇文章很全面,可以参考(一定能配出来,出不来请仔细核对每一个步骤)。
https://www.jianshu.com/p/6e16c0429044
这篇文章连NDK环境也一起配置了,当然我这里的内容要实现其实只要配置到NDK之前就行(因为我是SDK实现人脸检测),当然全部配完也没问题。
整体思路
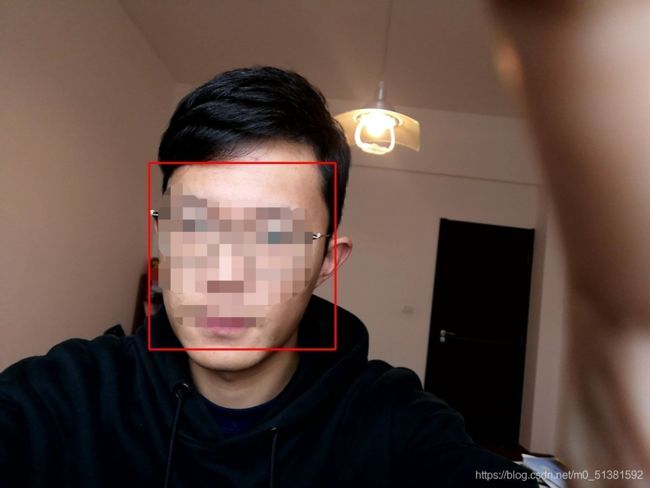
利用JavaCameraView呈现摄像头画面,加载OpenCV自带的haarcascade_frontalface_alt_tree.xml级联分类器(测试了多个级联分类器,该分类器效果最好),用分类器去检测每一帧的图像是否存在人脸,并且用框框住。
PS:最后会介绍如何将框住的人脸自动截出来,并且保存本地路径。
实物图(手动打码):


在MainActivity中插入以下代码
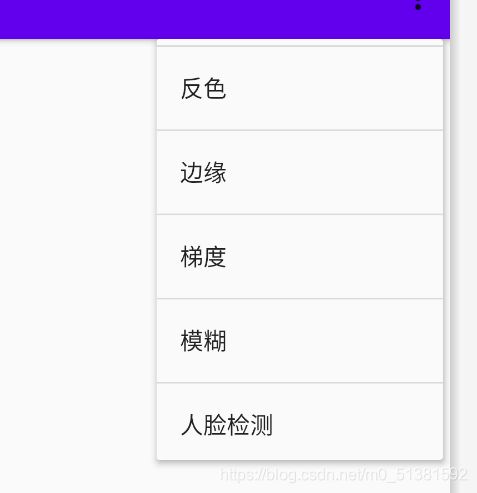
因为初学的原因,还试了一些图像处理的小例子。所以用了 PopupMenu来分别实现不同的功能。分为以下几种:

public class MainActivity extends CameraActivity implements CameraBridgeViewBase.CvCameraViewListener2, View.OnClickListener {

    private JavaCameraView javaCameraView;
    private  static int cameraIndex = 0;
    private Mat frame;
    int option =0;
    private CascadeClassifier face_detector;

    private BaseLoaderCallback baseLoaderCallback = new BaseLoaderCallback(this) {

        @Override
        public void onManagerConnected(int status) {

            switch (status) {

                case LoaderCallbackInterface.SUCCESS: {

                    initClassifier();
                    javaCameraView.enableView();
                }
                break;
                default:
                    super.onManagerConnected(status);
                    break;
            }
        }
    };

    /*
    加载一个OpenCV自带的正脸人脸级联分类器
    haarcascade_frontalface_alt_tree需要提前放入新建文件夹raw
     */
    private void initClassifier() {

        try {

            InputStream is = getResources().openRawResource(R.raw.haarcascade_frontalface_alt_tree);
            File cascadeDir = getDir("cascade", Context.MODE_PRIVATE);
            File cascadeFile = new File(cascadeDir, "haarcascade_frontalface_alt_tree.xml");
            FileOutputStream os = new FileOutputStream(cascadeFile);
            byte[] buffer = new byte[4096];
            int bytesRead;
            while ((bytesRead = is.read(buffer)) != -1) {

                os.write(buffer, 0, bytesRead);
            }
            is.close();
            os.close();
            face_detector = new CascadeClassifier(cascadeFile.getAbsolutePath());
        } catch (Exception e) {

            e.printStackTrace();
        }
    }


    @Override
    protected List<? extends CameraBridgeViewBase> getCameraViewList() {

        List<CameraBridgeViewBase> list = new ArrayList<>();
        list.add(javaCameraView);
        return list;
    }

    @Override
    protected void onCreate(Bundle savedInstanceState) {

        super.onCreate(savedInstanceState);
        setContentView(R.layout.activity_main);
        javaCameraView = findViewById(R.id.javaCameraView);
        javaCameraView.setVisibility(SurfaceView.VISIBLE);
        javaCameraView.setCvCameraViewListener(this);
        RadioButton back =findViewById(R.id.radioButton2);
        RadioButton front = findViewById(R.id.radioButton);
        back.setOnClickListener(this);
        front.setOnClickListener(this);
        back.setSelected(true);

        Button a =findViewById(R.id.b1);
        a.setOnClickListener(new View.OnClickListener() {

            @Override
            public void onClick(View v) {


                String face1= saveMatData(frame,"face1.jpg");
            }
        });

        Button button =findViewById(R.id.button2);
        button.setOnClickListener(new View.OnClickListener() {

            @Override
            public void onClick(View v) {

                PopupMenu popupMenu = new PopupMenu(MainActivity.this, v);
                popupMenu.getMenuInflater().inflate(R.menu.camera_view_menus, popupMenu.getMenu());
                popupMenu.show();
                // 通过上面这几行代码,就可以把控件显示出来了
                popupMenu.setOnMenuItemClickListener(new PopupMenu.OnMenuItemClickListener() {

                    @Override
                    public boolean onMenuItemClick(MenuItem item) {

                        int id = item.getItemId();
                        switch (id){

                            case R.id.invert:
                                option =1;
                                break;
                            case R.id.edge:
                                option=2;
                                break;
                            case R.id.sobel:
                                option=3;
                                break;
                            case R.id.boxblur:
                                option=4;
                                break;
                            case R.id.face_detection:
                                option =5;
                                break;
                            default:
                                option=0;
                                break;
                        }
                        return true;

                    }
                });
            }
        });

    }

    public String saveMatData(Mat mat,String path) {

        File fileDir = new File(Environment.getExternalStoragePublicDirectory(
                Environment.DIRECTORY_PICTURES), "mybook");
        if (!fileDir.exists()) {

            fileDir.mkdirs();
        }
        String name = path;
        File tempFile = new File(fileDir.getAbsoluteFile() + File.separator, name);
        Mat dst = new Mat(mat.rows(), mat.cols(), CvType.CV_8UC4);    //新建目标输出图像
        Imgproc.cvtColor(mat, dst, Imgproc.COLOR_RGB2BGR);
        Imgcodecs.imwrite(tempFile.getAbsolutePath(), dst);
        Log.e("存储", "FielSaveMatData" + tempFile.getPath());
        return tempFile.getPath();
    }


    @Override
    public void onPause() {

        super.onPause();
        if (javaCameraView != null)
            javaCameraView.disableView();
    }

    @Override
    public void onResume() {

        super.onResume();
        if (!OpenCVLoader.initDebug()) {

            OpenCVLoader.initAsync(OpenCVLoader.OPENCV_VERSION, this, baseLoaderCallback);
        } else {

            baseLoaderCallback.onManagerConnected(LoaderCallbackInterface.SUCCESS);
        }
    }

    @Override
    public void onCameraViewStarted(int width, int height) {


        frame = new Mat();

    }

    @Override
    public void onCameraViewStopped() {


        frame.release();

    }

    @Override
    public Mat onCameraFrame(CameraBridgeViewBase.CvCameraViewFrame inputFrame) {

      frame = inputFrame.rgba();
        //if (this.getResources().getConfiguration().orientation == ActivityInfo.SCREEN_ORIENTATION_PORTRAIT);{

            //Core.rotate(frame,frame,Core.ROTATE_90_CLOCKWISE);
        //}
        process(frame);//调用process方法处理实时图像
        return frame;
    }

    public void process(Mat frame){

        if (option == 0){

            //do nothing
        }else if (option == 1){

            Core.bitwise_not(frame,frame);//实现反色
        }else if (option == 2){

            Mat edge = new Mat();
            //Canny是一种实现边缘输出的函数,低于100的像素点被认为不是边缘,阈值高于200的像素点被认为是边缘。
            Imgproc.Canny(frame,edge,100,200,3,false);
            //根据frame这张图片的大小生成一个mat矩阵。
            Mat result= Mat.zeros(frame.size(),frame.type());
            //作用是把edge和frame重叠以后把edge中像素值为0(黑色)的点对应的frame中的点变为透明,而保留其他点。
            frame.copyTo(result,edge);
            //把生成的result边缘图像复制给frame
            result.copyTo(frame);
            //释放
            edge.release();
            result.release();
        }else if (option == 3){

            Mat gradx = new Mat();
            Imgproc.Sobel(frame,gradx, CvType.CV_32F,1,0);
            Core.convertScaleAbs(gradx,gradx);
            gradx.copyTo(frame);
            gradx.release();

        }else if (option == 4){

            Mat temp = new Mat();
            Imgproc.blur(frame,temp,new Size(15,15));
            temp.copyTo(frame);
            temp.release();

        }else if (option == 5){

            //faceDetect(frame.getNativeObjAddr());
            detectFace(frame);
        }
        else{


        }

    }

    private void detectFace(Mat frame) {

        Mat gray = new Mat();
        Imgproc.cvtColor(frame, gray, Imgproc.COLOR_RGBA2GRAY);
        Imgproc.equalizeHist(gray, gray);//加强对比度
        //将识别到的人脸区域设定一个区域
        MatOfRect faces = new MatOfRect();
        //定义一个方框框住人脸,设定能识别的最小和最大人脸范围。
        face_detector.detectMultiScale(gray, faces, 1.1, 1, 0, new Size(50, 50), new Size(3000, 3000));
        List<Rect> faceList = faces.toList();
        //判断是否检测到人脸,检测到人脸就标记出来
        if(faceList.size() != 0) {

            for (Rect rect : faceList) {

                //设定红框
                Imgproc.rectangle(frame, rect.tl(), rect.br(), new Scalar(255, 0, 0), 2, 8, 0);
            }
        }
        gray.release();
        faces.release();
    }


    public void onDestroy(){

        super.onDestroy();
        if (javaCameraView != null){

            javaCameraView.disableView();
        }
    }


    //前后置摄像头的选择
    @Override
    public void onClick(View view) {

        int id =view.getId();
        if (id == R.id.radioButton){

            cameraIndex=1;
        }else if (id == R.id.radioButton2){

            cameraIndex=0;
        }
        javaCameraView.setCameraIndex(cameraIndex);
        if (javaCameraView != null){

            javaCameraView.disableView();
        }
        javaCameraView.enableView();
    }
}
Activity的XML
<?xml version="1.0" encoding="utf-8"?>
<LinearLayout xmlns:android="http://schemas.android.com/apk/res/android"
    xmlns:app="http://schemas.android.com/apk/res-auto"
    android:layout_width="match_parent"
    android:layout_height="match_parent"
    android:orientation="vertical">

    <Button
        android:id="@+id/button2"
        android:layout_width="80dp"
        android:layout_height="40dp"
        android:text="模式选择" />
    <Button
        android:layout_width="80dp"
        android:layout_height="40dp"
        android:id="@+id/b1"/>

    <RadioGroup
        android:layout_width="match_parent"
        android:layout_height="wrap_content"
        android:orientation="horizontal">

        <RadioButton
            android:id="@+id/radioButton"
            android:layout_width="200dp"
            android:layout_height="wrap_content"
            android:text="前置摄像头" />

        <RadioButton
            android:id="@+id/radioButton2"
            android:layout_width="200dp"
            android:layout_height="wrap_content"
            android:text="后置摄像头" />
    </RadioGroup>

    <org.opencv.android.JavaCameraView
        android:id="@+id/javaCameraView"
        android:layout_width="350dp"
        android:layout_height="400dp"
        app:camera_id="back"
        app:show_fps="true" />

</LinearLayout>
AndroidManifest.xml添加权限
  <uses-permission android:name="android.permission.WRITE_EXTERNAL_STORAGE" />
    <uses-permission android:name="android.permission.CAMERA" />

    <uses-feature
        android:name="android.hardware.camera"
        android:required="true" />
    <uses-feature
        android:name="android.hardware.camera.autofocus"
        android:required="false" />
    <uses-feature
        android:name="android.hardware.camera.front"
        android:required="false" />
    <uses-feature
        android:name="android.hardware.camera.front.autofocus"
        android:required="false" />
将Values中的strings.xml修改
因为我用了popupMenu,所以要改,不用的话可以不用修改。
<resources>
    <string name="app_name">OpenCV</string>
    <string name="invert">反色</string>
    <string name="sobel">梯度</string>
    <string name="edge">边缘</string>
    <string name="boxblur">模糊</string>
    <string name="faceDetection">人脸检测</string>

</resources>
在menu中添加一个camera_view_menus.xml
因为我用了popupMenu,所以要加,不用的话可以不用加。
<?xml version="1.0" encoding="utf-8"?>
<menu xmlns:android="http://schemas.android.com/apk/res/android">
    <item
        android:id="@+id/invert"
        android:title="反色">
    </item>
    <item
        android:id="@+id/edge"
        android:title="边缘">
    </item>
    <item
        android:id="@+id/sobel"
        android:title="梯度">
    </item>
    <item
        android:id="@+id/boxblur"
        android:title="模糊">
    </item>
    <item
        android:id="@+id/face_detection"
        android:title="人脸检测">
    </item>
</menu>
最后记得添加级联分类器
在raw中将haarcascade_frontalface_alt_tree.xml复制进去。

截取人脸区域的函数
根据画框的坐标x和y,以及需要画框的长宽截图
 /**
     * 裁剪图片并重新装换大小
     * @param imagePath
     * @param posX
     * @param posY
     * @param width
     * @param height
     * @param outFile
     */
    public static void imageCut(String imagePath,String outFile, int posX,int posY,int width,int height ){


        //原始图像
        Mat image = Imgcodecs.imread(imagePath);

        //截取的区域:参数,坐标X,坐标Y,截图宽度,截图长度
        Rect rect = new Rect(posX,posY,width,height);

        //两句效果一样
        Mat sub = image.submat(rect);   //Mat sub = new Mat(image,rect);

        Mat mat = new Mat();
        Size size = new Size(300, 300);
        Imgproc.resize(sub, mat, size);//将人脸进行截图并保存

        Imgcodecs.imwrite(outFile, mat);

    }
上一个链接,里面是我上面所述的demo。
人脸实时检测,无截图
https://download.csdn.net/download/m0_51381592/15133180
人脸检测,并且截取人脸区域
https://download.csdn.net/download/m0_51381592/15134399