浅谈thymeleaf的基本使用
浅谈thymeleaf的基本使用
最近看了一些很多关于Java的技术视频和其它的博客,其中里面都会讲解到thymeleaf和freemaker,其实就是一种Java模板引擎,正好最近我做的这个功能里面,我就使用了它,感觉用起来还是蛮方便的,下面直接看它的基础语法和使用吧!
首先要想使用Thymeleaf的话,必须得加入依赖坐标,因为它很好的支持了html的语法格式,所以它对html语法的格式要求很严格,我看其它的一些文章上面都说到了这个问题,任何的标签都得有结束标记,否则使用它就会很容易报错,这就导致了一些前端人员不是很喜爱它,但实际上也可以解决这种问题,不需要太多关注html的语法格式,也可以随心所欲的使用thymeleaf,这里就需要加上它的另一个依赖坐标,导入下面两个依赖坐标以后,就可以在前端页面随心所欲的使用thymeleaf。
       <!--导入thymeleaf的依赖坐标-->
        <dependency>
            <groupId>org.springframework.boot</groupId>
            <artifactId>spring-boot-starter-thymeleaf</artifactId>
        </dependency>
        <!--允许不严格的html5格式出现-->
        <dependency>
            <groupId>net.sourceforge.nekohtml</groupId>
            <artifactId>nekohtml</artifactId>
            <version>1.9.22</version>
        </dependency>
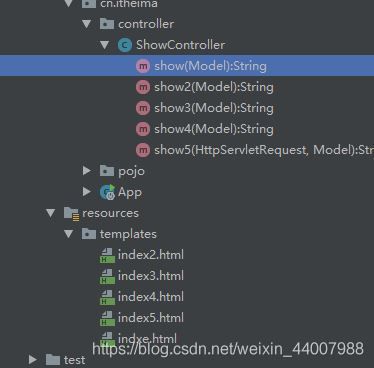
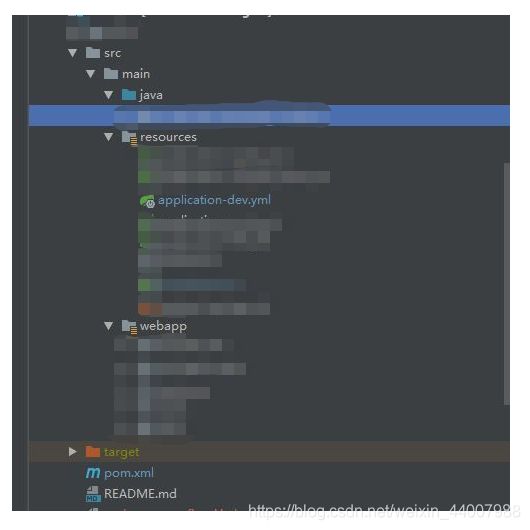
然后你需要在你的控制器里面,使用Model对象作为参数,它的作用就是将你想要的一些数据通过键值对的形式去传递到页面,因为这里返回的是页面,所以需要注意的点是不能使用RestController注解,同理在你的方法上也不能使用ResponseBody注解,否则就是恒不跳转。当然你也可以使用ModelAndView对象来进行页面的一个跳转,亲测有效。当然最重要的就是写url路径的时候,不要再最前面加上/。如果你的html是直接放在resource下面的templates目录下,直接像下面这样写即可,如果你的静态资源文件是放在webapp下面的话,可以在你的yml配置文件里面配上你的资源访问路径即可(注意也不需要在url路径前加上/)
如果你的静态资源是这样的话:

控制器就可以直接这样写
package cn.itheima.controller;

import cn.itheima.pojo.Users;
import org.springframework.stereotype.Controller;
import org.springframework.ui.Model;
import org.springframework.web.bind.annotation.PostMapping;
import org.springframework.web.bind.annotation.RequestMapping;

import javax.servlet.http.HttpServletRequest;
import java.util.*;

@Controller
public class ShowController {

    @RequestMapping("/show")
    public String show(Model model) {

        model.addAttribute("msg","Thymeleaf测试");
        model.addAttribute("key",new Date());
        return "indxe.html";
    }
}
在页面中获取它就变得十分简单,有点像以前Java web中使用jstl和el的写法,只不过它变得更加简单了,它是使用th:的形式来做到获取后台传过来的数据的,同时它很好的支持了html的语法格式,所以原本html的一些属性,现在只需要在原先的属性前加上th:,然后使用${}的形式去获取到对应的值。
<span th:text="${msg}"></span>
如果你的结构目录是这样的话:

只需要在yml文件里面配置你的prefix路径即可
spring:
	thymeleaf:
   		prefix: classpath:/META-INF/resources/
    	mode: LEGACYHTML5
    	cache: false
	    content-type: text/html
上面是它最简单的用法,如果后端传的是一些list,map等集合对象的话,用法其实也类似,下面是我关于集合对象做的一些测试用例
 @RequestMapping("/show3")
    public String show3(Model model) {

        List<Users> list = new ArrayList<>();
        list.add(new Users(1,"张三",16));
        list.add(new Users(2,"李四",17));
        list.add(new Users(3,"王五",18));
        model.addAttribute("list",list);
        return "index3";
    }
    @RequestMapping("/show4")
    public String show4(Model model) {

        Map<String,Users> map = new HashMap<>();
        map.put("u1",new Users(1,"张三",16));
        map.put("u2",new Users(2,"李四",17));
        map.put("u3",new Users(3,"王五",18));
        model.addAttribute("map",map);
        return "index4";
    }
前端页面获取的时候语法也是类似的,这里有兴趣的可以去看看thymeleaf的文档,基本都是一个模式
	//list的用法
    <tr th:each="u,var : ${list}">
        <td th:text="${u.userid}"></td>
        <td th:text="${u.username}"></td>
        <td th:text="${u.userage}"></td>
        <td th:text="${var.index}"></td>
        <td th:text="${var.count}"></td>
        <td th:text="${var.size}"></td>
        <td th:text="${var.even}"></td>
        <td th:text="${var.odd}"></td>
        <td th:text="${var.first}"></td>
        <td th:text="${var.last}"></td>
    </tr>
    //map的用法
	<tr th:each="maps : ${map}">
        <td th:each="user : ${maps}" th:text="${user.value.userid}"></td>
        <td th:each="user : ${maps}" th:text="${user.value.username}"></td>
        <td th:each="user : ${maps}" th:text="${user.value.userage}"></td>
    </tr>
最后,关于你是否使用thymeleaf或者freemaker亦或者是一些其它更流行的技术比如vue,react等来,我觉得一个是看自己做的项目是否有要求,另一个就是看自己的喜好吧。