SpringBoot(六) 数据访问(JDBC/MyBatis/Spring Data Jpa)
JBDC、MyBatis、Spring Data JPA
1、简介
对于数据访问层,无论是SQL还是NOSQL,Spring Boot默认采用整合 Spring Data的方式进行统一处理,添加大量自动配置,屏蔽了很多设置。引入各种xxxTemplate,xxxRepository来简化我们对数据访问层的操作。对我们来说只需要进行简单的设置即可。我们将在数据访问章节测试使用SQL相关、NOSQL在缓存、消息、检索等章节测试。
–JDBC
–MyBatis
–JPA
2、整合基本JDBC与数据源
1、引入starter:spring-boot-starter-jdbc
2、配置application.yml
3、测试
4、高级配置:使用druid数据源
–引入druid
–配置属性
5、配置druid数据源监控
2.1 创建工程整合JDBC
使用SpringBoot的向导创建工程,选中web、mysql和jdbc模块:
2.1.1 pom.xml
<project xmlns="http://maven.apache.org/POM/4.0.0" xmlns:xsi="http://www.w3.org/2001/XMLSchema-instance"
         xsi:schemaLocation="http://maven.apache.org/POM/4.0.0 https://maven.apache.org/xsd/maven-4.0.0.xsd">
    <modelVersion>4.0.0modelVersion>
    <parent>
        <groupId>org.springframework.bootgroupId>
        <artifactId>spring-boot-starter-parentartifactId>
        <version>2.2.6.RELEASEversion>
        <relativePath/>
    parent>
    <groupId>com.springboot.jdbcgroupId>
    <artifactId>spring-boot-06-data-jdbcartifactId>
    <version>0.0.1-SNAPSHOTversion>
    <name>spring-boot-06-data-jdbcname>
    <description>Demo project for Spring Bootdescription>

    <properties>
        <java.version>1.8java.version>
    properties>

    <dependencies>
        <dependency>
            <groupId>org.springframework.bootgroupId>
            <artifactId>spring-boot-starter-jdbcartifactId>
        dependency>
        <dependency>
            <groupId>org.springframework.bootgroupId>
            <artifactId>spring-boot-starter-webartifactId>
        dependency>
        <dependency>
            <groupId>mysqlgroupId>
            <artifactId>mysql-connector-javaartifactId>
            <scope>runtimescope>
        dependency>


        <dependency>
            <groupId>com.alibabagroupId>
            <artifactId>druidartifactId>
            <version>1.1.8version>
        dependency>
        <dependency>
            <groupId>org.springframework.bootgroupId>
            <artifactId>spring-boot-starter-testartifactId>
            <scope>testscope>
            <exclusions>
                <exclusion>
                    <groupId>org.junit.vintagegroupId>
                    <artifactId>junit-vintage-engineartifactId>
                exclusion>
            exclusions>
        dependency>
    dependencies>
    <build>
        <plugins>
            <plugin>
                <groupId>org.springframework.bootgroupId>
                <artifactId>spring-boot-maven-pluginartifactId>
            plugin>
        plugins>
    build>
project>
2.1.2 application.yml
在配置文件中,配置数据源的相关信息:
spring:
  datasource:
    url: jdbc:mysql://localhost:3306/jdbc?useUnicode=true&characterEncoding=utf8&serverTimezone=GMT
    driver-class-name: com.mysql.jdbc.Driver
    username: root
    password: 123456
url 的后面要加上:useUnicode=true&characterEncoding=utf8&serverTimezone=GMT,否则获取连接的时候会报错,同时中文会乱码:
java.sql.SQLException: The server time zone value '�й���ʱ��' is unrecognized or represents more than one time zone.
You must configure either the server or JDBC driver (via the 'serverTimezone' configuration property) to use a more specifc time zone value if you want to utilize time zone support
2.1.3 测试数据源和连接
在SpringBoot的测试类中,可以直接注入数据源,就是从容器中获取的,我们导入了jdbc的starter,那么SpringBoot默认就会帮我们创建数据源对象,我们来看默认创建的是什么数据源:
package com.springboot.jdbc;

import org.junit.Test;
import org.junit.runner.RunWith;
import org.springframework.beans.factory.annotation.Autowired;
import org.springframework.boot.test.context.SpringBootTest;
import org.springframework.test.context.junit4.SpringRunner;

import javax.sql.DataSource;
import java.sql.Connection;
import java.sql.SQLException;

@RunWith(SpringRunner.class)
@SpringBootTest
public class SpringBoot06DataJdbcApplicationTests {


    @Autowired
    DataSource dataSource;

    @Test
    public void contextLoads() throws SQLException {

        System.out.println("数据源:"+dataSource.getClass());
        Connection connection = dataSource.getConnection();
        System.out.println("从数据源中获取的连接:"+connection);
    }
}
数据源:class com.zaxxer.hikari.HikariDataSource (SpringBoot 1.x默认的是:org.apache.tomcat.jdbc.pool.DataSource);
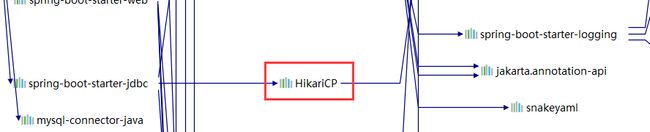
从数据源中获取的连接:HikariProxyConnection@1454366618 wrapping com.mysql.cj.jdbc.ConnectionImpl@64fe9da7
数据源的相关配置都在DataSourceProperties里面。
2.2 数据源自动配置原理
org.springframework.boot.autoconfigure.jdbc:这个包下都是数据源相关的配置类;
1、自动配置原理在:DataSourceConfiguration 类,根据导入的starter创建数据源,默认使用HikariDataSource 连接池;可以使用spring.datasource.type 指定自定义的数据源类型;
2、SpringBoot默认可以支持:org.apache.commons.dbcp2.BasicDataSource、com.zaxxer.hikari.HikariDataSource、org.apache.tomcat.jdbc.pool.DataSource;
3、可以自定义数据源
@Configuration(proxyBeanMethods = false)
@ConditionalOnMissingBean({
     DataSource.class})
@ConditionalOnProperty(name = {
     "spring.datasource.type"})
static class Generic {

    Generic() {
     }
    @Bean
    DataSource dataSource(DataSourceProperties properties) {

        //使用DataSourceBuilder创建数据源,利用反射创建响应type的数据源,并且绑定相关属性
        return properties.initializeDataSourceBuilder().build();
    }
}
4、关注一个类:DataSourceInitializer
它的作用是帮我们执行一些指定的数据库创建文件和数据文件;源码如下:
//
// Source code recreated from a .class file by IntelliJ IDEA
// (powered by Fernflower decompiler)
//

package org.springframework.boot.autoconfigure.jdbc;

import java.util.ArrayList;
import java.util.Collections;
import java.util.Iterator;
import java.util.List;
import javax.sql.DataSource;
import org.apache.commons.logging.Log;
import org.apache.commons.logging.LogFactory;
import org.springframework.boot.context.properties.source.InvalidConfigurationPropertyValueException;
import org.springframework.boot.jdbc.DataSourceBuilder;
import org.springframework.boot.jdbc.DataSourceInitializationMode;
import org.springframework.boot.jdbc.EmbeddedDatabaseConnection;
import org.springframework.core.io.DefaultResourceLoader;
import org.springframework.core.io.Resource;
import org.springframework.core.io.ResourceLoader;
import org.springframework.jdbc.config.SortedResourcesFactoryBean;
import org.springframework.jdbc.datasource.init.DatabasePopulatorUtils;
import org.springframework.jdbc.datasource.init.ResourceDatabasePopulator;
import org.springframework.util.StringUtils;

class DataSourceInitializer {

    private static final Log logger = LogFactory.getLog(DataSourceInitializer.class);
    private final DataSource dataSource;
    private final DataSourceProperties properties;
    private final ResourceLoader resourceLoader;

    DataSourceInitializer(DataSource dataSource, DataSourceProperties properties, ResourceLoader resourceLoader) {

        this.dataSource = dataSource;
        this.properties = properties;
        this.resourceLoader = (ResourceLoader)(resourceLoader != null ? resourceLoader : new DefaultResourceLoader());
    }

    DataSourceInitializer(DataSource dataSource, DataSourceProperties properties) {

        this(dataSource, properties, (ResourceLoader)null);
    }

    DataSource getDataSource() {

        return this.dataSource;
    }

    boolean createSchema() {

        //获取建表脚本
        List<Resource> scripts = this.getScripts("spring.datasource.schema", this.properties.getSchema(), "schema");
        if (!scripts.isEmpty()) {

            if (!this.isEnabled()) {

                logger.debug("Initialization disabled (not running DDL scripts)");
                return false;
            }

            String username = this.properties.getSchemaUsername();
            String password = this.properties.getSchemaPassword();
            this.runScripts(scripts, username, password);
        }

        return !scripts.isEmpty();
    }

    void initSchema() {

        List<Resource> scripts = this.getScripts("spring.datasource.data", this.properties.getData(), "data");
        if (!scripts.isEmpty()) {

            if (!this.isEnabled()) {

                logger.debug("Initialization disabled (not running data scripts)");
                return;
            }

            String username = this.properties.getDataUsername();
            String password = this.properties.getDataPassword();
            this.runScripts(scripts, username, password);
        }

    }
	//在SpringBoot 2.x中多了这个配置,DataSourceInitializationMode 其中有三个值,always为始终执行初始化,embedded只初始化内存数据库(默认值),如h2等,never为不执行初始化。
    //如果想要自动创建表和插入数据,需要配置:spring.datasource.initialization-mode  初始化模式(springboot2.x),
    private boolean isEnabled() {

        DataSourceInitializationMode mode = this.properties.getInitializationMode();
        if (mode == DataSourceInitializationMode.NEVER) {

            return false;
        } else {

            return mode != DataSourceInitializationMode.EMBEDDED || this.isEmbedded();
        }
    }

    private boolean isEmbedded() {

        try {

            return EmbeddedDatabaseConnection.isEmbedded(this.dataSource);
        } catch (Exception var2) {

            logger.debug("Could not determine if datasource is embedded", var2);
            return false;
        }
    }
	//定义数据库资源文件的获取规则,建表语句是默认是:schema-${platform}.sql,数据脚本的默认是:data-${platform}.sql
    //可以通过spring.datasource.platform 来设置${platform}的值,默认是 all,所以schema-all.sql 和data-all.sql也是可以默认执行的
    private List<Resource> getScripts(String propertyName, List<String> resources, String fallback) {

        if (resources != null) {

            return this.getResources(propertyName, resources, true);
        } else {

            String platform = this.properties.getPlatform();
            List<String> fallbackResources = new ArrayList();
            fallbackResources.add("classpath*:" + fallback + "-" + platform + ".sql");
            fallbackResources.add("classpath*:" + fallback + ".sql");
            return this.getResources(propertyName, fallbackResources, false);
        }
    }

    private List<Resource> getResources(String propertyName, List<String> locations, boolean validate) {

        List<Resource> resources = new ArrayList();
        Iterator var5 = locations.iterator();

        while(var5.hasNext()) {

            String location = (String)var5.next();
            Resource[] var7 = this.doGetResources(location);
            int var8 = var7.length;

            for(int var9 = 0; var9 < var8; ++var9) {

                Resource resource = var7[var9];
                if (resource.exists()) {

                    resources.add(resource);
                } else if (validate) {

                    throw new InvalidConfigurationPropertyValueException(propertyName, resource, "The specified resource does not exist.");
                }
            }
        }

        return resources;
    }

    private Resource[] doGetResources(String location) {

        try {

            SortedResourcesFactoryBean factory = new SortedResourcesFactoryBean(this.resourceLoader, Collections.singletonList(location));
            factory.afterPropertiesSet();
            return (Resource[])factory.getObject();
        } catch (Exception var3) {

            throw new IllegalStateException("Unable to load resources from " + location, var3);
        }
    }

    private void runScripts(List<Resource> resources, String username, String password) {

        if (!resources.isEmpty()) {

            ResourceDatabasePopulator populator = new ResourceDatabasePopulator();
            populator.setContinueOnError(this.properties.isContinueOnError());
            populator.setSeparator(this.properties.getSeparator());
            if (this.properties.getSqlScriptEncoding() != null) {

                populator.setSqlScriptEncoding(this.properties.getSqlScriptEncoding().name());
            }

            Iterator var5 = resources.iterator();

            while(var5.hasNext()) {

                Resource resource = (Resource)var5.next();
                populator.addScript(resource);
            }

            DataSource dataSource = this.dataSource;
            if (StringUtils.hasText(username) && StringUtils.hasText(password)) {

                dataSource = DataSourceBuilder.create(this.properties.getClassLoader()).driverClassName(this.properties.determineDriverClassName()).url(this.properties.determineUrl()).username(username).password(password).build();
            }

            DatabasePopulatorUtils.execute(populator, dataSource);
        }
    }
}
-
在SpringBoot 2.x中多了这个配置,DataSourceInitializationMode 其中有三个值,always为始终执行初始化,embedded只初始化内存数据库(默认值),如h2等,never为不执行初始化。如果想要自动创建表和插入数据,需要配置:spring.datasource.initialization-mode 初始化模式。
-
定义数据库资源文件的获取规则,建表语句是默认是:schema- p l a t f o r m . s q l , 数 据 脚 本 的 默 认 是 : d a t a − {platform}.sql,数据脚本的默认是:data- platform.sql,数据脚本的默认是:data−{platform}.sql
可以通过spring.datasource.platform 来设置${platform}的值,默认是 all,所以schema-all.sql 和data-all.sql也是可以默认执行的 -
也可以自定义脚本位置,可以通过spring.datasource.schema 与 spring.datasource.data 来改变,例如:
spring:
  datasource:
    url: jdbc:mysql://localhost:3306/jdbc?useUnicode=true&characterEncoding=utf8&serverTimezone=GMT
    driver-class-name: com.mysql.jdbc.Driver
    username: root
    password: 123
    initialization-mode: always
    schema: [classpath:sql/department.sql]
    data: [classpath:sql/data.sql]
5、自动配置了JdbcTemplate
查看 JdbcTemplateAutoConfiguration 的源码,给我们配置了JdbcTemplate和NamedParameterJdbcTemplate
@Configuration(
    proxyBeanMethods = false
)
@ConditionalOnClass({
       DataSource.class, JdbcTemplate.class})
@ConditionalOnSingleCandidate(DataSource.class)
@AutoConfigureAfter({
       DataSourceAutoConfiguration.class})
@EnableConfigurationProperties({
       JdbcProperties.class})
@Import({
       JdbcTemplateConfiguration.class, NamedParameterJdbcTemplateConfiguration.class})
public class JdbcTemplateAutoConfiguration {

    public JdbcTemplateAutoConfiguration() {

    }
}
所以可以在我们的项目中直接注入JdbcTemplate;
示例代码:
package com.springboot.jdbc.controller;

import org.springframework.beans.factory.annotation.Autowired;
import org.springframework.jdbc.core.JdbcTemplate;
import org.springframework.web.bind.annotation.RequestMapping;
import org.springframework.web.bind.annotation.RestController;

import java.util.List;
import java.util.Map;

@RestController
public class HolleController {

    @Autowired
    JdbcTemplate jdbcTemplate;

    @RequestMapping("/jdbc")
    public List<Map<String,Object>> getList(){

        List<Map<String, Object>> list = jdbcTemplate.queryForList("select * from department");
        return list;
    }
}
启动访问:http://localhost:8080/jdbc,能查出表中的数据:
[{
       "id":1,"departmentName":"AA"},{
       "id":2,"departmentName":"BB"},{
       "id":3,"departmentName":"CC"}]
3 整合druid连接池
git上的druid的文档:https://github.com/alibaba/druid/wiki/首页
3.1 手动注册servlet和filter的方式
3.1.1 application.yml的配置
server:
  port: 8081
spring:
  datasource:
    url: jdbc:mysql://localhost:3306/jdbc?useUnicode=true&characterEncoding=utf8&serverTimezone=GMT
    driver-class-name: com.mysql.jdbc.Driver
    username: root
    password: 123
    initialization-mode: always
    #schema: [classpath:sql/department.sql]
    #data: [classpath:sql/data.sql]
    type: com.alibaba.druid.pool.DruidDataSource

    #配置初始化大小/最小/最大
    initialSize: 5
    minIdle: 5
    maxActive: 20
    #获取连接等待超时时间
    maxWait: 60000
    #间隔多久进行一次检测,检测需要关闭的空闲连接
    timeBetweenEvictionRunsMillis: 60000
    #一个连接在池中最小生存的时间
    minEvictableIdleTimeMillis: 300000
    #用来检测连接是否有效的sql,要求是一个查询语句,常用select 'x'。
    #如果validationQuery为null,testOnBorrow、testOnReturn、testWhileIdle都不会起作用。
    validationQuery: SELECT 1 FROM DUAL
    #申请连接时执行validationQuery检测连接是否有效,做了这个配置会降低性能。
    testWhileIdle: true
    #归还连接时执行validationQuery检测连接是否有效,做了这个配置会降低性能。
    testOnBorrow: false
    #建议配置为true,不影响性能,并且保证安全性。申请连接的时候检测,
    #如果空闲时间大于timeBetweenEvictionRunsMillis,执行validationQuery检测连接是否有效。
    testOnReturn: false
    #是否缓存preparedStatement,也就是PSCache。PSCache对支持游标的数据库性能提升巨大,比如说oracle。在mysql下建议关闭。
    poolPreparedStatements: false
    #   配置监控统计拦截的filters,去掉后监控界面sql无法统计,'wall'用于防火墙,log4j 用于druid的日志
    filters: stat,wall,log4j
    #要启用PSCache,必须配置大于0,当大于0时,poolPreparedStatements自动触发修改为true。在Druid中,不会存在Oracle下PSCache占用内存过多的问题,可以把这个数值配置大一些,比如说100
    maxPoolPreparedStatementPerConnectionSize: 20
    #合并多个DruidDataSource的监控数据
    useGlobalDataSourceStat: true
    connectionProperties: druid.stat.mergeSql=true;druid.stat.slowSqlMillis=500
3.1.2 添加log4j的坐标
记得要导入log4j日志包,否则会报错:
<dependency>
    <groupId>log4jgroupId>
    <artifactId>log4jartifactId>
    <version>1.2.17version>
dependency>
没导包会报错:
Failed to bind properties under 'spring.datasource' to javax.sql.DataSource:

    Property: spring.datasource.filters
    Value: stat,wall,log4j
    Origin: class path resource [application.yml]:24:14
    Reason: org.apache.log4j.Priority
2.1.3 编写druid的配置类
package com.springboot.jdbc.conf;

import com.alibaba.druid.pool.DruidDataSource;
import com.alibaba.druid.support.http.StatViewServlet;
import com.alibaba.druid.support.http.WebStatFilter;
import org.springframework.boot.context.properties.ConfigurationProperties;
import org.springframework.boot.web.servlet.FilterRegistrationBean;
import org.springframework.boot.web.servlet.ServletRegistrationBean;
import org.springframework.context.annotation.Bean;
import org.springframework.context.annotation.Configuration;

import javax.sql.DataSource;
import java.util.Arrays;
import java.util.HashMap;
import java.util.Map;

@Configuration
public class DruidConfig {


    //把配置文件中以 spring.datasource 开头的绑定到数据源datasource
    @ConfigurationProperties(prefix = "spring.datasource")
    @Bean
    public DataSource dataSource(){

        return new DruidDataSource();
    }

    //配置Druid的监控
    //1、配置一个管理后台的Servlet:StatViewServlet,一定要加上:/druid/* 否则访问报错
    @Bean
    public ServletRegistrationBean statViewServlet(){

        ServletRegistrationBean servletRegistrationBean =
                new ServletRegistrationBean(new StatViewServlet(),"/druid/*");
        Map<String,String> initParams = new HashMap<>();//定义servlet的初始化参数
        initParams.put("loginUsername","admin");
        initParams.put("loginPassword","123456");
        initParams.put("allow","");//默认就是允许所有访问
        initParams.put("deny","192.168.15.21");//设置禁止访问的路径

        servletRegistrationBean.setInitParameters(initParams);
        return servletRegistrationBean;
    }

    //2、配置一个web监控的filter
    @Bean
    public FilterRegistrationBean webStatFilter(){

        FilterRegistrationBean bean = new FilterRegistrationBean();
        bean.setFilter(new WebStatFilter());

        Map<String,String> initParams = new HashMap<>();
        initParams.put("exclusions","*.js,*.css,/druid/*");//设置不拦截的路径
        bean.setInitParameters(initParams);
        bean.setUrlPatterns(Arrays.asList("/*"));

        return  bean;
    }
}
注意:ServletRegistrationBean servletRegistrationBean = new ServletRegistrationBean(new StatViewServlet(),"/druid/*") 千万别忘记了 "/druid/*"
2.1.4 登录druid的后台管理
浏览器访问:http://localhost:8081/druid/login.html
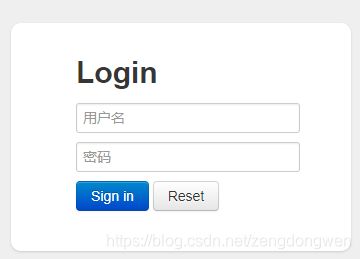
输入:admin / 123456 登录进去:
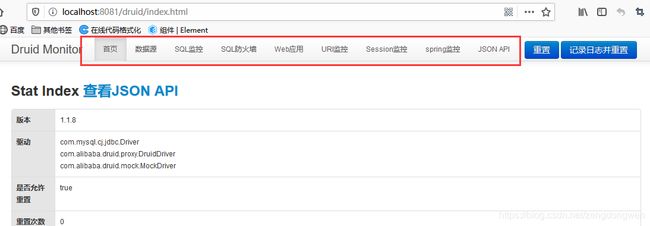
整合就算成功了。可以执行刚才的HelloController的方法,看看会不会监控到该sql
先访问:http://localhost:8081/jdbc,返回看sql监控:

监控到了我们刚才指定的sql。
4、整合MyBatis
4.1 创建SpringBoot工程
使用SpringBoot的向导创建工程,选中web,jdbc,mysql和mybatis四个模块;
4.1.1 pom.xml
创建之后的pom文件如下:
<project xmlns="http://maven.apache.org/POM/4.0.0" xmlns:xsi="http://www.w3.org/2001/XMLSchema-instance"
         xsi:schemaLocation="http://maven.apache.org/POM/4.0.0 https://maven.apache.org/xsd/maven-4.0.0.xsd">
    <modelVersion>4.0.0modelVersion>
    <parent>
        <groupId>org.springframework.bootgroupId>
        <artifactId>spring-boot-starter-parentartifactId>
        <version>2.2.6.RELEASEversion>
        <relativePath/>
    parent>
    <groupId>com.springboot.data.mybatisgroupId>
    <artifactId>spring-boot-06-data-mybatisartifactId>
    <version>0.0.1-SNAPSHOTversion>
    <name>spring-boot-06-data-mybatisname>
    <description>Demo project for Spring Bootdescription>

    <properties>
        <java.version>1.8java.version>
    properties>

    <dependencies>
        <dependency>
            <groupId>org.springframework.bootgroupId>
            <artifactId>spring-boot-starter-jdbcartifactId>
        dependency>
        <dependency>
            <groupId>org.springframework.bootgroupId>
            <artifactId>spring-boot-starter-webartifactId>
        dependency>
        <dependency>
            <groupId>org.mybatis.spring.bootgroupId>
            <artifactId>mybatis-spring-boot-starterartifactId>
            <version>2.1.2version>
        dependency>

        <dependency>
            <groupId>mysqlgroupId>
            <artifactId>mysql-connector-javaartifactId>
            <scope>runtimescope>
        dependency>


        <dependency>
            <groupId>com.alibabagroupId>
            <artifactId>druidartifactId>
            <version>1.1.8version>
        dependency>


       <dependency>
            <groupId>log4jgroupId>
            <artifactId>log4jartifactId>
            <version>1.2.17version>
        dependency>

        <dependency>
            <groupId>junitgroupId>
            <artifactId>junitartifactId>
            <scope>testscope>
        dependency>
        <dependency>
            <groupId>org.springframework.bootgroupId>
            <artifactId>spring-boot-starter-testartifactId>
            <scope>testscope>
            <exclusions>
                <exclusion>
                    <groupId>org.junit.vintagegroupId>
                    <artifactId>junit-vintage-engineartifactId>
                exclusion>
            exclusions>
        dependency>
    dependencies>
    <build>
        <plugins>
            <plugin>
                <groupId>org.springframework.bootgroupId>
                <artifactId>spring-boot-maven-pluginartifactId>
            plugin>
        plugins>
    build>
project>
参照第3点,配置好application.yml和DruidConfig。
4.1.2 application.yml
server:
  port: 8081
spring:
  datasource:
    url: jdbc:mysql://localhost:3306/mybatis?useUnicode=true&characterEncoding=utf8&serverTimezone=GMT
    driver-class-name: com.mysql.jdbc.Driver
    username: root
    password: 123
    type: com.alibaba.druid.pool.DruidDataSource
    #配置执行建表sql和数据sql
    initialization-mode: always
    #配置初始化大小/最小/最大
    initialSize: 5
    minIdle: 5
    maxActive: 20
    #获取连接等待超时时间
    maxWait: 60000
    #间隔多久进行一次检测,检测需要关闭的空闲连接
    timeBetweenEvictionRunsMillis: 60000
    #一个连接在池中最小生存的时间
    minEvictableIdleTimeMillis: 300000
    #用来检测连接是否有效的sql,要求是一个查询语句,常用select 'x'。
    #如果validationQuery为null,testOnBorrow、testOnReturn、testWhileIdle都不会起作用。
    validationQuery: SELECT 1 FROM DUAL
    #申请连接时执行validationQuery检测连接是否有效,做了这个配置会降低性能。
    testWhileIdle: true
    #归还连接时执行validationQuery检测连接是否有效,做了这个配置会降低性能。
    testOnBorrow: false
    #建议配置为true,不影响性能,并且保证安全性。申请连接的时候检测,
    #如果空闲时间大于timeBetweenEvictionRunsMillis,执行validationQuery检测连接是否有效。
    testOnReturn: false
    #是否缓存preparedStatement,也就是PSCache。PSCache对支持游标的数据库性能提升巨大,比如说oracle。在mysql下建议关闭。
    poolPreparedStatements: false
    #   配置监控统计拦截的filters,去掉后监控界面sql无法统计,'wall'用于防火墙,log4j 用于druid的日志
    filters: stat,wall,log4j
    #要启用PSCache,必须配置大于0,当大于0时,poolPreparedStatements自动触发修改为true。在Druid中,不会存在Oracle下PSCache占用内存过多的问题,可以把这个数值配置大一些,比如说100
    maxPoolPreparedStatementPerConnectionSize: 20
    #合并多个DruidDataSource的监控数据
    useGlobalDataSourceStat: true
    connectionProperties: druid.stat.mergeSql=true;druid.stat.slowSqlMillis=500
    schema:
      - classpath:sql/department.sql
      - classpath:sql/employee.sql
schema: #记得第一次运行后就要注释掉
- classpath:sql/department.sql
- classpath:sql/employee.sql
4.1.3 创建数据库表
配置文件中配置的数据库是mybatis,所以需要到MySQL中创建mybatis数据库,然后,sql目录下对应的department.sql 和 employee.sql 如下:
SET FOREIGN_KEY_CHECKS=0;

-- ----------------------------
-- Table structure for department
-- ----------------------------
DROP TABLE IF EXISTS `department`;
CREATE TABLE `department` (
  `id` int(11) NOT NULL AUTO_INCREMENT,
  `department_name` varchar(255) DEFAULT NULL,
  PRIMARY KEY (`id`)
) ENGINE=InnoDB AUTO_INCREMENT=1 DEFAULT CHARSET=utf8;


SET FOREIGN_KEY_CHECKS=0;

-- ----------------------------
-- Table structure for employee
-- ----------------------------
DROP TABLE IF EXISTS `employee`;
CREATE TABLE `employee` (
  `id` int(11) NOT NULL AUTO_INCREMENT,
  `lastName` varchar(255) DEFAULT NULL,
  `email` varchar(255) DEFAULT NULL,
  `gender` int(2) DEFAULT NULL,
  `d_id` int(11) DEFAULT NULL,
  PRIMARY KEY (`id`)
) ENGINE=InnoDB AUTO_INCREMENT=1 DEFAULT CHARSET=utf8;
4.1.4 创建相关的JavaBean
public class Department {

    private Integer id;
    private String departmentName;
}
public class Employee {

    private Integer id;
    private String lastName;
    private String email;
    private Integer gender;
    private String dId;
}
4.2 注解整合
MyBatis官方文档
4.2.1 创建Mapper文件
package com.springboot.data.mybatis.mapper;

import com.springboot.data.mybatis.pojo.Department;
import org.apache.ibatis.annotations.*;

@Mapper
public interface DepartmentMapper {


    @Select("select * from department where id = #{id}")
    public Department selectById(Integer id);

    @Options(useGeneratedKeys = true,keyProperty = "id")//指定主键
    @Insert("insert into department (department_name) values (#{departmentName})")
    public int insert(Department department);

    @Update("update department set department_name=#{departmentName} where id = #{id}")
    public int update(Department department);

    @Delete("delete from department where id = #{id}")
    public int delete(Integer id);
}
@Mapper 一定要用这个注解表明这是一个操作数据库的mapper
使用MapperScan批量扫描所有的Mapper接口;
@MapperScan(value = “com.springboot.data.mybatis.mapper”)
4.2.2 自定义MyBatisConfig的mybatis配置类
MyBatis的自动配置参考:MybatisAutoConfiguration
如果我们需要开启驼峰命名等相关Mybatis的配置,可以自定义配置类,定义ConfigurationCustomizer:
package com.springboot.data.mybatis.conf;

import org.apache.ibatis.session.Configuration;
import org.mybatis.spring.boot.autoconfigure.ConfigurationCustomizer;
import org.springframework.context.annotation.Bean;

//配置Mybatis的相关配置
@org.springframework.context.annotation.Configuration
public class MyBatisConfig {

    @Bean
    public ConfigurationCustomizer configurationCustomizer(){

        return new ConfigurationCustomizer(){

            @Override
            public void customize(Configuration configuration) {

                //配置驼峰命名
                configuration.setMapUnderscoreToCamelCase(true);
            }
        };
    }
}
4.2.3 定义controller做测试
package com.springboot.data.mybatis.controller;

import com.springboot.data.mybatis.DepartmentMapper;
import com.springboot.data.mybatis.pojo.Department;
import org.springframework.beans.factory.annotation.Autowired;
import org.springframework.web.bind.annotation.GetMapping;
import org.springframework.web.bind.annotation.PathVariable;
import org.springframework.web.bind.annotation.ResponseBody;
import org.springframework.web.bind.annotation.RestController;

@RestController
public class DepartmentController {


    @Autowired
    DepartmentMapper departmentMapper;

    @GetMapping("/dept/{id}")
    public Department selectById(@PathVariable("id") Integer id){

        return departmentMapper.selectById(id);
    }

    @GetMapping("/dept")
    public Department insert(Department department){

        departmentMapper.insert(department);
        return department;
    }

    @GetMapping("/dept/update")
    public Department update(Department department){

        departmentMapper.update(department);
        return department;
    }

    @GetMapping("/dept/delete/{id}")
    public int delete(@PathVariable("id") Integer id){

        int delete = departmentMapper.delete(id);
        return delete;
    }
}
4.2.4 测试
浏览器:http://localhost:8081/dept?departmentName=AA 插入操作
浏览器:http://localhost:8081/dept/update?id=1&departmentName=BB 修改操作
浏览器:http://localhost:8081/dept/1 查询操作
浏览器:http://localhost:8081/dept/delete/1 删除操作
在druid的后台管理中,也能看到相关监控操作:

4.3 配置文件整合
4.3.1 创建Mapper接口
package com.springboot.data.mybatis.mapper;

import com.springboot.data.mybatis.pojo.Employee;
import org.apache.ibatis.annotations.Mapper;

@Mapper
public interface EmployeeMapper {


    public int insertEmp(Employee employee);

    public Employee selectById(Integer id);
}
4.3.2 添加MyBatis的主配置文件
在resources下面的创建 mybatis目录,里面创建 mybatis-config.xml:
<configuration>

    <settings>

        <setting name="mapUnderscoreToCamelCase" value="true"/>
    settings>
configuration>
好像引入了配置文件之后,之前配置的ConfigurationCustomizer中的驼峰命名就失效了,所以这里要配置驼峰命名;
4.3.3 添加Mapper映射文件
以EmployeeMapper’为例:
<mapper namespace="com.springboot.data.mybatis.mapper.EmployeeMapper">

    <select id="selectById" resultType="com.springboot.data.mybatis.pojo.Employee">
        SELECT * FROM employee WHERE id=#{id}
    select>

    <insert id="insertEmp">

        <selectKey keyProperty="id" order="AFTER" resultType="java.lang.Integer">
            SELECT LAST_INSERT_ID()
        selectKey>
        INSERT INTO employee(lastName,email,gender,d_id) VALUES (#{lastName},#{email},#{gender},#{dId})
    insert>
mapper>
注意:sql片段的id属性要和mapper接口中的方法名对应,namespace=“com.springboot.data.mybatis.mapper.EmployeeMapper” 是Mapper接口的类全名
4.3.4 修改application.yml
在配置文件中,需要指定主配置文件和映射文件的位置:mybatis是最顶层的,不是spring下面的
mybatis:
  # 配置全局配置文件的位置
  config-location: classpath:mybatis/mybatis-config.xml
  # 配置mapper文件的位置
  mapper-locations: classpath:mybatis/mapper/*.xml
4.3.5 启动测试
浏览器:http://localhost:8081/[email protected]&gender=1&dId=6
浏览器:http://localhost:8081/emp/1
MyBatis的整合到此结束了。
5、整合Spring Data JPA
5.1 Spring Data JPA简介
1、 简介
Spring Data 项目的目的是为了简化构建基于Spring 框架应用的数据访问技术,包括非关系数据库、Map-Reduce 框架、云数据服务等等;另外也包含对关系数据库的访问支持。Spring Data JPA 底层使用的Hibernate来做实现。
Spring Data 包含多个子项目:
- Spring Data Commons
- Spring Data JPA
- Spring Data KeyValue
- Spring Data LDAP
- Spring Data MongoDB
- Spring Data Gemfire
- Spring Data REST
- Spring Data Redis
- Spring Data for Apache Cassandra
- Spring Data for Apache Solr
- Spring Data Couchbase (community module)
- Spring Data Elasticsearch (community module)
- Spring Data Neo4j (community module)
2、 SpringData特点
SpringData为我们提供使用统一的API来对数据访问层进行操作;这主要是Spring Data Commons项目来实现的。Spring Data Commons让我们在使用关系型或者非关系型数据访问技术时都基于Spring提供的统一标准,标准包含了CRUD(创建、获取、更新、删除)、查询、排序和分页的相关操作。
3、统一的Repository接口
- Repository
- RevisionRepository
- CrudRepository
- PagingAndSortingRepository
而我们接下来要使用的是JpaRespository ,它的继承关系是这样的:

3、提供数据访问模板类xxxTemplate;
如:MongoTemplate、RedisTemplate等
4、JPA与Spring Data
1)、JpaRepository基本功能
编写接口继承JpaRepository既有crud及分页等基本功能
2)、定义符合规范的方法命名
在接口中只需要声明符合规范的方法,即拥有对应的功能
3)、@Query自定义查询,定制查询SQL
4)、Specifications查询(Spring Data JPA支持JPA2.0的Criteria查询)
5.2 整合JPA
1、引入spring-boot-starter-data-jpa
2、配置文件打印SQL语句
3、创建Entity标注JPA注解
4、创建Repository接口继承JpaRepository
5、测试方法
5.2.1 创建工程
使用SpringBoot的向导创建工程,选中 web、jdbc、jpa、mysql 模块,
1、pom文件
<project xmlns="http://maven.apache.org/POM/4.0.0" xmlns:xsi="http://www.w3.org/2001/XMLSchema-instance"
         xsi:schemaLocation="http://maven.apache.org/POM/4.0.0 https://maven.apache.org/xsd/maven-4.0.0.xsd">
    <modelVersion>4.0.0modelVersion>
    <parent>
        <groupId>org.springframework.bootgroupId>
        <artifactId>spring-boot-starter-parentartifactId>
        <version>2.2.6.RELEASEversion>
        <relativePath/>
    parent>
    <groupId>com.springboot.data.jpagroupId>
    <artifactId>spring-boot-06-data-jpaartifactId>
    <version>0.0.1-SNAPSHOTversion>
    <name>spring-boot-06-data-jpaname>
    <description>Demo project for Spring Bootdescription>

    <properties>
        <java.version>1.8java.version>
    properties>

    <dependencies>
        <dependency>
            <groupId>org.springframework.bootgroupId>
            <artifactId>spring-boot-starter-data-jpaartifactId>
        dependency>
        <dependency>
            <groupId>org.springframework.bootgroupId>
            <artifactId>spring-boot-starter-jdbcartifactId>
        dependency>
        <dependency>
            <groupId>org.springframework.bootgroupId>
            <artifactId>spring-boot-starter-webartifactId>
        dependency>

        <dependency>
            <groupId>mysqlgroupId>
            <artifactId>mysql-connector-javaartifactId>
            <scope>runtimescope>
        dependency>


        <dependency>
            <groupId>com.alibabagroupId>
            <artifactId>druidartifactId>
            <version>1.1.8version>
        dependency>


        <dependency>
            <groupId>log4jgroupId>
            <artifactId>log4jartifactId>
            <version>1.2.17version>
        dependency>

        <dependency>
            <groupId>junitgroupId>
            <artifactId>junitartifactId>
            <scope>testscope>
        dependency>
        <dependency>
            <groupId>org.springframework.bootgroupId>
            <artifactId>spring-boot-starter-testartifactId>
            <scope>testscope>
            <exclusions>
                <exclusion>
                    <groupId>org.junit.vintagegroupId>
                    <artifactId>junit-vintage-engineartifactId>
                exclusion>
            exclusions>
        dependency>
    dependencies>

    <build>
        <plugins>
            <plugin>
                <groupId>org.springframework.bootgroupId>
                <artifactId>spring-boot-maven-pluginartifactId>
            plugin>
        plugins>
    build>

project>
2、application.properties
server.port=8081

#数据源的相关配置
spring.datasource.url=jdbc:mysql://localhost:3306/jpa?useUnicode=true&characterEncoding=utf8&serverTimezone=GMT
spring.datasource.driver-class-name=com.mysql.jdbc.Driver
spring.datasource.username=root
spring.datasource.password=123
spring.datasource.type=com.alibaba.druid.pool.DruidDataSource
spring.datasource.initialSize=5
spring.datasource.minIdle=5
spring.datasource.maxActive=20
spring.datasource.maxWait=60000
spring.datasource.timeBetweenEvictionRunsMillis=300000
spring.datasource.validationQuery=SELECT 1 FROM DUAL
spring.datasource.testWhileIdle=true
spring.datasource.testOnBorrow=false
spring.datasource.testOnReturn=false
spring.datasource.poolPreparedStatements=false
spring.datasource.filters=stat,wall,log4j
spring.datasource.maxPoolPreparedStatementPerConnectionSize=20
spring.datasource.useGlobalDataSourceStat=true
spring.datasource.connectionProperties=druid.stat.mergeSql=true;druid.stat.slowSqlMillis=500

#Jpa的配置,自动创建表和打印sql到控制台的配置
spring.jpa.hibernate.ddl-auto=update
spring.jpa.show-sql=true
5.2.2 整合druid
参考 第3点
5.2.3 创建Entity
import javax.persistence.*;

//使用JPA注解配置映射关系
@Entity //告诉JPA这是一个实体类(和数据表映射的类)
@Table(name = "tbl_user") //@Table来指定和哪个数据表对应;如果省略默认表名就是user;
public class Employee {


    @Id
    @GeneratedValue(strategy = GenerationType.IDENTITY)//自增主键
    private Integer id;
    //这是和数据表对应的一个列
    @Column(name = "last_name",length = 255)
    private String lastName;
    @Column//省略默认列名就是属性名
    private String email;
}
5.2.4 创建Repository接口
import com.springboot.data.jpa.pojo.Employee;
import org.springframework.data.jpa.repository.JpaRepository;

public interface EmployeeRepository extends JpaRepository<Employee,Integer> {

}
我们的EmployeeRepository 只要继承 JpaRepository 就可以了,泛型中:第一个是entity的名称,第二个是entity的主键类型。这样我们的EmployeeRepository 就拥有了基本的增删改查以及分页的功能。
5.2.5 创建Controller
创建Controller主要是为了测试:
package com.springboot.data.jpa.controller;

import com.springboot.data.jpa.pojo.Employee;
import com.springboot.data.jpa.repository.EmployeeRepository;
import org.springframework.beans.factory.annotation.Autowired;
import org.springframework.web.bind.annotation.PathVariable;
import org.springframework.web.bind.annotation.RequestMapping;
import org.springframework.web.bind.annotation.RestController;

import java.util.Optional;

@RestController
public class EmployeeController {


    @Autowired
    EmployeeRepository employeeRepository;
	//新增方法
    @RequestMapping("/insertEmp")
    public Employee insertEmployee(Employee employee){

        employeeRepository.save(employee);
        return employee;
    }
    //查询方法,根据id查询
    @RequestMapping("selectById/{id}")
    public Employee selectById(@PathVariable("id") Integer id){

        Optional<Employee> optional = employeeRepository.findById(id);
        if(optional.isPresent()){

            return optional.get();
        }
        return null;
    }
}
5.2.6 浏览器测试
http://localhost:8081/[email protected]
http://localhost:8081/selectById/1