ACL测试(2)
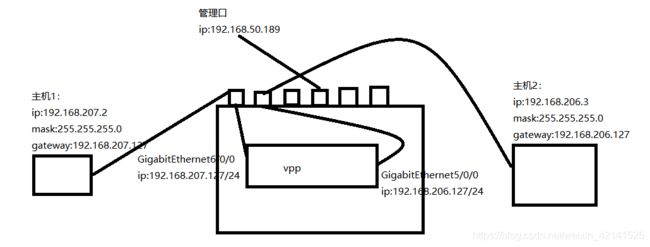
一、不同网段主机间通过vpp通信
2.acl配置命令
[1]添加acl命令
set acl-plugin acl <permit|deny> src <PREFIX> dst <PREFIX> proto X sport X-Y dport X-Y [tag FOO] {
     use comma separated list for multiple rules}
	<permit|deny> :通过/丢弃
	PREFIX	:源或目的ip/mask
	X :proto字段
	X-Y:源端口/目的端口  可以是一个值也可以设置一个取值范围
[2]把acl绑在接口上
set acl-plugin interface <interface> <input|output> <acl INDEX> [del]
	<interface>:要绑定的接口名称
	<input|output>:绑定接口的方向
	<acl INDEX>:acl索引
3.acl配置
[1]src ip:192.168.207.0网段 dst ip:192.168.206.0网段 permit 绑在接口GigabitEthernet6/0/0 input方向上
配置acl规则:set acl-plugin acl permit src 192.168.207.0/24 dst 192.168.206.0/24
绑定接口:set acl-plugin interface GigabitEthernet6/0/0 input acl 1
查看规则:show acl-plugin acl

测试结果:
trace add dpdk-input 10
show trace 查看
能够匹配上的报文通过

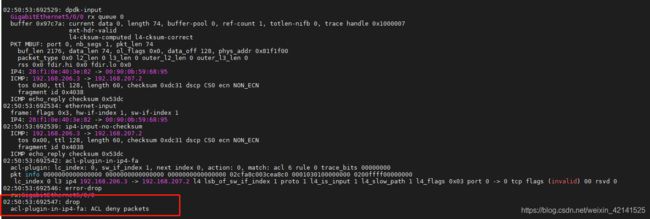
[2]src ip 192.168.207.0网段 dport 80 的报文 deny 绑在GigabitEthernet6/0/0 input方向
配置规则:set acl-puligin acl deny src 192.168.207.0/24 dport 80
绑定接口:set acl-plugin interface GigabitEthernet6/0/0 input acl 3
查看规则:show acl-plugin acl
![]()
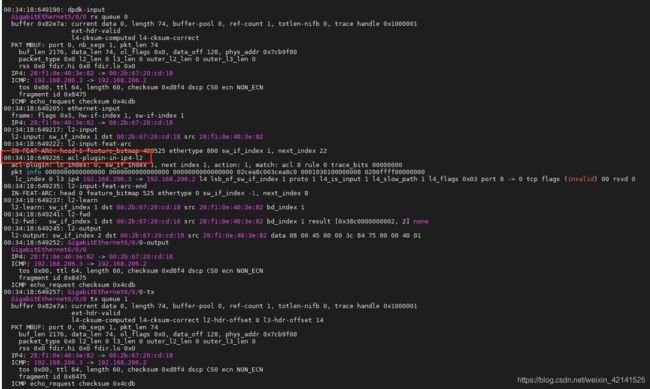
[3]src ip 192.168.206/24 网段 dst ip 192.168.207.0/24网段 deny 绑在GigabitEthernet5/0/0 input方向
配置规则:set acl-puligin acl deny src 192.168.206.0/24 dst 192.168.206.0/24
绑定接口:set acl-plugin interface GigabitEthernet5/0/0 input acl 6
查看规则:show acl-plugin acl
![]()
二、相同网段间通过vpp通信
2.配置命令
[1]创建桥
create bridge-domain <bridge-domain-id> [learn <0|1>] [forward <0|1>] [uu-flood <0|1>] [flood <0|1>] [arp-term <0|1>] [arp-ufwd <0|1>] [mac-age <nn>] [bd-tag <tag>]
	<bridge-domain-id>:网桥域名称
	[learn <0|1>] [forward <0|1>] [uu-flood <0|1>] [flood <0|1>] [arp-term <0|1>] [arp-ufwd <0|1>] [mac-age <nn>] [bd-tag <tag>]:可以在每个接口和每个网桥域上独立启用和禁用MAC学习,单播转发和泛洪等,默认情况下是启用这些功能的
[2]删除网桥
create bridge-domain <bridge-domain-id> del
[3]创建并将接口添加到网桥域
set interface l2 bridge <interface> <bridge-domain-id> [bvi|uu-fwd] [shg]
	<interface>:接口名称
	<bridge-domain-id>:网桥域
[4]查看网桥域的设置
show bridge-domain <bridge-domain-id> detail
	<bridge-domain-id>:网桥域
[5]查看二层转发流表
show l2fib verbose
3.测试过程
[1]创建并将接口添加到网桥域
set interface l2 bridge GigabitEthernet5/0/0 100
set interface l2 bridge GigabitEthernet6/0/0 100
show bridge-domain 100 detail 查看

[2]查看二层转发流表
show l2fib verbose

[3]主机192.168.206.3 ping 主机192.168.206.2
trace add dpdk-input 10
show trace 查看节点流程


[4]配置acl测试
(1)测试一
配置acl: set acl-plugin acl deny src 192.168.206.3/32
绑定接口: set acl-plugin interface GigabitEthernet5/0/0 input acl 7

(2)测试二
配置acl: set acl-plugin acl permit dst 192.168.206.2/32
绑定接口: set acl-plugin interface GigabitEthernet5/0/0 input acl 8

(3)测试三
配置acl: set acl-plugin acl permit dst 192.168.206.2/32
set acl-plugin deny src 192.168.206.5/32
绑定接口: set acl-plugin interface GigabitEthernet5/0/0 input acl 2
set acl-plugin interface GigabitEthernet5/0/0 input acl 1

测试结果:
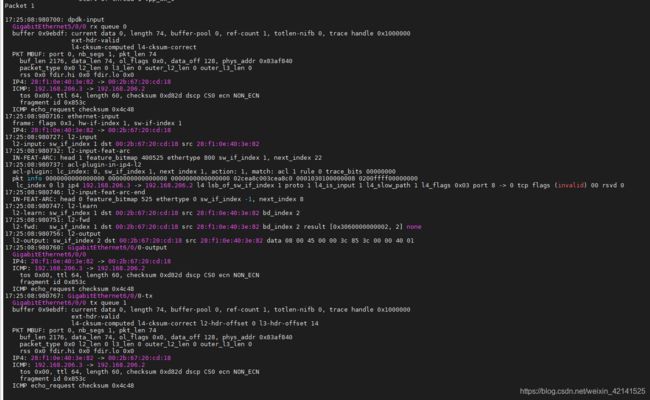
主机192.168.206.3 ping 192.168.206.2 可以通
报文先匹配acl2匹配失败后继续匹配acl1能够匹配上报文通过
(4)测试四
acl配置: set acl-plugin acl deny src 192.168.206.3/32
set acl-plugin acl permit dst 192.168.206.2/32
绑定接口: set acl-plugin interface GigabitEthernet5/0/0 input acl 0
set acl-plugin interafce GigabitEthernet5/0/0 input acl 1

测试结果:
报文匹配上acl 0 不再继续向下匹配,按照acl 0所配置的规则进行访问控制处理,报文被丢弃
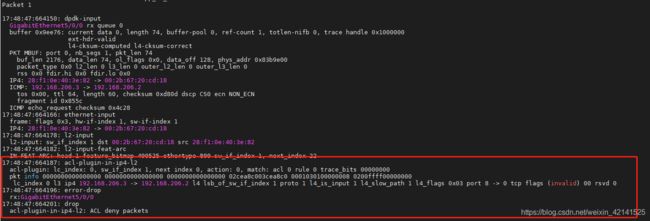
(5)测试五
acl配置: set acl-plugin acl deny src 192.168.206.3/32
set acl-plugin acl permit dst 192.168.206.2/32
绑定接口: set acl-plugin interface GigabitEthernet5/0/0 input acl 1
set acl-plugin interafce GigabitEthernet5/0/0 input acl 0

