django管理界面美化_Django管理界面
django管理界面美化
Here you will learn about working with django admin interface.
在这里,您将了解有关使用django管理界面的信息。
Prerequiests: It is necessary to learn about models first before working with Django admin panel. You can learn about models here.
先决条件:在使用Django管理面板之前,有必要先了解模型 。 您可以在此处了解模型 。
Django中的admin.py文件是什么? (What is admin.py File in Django?)
We’ve created an app and a model in previous articles. But we haven’t stored anything yet to our database. Django’s admin interface will help us to add, edit and delete the data from the database using the models. As we know models are the structure of our database tables, we can add a new object, edit it and delete objects from database in two ways either by coding or by using a graphical user interface. That graphical user interface to store, edit and delete data from database is Django admin interface.
在先前的文章中,我们已经创建了一个应用程序和一个模型。 但是我们还没有存储任何东西到我们的数据库中。 Django的管理界面将帮助我们使用模型从数据库中添加,编辑和删除数据。 我们知道模型是数据库表的结构,我们可以通过编码或使用图形用户界面两种方式添加,编辑和删除数据库中的对象。 用于存储,编辑和删除数据库数据的图形用户界面是Django管理界面。
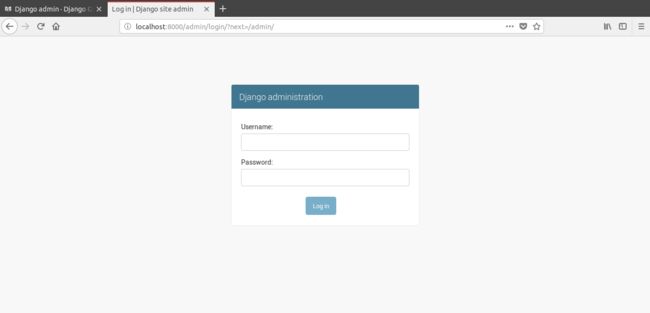
In above screenshots, first is a screenshot of admin page which requires the login to do any changes in database, that’s why it is secured way to work with database and in second image you can see some Models that we have added to admin interface.
在上面的屏幕截图中,第一个是管理页面的屏幕截图,该页面要求登录名对数据库进行任何更改,这就是为什么它是安全的数据库处理方式的原因,在第二个图像中,您可以看到我们已添加到管理界面中的一些模型。
使用Django管理面板 (Working with Django Admin Panel)
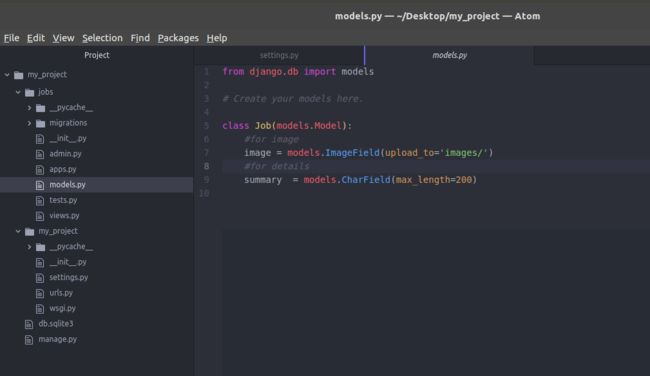
As mentioned above, before working with database first you should have created a model. As in previous article we created a model (having ImageField and CharField) named as Job. Now we’ll add this model to admin interface so we can store data in ImageField and CharField using Django’s admin.
如上所述,在使用数据库之前,您应该先创建一个模型。 与上一篇文章一样,我们创建了一个名为Job的模型(具有ImageField和CharField) 。 现在,我们将此模型添加到管理界面中,以便可以使用Django的admin将数据存储在ImageField和CharField中。
So let’s start.
因此,让我们开始吧。
步骤1:建立使用者帐户 (Step 1: Create a User Account)
Run your project and open admin page (for example – http://127.0.0.1:8000/admin or localhost:8000/admin/).
运行您的项目并打开管理页面(例如– http://127.0.0.1:8000/admin或localhost:8000 / admin /)。
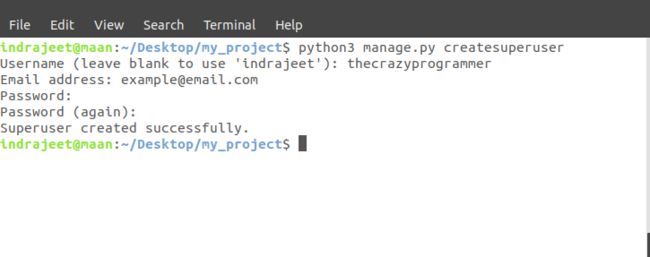
So a username and password is required to move forward, means we need to create an account. To create it open your terminal and stop the server then type this command –
因此,需要用户名和密码才能继续前进,这意味着我们需要创建一个帐户。 要创建它,请打开您的终端并停止服务器,然后键入以下命令–
python manage.py createsuperuser
python manage.py createsuperuser
After hitting enter it will ask you for an username, you can type any username but if don’t enter anything and just hit enter then it will take your computer name as username. Let’s say we have created username as thecrazyprogrammer.
按下Enter键后,它将要求您输入用户名,您可以键入任何用户名,但是如果不输入任何内容,只需按下Enter键,它将以您的计算机名作为用户名。 假设我们已经将用户名创建为thecrazyprogrammer 。
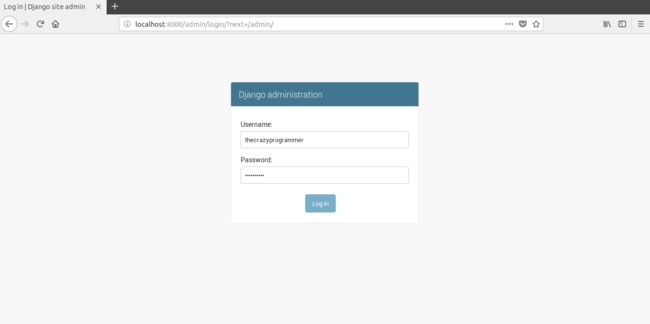
After username, it will ask your email address and a password. So after creating a username let’s run your server again and open localhost:8000/admin again, then login with your username and password you’ve entered above.
输入用户名后,它将询问您的电子邮件地址和密码。 因此,在创建用户名后,让我们再次运行服务器并再次打开localhost:8000 / admin ,然后使用您在上面输入的用户名和密码登录。
Note: If you forgot your password later, then there is no need to worry. As long as you have access to your server you can change it.
注意:如果以后忘记密码,则无需担心。 只要您有权访问服务器,就可以对其进行更改。
So now you’ve access to the Django admin page. At present there is only options are showing which can be used to add or see the new username and groups. But our created model Job is still not shown up.
因此,现在您可以访问Django管理页面。 当前,仅显示可用于添加或查看新用户名和组的选项。 但是我们创建的模型Job仍然没有显示。
步骤2:在admin.py中注册模型 (Step 2: Register Your Model in admin.py)
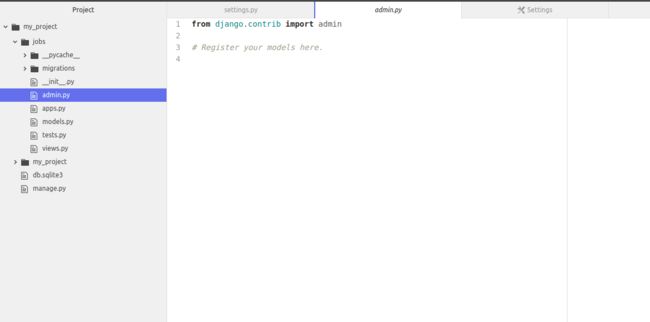
To register your model in admin.py, open the admin.py inside the same app directory where is your models.py (model to be added) is present.
要在admin.py中注册您的模型,请在其中存在您的models.py(要添加的模型)的同一应用程序目录中打开admin.py。
Now inside this file write the code as shown below .
现在,在此文件中编写如下所示的代码。
from django.contrib import admin

from .models import Job

admin.site.register(Job)
Here Job is the name of our model that we want to register. Now save that file and reload the admin page in browser and you’ll get Job model in the Django’s admin.
Job是我们要注册的模型的名称。 现在保存该文件并在浏览器中重新加载管理页面,您将在Django的管理中获得Job模型。
步骤3:从数据库中添加,编辑和删除数据(对象) (Step 3: Add, Edit and Delete Data (Objects) from Database)
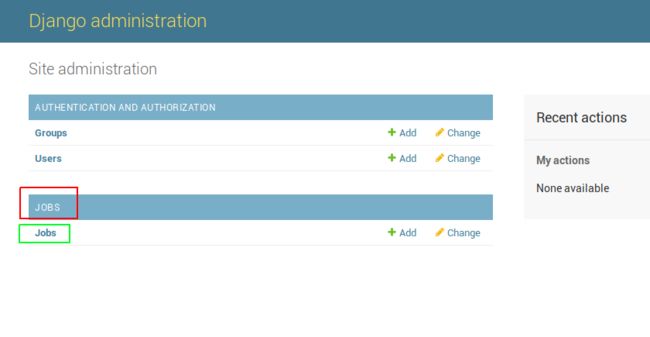
Here JOBS in red square is name of the APP and Job in green square is the model. As we can add more than one model in an app it will be shown under the JOBS app.
在这里,红色方块中的JOBS是APP的名称,绿色方块中的Job是模型。 由于我们可以在一个应用程序中添加多个模型,因此它将显示在JOBS应用程序下。
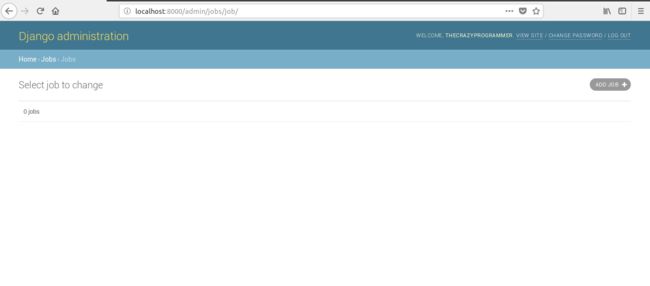
Now open the Jobs model.
现在打开乔布斯模型。
Currently there is nothing in the database. To add it click on Add Job button at right of the screen. Then you will see that the fields we’ve specified in the Model will be shown up here.
当前数据库中没有任何内容。 要添加它,请单击屏幕右侧的“添加作业”按钮。 然后,您将看到我们在模型中指定的字段将显示在此处。
Add data and save it.
添加数据并保存。
And our data is stored into database. Now you may have got the idea that how easy is working with Django. We didn’t need to specify the queries to store the data into database. It will be very helpful, let’s say you have a website running on server. You want to change/delete/add some data. All you have to do is login to your admin interface and update it using Django admin and your site will be up to date.
并且我们的数据存储在数据库中。 现在您可能已经有了使用Django的便捷性的想法。 我们不需要指定查询即可将数据存储到数据库中。 它将非常有帮助,假设您在服务器上运行了一个网站。 您要更改/删除/添加一些数据。 您所要做的就是登录您的管理界面,并使用Django admin对其进行更新,您的网站将保持最新状态。
That’s all
就这样
I hope you’ve understood the basic idea of storing data into database using Django’s admin interface. We’ll also see how to fetch data from database in other articles. If you’ve any problem related to this article then please let us know in comment box, We’ll reply as soon as possible.
我希望您了解使用Django的管理界面将数据存储到数据库中的基本思想。 在其他文章中,我们还将看到如何从数据库中获取数据。 如果您有与本文相关的任何问题,请在评论框中告知我们,我们将尽快答复。
翻译自: https://www.thecrazyprogrammer.com/2019/01/django-admin-interface.html
django管理界面美化

