Splash闪屏页的开发(详解)
第一步话就是设置我们的布局文件的开发:
先创建我们的activity即是我们的splashActivity:
 然后的话就是创建我们的 FullScreenVideoView.java文件相当于是我们自建的videoview

package com.example.moneyandroid;

import android.content.Context;
import android.util.AttributeSet;
import android.widget.VideoView;

public class FullScreenVideoView extends VideoView {

    // 这个构造方法主要用于直接new出来的对象
    public FullScreenVideoView(Context context) {

        super(context);
    }
    // 这个构造方法主要用于xml文件中,支持自定义的样式
    public FullScreenVideoView(Context context, AttributeSet attrs) {

        super(context, attrs);
    }
   // 这个构造方法主要用于xml文件中,支持自定义的样式
    public FullScreenVideoView(Context context, AttributeSet attrs, int defStyleAttr) {

        super(context, attrs, defStyleAttr);
    }

    //重写我们的onMeasure
    @Override
    protected void onMeasure(int widthMeasureSpec, int heightMeasureSpec) {

        // widthMeasureSpec 包含两个主要的内容: 1: 测量模   2: 大小
        int with = getDefaultSize(0,widthMeasureSpec);
        int height = getDefaultSize(0,heightMeasureSpec);
        setMeasuredDimension(with,height);
//        super.onMeasure(widthMeasureSpec, heightMeasureSpec);


        /*
        * todo 现在的话就是我们的模式的讲解,就是我们在使用我们的这个方式的时候会用到的模式
        *  EXACTLY 的模式的话就是我们的 精确的模式-----------》 如果系统调用的是该模式的话、
        * 这时的话控件的大小会随着子控件或是内容的变化而变化----》 不超出父控件允许的最大范围即可
        *
        * AT_MOST -----> 该模式的话是我们的最大值的测量模式
        *
        *
        *UnsPECIFIDE  该模式只有我们自定义控件的时候才会用到 view 想要多大就多大
        *
        * tetxview 系统提供的处理文本的控件
        *
        * */
   }
}
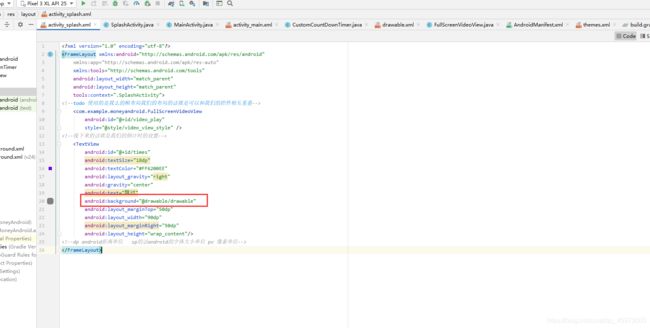
然后的话就是设置我们的splash.xml文件:

xml version="1.0" encoding="utf-8"?>
<FrameLayout xmlns:android="http://schemas.android.com/apk/res/android"
    xmlns:app="http://schemas.android.com/apk/res-auto"
    xmlns:tools="http://schemas.android.com/tools"
    android:layout_width="match_parent"
    android:layout_height="match_parent"
    tools:context=".SplashActivity">
<!--todo 使用的是我么的帧布局我们的布局的话就是可以和我们的控件相互重叠-->
    <com.example.moneyandroid.FullScreenVideoView
        android:id="@+id/video_play"
        style="@style/video_view_style" />
<!--接下来的话就是我们的倒计时的设置-->
    <TextView
        android:id="@+id/times"
        android:textSize="18dp"
        android:textColor="#FF6200EE"
        android:layout_gravity="right"
        android:gravity="center"
        android:text="跳过"
        android:background="@drawable/drawable"
        android:layout_marginTop="50dp"
        android:layout_width="90dp"
        android:layout_marginRight="50dp"
        android:layout_height="wrap_content"/>
<!--dp android距离单位   sp的话android的字体大小单位 px 像素单位-->
</FrameLayout>
同时在我们的res的目录下创建我们的就是rew文件目录然后将我们准备好的视屏放置进去:

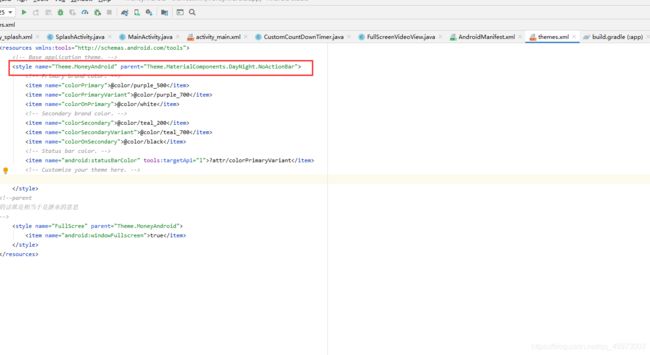
同时将我们的themes文件的actionbar改为noactionbar:
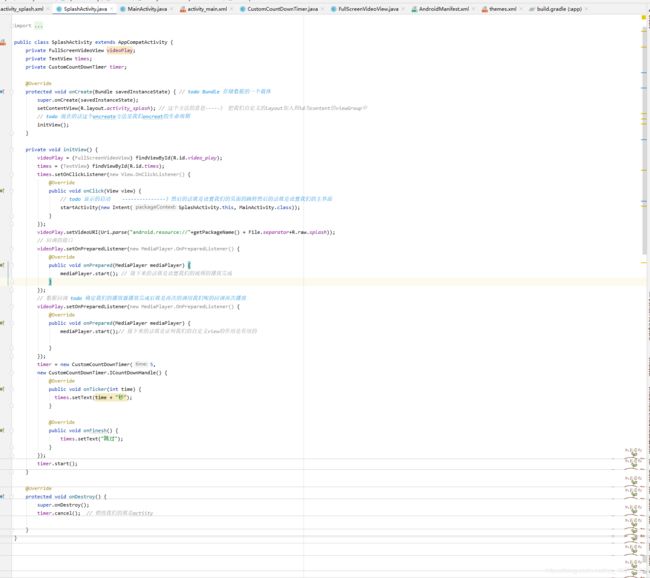
然后的话就是编写我们的相关的java代码:
package com.example.moneyandroid;

import androidx.annotation.NonNull;
import androidx.appcompat.app.AppCompatActivity;

import android.content.Intent;
import android.media.MediaPlayer;
import android.net.Uri;
import android.os.Bundle;
import android.os.PersistableBundle;
import android.view.View;
import android.widget.TextView;
import android.widget.VideoView;

import java.io.File;

public class SplashActivity extends AppCompatActivity {

    private FullScreenVideoView videoPlay;
    private TextView times;
    private CustomCountDownTimer timer;

    @Override
    protected void onCreate(Bundle savedInstanceState) {
      // todo Bundle 存储数据的一个载体
        super.onCreate(savedInstanceState);
        setContentView(R.layout.activity_splash); // 这个方法的意思-----》 把我们自定义的layout加入到id为content的viewGroup中
        // todo 现在的话这个oncreate方法是我们oncreat的生命周期
        initView();
    }

    private void initView() {

        videoPlay = (FullScreenVideoView) findViewById(R.id.video_play);
        times = (TextView) findViewById(R.id.times);
        times.setOnClickListener(new View.OnClickListener() {

            @Override
            public void onClick(View view) {

                // todo 显示的启动    ---------------》然后的话就是设置我们的页面的跳转然后的话就是设置我们的主界面
                startActivity(new Intent(SplashActivity.this, MainActivity.class));
            }
        });
        videoPlay.setVideoURI(Uri.parse("android.resource://"+getPackageName() + File.separator+R.raw.splash));
        // 回调的接口
        videoPlay.setOnPreparedListener(new MediaPlayer.OnPreparedListener() {

            @Override
            public void onPrepared(MediaPlayer mediaPlayer) {

                mediaPlayer.start(); // 接下来的话就是设置我们的视频的播放完成
            }
        });
        // 数据回调 todo 确定我们的播放器播放完成后就是再次的调用我们呢的回调再次播放
        videoPlay.setOnPreparedListener(new MediaPlayer.OnPreparedListener() {

            @Override
            public void onPrepared(MediaPlayer mediaPlayer) {

                mediaPlayer.start();// 接下来的话就是证明我们的自定义view的作用是有用的

            }
        });
        timer = new CustomCountDownTimer(5,
        new CustomCountDownTimer.ICountDownHandle() {

            @Override
            public void onTicker(int time) {

              times.setText(time + "秒");
            }

            @Override
            public void onFinesh() {

                times.setText("跳过");
            }
        });
        timer.start();
    }

    @Override
    protected void onDestroy() {

        super.onDestroy();
        timer.cancel();  // 销毁我们的就是actiity

    }
}
同时创建我们的就是啊CustomCountDownTimer.java文件然后的话就是设置我们的handle编写我们的倒计时:

package com.example.moneyandroid;

import java.util.logging.Handler;
import java.util.logging.LogRecord;

public class CustomCountDownTimer implements  Runnable{

      private  int time;
      private int countDowntime;
      private final ICountDownHandle iCountDownHandle;
      private boolean isRunn;
    private final android.os.Handler handler1;
    // 实时去回调 这个时间是什么时间,倒计时是几秒,使用到的设计模式观察者设计模式

       // 支持传入的总时间

      // 每过一秒,总秒数减去1

      // 总时间倒计时为0时要回调完成的状态

      // todo handle ----------------> handle --------------> 线程之间的通信
      public CustomCountDownTimer(int time, ICountDownHandle iCountDownHandle){

          handler1 = new android.os.Handler();
              this.time = time;
              this.countDowntime = time; // 设置它的值
              this.iCountDownHandle = iCountDownHandle;
      }

    // 实现的具体逻辑
    @Override
    public void run() {

          // todo ------------>第三步------------》
         if(isRunn){


             if(iCountDownHandle != null){

                 iCountDownHandle.onTicker(countDowntime);
             }if(countDowntime == 0){

                 if(iCountDownHandle != null){

                     iCountDownHandle.onFinesh();
                 }
             }else{

                 countDowntime = time --;
                 handler1.postDelayed(this,1000);  // 延时1秒
             }

         }
    }
    public void start(){
      // 开启倒计时
          isRunn = true;
          handler1.post(this);
    }
    // 这个的话就是我们的
    public void cancel(){
      // 结束倒计时
          isRunn = false;
          handler1.removeCallbacks(this);
    }

    // 定义一个接口(ioc数据回调)
      public interface ICountDownHandle{

          void onTicker(int time); // 倒计时回调
                    // todo ------------>第二步
          void onFinesh(); // 完成时回调
      }
}
这里的话我们还在android中自己画了一个倒计时的背景文件:

将该文件引用到我们的Splash.xml文件中
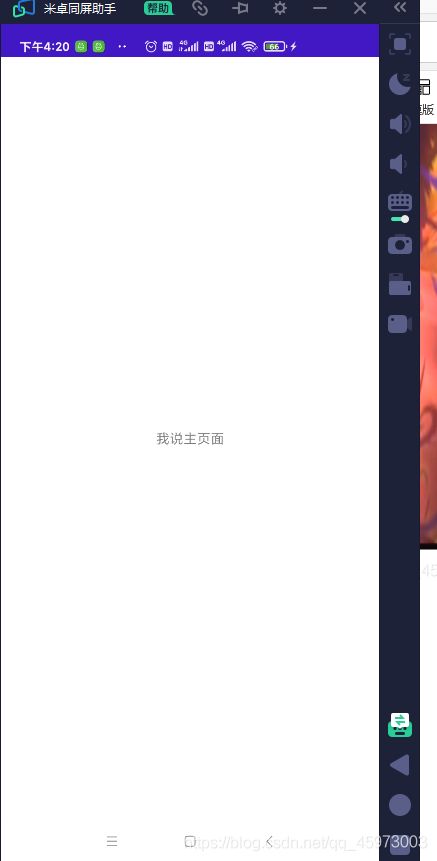
 然后的话程序运行的效果: