云开发---uniapp云开发(四)---本机手机号一键登录以及第三方登陆
我们来实现一键登录以及第三方登陆
一键登录手登陆机号使用
大学之道亦在自身,努力学习,热血青春
如果对编程感兴趣可以加入我们的qq群一起交流:974178910
未经本人允许,禁止转载
![]()
uni一键登陆
- 主要以本机号码为例演示 下面也有其它(微信/qq)
- 开通一键登录
- 一键登陆
-
- 获取可用服务商
- 预登陆
-
- 小案例
- 登陆
-
- 一键登录拿到access_token
- access_token换取手机号
-
- 在云函数中
- 客户端传送access_token
- 本机号码一键登录案例
-
- 逻辑和效果
- 云函数
- 页面代码
- 微信登陆
-
- 效果
- 登陆
- 获取用户信息
- 检测登陆是否过期
- 演示代码
- QQ登陆
-
- 效果
- 登陆
- 获取用户信息
- 检测登陆是否过期
- 演示代码
主要以本机号码为例演示 下面也有其它(微信/qq)
预登陆只有app支持
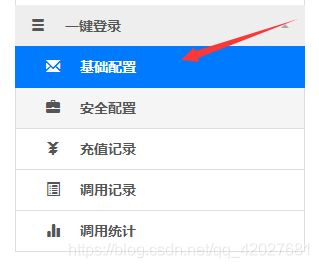
开通一键登录
登陆开发者后台 https://dev.dcloud.net.cn/
一键登陆
获取可用服务商
uni.getProvider({

    service: 'oauth',
    success: function (res) {

        console.log(res.provider)
    }
});
预登陆
可以判断当前设备环境是否支持一键登录
uni.preLogin({

	provider: 'univerify',
	success() {
      //预登录成功
		// 显示一键登录选项
		console.log("预登陆成功")
	},
	fail(res) {
      // 预登录失败
		// 不显示一键登录选项(或置灰)
		// 根据错误信息判断失败原因,如有需要可将错误提交给统计服务器
		console.log(res.errCode)
		console.log(res.errMsg)
	}
})
小案例
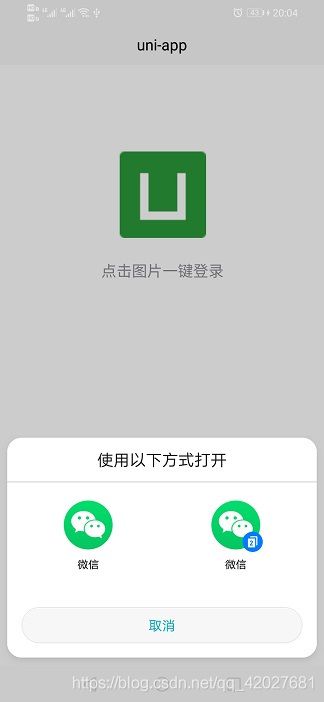
如果支持一键登陆 就显示一键登录 否则就显示普通账号密码登陆
<template>
	<view>
		<view v-if="isSupport" class="content">
			<image class="logo" src="/static/logo.png" @click="login()"></image>
			<view class="text-area">
				<text class="title">{
     {
     title}}</text>
			</view>
		</view>
		<view v-if="!isSupport">
			<input placeholder="账号" />
			<input placeholder="密码" />
		</view>
	</view>
</template>

<script>
	export default {

		data() {

			return {

				title: '点击图片一键登录',
				isSupport: true
			}
		},
		onLoad() {

			this.prelogin()
		},
		methods: {

			login(){

				uni.login({

				    provider: 'univerify',
				    univerifyStyle: {
      // 自定义登录框样式
				    //参考`univerifyStyle 数据结构`
				  },
				    success(res){
      // 登录成功
				        console.log(res.authResult);  // {openid:'登录授权唯一标识',access_token:'接口返回的 token'}
				    },
				    fail(res){
       // 登录失败
				        console.log(res.errCode)
				        console.log(res.errMsg)
				    }
				})
			},
			prelogin() {

				let vm = this;
				uni.preLogin({

				    provider: 'univerify',
				    success(){
       //预登录成功
				        // 显示一键登录选项
						console.log("预登陆成功")
				    },
				    fail(res){
       // 预登录失败
				        // 不显示一键登录选项(或置灰)
				    // 根据错误信息判断失败原因,如有需要可将错误提交给统计服务器
						vm.isSupport = false;
				        console.log(res.errCode)
				        console.log(res.errMsg)
				    }
				})


			}
		}
	}
</script>

<style>
	.content {

		display: flex;
		flex-direction: column;
		align-items: center;
		justify-content: center;
	}

	.logo {

		height: 200rpx;
		width: 200rpx;
		margin-top: 200rpx;
		margin-left: auto;
		margin-right: auto;
		margin-bottom: 50rpx;
	}

	.text-area {

		display: flex;
		justify-content: center;
	}

	.title {

		font-size: 36rpx;
		color: #8f8f94;
	}
</style>
登陆
一键登录拿到access_token
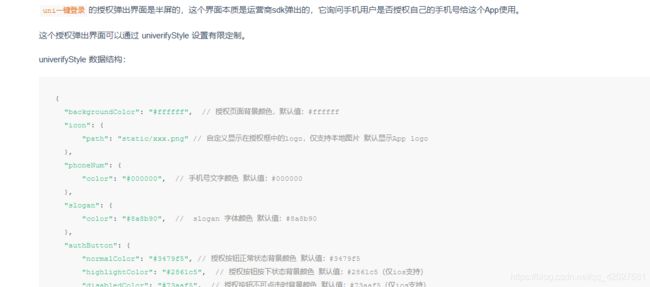
univerifyStyle 数据结构样式 参考链接 https://uniapp.dcloud.io/univerify
uni.login({

	provider: 'univerify',
	univerifyStyle: {
      // 自定义登录框样式
		//参考`univerifyStyle 数据结构`
	},
	success(res) {
      // 登录成功
		console.log(res.authResult); // {openid:'登录授权唯一标识',access_token:'接口返回的 token'}
		uni.closeAuthView(); //关闭一键登陆窗口
	},
	fail(res) {
      // 登录失败
		console.log(res.errCode)
		console.log(res.errMsg)
	}
})
如下
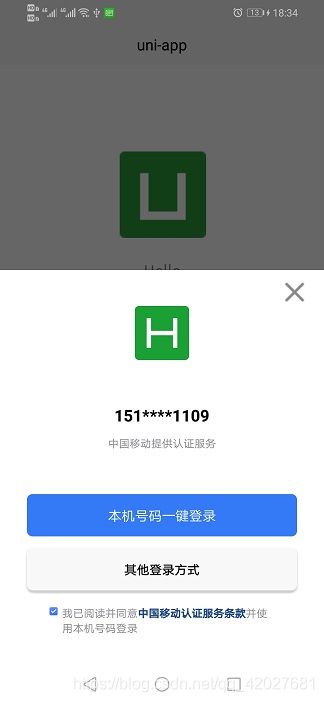 这里拿到 openid 和access_token
console.log(res.authResult)
![]()
一键登陆成功后 记得关闭登陆窗口
uni.closeAuthView()
access_token换取手机号
拿到手机号就可以用手机号注册什么的了 也可以通过手机号获取信息
在云函数中
如果不知道如何创建云函数 请参考 https://dmhsq.blog.csdn.net/article/details/113746528
'use strict';
exports.main = async (event, context) => {

	//event为客户端上传的参数
	const res = await uniCloud.getPhoneNumber({
     ),
		provider: 'univerify', //微信 weixin qq qq
		apiKey: 'xxx', // 在开发者中心开通服务并获取apiKey
		apiSecret: 'xxx', // 在开发者中心开通服务并获取apiSecret
		access_token: event.access_token,
		openid: event.openid
	})
	console.log(res);
	//返回数据给客户端
	return "登陆成功"
};
客户端传送access_token
uni.login({

	provider: 'univerify',
	univerifyStyle: {
      // 自定义登录框样式
		//参考`univerifyStyle 数据结构`
	},
	success(res) {
      // 登录成功
		console.log(res.authResult); // {openid:'登录授权唯一标识',access_token:'接口返回的 token'}
		uniCloud.callFunction({
      //换取手机号 但是不返回手机号(返回不安全)
			name: 'dologintest',
			data: {

				access_token: res.authResult.access_token,
				openid: res.authResult.openid
			},
			success:function(res){

				console.log(res)
			}
		})
		uni.closeAuthView()
	},
	fail(res) {
      // 登录失败
		console.log(res.errCode)
		console.log(res.errMsg)
	}
})
本机号码一键登录案例
逻辑和效果
一键登录 获取手机号 在数据查询 如果没有此账号 就默认注册
如果环境不支持号码一键登录 就显示账号密码登陆
创建云数据库 如果你不知道如何创建 请参考 https://dmhsq.blog.csdn.net/article/details/113855441
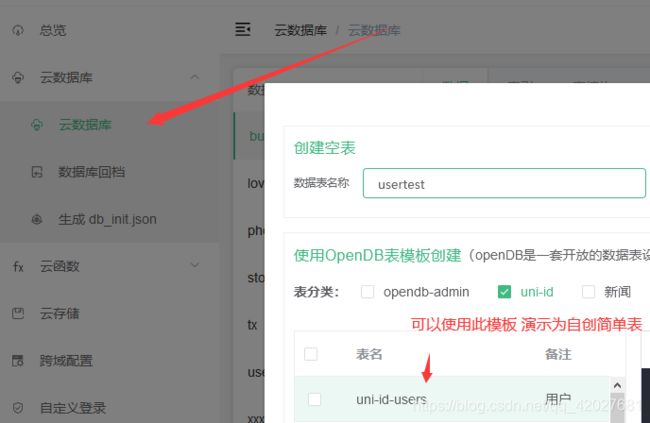 这里只用用户名和手机号

首先我们预登陆 如果成功 说明支持号码一键登录 如果不支持 就显示 账号密码登陆
 一键登陆
一键登陆
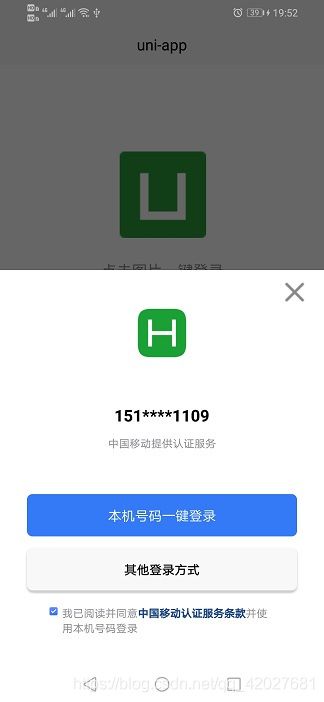
如果没有注册 就默认注册
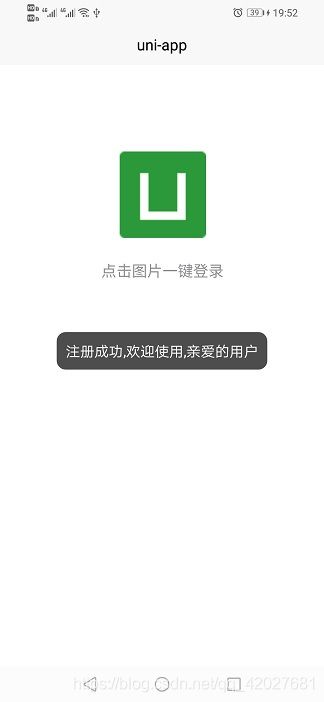 如果注册过 就返回用户名
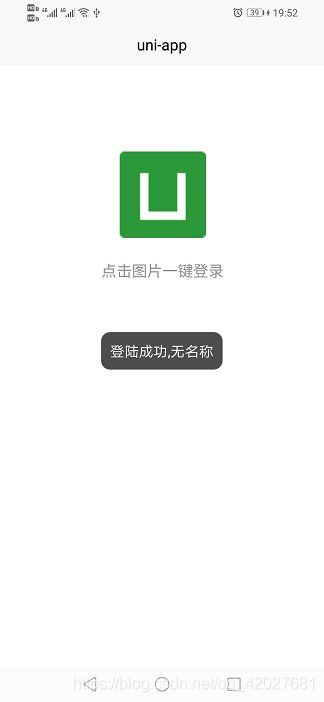

云函数
'use strict';
exports.main = async (event, context) => {

	//event为客户端上传的参数
	const res = await uniCloud.getPhoneNumber({

	      provider: 'univerify',
	      apiKey: 'xxxxxx', // 在开发者中心开通服务并获取apiKey
	      apiSecret: 'xxxxxxx', // 在开发者中心开通服务并获取apiSecret
	      access_token: event.access_token,
	      openid: event.openid
	  })

	 // console.log(res.phoneNumber);
	 if (res.success){

		 const db = uniCloud.database();
		 // 获取 `usertest` 集合的引用
		 const collection = db.collection('usertest');
		 let resp = await collection.where({
     phone:res.phoneNumber}).get();
		 let msgs = {

			 code: 0,
			 msg: "成功"
		 }
		 if(resp.data.length==0){

			 let resps = await collection.add({
     username:"无名称",phone:res.phoneNumber});
			 msgs.msg = "注册成功,欢迎使用,亲爱的用户"
		 }else{

			 msgs.msg = "登陆成功,"+resp.data[0].username
		 }
		 return msgs;
	 }else{

		 return {

			 code: 4001,
			 msg: "获取手机号失败"
		 }
	 }


};
页面代码
<template>
	<view>
		<view v-if="isSupport" class="content">
			<image class="logo" src="/static/logo.png" @click="login()"></image>
			<view class="text-area">
				<text class="title">{
     {
     title}}</text>
			</view>
		</view>
		<view v-if="!isSupport">
			<input placeholder="账号" />
			<input placeholder="密码" />
		</view>
	</view>
</template>

<script>
	export default {

		data() {

			return {

				title: '点击图片一键登录',
				isSupport: true
			}
		},
		onLoad() {

			this.prelogin()
		},
		methods: {

			login(){

				uni.login({

				    provider: 'univerify',
				    univerifyStyle: {
      // 自定义登录框样式
				    //参考`univerifyStyle 数据结构`
				  },
				    success(res){
      // 登录成功
				        console.log(res.authResult);  // {openid:'登录授权唯一标识',access_token:'接口返回的 token'}
						uniCloud.callFunction({

							name:'dologintest',
							data:{
     access_token:res.authResult.access_token,openid:res.authResult.openid},
							success:function(res){

								uni.showToast({

									icon:"none",
									title:res.result.msg
								})
							}
						})
						uni.closeAuthView()
				    },
				    fail(res){
       // 登录失败
				        console.log(res.errCode)
				        console.log(res.errMsg)
				    }
				})
			},
			prelogin() {

				let vm = this;
				uni.preLogin({

				    provider: 'univerify',
				    success(){
       //预登录成功
				        // 显示一键登录选项
						console.log("预登陆成功")
						uni.showToast({

							icon:"none",
							title:"预登陆成功"
						})
				    },
				    fail(res){
       // 预登录失败
				        // 不显示一键登录选项(或置灰)
				    // 根据错误信息判断失败原因,如有需要可将错误提交给统计服务器
						vm.isSupport = false;
				        console.log(res.errCode)
				        console.log(res.errMsg)
				    }
				})


			}
		}
	}
</script>

<style>
	.content {

		display: flex;
		flex-direction: column;
		align-items: center;
		justify-content: center;
	}

	.logo {

		height: 200rpx;
		width: 200rpx;
		margin-top: 200rpx;
		margin-left: auto;
		margin-right: auto;
		margin-bottom: 50rpx;
	}

	.text-area {

		display: flex;
		justify-content: center;
	}

	.title {

		font-size: 36rpx;
		color: #8f8f94;
	}
</style>
微信登陆
效果
登陆
uni.login({

	provider: 'weixin',
	success(res) {
      // 登录成功
		uni.showToast({

			icon: 'none',
			title: '登陆成功'
		})
	},
	fail(res) {
      // 登录失败
		uni.showToast({

			icon: 'none',
			title: '登陆失败'
		})
	}
})
获取用户信息
这里显示 用户名
uni.getUserInfo({

	success: function(res) {

		uni.showToast({

			icon: 'none',
			title: '用户名为' + res.userInfo.nickName
		})
	}
})
{

	"errMsg": "getUserInfo:ok",
	"userInfo": {

		"openId": "xxxxx",
		"nickName": "xxxx",
		"gender": xxxx,
		"city": "xxx",
		"province": "xxx",
		"country": "xxxx",
		"avatarUrl": "xxxxxxxxxx",
		"unionId": "xxxx"
	}
}
检测登陆是否过期
uni.checkSession({

	success: function(res) {

		console.log(res)
	}
})
演示代码
<template>
	<view>
		<view class="content">
			<button type="primary" @click="login()">登陆</button>
			<button type="primary" @click="getUser()">获取用户信息</button>
			<button type="primary" @click="check()">检测登陆是否过期</button>
		</view>
	</view>
</template>

<script>
	export default {

		data() {

			return {


			}
		},
		onLoad() {


		},
		methods: {

			getUser(){

				uni.getUserInfo({

					success:function(res){

						uni.showToast({

							icon: 'none',
							title: '用户名为'+res.userInfo.nickName
						})
					}
				})
			},
			check(){

				uni.checkSession({

					success:function(res){

						console.log(res)
					}
				})
			},
			login() {

				uni.login({

					provider: 'weixin',
					success(res) {
      // 登录成功
						uni.showToast({

							icon: 'none',
							title: '登陆成功'
						})
					},
					fail(res) {
      // 登录失败
						uni.showToast({

							icon: 'none',
							title: '登陆失败'
						})
					}
				})
			}
		}
	}
</script>

<style>
	.content {

		display: flex;
		flex-direction: column;
		align-items: center;
		justify-content: center;
	}

	.logo {

		height: 200rpx;
		width: 200rpx;
		margin-top: 200rpx;
		margin-left: auto;
		margin-right: auto;
		margin-bottom: 50rpx;
	}

	.text-area {

		display: flex;
		justify-content: center;
	}

	.title {

		font-size: 36rpx;
		color: #8f8f94;
	}
</style>
QQ登陆
效果
登陆
uni.login({

	provider: 'weixin',
	success(res) {
      // 登录成功
		uni.showToast({

			icon: 'none',
			title: '登陆成功'
		})
	},
	fail(res) {
      // 登录失败
		uni.showToast({

			icon: 'none',
			title: '登陆失败'
		})
	}
})
获取用户信息
这里显示 用户名
uni.getUserInfo({

	success: function(res) {

		uni.showToast({

			icon: 'none',
			title: '用户名为' + res.userInfo.nickName
		})
	}
})
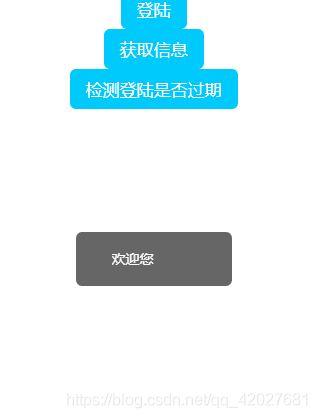
如果获取不到 就使用
getUserInfo(e) {

	console.log(e.detail.userInfo)
	uni.showToast({

		icon: 'none',
		title: "欢迎您" + e.detail.userInfo.nickName
	})
}
返回的数据格式为
userInfo:{

	avatarUrl: "xxxxxx"
	city: "xxxx
	country: "xxxx"
	gender: 1
	language: "zh_CN"
	nickName: "xxxx"
	province: "xxxxx"
}
检测登陆是否过期
uni.checkSession({

	success: function(res) {

		console.log(res)
	}
})
演示代码
<template>
	<view>
		<view class="content">
			<button type="primary" @click="login()">登陆</button>
			<button @getuserinfo="getUserInfo" open-type="getUserInfo" type="primary">获取信息</button>
			<button type="primary" @click="check()">检测登陆是否过期</button>
		</view>
	</view>
</template>

<script>
	export default {

		data() {

			return {


			}
		},
		onLoad() {


		},
		methods: {

			  getUserInfo(e) {

				  console.log(e.detail)
				  uni.showToast({

				  	icon:'none',
				  	title: "欢迎您"+e.detail.userInfo.nickName
				  })
			  },
			getUser(){

				uni.getUserInfo({

					withCredentials:true,
					success:function(res){

						console.log(res)
						uni.showToast({

							icon:'none',
							title:res.userInfo
						})
					},
					fail:function(res){

						console.log(res)
					}
				})
			},
			check(){

				uni.checkSession({

					success:function(res){

						console.log(res)
					}
				})
			},
			login() {

				uni.login({

					provider: 'qq',
					success(res) {
      // 登录成功
						console.log(res)
						uni.showToast({

							icon:'none',
							title:"登陆成功"
						})

					},
					fail(res) {
      // 登录失败
						uni.showToast({

							icon: 'none',
							title: '登陆失败'
						})
					}
				})
			}
		}
	}
</script>

<style>
	.content {

		display: flex;
		flex-direction: column;
		align-items: center;
		justify-content: center;
	}

	.logo {

		height: 200rpx;
		width: 200rpx;
		margin-top: 200rpx;
		margin-left: auto;
		margin-right: auto;
		margin-bottom: 50rpx;
	}

	.text-area {

		display: flex;
		justify-content: center;
	}

	.title {

		font-size: 36rpx;
		color: #8f8f94;
	}
</style>
大学之道亦在自身,努力学习,热血青春
如果对编程感兴趣可以加入我们的qq群一起交流:974178910


