VHDL快速入门
写在前面
VHDL是一门硬件语言,没学过硬件语言,挺感兴趣,还可以用在计组的实验中,花了点时间学习整理了一下VHDL的基本语法,方便查看。本blog所用到的所有图片都引用自
VHDL语言的基本语法参考文档
一、VHDL语言的基本语法
1、VHDL语言的表示符
2、VHDL的数字
2.1 数字型文字
156E2的意思是156 × \times × 1 0 2 10^2 102;
下划线可以连接数字。

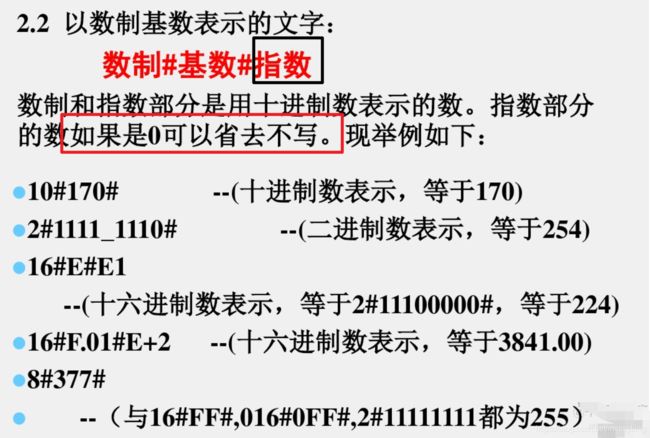
2.2 数字基数表示的文字
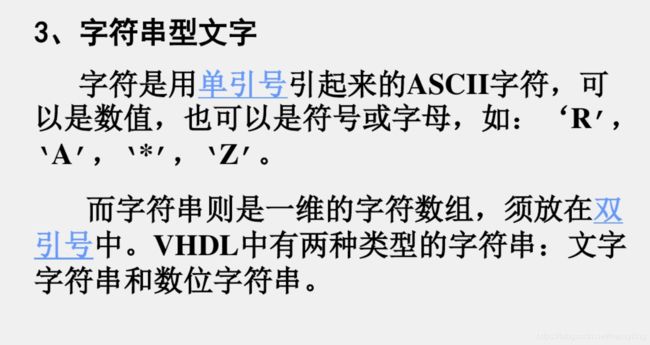
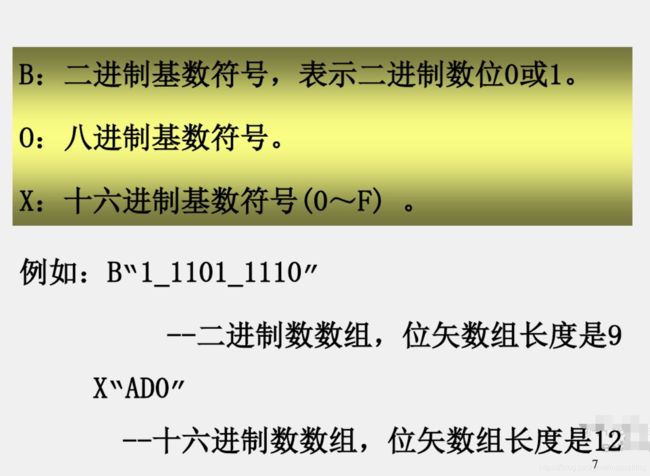
2.3 字符串型文字
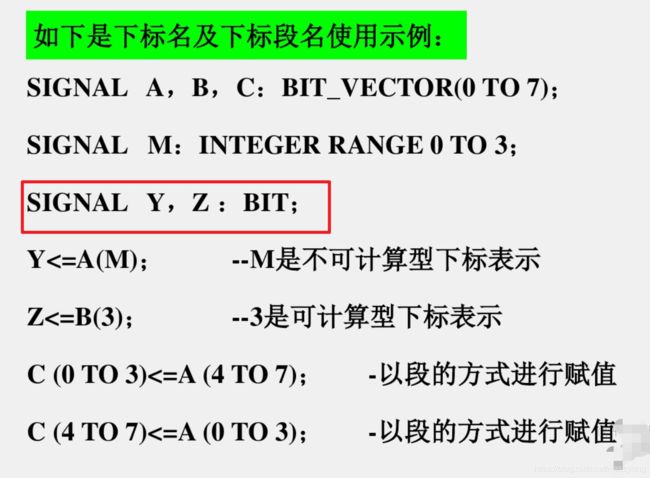
2.4 下标名及下标段名
downto 和 to 有什么区别
举个例子,比如要生命一个长度位8的vector的信号
Signal s1: std_logic_vector(7 downto 0); 这个形成的数组下标值从右到左依次是7,6,5,4,3,2,1,0
Signal s2: std_logic_vector(0 to 7);这个形成的数组的下标值从右到做依次是0,1,2,3,4,5,6,7
所以区别就是显示方向不同而已。
二、VHDL语言的数据对象
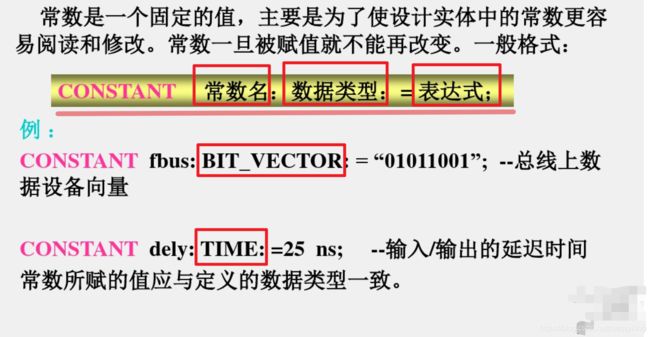
1、常数
![]()
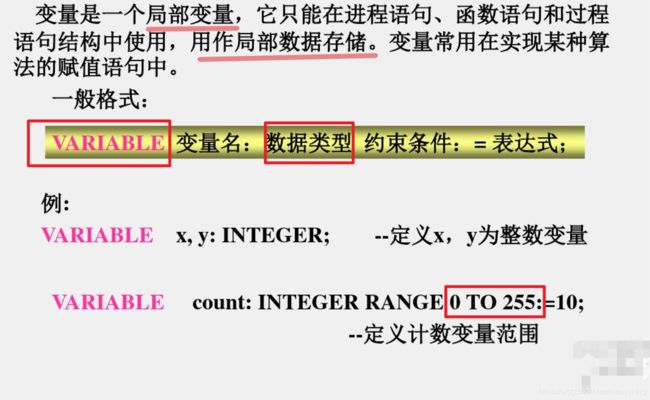
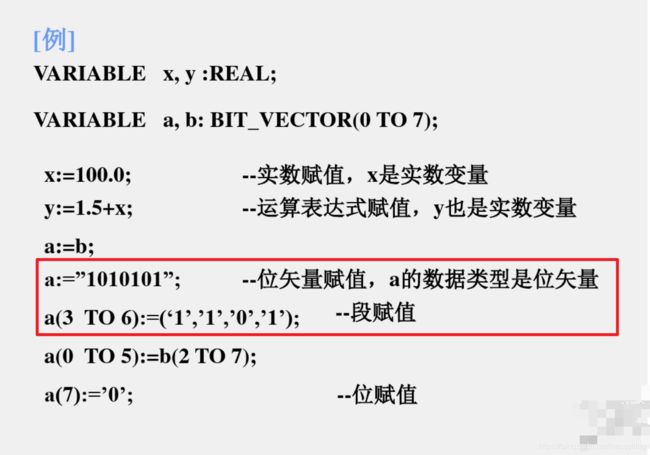
2、变量
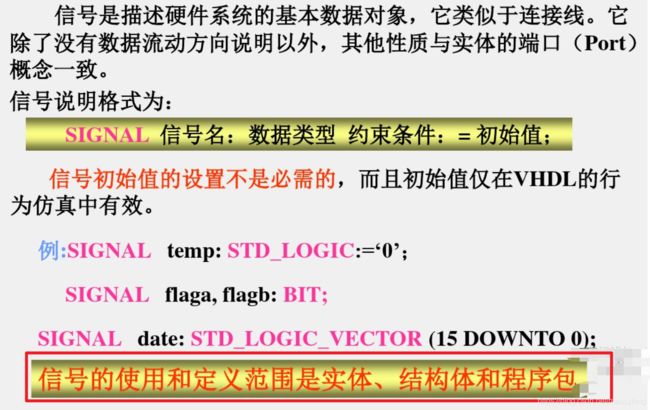
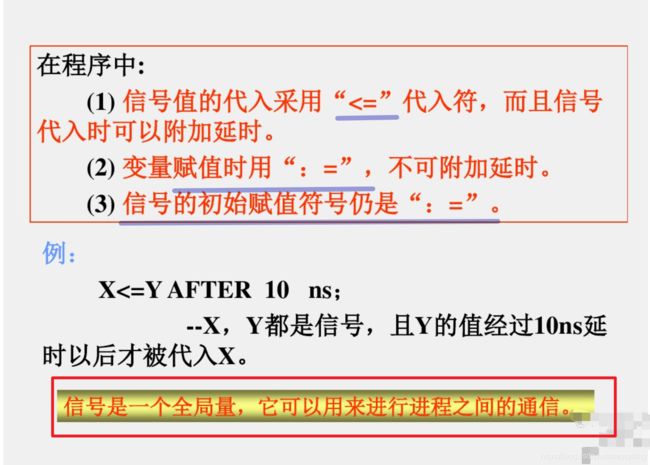
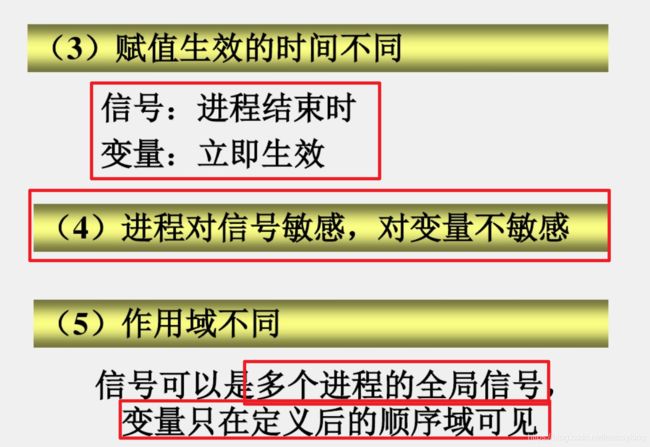
3、信号(SIGNAL)
三、VHDL中的数据类型
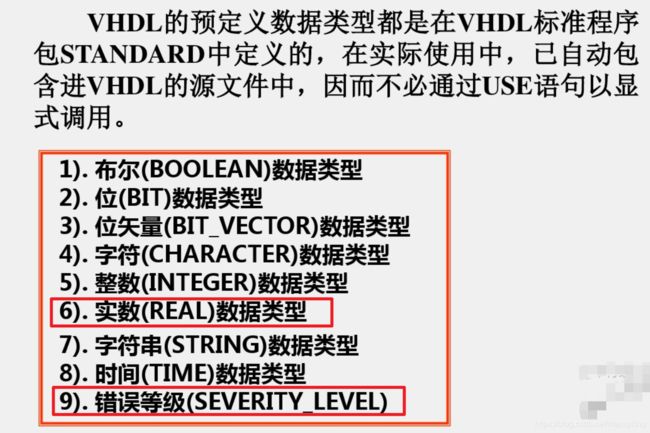
1、VHDL的预定义数据类型
1.1 布尔(BOOLEAN)
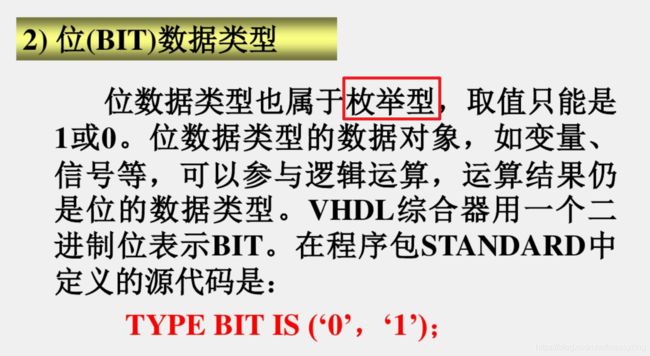
1.2 位(BIT)
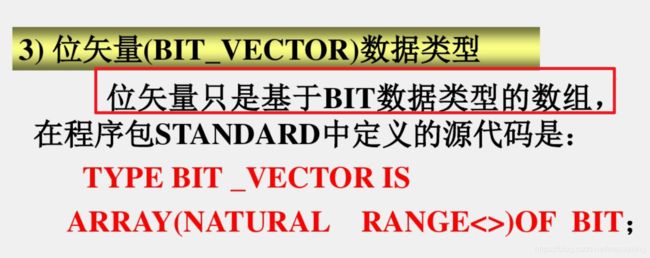
1.3 位矢量(BIT_VECTOR)
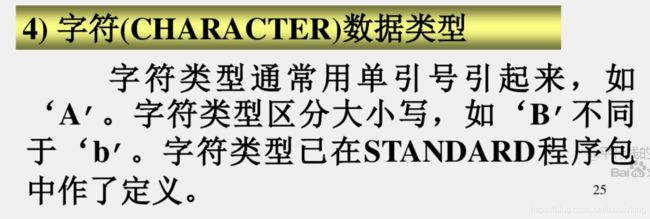
1.4 字符(CHARACHTER)
1.5 整数(INTEGER)
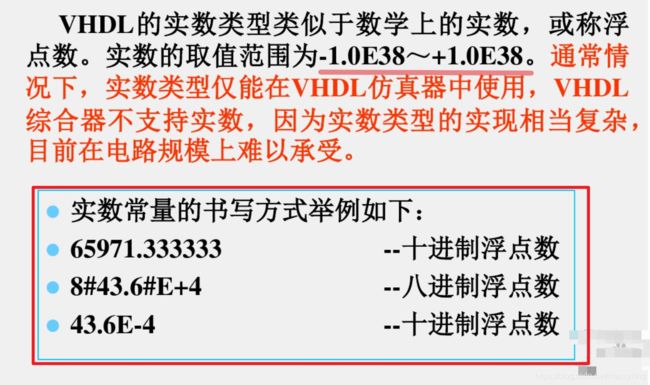
1.6 实数(REAL)
1.7 字符串(STRING)
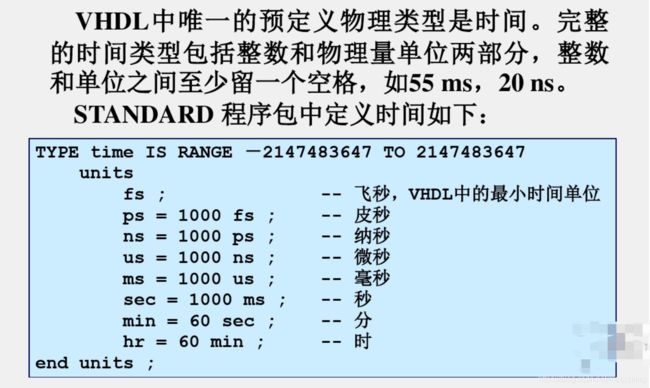
1.8 时间(TIME)数据类型
1.9 错误等级(SEVERITY_LEVEL)
2、IEEE预定义标准逻辑位与矢量
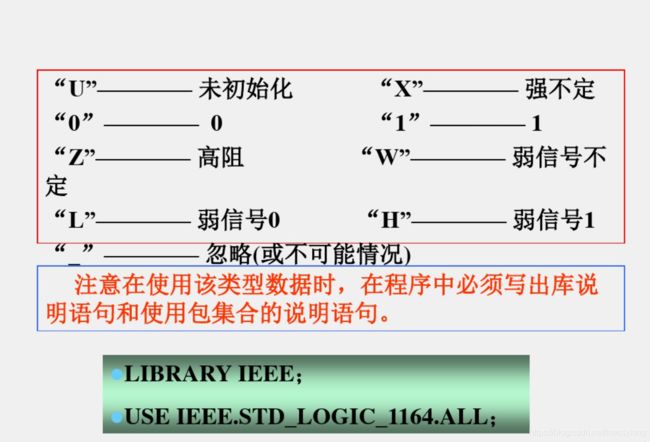
2.1 标准逻辑位STD_LOGIN数据类型
2.2 标准逻辑矢量(STD_LOGIC_VECTOR)
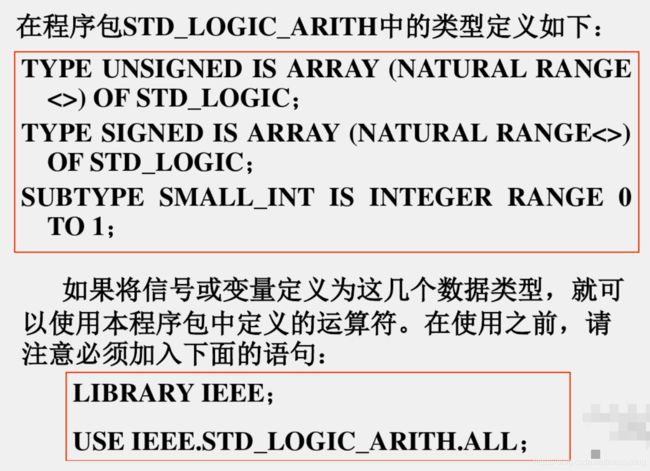
2.3 其他预定义标准数据类型
(1) 无符号数据类型(UNSIGNED TYPE)
(2) 有符号数据类型(SIGNED TYPE)
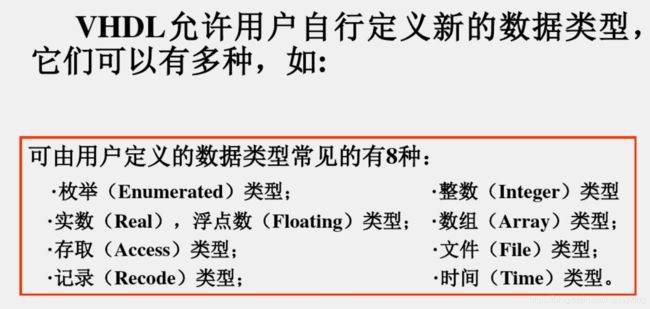
2.4 用户自定义数据类型方式
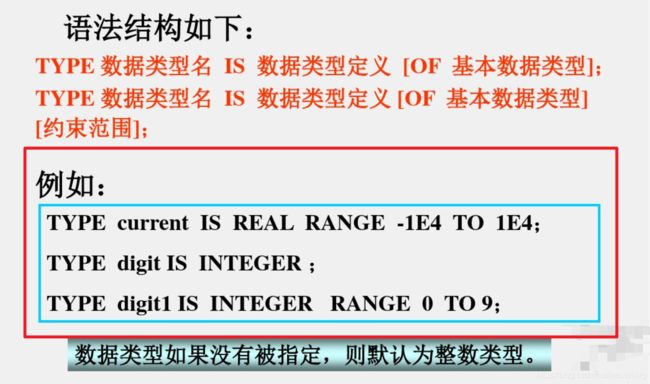
(1) TYPE语句用法
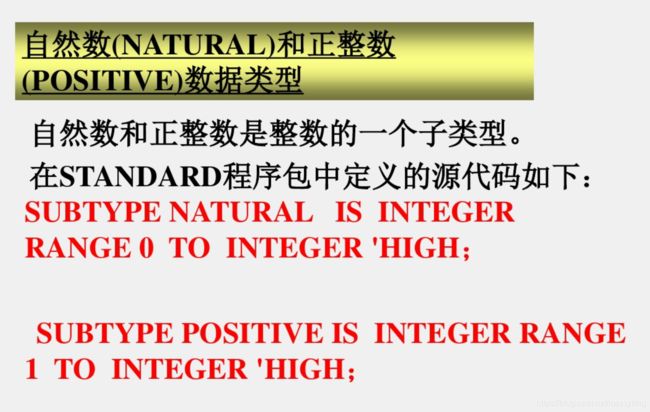
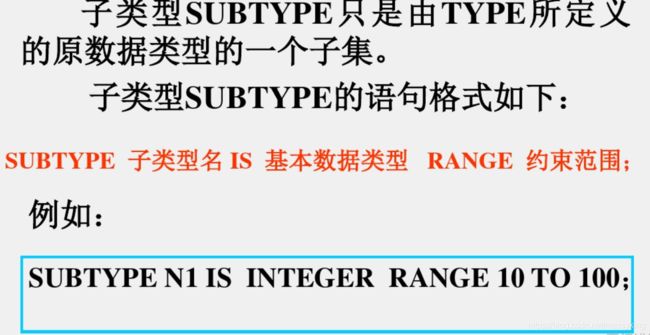
(2) SUBTYPE语句的用法
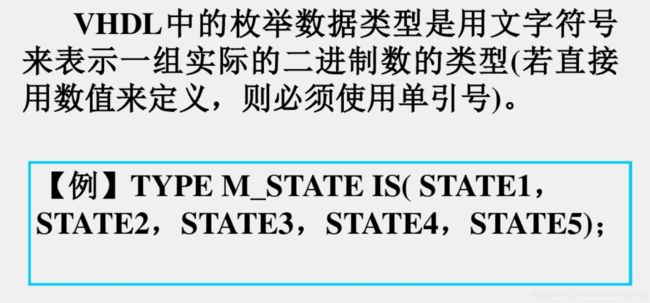
(3) 枚举类型
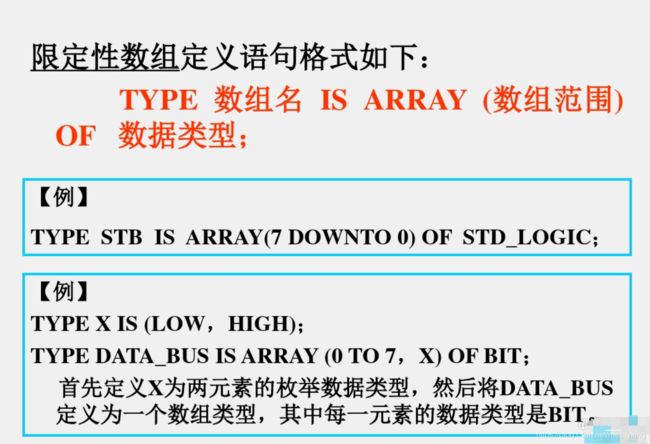
(4) 数组类型
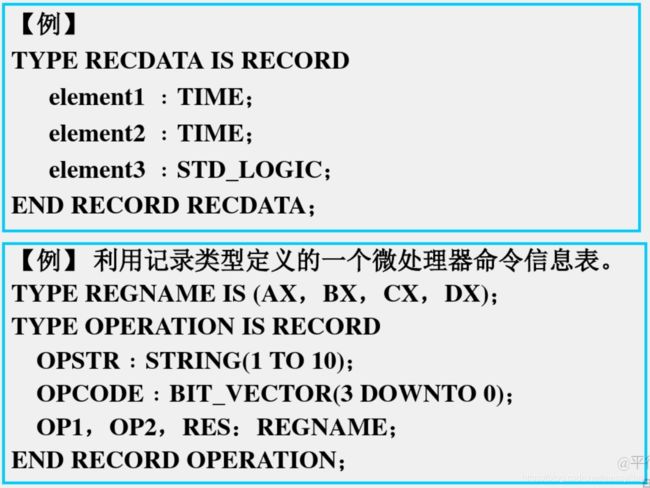
(5) 记录类型
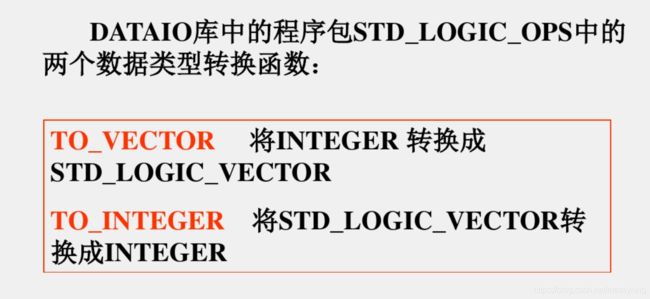
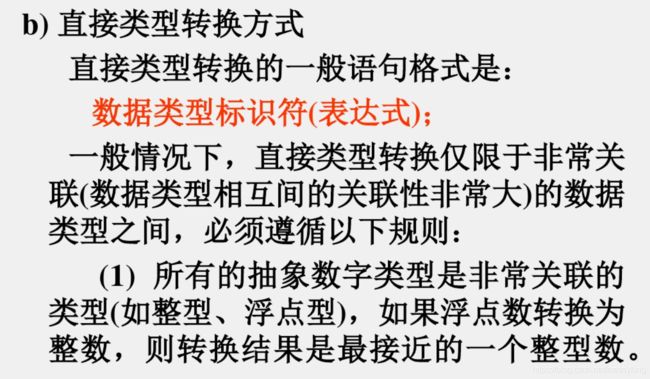
(6) 数据类型转换
四、VHDL In Quartus Ⅱ
这章里边部分参考一位旁友hayroc的笔记,一起放上来方便看。
1、VHDL入门
(1)vhdl设计组成:
库和程序包(libary, package)
实体(entity)
结构体(architecture)
配置(configuration)
通俗来讲:
库和包 -> 材料,工具箱
实体 -> 硬件外部的接口
结构体 -> 硬件内部的具体实现
(2)语法
实体:
entity 实体名 is
    generic(常数名:数据类型:初值)
    port(端口信号名:数据类型)
end 实体名
结构体:通过vhdl语句描述实体的具体行为和逻辑功能
architecture 结构体名 of 实体名 is
    说明部分(可选,如数据类型type 常数constand 信号signal 元件component 过程pocedure 变量variable和进程process等)
begin
    功能描述部分
end 结构体名
逻辑
if 条件 then
    --do something;
else if 条件 then
    --do something;
else
    --do something;
end if;
循环
for x in 0 to n loop
    --do something;
end loop;
运算符
赋值运算:
<= 信号赋值
:= 变量赋值
=> 数组内部分元素赋值
逻辑运算:
not 非
and 与
or 或
nand 与非
nor 或非
xor 异或
注意:对数组类型,参与运算的数组位数要相等,运算为对应位进行
算术运算:
+ 加
- 减
* 乘
/ 除
mod 模
rem 取余
** 指数
abs 绝对值
注意:尽量只使用加减
关系运算:
=> 大于等于
<= 小于等于
大于
< 小于
/= 不等于
= 等于
连接运算:
& 连接运算结果为同类型构成的数组
注意:从本质上讲,VHDL代码是并发执行的。只有PROCESS,FUNCTION或者PROCEDURE内部的代码才是顺序执行的。值得注意的是,尽管这些模块中的代码是顺序执行的,但是当它们作为一个整体是,与其他模块之间又是并发的。IF,WAIT,CASE,LOOP语句都是顺序代码,用在PROCESS,FUNCTION和PROCEDURE内部。
2、代码实例
(1)半加器
--halfadder
library ieee;
use ieee.std_logic_1164.all;
use ieee.std_logic_unsigned.all;

entity halfadder is
    port(a, b : in std_logic;
         s, c : out std_logic
         --s -> sum, c -> carry
        );
end halfadder;

architecture f_halfadder of halfadder is
begin
    s <= a xor b;
    c <= a and b;
end f_halfadder;
(2)一位全加器
--fulladder
library ieee;
use ieee.std_logic_1164.all;
use ieee.std_logic_unsigned.all;

entity fulladder is
    port(a, b, c0 : in std_logic;
            s, c1 : out std_logic
        );
end fulladder;

architecture f_fulladder of fulladder is
begin
    s  <= a xor b xor c0;
    c1 <= (a and b) or (c0 and (a xor b));
end f_fulladder;
(3)四位加法器
--add4
library ieee;
use ieee.std_logic_1164.all;
use ieee.std_logic_unsigned.all;

entity add4 is
    port(a, b : in std_logic_vector(3 downto 0);
            s : out std_logic_vector(3 downto 0);
           c0 : in std_logic;
           c1 : out std_logic
        );
end add4;

architecture f_add4 of add4 is
begin
    --模拟手算加法
    process(a, b, c0)
    variable t : std_logic;
    begin
        t := c0;
        for x in 0 to 3 loop
            s(x) <= a(x) xor b(x) xor t;
               t := (a(x) and b(x)) or (t and (a(x) xor b(x)));
        end loop;
        c1 <= t;
    end process;
end f_add4;
(4)四位不带符号乘法器
直接使用 ”+“ 号要结果的存储要多加一位。
---mul4
library ieee;
use ieee.std_logic_1164.all;
use ieee.std_logic_unsigned.all;

entity mul4 is
    port(n0, n1 : in std_logic_vector(3 downto 0);
             a0 : out  std_logic_vector(7 downto 0)
        );
end mul4;

architecture f_mul4 of mul4 is
signal t0, t1, t2, t3 : std_logic_vector(3 downto 0);

begin
    process(n0, n1, t0, t1, t2, t3)
    begin
        --模拟手算乘法
        if n1(0) = '1' then
            t0 <= n0;
        else
            t0 <= "0000";
        end if;

        if n1(1) = '1' then
            t1 <= n0;
        else
            t1 <= "0000";
        end if;

        if n1(2) = '1' then
            t2 <= n0;
        else
            t2 <= "0000";
        end if;

        if n1(3) = '1' then
            t3 <= n0;
        else
            t3 <= "0000";
        end if;

        a0 <= ("0000" & t0) + ("000" & t1 & '0') + ("00" & t2 & "00") + ('0' & t3 & "000");
    end process;
end f_mul4;
(5)五位带符号数的补码阵列乘法器
library ieee;
use ieee.std_logic_1164.all;
use ieee.std_logic_unsigned.all;
entity comp4 is
	port (c0 : in std_logic;
			flag1: in std_logic;
			num1 : in std_logic_vector (3 downto 0);
			flag2: in std_logic;
			num2 : in std_logic_vector (3 downto 0);
			res1 : out std_logic_vector(3 downto 0);
			res2 : out std_logic_vector(3 downto 0));
end comp4;
architecture f_comp4 of comp4 is
begin
process(num1,flag1,num2,flag2,c0)
	Variable tmp_ci:std_logic;
	begin
		res1<="0000";
		res2<="0000";
		tmp_ci:='0';
		for i in 0 to 3 loop
			res1(i)<=(num1(i) xor (tmp_ci and flag1));
			tmp_ci:=num1(i) or tmp_ci;
		end loop;
		tmp_ci:='0';
		for i in 0 to 3 loop
			res2(i)<=(num2(i) xor (tmp_ci and flag2));
			tmp_ci:=num2(i) or tmp_ci;
		end loop;
end process;
end f_comp4;
mult_array(四位乘法阵列)
--这里实现的是没有符号的乘法阵列
library ieee;
use ieee.std_logic_1164.all;
use ieee.std_logic_unsigned.all;
entity mult_array is
	port(num1, num2: in std_logic_vector(3 downto 0); -- num1是被乘数,舗um2是成乘数
			   res : out std_logic_vector(7 downto 0);
			   test: out std_logic_vector(7 downto 0));
end mult_array;
architecture f_mult_array of mult_array is
TYPE mult_array is Array(3 downto 0) of std_logic_vector(6 downto 0);
Signal m: mult_array;
begin
	process(m,num1,num2)
	Variable tmp_num2:std_logic_vector(3 downto 0);
	begin
		for i in 0 to 3 loop
			m(i)<="0000000";
			if num2(i)='1' then
				m(i)(3+i downto i)<=num1(3 downto 0);
			end if;
		end loop;
		--test(7 downto 4 ) <= num2(3 downto 0);
		res<=('0' & m(0)) + ('0' & m(1)) + ('0' & m(2)) + ('0' & m(3));
	end process;
end f_mult_array;
comp8(八位求补器)
library ieee;
use ieee.std_logic_1164.all;
use ieee.std_logic_unsigned.all;
entity comp8 is
	port (e, c0 : in std_logic;
			num : in std_logic_vector (7 downto 0);
			result : out std_logic_vector(7 downto 0));
end comp8;
architecture f_comp8 of comp8 is
begin
process(num,e,c0)
	Variable tmp_ci:std_logic;
	begin
		tmp_ci:='0';
		for i in 0 to 7 loop
			result(i)<=(num(i) xor (tmp_ci and e));
			tmp_ci:=num(i) or tmp_ci;
		end loop;
end process;
end f_comp8;
3、Debug日志
1、同一个项目文件有两个vhd文件时,如果要对不同的vhd文件进行仿真的话需要对先把要仿真的文件置于top entity,然后把这个文件编译一遍,这样才能在node finder里边找到对应的引脚。
2、信号的赋值操作只有在进程结束后才会进行,所以如果信号在进程内被多次赋值的话,只有最后一次赋值操作才会起作用,所以在进程内写算法一般都是用variable,signal和variable的区别具体可以看这篇blog => VHDL中信号与变量的区别及赋值的讨论
3、当自己制作的组件的某一个接口是一个数组,这时候要用总线连接,具体的连法可以看这篇blogquartus总线怎样连接
4、在用vhdl写组件的的时候,在定义process的时候,一定要把用到的input的端口写进porcess定义时的括号里边,否则可能导致的后果就是你把你写好的这个组件生成出来之后,结果永远对不上!
错误请指出,不定时更新,ths!
May you give me a like?

