Windows下利用Nginx部署纯前端项目(前后台完全分离项目部署及解决跨域请求后台数据问题)
1.下载nginx
https://www.nginx.cn/nginx-download
下载稳定版本,以nginx/Windows-1.16.1为例,直接下载 nginx/Windows-1.16.1
下载后解压,解压后如下:
2.启动nginx
有很多种方法启动nginx
(1)直接双击nginx.exe,双击后一个黑色的弹窗一闪而过
(2)打开cmd命令窗口,切换到nginx解压目录下,输入命令 nginx.exe 或者 start nginx ,回车即可
3.检查nginx是否启动成功
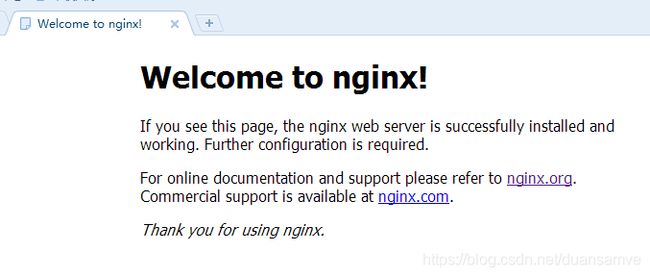
直接在浏览器地址栏输入网址 http://localhost:80,回车,出现以下页面说明启动成功
也可以在cmd命令窗口输入命令 tasklist /fi "imagename eq nginx.exe" ,出现如下结果说明启动成功
nginx的配置文件是conf目录下的nginx.conf,默认配置的nginx监听的端口为80,如果80端口被占用可以修改为未被占用的端口即可。
检查80端口是否被占用的命令是:
netstat -ano | findstr 0.0.0.0:80

 或

netstat -ano | findstr "80"
4、重启nginx
当我们修改了nginx的配置文件nginx.conf 时,不需要关闭nginx后重新启动nginx,只需要执行命令
nginx -s reload 即可让改动生效
5.关闭nginx
如果使用cmd命令窗口启动nginx,关闭cmd窗口是不能结束nginx进程的,可使用两种方法关闭nginx
(1)输入nginx命令 nginx -s stop(快速停止nginx) 或 nginx -s quit(完整有序的停止nginx)
(2)使用taskkill taskkill /f /t /im nginx.exe
6.使用nginx代理服务器做负载均衡
我们可以修改nginx的配置文件nginx.conf 达到访问nginx代理服务器时跳转到指定服务器的目的,即通过proxy_pass 配置请求转发地址,即当我们依然输入http://localhost:80 时,请求会跳转到我们配置的服务器
同理,我们可以配置多个目标服务器,当一台服务器出现故障时,nginx能将请求自动转向另一台服务器,例如配置如下:
当服务器 localhost:8080 挂掉时,nginxnginx能将请求自动转向服务器 192.168.101.9:8080 。上面还加了一个weight属性,此属性表示各服务器被访问到的权重,weight
越高被访问到的几率越高。
7.nginx配置静态资源
将静态资源(如jpg|png|css|js等)放在如下配置的f:/nginx-1.12.2/static目录下,然后在nginx配置文件中做如下配置(注意:静态资源配置只能放在 location / 中),浏览器中访问 http://localhost:80/1.png 即可访问到 f:/nginx-1.12.2/static目录下的 1.png图片
8、nginx反向代理跨域请求后台服务器:
1) 所有页面文件放在Nginx文件目录的html目录下
nginx.conf配置如下:
		// 所有以/blog开头的请求都将转发给后台服务器
		location ~ /blog/ {
            proxy_pass   http://localhost:9999;
        }
页面的接口请求地址如下:
/blog/check_login_status/ $http({
method: "POST",
url: "/blog/check_login_status/",
data: JSON.stringify(values)
})
.then(res => {
localStorage['token'] = 1;
this.props.history.replace("/");
})
.catch(err => {
notification["error"]({
message: '错误图示',
description:
'用户名或密码错误',
});
});此时经过Nginx代理后,所有以/blog开头的请求都将转发给后台服务器。
1) 所有页面文件放在另外一台服务器上,假设服务器地址为http://localhost:6666,则nginx.conf配置如下:
        // 所有请求(不以/blog开头的请求)都将转发给前台应用
        location / {
            proxy_pass   http://localhost:6666;
        }

		// 所有以/blog开头的请求都将转发给后台服务器
		location ~ /blog/ {
            proxy_pass   http://localhost:9999;
        }
前端代码不变。


