Linux下Pytorch版deeplabv3+环境配置训练自己的数据集
Linux下Pytorch版deeplabv3+环境配置训练自己的数据集
-
- 开发环境
- 数据集准备
-
- 1.VOC数据集格式
-
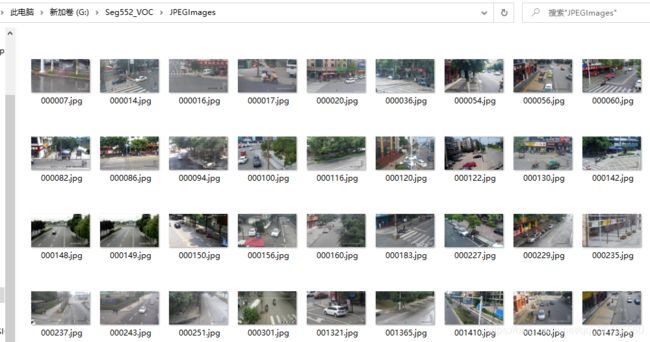
- `JPEGImages`里面放原图
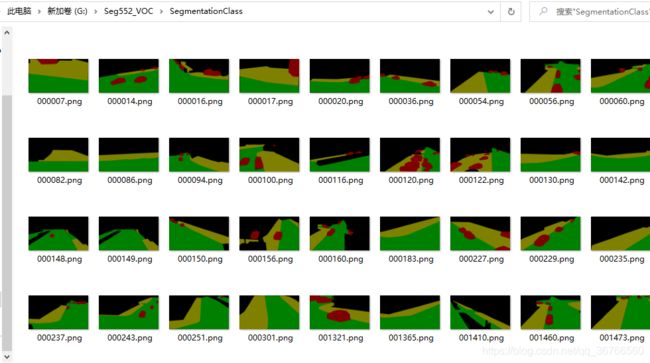
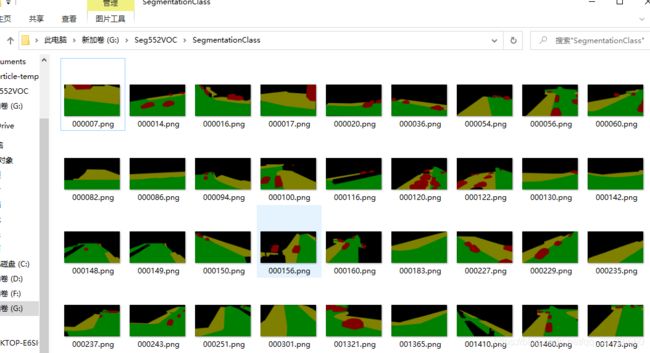
- `SegmentationClass`里面放对应的mask图片png格式,注意要和`JPEGImages`里的图片一一对应
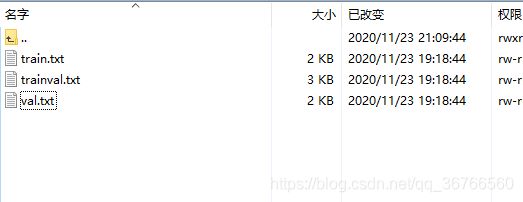
- `ImageSets/ Segmentation`的txt文件中放去掉后缀的图片名
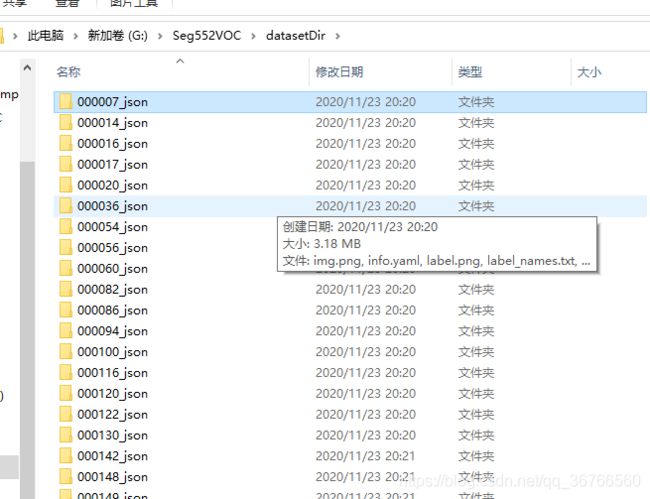
- 2.json转换mask图片
- 3.提取出所有文件夹中的`label.png`并改成对应的名字放在指定目录中
- 修改代码
-
- 1.在`mypath.py`中添加自己的数据集名称与路径
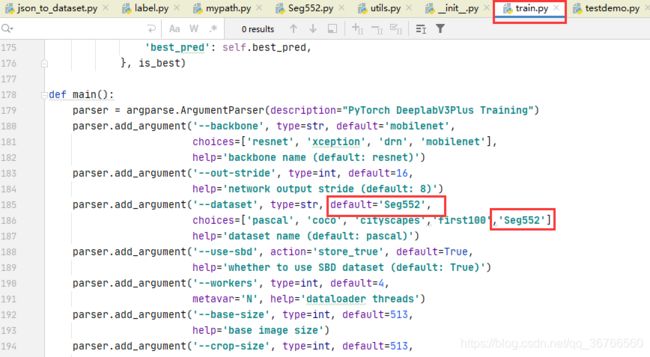
- 2.在同级目录中修改`train.py`约185行添加自己数据集的名称(可以设置为默认)
- 3.在dataloaders目录下修改__init__.py
- 4. 修改dateloaders目录下`utils.py`
- 5.在dataloaders/datasets目录下添加文件
- 运行并测试
-
- 1.开始训练
- 2.测试
开发环境
我使用的是实验室服务器的环境:
- CentOS(windows也可)
- pytorch-gpu1.7
- python3.7
代码在这:链接
数据集准备
1.VOC数据集格式
文件安排如下:
- ImageSets
	- Segmentation
		- train.txt
		- trainval.txt
		- val.txt
- JPEGImages
- SegmentationClass
JPEGImages里面放原图
SegmentationClass里面放对应的mask图片png格式,注意要和JPEGImages里的图片一一对应
ImageSets/ Segmentation的txt文件中放去掉后缀的图片名
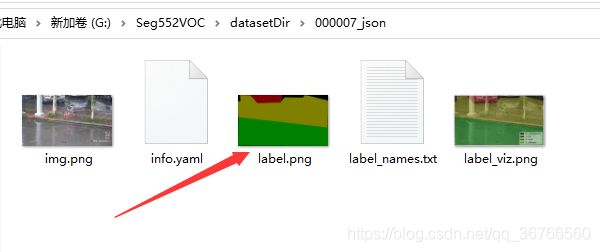
2.json转换mask图片
数据转换参考的这里
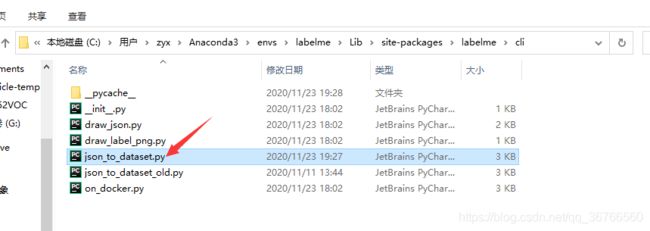
- 用下面的代码替换labelme环境下的对应文件
Anaconda3\envs\labelme\Lib\site-packages\labelme\cli(注意替换掉path的路径,换上自己的json文件路径)
import argparse
import base64
import json
import os
import os.path as osp

import PIL.Image
import yaml

from labelme.logger import logger
from labelme import utils

path = "G:/Seg552VOC/seg552Json"
dirs = os.listdir(path)


def label(json_file, out_dir, label_name_to_value):
    data = json.load(open(json_file))
    if data['imageData']:
        imageData = data['imageData']
    else:
        imagePath = os.path.join(os.path.dirname(json_file), data['imagePath'])
        with open(imagePath, 'rb') as f:
            imageData = f.read()
            imageData = base64.b64encode(imageData).decode('utf-8')
    img = utils.img_b64_to_arr(imageData)

    for shape in sorted(data['shapes'], key=lambda x: x['label']):
        label_name = shape['label']
        if label_name in label_name_to_value:
            label_value = label_name_to_value[label_name]
        else:
            label_value = len(label_name_to_value)
            label_name_to_value[label_name] = label_value
    lbl = utils.shapes_to_label(img.shape, data['shapes'], label_name_to_value)

    label_names = [None] * (max(label_name_to_value.values()) + 1)
    for name, value in label_name_to_value.items():
        label_names[value] = name
    lbl_viz = utils.draw_label(lbl, img, label_names)

    PIL.Image.fromarray(img).save(osp.join(out_dir, 'img.png'))
    utils.lblsave(osp.join(out_dir, 'label.png'), lbl)
    PIL.Image.fromarray(lbl_viz).save(osp.join(out_dir, 'label_viz.png'))

    with open(osp.join(out_dir, 'label_names.txt'), 'w') as f:
        for lbl_name in label_names:
            f.write(lbl_name + '\n')

    logger.warning('info.yaml is being replaced by label_names.txt')
    info = dict(label_names=label_names)
    with open(osp.join(out_dir, 'info.yaml'), 'w') as f:
        yaml.safe_dump(info, f, default_flow_style=False)

    logger.info('Saved to: {}'.format(out_dir))


def main():
    logger.warning('This script is aimed to demonstrate how to convert the'
                   'JSON file to a single image dataset, and not to handle'
                   'multiple JSON files to generate a real-use dataset.')

    parser = argparse.ArgumentParser()
    parser.add_argument('json_file_dir')
    parser.add_argument('-o', '--out', default=None)
    args = parser.parse_args()
    label_name_to_value = {
     '_background_': 0}

    for json_file in dirs:
        if args.out is None:
            out_dir = osp.basename(json_file).replace('.', '_')
            out_dir = osp.join(osp.dirname(json_file), out_dir)
        else:
            out_dir = args.out
        if not osp.exists(out_dir):
            os.mkdir(out_dir)

        label(json_file, out_dir, label_name_to_value)
if __name__ == '__main__':
    main()
3.提取出所有文件夹中的label.png并改成对应的名字放在指定目录中
label.py代码如下:
import os
import shutil

inputdir = 'G:/Seg552VOC/datasetDir'
outputdir = 'G:/Seg552VOC/ImageSetNew'

for dir in os.listdir(inputdir):
    # 设置旧文件名(就是路径+文件名)
    oldname = inputdir + os.sep + dir + os.sep + 'label.png'  # os.sep添加系统分隔符

    # 设置新文件名
    newname = outputdir + os.sep + dir.split('_')[0] + '.png'

    shutil.copyfile(oldname, newname)  # 用os模块中的rename方法对文件改名
    print(oldname, '======>', newname)
修改代码
参考博客:链接
1.在mypath.py中添加自己的数据集名称与路径
2.在同级目录中修改train.py约185行添加自己数据集的名称(可以设置为默认)
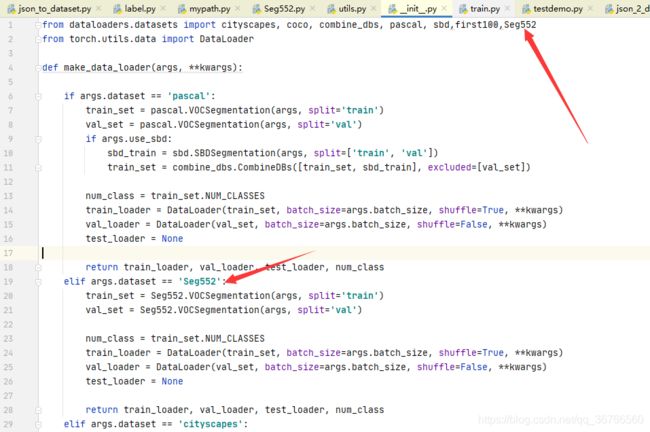
3.在dataloaders目录下修改__init__.py
在第一行添加数据集名称,复制'pascal'数据集描述,把名称修改为自己数据集的名字
4. 修改dateloaders目录下utils.py
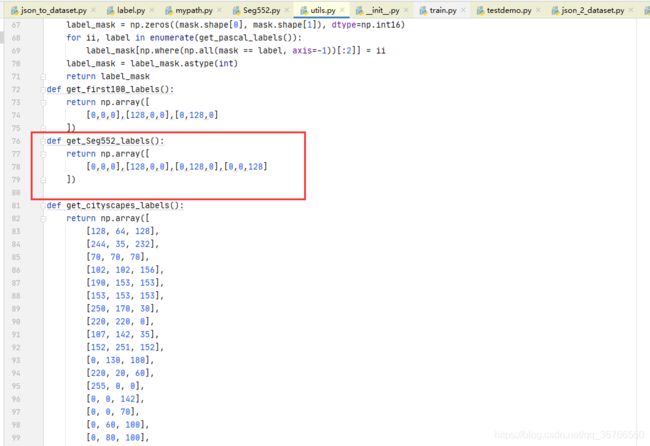
在24行左右添加代码,其中n_classes是你要分割的类别数

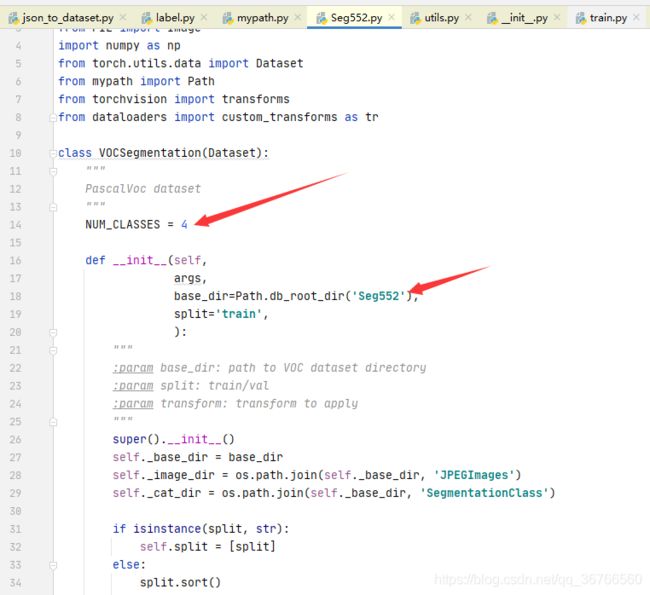
5.在dataloaders/datasets目录下添加文件
复制一份pascal.py,并重命名文件
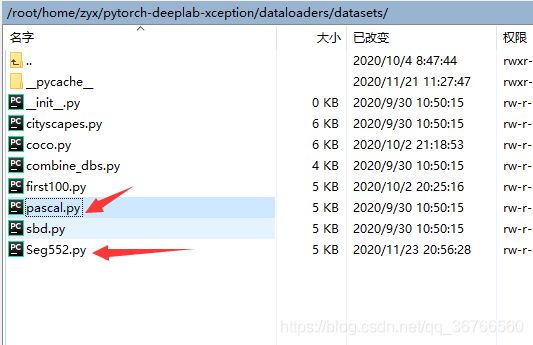
修改里面的类别数和数据集名称
运行并测试
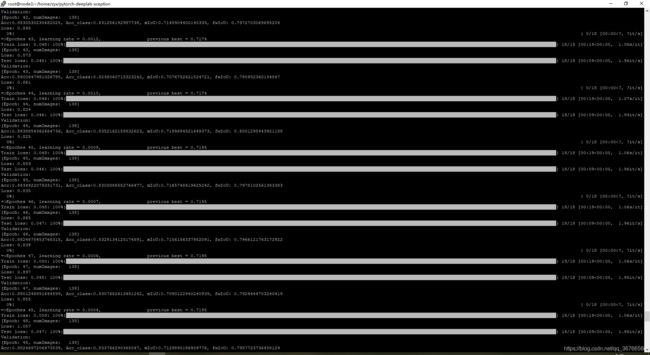
1.开始训练
运行指令如下
python train.py --backbone mobilenet --lr 0.007 --workers 1 --epochs 50 --batch-size 8 --gpu-ids 0 --checkname deeplab-mobilenet
–backbone mobilenet 指的是使用mobilenet作为backbone
–gpu-ids 0 指定gpu
–checkname deeplab-mobilenet 使用mobilenet预训练模型
2.测试
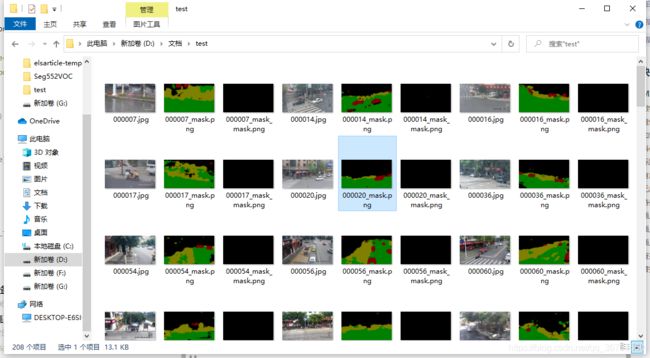
测试testdemo.py
修改–in-path为数据集的测试图片,最后的结果保存在–in-path中
#
# demo.py
#
import argparse
import os
import numpy as np
import time

from modeling.deeplab import *
from dataloaders import custom_transforms as tr
from PIL import Image
from torchvision import transforms
from dataloaders.utils import  *
from torchvision.utils import make_grid, save_image

def main():

    parser = argparse.ArgumentParser(description="PyTorch DeeplabV3Plus Training")
    parser.add_argument('--in-path', type=str,  default='/root/home/zyx/Seg552_VOC/test',
                        help='image to test')
    # parser.add_argument('--out-path', type=str, required=True, help='mask image to save')
    parser.add_argument('--backbone', type=str, default='resnet',
                        choices=['resnet', 'xception', 'drn', 'mobilenet'],
                        help='backbone name (default: resnet)')
    parser.add_argument('--ckpt', type=str, default='deeplab-resnet.pth',
                        help='saved model')
    parser.add_argument('--out-stride', type=int, default=16,
                        help='network output stride (default: 8)')
    parser.add_argument('--no-cuda', action='store_true', default=False,
                        help='disables CUDA training')
    parser.add_argument('--gpu-ids', type=str, default='0',
                        help='use which gpu to train, must be a \
                        comma-separated list of integers only (default=0)')
    parser.add_argument('--dataset', type=str, default='pascal',
                        choices=['pascal', 'coco', 'cityscapes','invoice'],
                        help='dataset name (default: pascal)')
    parser.add_argument('--crop-size', type=int, default=513,
                        help='crop image size')
    parser.add_argument('--num_classes', type=int, default=4,
                        help='crop image size')
    parser.add_argument('--sync-bn', type=bool, default=None,
                        help='whether to use sync bn (default: auto)')
    parser.add_argument('--freeze-bn', type=bool, default=False,
                        help='whether to freeze bn parameters (default: False)')

    args = parser.parse_args()
    args.cuda = not args.no_cuda and torch.cuda.is_available()
    if args.cuda:
        try:
            args.gpu_ids = [int(s) for s in args.gpu_ids.split(',')]
        except ValueError:
            raise ValueError('Argument --gpu_ids must be a comma-separated list of integers only')

    if args.sync_bn is None:
        if args.cuda and len(args.gpu_ids) > 1:
            args.sync_bn = True
        else:
            args.sync_bn = False
    model_s_time = time.time()
    model = DeepLab(num_classes=args.num_classes,
                    backbone=args.backbone,
                    output_stride=args.out_stride,
                    sync_bn=args.sync_bn,
                    freeze_bn=args.freeze_bn)

    ckpt = torch.load(args.ckpt, map_location='cpu')
    model.load_state_dict(ckpt['state_dict'])
    model = model.cuda()
    model_u_time = time.time()
    model_load_time = model_u_time-model_s_time
    print("model load time is {}".format(model_load_time))

    composed_transforms = transforms.Compose([
        tr.Normalize(mean=(0.485, 0.456, 0.406), std=(0.229, 0.224, 0.225)),
        tr.ToTensor()])
    for name in os.listdir(args.in_path):
        s_time = time.time()
        image = Image.open(args.in_path+"/"+name).convert('RGB')

        # image = Image.open(args.in_path).convert('RGB')
        target = Image.open(args.in_path+"/"+name).convert('L')
        sample = {
     'image': image, 'label': target}
        tensor_in = composed_transforms(sample)['image'].unsqueeze(0)

        model.eval()
        if args.cuda:
            tensor_in = tensor_in.cuda()
        with torch.no_grad():
            output = model(tensor_in)

        grid_image = make_grid(decode_seg_map_sequence(torch.max(output[:3], 1)[1].detach().cpu().numpy()),
                                3, normalize=False, range=(0, 255))
        save_image(grid_image,args.in_path+"/"+"{}_mask.png".format(name[0:-4]))
        u_time = time.time()
        img_time = u_time-s_time
        print("image:{} time: {} ".format(name,img_time))
        # save_image(grid_image, args.out_path)
        # print("type(grid) is: ", type(grid_image))
        # print("grid_image.shape is: ", grid_image.shape)
    print("image save in in_path.")
if __name__ == "__main__":
   main()

# python demo.py --in-path your_file --out-path your_dst_file
测试命令
python testdemo.py --ckpt run/Seg552/deeplab-mobilenet/checkpoint.pth.tar --backbone mobilenet
参考博客:
Pytorch 语义分割DeepLabV3+ 训练自己的数据集 从数据准备到模型训练
【windows10】使用pytorch版本deeplabv3+训练自己数据集
制作自己的语义分割数据集(仿voc2012数据集)
