[TOC]
vscode 小巧灵活, 与LaTex结合起来体验不错, 加上git进行版本控制,可以方便的管理版本,这样可以方便多人进行协作,对于批注可以使用latexdiff来进行操作
更改后,保存文件,自动在预览图里面显示。
如果按照步骤一步步进行,应该不会出现问题,如果有问题可以直接评论,看到立即回复。
1、安装textlive
# 这一步会安装比较久,稍等一会
sudo apt-get install texlive-full cjk-latex latex-cjk-chinese
2、安装中文
通过使用自定义的字体、中文配置、编码选项等。使 LaTex 支持中文,当然 XeTeX 原生支持中文。这也是个人优先选择配置 xelatex 环境的原因。
拷贝 Windows 下字体 C 盘 Windows 路径下,Fonts 文件夹,
(C:\windows\fonts)
存储全部 Windows 上的字体文件,将其拷贝。
或者直接下载我准备好的windows字体文件:
链接: https://pan.baidu.com/s/1rIU6MwxXQef-HQ9u5Nul8g 提取码: 1yie
复制到 Linux 对应字体路径下
** 建立字体存储文件夹,在Linux字体路径下**
sudo mkdir /usr/share/fonts/winfonts
复制到 /usrshare/fonts/winfonts
安装字体
cd /usr/share/fonts/winfonts
sudo mkfontscale
sudo mkfontdir
刷新字体缓存
sudo fc-cache -vf
# 查看宋体是否安装
fc-list -vf | grep '宋体'
或者直接复制字体文件到~/.font/ 目录下
fc-cache -fv
fc-list -vf | grep '字体'
3、编译文件
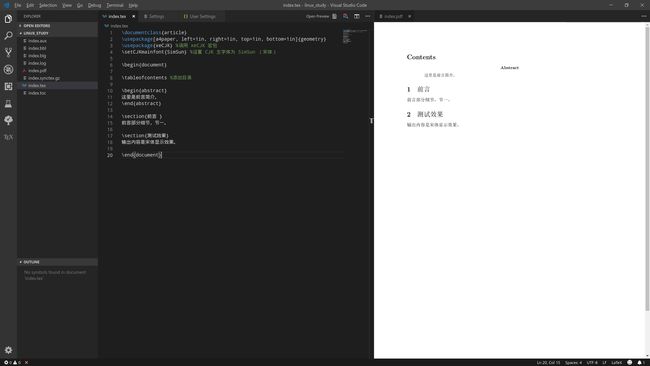
在目录下创建demo.tex文件,文档内容
\documentclass{article}
\usepackage[a4paper, left=1in, right=1in, top=1in, bottom=1in]{geometry}
\usepackage{xeCJK} %调用 xeCJK 宏包
\usepackage{listings}
\author{ ice }
\date {2019.01.28}
\setCJKmainfont{WenQuanYi Micro Hei Mono:style=Regular} %设置 CJK 主字体为 SimSun (宋体)
\title{Latex入门学习}
\begin{document}
\maketitle
\begin{center}
\end{center}

\tableofcontents %添加目录

\tableofcontents

\begin{abstract}
this is abstract。
\end{abstract}

\section{asf}
你好。

\section{as}
hello world

% Lorem  \cite{Lutz2017} ipsum dolor sit amet, consectetur adipisicing

% \bibliography{info}
\bibliographystyle{ieeetr}

\end{document}
然后输入命令
xelatex demo.tex
命令执行完毕查看是否有demo.pdf文件生成
4、安装vscode 插件
如果想集成到vscode,可以在vscode 中安装
latex-workshop这个插件
5、配置vscode
打开 vscode 选项配置ctrl+,,在User settings中,加入如下配置内容:
  "editor.wordWrap": "on",
  "latex-workshop.latex.tools": [
    {
      "name": "latexmk",
      "command": "latexmk",
      "args": [
        "-synctex=1",
        "-interaction=nonstopmode",
        "-file-line-error",
        "-pdf",
        "%DOC%"
      ]
    },
    {
      "name": "xelatex",
      "command": "xelatex",
      "args": [
        "-synctex=1",
        "-interaction=nonstopmode",
        "-file-line-error",
        "%DOC%"
      ]
    },
    {
      "name": "pdflatex",
      "command": "pdflatex",
      "args": [
        "-synctex=1",
        "-interaction=nonstopmode",
        "-file-line-error",
        "%DOC%"
      ]
    },
    {
      "name": "bibtex",
      "command": "bibtex",
      "args": [
        "%DOCFILE%"
      ]
    }
  ],
  "latex-workshop.latex.recipes": [
   {
      "name": "latexmk",
      "tools": [
        "latexmk"
      ]
    },
    {
      "name": "xelatex -> bibtex -> xelatex*2",
      "tools": [
        "xelatex",
        "bibtex",
        "xelatex",
        "xelatex"
      ]
    },
    {
      "name": "xelatex",
      "tools": [
        "xelatex"
      ]
    },
    {
      "name": "pdflatex -> bibtex -> pdflatex*2",
      "tools": [
        "pdflatex",
        "bibtex",
        "pdflatex",
        "pdflatex"
      ]
    }
  ],
  "latex-workshop.view.pdf.viewer": "browser",
  "files.autoSave": "afterDelay"
6、配置latexdiff
latex 工具主要用于订正,可以方便的显示出改变内容。
latexdiff old.tex new.tex > diff.tex
默认latexdiff对git的支持比较弱,如果想对git进行集成使用,可以安装:git-latexdiff
如果提示安装失败,可以尝试安装
sudo apt install asciidoc
默认gitlatexdiff 想支持中文可以尝试如下的命令:
# 比较上一个版本的变化
git latexdiff --xelatex --quiet --main demo.tex HEAD~1
# 对比两个版本中的变化8486ea3为老版本,cc306a6为新版本
git latexdiff --xelatex --quiet --main demo.tex 8486ea3 cc306a6
7、支持代码
如果想要在latex里支持代码,可以尝试如下的方式
\lstset{
    columns=fixed,
    numbers=left,                                        % 在左侧显示行号
    frame=none,                                          % 不显示背景边框
    backgroundcolor=\color[RGB]{245,245,244},            % 设定背景颜色
    keywordstyle=\color[RGB]{40,40,255},                 % 设定关键字颜色
    numberstyle=\footnotesize\color{darkgray},           % 设定行号格式
    commentstyle=\it\color[RGB]{0,96,96},                % 设置代码注释的格式
    stringstyle=\rmfamily\slshape\color[RGB]{128,0,0},   % 设置字符串格式
    showstringspaces=false,                              % 不显示字符串中的空格
    language=bash,                                        % 设置语言
}

\begin{lstlisting}
    # 8486ea3为老版本,cc306a6为新版本,此命令会自动创建对比版本,
    # 如果有安装pdf阅读器,则会自动用pdf阅读器打开
    git latexdiff --xelatex --quiet --main demo.tex 8486ea3 cc306a6
\end{lstlisting}
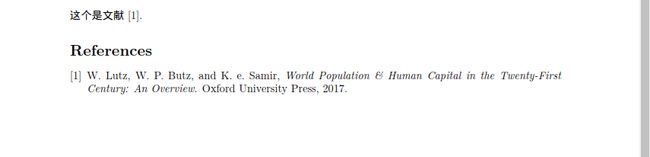
8、添加参考文献
plain,按字母的顺序排列,比较次序为作者、年度和标题.

unsrt,样式同plain,只是按照引用的先后排序.

alpha,用作者名首字母+年份后两位作标号,以字母顺序排序.

abbrv,类似plain,将月份全拼改为缩写,更显紧凑.

ieeetr,国际电气电子工程师协会期刊样式.acm,美国计算机学会期刊样式.

siam,美国工业和应用数学学会期刊样式.

apalike,美国心理学学会期刊样式.
首先在文件夹下添加info.lib
内容如下:
@Article{GraffZivin2018,
    author  = {Graff Zivin, Joshua and Hsiang, Solomon M and Neidell, Matthew},
    title   = {Temperature and Human Capital in the Short and Long Run},
    journal = {Journal of the Association of Environmental and Resource Economists},
    year    = {2018},
    volume  = {5},
    number  = {1},
    pages   = {77-105},
    issn    = {2333-5955},
    type    = {Journal Article},
}

@Book{Lutz2017,
    title     = {World Population \& Human Capital in the Twenty-First Century: An Overview},
    publisher = {Oxford University Press},
    year      = {2017},
    author    = {Lutz, Wolfgang and Butz, William P and Samir, KC ed},
    isbn      = {0192542834},
    type      = {Book},
}

@Article{Zeng2017,
    author  = {Zeng, X. and Liu, L. and Leung, S. and Du, J. and Wang, X. and Li, T.},
    title   = {A decision support model for investment on P2P lending platform},
    journal = {PLoS One},
    year    = {2017},
    volume  = {12},
    number  = {9},
    pages   = {e0184242},
    issn    = {1932-6203 (Electronic)
            1932-6203 (Linking)},
    doi     = {10.1371/journal.pone.0184242},
    type    = {Journal Article},
    url     = {https://www.ncbi.nlm.nih.gov/pubmed/28877234},
}
可以将如下的代码放在\end{document}之前
通过\cite就可以直接使用文献了。
这个是文献\cite{Lutz2017}.
\bibliography{info}
\bibliographystyle{ieeetr}
效果如下图所示:
参考文章:
http://ctan.mirror.rafal.ca/info/lshort/english/lshort.pdf
其他文章:
Fish Shell使用心得
Deepin系统的初步使用