CentOS 7下Red5流媒体服务器的搭建与测试
Red5流媒体服务器的搭建
- 一、Red5流媒体简介
- 二、搭建流程
-
-
- 1、下载Red5
- 2、修改Red5相关配置
- 3、启动Red5服务器
- 4、问题解决
-
- 问题1:
- 问题2:
- 5、测试环节
- 6、结语
-
一、Red5流媒体简介
Red5流媒体服务器是一个采用Java开发的开源免费的Flash流媒体服务器。并且相对于其他开源的流媒体服务器Red5易搭建、易理解。比其他收费的流媒体服务器更经济,它支持把音频(MP3)和视频(FLV)转换成播放流;录制客户端播放流(只支持FLV);共享对象;现场直播流发布;远程调用。本人是因为需要做一个服务器来保存用户上传的音频和视频,并且用户可以随时观看和下载服务器上有的音频或视频。因此接触到流媒体服务器,因为Red5开源免费,并且性能还可,就学习了一下Red5,接下来我就分享一下我的搭建过程、遇到的问题和如何解决问题的。
二、搭建流程
1、下载Red5
下载Red5压缩包到自己熟悉的文件夹中下载。(如:cd /usr/local)
wget https://github.com/Red5/red5-server/releases/download/v1.2.6/red5-server-1.2.6.tar.gz
解压缩Red5
tar -zxvf red5-server-1.2.6.tra.gz
2、修改Red5相关配置
打开conf文件夹下的red5.properties
[root@localhost red5-server]# vim conf/red5.properties
这里我们先把HTTP和RTMP的host修改为我们本机的IP,端口可以使用默认的,也可自定义修改。这里我修改host为我本机IP:10.6.3.104
# Socket policy
policy.host=0.0.0.0
policy.port=843

# HTTP
http.host=10.6.3.104
http.port=5080
https.port=5443
http.URIEncoding=UTF-8
http.max_headers_size=8192
http.max_keep_alive_requests=-1
http.max_threads=20
http.acceptor_thread_count=10
http.processor_cache=20

# RTMP
rtmp.host=10.6.3.104
rtmp.port=1935
rtmp.io_threads=8
rtmp.send_buffer_size=65536
rtmp.receive_buffer_size=65536
rtmp.ping_interval=1000
rtmp.max_inactivity=60000
rtmp.max_handshake_time=5000
rtmp.tcp_nodelay=true
rtmp.tcp_keepalive=false
rtmp.default_server_bandwidth=10000000
rtmp.default_client_bandwidth=10000000
rtmp.client_bandwidth_limit_type=2
rtmp.bandwidth_detection=false
rtmp.encoder_base_tolerance=5000
rtmp.encoder_drop_live_future=false
# traffic optimization hinting. to disable set traffic class set to -1
# low delay + high throughput == 24 (0x18)
rtmp.traffic_class=-1
# requested maximum length of the queue of incoming connections
rtmp.backlog=32
# the interval (seconds) between each throughput calculation
rtmp.thoughput_calc_interval=15
# enable use of the default mina acceptor
rtmp.default_acceptor=true
# socket i/o pool sizes used when default acceptor is disabled
rtmp.initial_pool_size=0
rtmp.max_pool_size=2
rtmp.max_processor_pool_size=8
rtmp.executor_keepalive_time=60000
mina.logfilter.enable=false
# scheduler configs (per application)
rtmp.scheduler.pool_size=8
rtmp.deadlockguard.sheduler.pool_size=8
# message executor configs (per application) - adjust these as needed if you get tasks rejected
rtmp.executor.core_pool_size=4
rtmp.executor.max_pool_size=32
rtmp.executor.queue_capacity=64
# drop audio packets when queue is almost full, to disable this, set to 0
rtmp.executor.queue_size_to_drop_audio_packets=60
# maximum amount of time allotted to process a single rtmp message / packet in milliseconds, set it as 0 to disable timeout
rtmp.max_handling_time=2000
# connection tweaks - dont modify unless you know what you're doing
rtmp.channel.initial.capacity=3
rtmp.channel.concurrency.level=1
rtmp.stream.initial.capacity=1
rtmp.stream.concurrency.level=1
rtmp.pending.calls.initial.capacity=3
rtmp.pending.calls.concurrency.level=1
rtmp.reserved.streams.initial.capacity=1
rtmp.reserved.streams.concurrency.level=1
# maximum packet size allowed in bytes
rtmp.max_packet_size=3145728

# RTMPS
rtmps.host=0.0.0.0
rtmps.port=8443
rtmps.ping_interval=5000
rtmps.max_inactivity=60000
rtmps.max_keep_alive_requests=-1
rtmps.max_threads=8
rtmps.acceptor_thread_count=2
rtmps.processor_cache=20
# RTMPS Key and Trust store parameters
rtmps.keystorepass=password
rtmps.keystorefile=conf/keystore.jks
rtmps.truststorepass=password
rtmps.truststorefile=conf/truststore.jks

# RTMPT
rtmpt.host=0.0.0.0
rtmpt.port=8088
rtmpt.ping_interval=5000
rtmpt.max_inactivity=60000
rtmpt.max_handshake_time=5000
rtmpt.max_keep_alive_requests=-1
rtmpt.max_threads=8
rtmpt.acceptor_thread_count=2
rtmpt.processor_cache=20
rtmpt.encoder_base_tolerance=5000
rtmpt.encoder_drop_live_future=true
# better setting for streaming media
rtmpt.target_reponse_size=32768
# best setting for small messages or shared objects
#rtmpt.target_reponse_size=8192
# max incoming messages to process at a time. the most that FP appears to send is 166
rtmpt.max_in_msg_process=166
# max time in millis that we will wait when offering data to the in or out queue
rtmpt.max_queue_offer_time=125
# max offer attempts
rtmpt.max_queue_offer_attempts=4

# Debug proxy (needs to be activated in red5-core.xml)
proxy.source_host=127.0.0.1
proxy.source_port=1936
proxy.destination_host=127.0.0.1
proxy.destination_port=1935

# JMX
jmx.rmi.host=localhost
jmx.rmi.port=9999
jmx.rmi.sport=9998
jmx.rmi.port.remoteobjects=
jmx.keystorepass=password
jmx.mina.monitor.enable=false
jmx.mina.poll.interval=1000
# Whether to always create the registry in-process, not attempting to
# locate an existing registry at the specified port. Set to "true" in order
# to avoid the overhead of locating an existing registry when you always intend
# to create a new registry in any case.
jmx.registry.create=true
# Whether or not the MBeanServerFactoryBean should attempt to locate a running
# MBeanServer before creating one
jmx.reuse.existing.server=true
# Whether to register the MBeanServer with the MBeanServerFactory, making it
# available through MBeanServerFactory.findMBeanServer()
jmx.register.factory=true
# Whether any threads started for the JMXConnectorServer should be started as daemon threads
jmx.daemon=true
# Whether the JMXConnectorServer should be started in a separate thread
jmx.threaded=true

# Server properties
# max events to send in a single update
so.max.events.per.update=64
so.scheduler.pool_size=4
keyframe.cache.entry.max=500
war.deploy.server.check.interval=600000
fileconsumer.delayed.write=true
fileconsumer.queue.size=120
fileconsumer.wait.for.keyframe=true
subscriberstream.buffer.check.interval=5000
subscriberstream.underrun.trigger=100
subscriberstream.max.pending.frames=10
subscriberstream.max.sequential.frames=10
broadcaststream.auto.record=false
3、启动Red5服务器
修改完以上的配置,我们就可以启动Red5服务器啦。
[root@localhost red5-server]# ./red5.sh
你以为这就启动成功了?我在两台Linux下搭Red5都遇到了问题,你也不例外。。。
4、问题解决
问题1:
[root@localhost red5-server]# ./red5.sh
Running on  Linux
Starting Red5
Unrecognized VM option 'UseZGC'
Error: Could not create the Java Virtual Machine.
Error: A fatal exception has occurred. Program will exit.
对于这个问题我们还需要改一下配置文件,进入到red5.sh文件
[root@localhost red5-server]# vim red5.sh
找到下面文件里的-XX:+UseZGC,删去即可
。。。。。。。。。上面还有我就没复制了
# JAVA options
# ZGC collector https://wiki.openjdk.java.net/display/zgc
# You can set JVM additional options here if you want
if [ -z "$JVM_OPTS" ]; then
    JVM_OPTS="-XX:+UnlockExperimentalVMOptions -XX:+UseZGC -Xms256m -Xmx1g -Xverify:none -XX:+UseBiasedLocking -XX:InitialCodeCacheSize=8m -XX:MaxGCPauseMillis=500 -XX:ReservedCodeCacheSize=32m"
fi
# Set up security options
SECURITY_OPTS="-Djava.security.debug=failure"
# Set up tomcat options
TOMCAT_OPTS="-Dcatalina.home=$RED5_HOME -Dcatalina.useNaming=true"

export JAVA_OPTS="$SECURITY_OPTS $JAVA_OPTS $JVM_OPTS $TOMCAT_OPTS $NATIVE"

if [ -z "$RED5_MAINCLASS" ]; then
再到第3步重启Red5服务器,然后又报错,就是问题2了。
问题2:
[root@localhost red5-server]# ./red5.sh
Running on  Linux
Starting Red5
Error: A JNI error has occurred, please check your installation and try again
Exception in thread "main" java.lang.UnsupportedClassVersionError: org/red5/server/Bootstrap has been compiled by a more recent version of the Java Runtime (class file version 55.0), this version of the Java Runtime only recognizes class file versions up to 52.0
	at java.lang.ClassLoader.defineClass1(Native Method)
	at java.lang.ClassLoader.defineClass(ClassLoader.java:763)
	at java.security.SecureClassLoader.defineClass(SecureClassLoader.java:142)
	at java.net.URLClassLoader.defineClass(URLClassLoader.java:467)
	at java.net.URLClassLoader.access$100(URLClassLoader.java:73)
	at java.net.URLClassLoader$1.run(URLClassLoader.java:368)
	at java.net.URLClassLoader$1.run(URLClassLoader.java:362)
	at java.security.AccessController.doPrivileged(Native Method)
	at java.net.URLClassLoader.findClass(URLClassLoader.java:361)
	at java.lang.ClassLoader.loadClass(ClassLoader.java:424)
	at sun.misc.Launcher$AppClassLoader.loadClass(Launcher.java:338)
	at java.lang.ClassLoader.loadClass(ClassLoader.java:357)
	at sun.launcher.LauncherHelper.checkAndLoadMain(LauncherHelper.java:495)
这个报错原因就是openjdk的版本低了,然后打开Red5的配置文件发现默认使用的是jdk11,然后我把他的配置文件该文jdk8,再次启动,结果还是报这个错,没办法,下载jdk11吧。
jdk下载方法和上面Red5压缩包的下载一样,后期我也会发一篇关于openjdk的下载方法,大家可以关注一下,哈哈哈。。。
下载完jdk11之后,再次修改./red5.sh文件
#!/bin/bash

if [ -z "$RED5_HOME" ]; then
  export RED5_HOME=`pwd`;
fi

# Java 11
export JAVA_HOME=/opt/jdk-11

P=":" # The default classpath separator
OS=`uname`
case "$OS" in
  CYGWIN*|MINGW*) # Windows Cygwin or Windows MinGW
      P=";" # Since these are actually Windows, let Java know
      # Native path
      NATIVE="-Djava.library.path=$RED5_HOME/lib/amd64-Windows-msvc"
  ;;
将JAVA_HOME的路径改为你jdk11的路径。然后再次启动
。。。。。上面巴拉巴拉一大堆
[INFO] [pool-1-thread-5] org.red5.net.websocket.WebSocketScope - Application scope: Scope [name=oflaDemo, path=/default, type=APPLICATION, autoStart=true, creationTime=1619008576027, depth=1, enabled=true, running=true]
[INFO] [pool-1-thread-5] org.red5.net.websocket.WebSocketScopeManager - addWebSocketScope: WebSocketScope [path=/oflaDemo, listeners=0, connections=0]
[INFO] [pool-1-thread-5] org.red5.net.websocket.WebSocketScope - WebSocket scope added
[INFO] [pool-1-thread-3] org.red5.net.websocket.WebSocketPlugin - Creating WebSocketScopeManager for org.red5.server.adapter.MultiThreadedApplicationAdapter@337edd9c
[INFO] [pool-1-thread-3] org.red5.net.websocket.WebSocketPlugin - WebSocketPlugin application: org.red5.server.adapter.MultiThreadedApplicationAdapter@337edd9c
[INFO] [pool-1-thread-3] org.red5.net.websocket.WebSocketScope - Application scope: Scope [name=SOSample, path=/default, type=APPLICATION, autoStart=true, creationTime=1619008576039, depth=1, enabled=true, running=true]
[INFO] [pool-1-thread-3] org.red5.net.websocket.WebSocketScopeManager - addWebSocketScope: WebSocketScope [path=/SOSample, listeners=0, connections=0]
[INFO] [pool-1-thread-3] org.red5.net.websocket.WebSocketScope - WebSocket scope added
[INFO] [pool-6-thread-1] org.red5.server.tomcat.WarDeployer - Deploy wars with app start
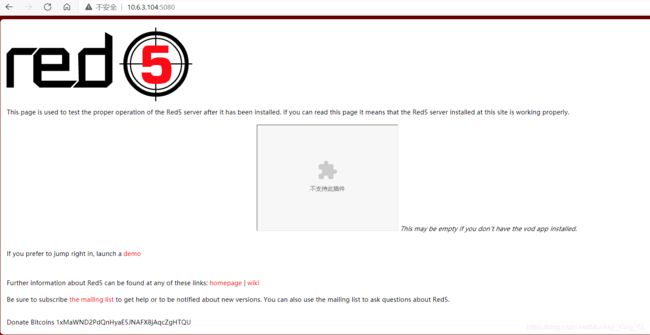
然后打开浏览器访问http://你的IP:端口,我的就是http:10.6.3.104:5080,出现以下页面,,恭喜你,说明你搭建成功了。

5、测试环节
red5的播放默认使用的是Flash,但是目前很多浏览器不使用Flash了,因此我们先自己使用Xftp上传一段视频到red5上,然后再通过url进行访问。
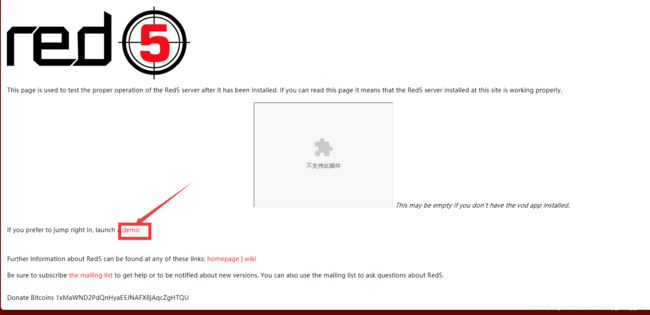
1、进入red5的demo

通过对demo的探索,我发现可以直接使用他也是一个Web项目可以通过Xftp向Linux上传视频或者音频,然后通过url进行访问。
2、上传视频

点击这个Xftp可以往Linux下上传视频,我上传了一个叫1.mp4的视频。

然后重启Red5服务器,通过http://你的主机:端口/视频路径,我的就是http://10.6.3.104:5080/oflaDemo/1.mp4。如果能正常播放你上传的视频,然后说明你的Red5流媒体服务器搭建完全成功。
6、结语
因为我们是搭建在Linux上,我们每次上传视频或音频不可能打开Xftp,通过Xftp来上传。因此我们需要继续研究Red5,看它对外提供了哪些接口,如何与项目的Web通信。本人也会继续研究Red5,后续可能会继续发布Red5的相关知识,请大家多多支持,如有问题,欢迎大家指正批评。
