学习目标
在之前的文章中我们学习了 Spring Cloud Config,不知道小伙伴理解了多少,今天我们学习一下 Eureka,有些小伙伴问我现在在生产环境中已经很少使用 Spring Cloud Config 和 Eureka 了,为什么还要写这方面的博客,这里我说明一下,由于我也会刚刚接触微服务,所以想把 Spring Cloud 生态圈里的技术大体都看一看,多了解一些,对以后学习 Consul、Apollo 等中间件都会有较好的帮助,所以我这里依旧使用了 Spring Boot 1.x 版本进行学习,之后也会切换到 2.x 版本,好了,废话不多说,来看看今天的内容吧。
服务发现/注册
1)服务发现:在计算机网络中,一种自动发现设备或者服务的技术,通过服务发现协议(Service Discovery Protocol)实现。
2)服务注册:在计算机网络中,为了更好的治理多个设备或者服务,这些设备或者服务主动或者被动注册到管理中心,以便服务被发现和消费。
3)常见的注册中心有:
- Apache Zookeeper
- Netflix Eureka
- Consul
4)这里我们要说的是 Spring Cloud Netflix Eureka,Eureka 是有 Netflix 公司发明的服务发现中间件,包括服务发现服务器和客户端。
核心组件:
- Eureka Server
- Eureka Client
Eureka Server
服务端 Eureka Server:是 Eureka Client 的注册服务中心,管理所有注册服务、以及其实例信息和状态。
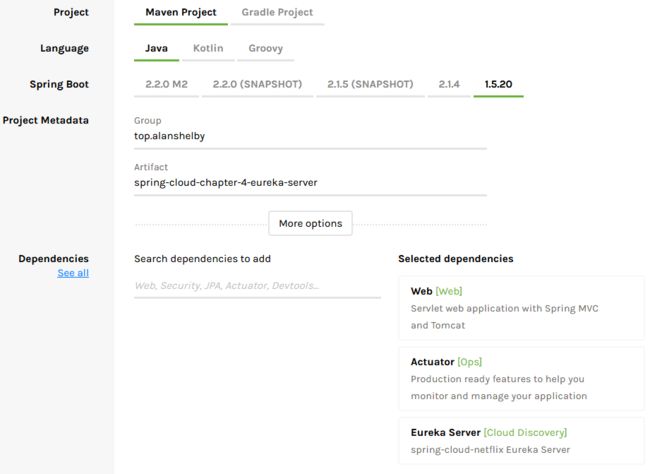
创建 spring-cloud-chapter-4-eureka-server 项目
1)上图中选择依赖我们添加了 org.springframework.cloud:spring-cloud-starter-eureka-server
2)激活 Eureka Server:@EnableEurekaServer
package top.alanshelby.springcloudchapter4eurekaserver;

import org.springframework.boot.SpringApplication;
import org.springframework.boot.autoconfigure.SpringBootApplication;
import org.springframework.cloud.netflix.eureka.server.EnableEurekaServer;

@SpringBootApplication
@EnableEurekaServer
public class SpringCloudChapter4EurekaServerApplication {

    public static void main(String[] args) {
        SpringApplication.run(SpringCloudChapter4EurekaServerApplication.class, args);
    }
}
3)调整 Eureka 服务器配置 application.properties
spring.application.name=spring-cloud-eureka-server
server.port=9090
management.security.enabled = false
此时启动项目会报如下错误,运行效果是没问题的:
com.netflix.discovery.shared.transport.TransportException: Cannot execute request on any known server
com.sun.jersey.api.client.ClientHandlerException: java.net.ConnectException: Connection refused: connect
Caused by: java.net.ConnectException: Connection refused: connect
问题原因:Eureka Server 既是注册服务器也是客户端,默认情况它也需要配置注册中心地址,这里它自己是注册中心,没有其它可连接的注册中心,它自己也没有必要注册到自己上面。我们访问 http://localhost:9090/health 链接,会找到下面的线索:
description: "Eureka discovery client has not yet successfully connected to a Eureka server"
大致意思是:Eureka 客户端还没有成功连接到 Eureka 注册中心
该问题可通过配置解决,所有我们在 application.properties 配置文件中添加如下配置:
# Spring Cloud Eureka 服务器做为注册中心,通常情况下不需要再注册到其它注册中心
# 同时,他也不需要去获取客户端额信息
# 取消向注册中心注册
eureka.client.registerWithEureka = false
# 取消向注册中心获取注册信息(服务实例的信息)
eureka.client.fetchRegistry = false
我们重新启动服务端项目,查看控制台输出的日志会发现已经没有报错信息了。
扩展:上面配置文件中的属性我是用了驼峰的写法(registerWithEureka),而 idea 这个 IDE 代码提示的是使用"-"分割(register-with-eureka),有些小伙伴会有点疑问,在这里说明一下,在 Spring Boot 中,这几种配置文件的写法都是可以的。这里我们搜索一下
org.springframework.boot.bind.RelaxedNames这个类,里面有一个枚举类org.springframework.boot.bind.RelaxedNames.Manipulation,可以解释这个问题,这里就不再展开讲解了,感兴趣的小伙伴自己看一下代码。
Eureka Client
客户端 Eureka Client:为当前服务提供注册、同步、查找服务以及其实例信息或状态等能力。
创建 spring-cloud-chapter-4-eureka-client 项目
1)依赖:org.springframework.cloud:spring-cloud-starter-eureka
2)激活:@EnableDiscoveryClient 或者 @EnableEurekaClient
package top.alanshelby.springcloudchapter4eurekaclient;

import org.springframework.boot.SpringApplication;
import org.springframework.boot.autoconfigure.SpringBootApplication;
import org.springframework.cloud.netflix.eureka.EnableEurekaClient;

@SpringBootApplication
@EnableEurekaClient
//@EnableDiscoveryClient
public class SpringCloudChapter4EurekaClientApplication {

    public static void main(String[] args) {
        SpringApplication.run(SpringCloudChapter4EurekaClientApplication.class, args);
    }
}
3)调整 Eureka Client 配置 application.properties
spring.application.name = spring-cloud-eureka-client
server.port = 8080
management.security.enabled = false
启动项目会有和 Eureka Server 同样的错误,这里就不再重复提供错误信息了,在上面我们也说到了错误原因是找不到可以注册的 Eureka Server,对于客户端来说,配置好对应的注册中心就可以了。
4)再次调整 Eureka Client 配置 application.properties
# Spring Cloud Eureka 客户端注册到 Eureka 服务器
eureka.client.serviceUrl.defaultZone = http://localhost:9090/eureka
重启项目,我们查看一下 Eureka Server 的信息,浏览器访问:http://localhost:9090/,可以看到我们的客户端已经注册到了注册中心上,Application 就对应我们客户端中配置的 spring.application.name,这样我们就把客户端的问题解决了。
扩展:配置参数
# 调整状态页面
eureka.instance.status-page-url-path = /status
# 调整健康检查页面
eureka.instance.health-check-url-path = /health
这里以调整状态页面为例说明一下:
在启动类中添加 status 映射,如下所示:
@SpringBootApplication
@EnableEurekaClient
//@EnableDiscoveryClient
@RestController
public class SpringCloudChapter4EurekaClientApplication {
public static void main(String[] args) {...}
@GetMapping("/status")
public String status() {
return "200
";
}
}
启动项目,访问 http://localhost:9090/,看到下图标红信息,点击后即可跳转到我们自定义的 status 映射,该访问路径默认为 http://USER-2EN10OPDKM:8080/info。
Spring Cloud Config 整合 Eureka
对于 Spring Cloud Config 工程我们使用 https://zhuanlan.zhihu.com/p/63972057(Spring Cloud 之配置服务器(下)配置刷新) 中的 spring-cloud-chapter-3-config-server,我们将其更名为 spring-cloud-chapter-4-config-server,修改时要将启动类以及 pom.xml 中的对应信息进行修改,即共有以下三个项目(注:项目可从文末码云地址中查看):
- spring-cloud-chapter-4-eureka-server
- spring.application.name=spring-cloud-eureka-server
- server.port=9090
- spring-cloud-chapter-4-config-server
- spring.application.name=spring-cloud-config-server
- server.port=7070
- spring-cloud-chapter-4-eureka-client
- spring.application.name=spring-cloud-eureka-client
- server.port=8080
这里我们画一下图来看看这三个项目之间的关系:
可以看出这里的 Config Server 做为了 Eureka Server 的客户端,将自己注册到了 Eureka Server 上,Eureka Client 也注册到了 Eureka Server 上,同时 Eureka Client 也充当 Config Client,而 Config Client 则会注册到 Config Server 上。这里我们一步步进行演示,如何将 Spring Cloud Config 整合到 Eureka。
1、调整 spring-cloud-config-server 成为 Eureka 客户端
1)在 pom.xml 中引入 spring-cloud-starter-eureka 客户端的 Maven 依赖
    org.springframework.cloud
    spring-cloud-starter-eureka
2)激活 Eureka 客户端
在启动类中添加 @EnableDiscoveryClient 注解,激活 Eureka 客户端。
@SpringBootApplication
@EnableConfigServer
@EnableDiscoveryClient
public class SpringCloudChapter4ConfigServerApplication {
    public static void main(String[] args) {...}
}
3)调整 spring-cloud-config-server 应用配置(application.properties),这里将端口改为了 7070
spring.application.name = spring-cloud-config-server
server.port = 7070
management.security.enabled = false

# 配置服务器远程 Git 仓库(GitHub)
spring.cloud.config.server.git.uri = https://github.com/AlanShelby/blogs-temporary.git

# 强制更新
spring.cloud.config.server.git.force-pull = true

# 配置 Eureka 客户端
# spring-cloud-config-server 注册到 Eureka 服务器
eureka.client.serviceUrl.defaultZone = http://localhost:9090/eureka
经过以上三个步骤,该 spring-cloud-config-server 就具备 Eureka Client 的能力了。我们依次启动 spring-cloud-chapter-4-eureka-server 和 spring-cloud-chapter-4-config-server,访问 Eureka Server: http://localhost:9090/ 查看,可以看到 spring-cloud-config-server 已经注册到了 spring-cloud-eureka-server 上。
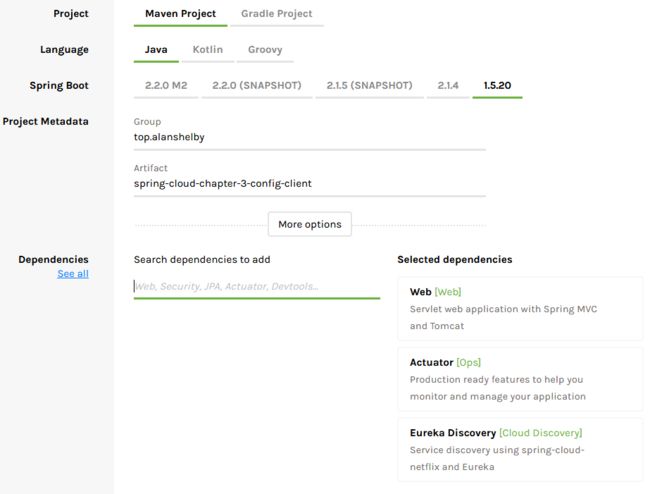
2、调整 spring-cloud-eureka-client 成为 Config 客户端
从上面的架构图可以看出,spring-cloud-eureka-client 既是 Eureka 的客户端,也是 Config 的客户端,下面我们添加一些配置,让 spring-cloud-eureka-client 成为 Config 的客户端。
1)在 pom.xml 中引入 spring-cloud-starter-config 客户端的 Maven 依赖
    org.springframework.cloud
    spring-cloud-starter-config
2)在 classpath 下创建 bootstrap.properties 配置文件,并添加如下配置:
# Spring Cloud Eureka 客户端注册到 Eureka 服务器
# 注意:当前应用需要提前获取应用信息,那么将 Eureka 的配置信息提前至 bootstrap.properties 文件
# 原因:bootstrap 上下文是 Spring Boot 上下文的父上下文,它是最先加载的,因此需要最优先加载 Eureka 注册信息
eureka.client.serviceUrl.defaultZone = http://localhost:9090/eureka

# 配置客户端应用关联的应用,该配置是可选的,如果不配置,采用 spring.application.name
spring.cloud.config.name = blogstemp
# 关联 profile
spring.cloud.config.profile = prod
# 关联 label
spring.cloud.config.label = master
# 激活 Config 服务器发现
spring.cloud.config.discovery.enabled = true
# 配置 Config 服务器的应用名称(ServerId)
spring.cloud.config.discovery.service-id = SPRING-CLOUD-CONFIG-SERVER
注意:这里没有使用之前文章中使用的属性
spring.cloud.config.uri,而是使用了spring.cloud.config.discovery.enabled和spring.cloud.config.discovery.service-id进行替代,使用 service-id 的形式,也就是我们在配置文件中配置的spring.application.name属性,这两种方式的区别在于,使用spring.cloud.config.uri配置是通过写死地址的形式配置的,是 Config 客户端直接去与 Config 服务端进行接触,配置如下:
spring.cloud.config.uri = http://localhost:9090/
而使用 service-id 的形式,是 Config 客户端通过 service-id 到 Eureka Server 上找到对应的服务,无需固定关联 uri,较为灵活。
3)检验效果
在 spring-cloud-chapter-4-eureka-server 和 spring-cloud-chapter-4-config-server 服务启动的前提下,启动 spring-cloud-eureka-client 服务,通过浏览器访问 http://localhost:8080/env 查看效果。
至此,关于 Eureka 的简单使用就讲解完了,下一文中会对 Eureka 的高可用进行讲解,这是我的理解,各位看官如果有不同见解或文章中有错误,请不吝指正。
所用代码码云地址:https://gitee.com/AlanShelby/spring-cloud-chapter
知乎专栏地址:https://zhuanlan.zhihu.com/c_200981602
个人微信公众号:AlanShelby(多多关注,感谢~)


