前端学习笔记day03--CSS样式
前端学习笔记day03–CSS样式
一、span和div元素
1.span
span是一种行内元素,没有任何样式。
<h1>你<span>好span>h1>
在style标签中声明span元素的属性之后,再看h1标签中的字。
		<style>
			h1{

				font-size: 30px;
			}
			span{

				color: red;
			}
		style>
![]()
2.div
div是一种块元素,同样的,它本身没有样式。eg:给div标签设置背景色。
		<style>
			div{

				background: greenyellow;
			}
		style>

		<body>
			<div>
				我在放假
			div>
		body>
二、字体样式
font-family 字体类型。
1.修改默认的字体样式。eg:修改h1标签的默认字体。
		<style>
			#first{

				font-family: "楷体";
			}

			#en{

				font-family: "roman";
			}

			#th{

				font-family: "roman" "楷体";
			}

			#fu{

				font-family: "楷体" "roman";
			}
		style>

		<body>
			<h1>
				hello你好
			h1>

			<h1 id="first">
				hello你好
			h1>

			<h1 id="en">
				hello你好
			h1>

			<h1 id="th">
				hello你好
			h1>

			<h1 id="fu">
				hello你好
			h1>
		body>

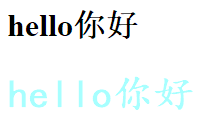
上图中分别是原样式、修改中文字体样式、修改英文字体样式和混合样式的效果。中文字体对中英文都有影响,英文字体只影响英文,混合样式需要先设置英文字体后设置中文字体。设置字体时应注意选用常用字体。
(1)一些相关属性
1)font-size 字体大小
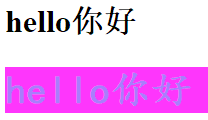
2)color 字体颜色:英文单词所能表达的颜色是很有限的,除了英文单词以外还可以用rgb(三原色)来配颜色 color: rgb(a,b,c) ,三个值的取值范围都是0(黑)–255(白);在三原色之上还可以增加透明度 color: rgba(a,b,c,d) ,取值范围0(完全透明)–1;十六进制0-FF来表示更多的颜色 color:#00AA00,如果每两位的值相同的话,可以简写为其中的一个值,如:#00AA00可以简写为#0A0。如果我们想使用图片中的某种配色,但是不知道它的十六进制编码,我们可以用取色器来读出它的颜色。
		<style>
			#first{

				font-family: "楷体";
				font-size: 40px;
				color: rgba(25,255,255,0.4);
		style>
		<body>
			<h1>
				hello你好
			h1>

			<h1 id="first">
				hello你好
			h1>
		body>
背景设置透明度的效果
3)font-weight 字体粗细,范围100-900,有normal(400),bold(700)等。
		<style>
			h1{

				font-weight: bold;
			}
		style>
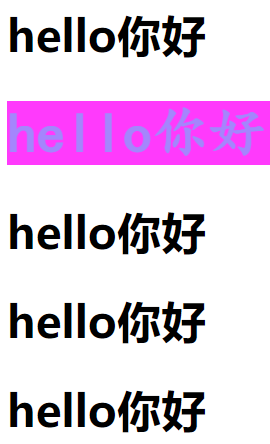
4)font-style 字体风格,如斜体、宋体、微软雅黑等等,还可以设置字体大小。
		<style>
			h1{

				font:italic 50px "微软雅黑"
			}
		style>
font-style还可以和font-weight组成混合属性。
		<style>
			h1{

				font-weight: bolder;
				font-style: italic;
			}
		style>
图略。
复合属性在使用时有顺序要求:font-style font-weight font-size font-family。
三、文本样式
需要在head标签中,写相应标签的选择器
1.background 背景颜色。
2.text-align 文本的对齐方式。
3.text-indent 首行缩进,可以是距离(2em),也可以是百分比。
4.font-size 字体大小。
5.line-height 行高。多行调整行间距,单行使数据集中。
6.text-decoration 文本装饰。
		<style>
			p{

				background: red;

				text-align: left;

				text-indent: 2em;

				font-size: 30px;

				line-height: 40px;

				text-decoration: underline;
			}
			span{

				background: yellow;
				text-align: center;
			}
		style>

		<body>
			<p>中秋p>
		body>
四、竖直对齐
1.vertical-align 设置元素的竖直对齐方式。默认方式为bottom,middle可以使图文竖直对齐,对图片添加该属性。
2.text-shadow 文本阴影。
阴影颜色  X轴偏移量(正值,向右偏移)  Y轴偏移量(正值,向下偏移) 清晰度(越小越清晰,越大越模糊)
如text-shadow:green 10px 10px 10px;
		<style>
			img{

				vertical-align: middle;
			}

			span{

				font-size: 40px;
				text-shadow:green 10px 10px 10px;
			}
		style>

		<body>
			<p>
				<img src="img/下载图标.gif">
				<span>111span>
			p>
		body>
五、超链接
CSS可以设置超链接访问前、点击时和访问过等的样式。
1.E:link 未访问时的状态。
		<style>
			a{

				font-size: 30px;
			}
			a:link{

				color: black;
			}
		style>

		<body>
			<a href="文本样式.html">
				1234
			a>
		body>
		<style>
			a:visited{

				color: yellow;
			}
		style>
3.E:hover 鼠标悬浮时的状态。
		<style>
			a:hover{

				color: red;
			}
		style>
		<style>
			a:active{

				color: blue;
			}
		style>
六、列表样式
1.list-style: none;或者 list-style-type: none; 去掉无序列表前面的小圆点。
		<style type="text/css">
			ul{

				list-style: none;
				/*list-style-type: none;*/
			}
		style>

		<body>
			<ul>
				<li>11li>
				<li>22li>
				<li>33li>
			ul>
		body>
七、背景
1.background-color 背景色。如:background-color: gray;

2.background-image 背景图片。如:background-image: url(../../img/下载图标.gif);

3.background-repeat 背景重复样式,background-repeat: repeat默认值,表示在水平方向(x轴)和垂直方向(y轴)同时平铺,background-repeat: no-repeat表示不平铺。

4.background-position 背景位置,可以用px、百分比或者位置的单词,也可以混合使用。如:background-position: 50% center;
![]()
5.background: url(路径/img) 90% center 混合使用时没有顺序要求。如:background: url(../../img/下载图标.gif) 50% center no-repeat yellow;

6.background-size (1)px:可能会压缩、拉伸、留白;(2)百分比:基于控件会压缩、拉伸、留白;(3)cover:不会留白,但会裁剪;
(4)contain:不会压缩或者拉伸,但会有留白,建议背景图像像素高一些,比例和控件比例一致。
		<style type="text/css">
			p{

				background-color: gray;
				background-image: url(../../img/下载图标.gif);
				background-repeat: no-repeat;
				background-position: 50% center;
				background: url(../../img/下载图标.gif) 50% center no-repeat yellow;
			}

			div{

				width: 200px;
				height: 200px;
				background: url() no-repeat;
				background-size: 100%;
				border: 1px soild red;
			}
		style>

		<body>
			<p>
				新闻
			p>
		body>
7.背景渐变
background: linear-gradient()可以设定一个图像块区域,然后在该区域内设置颜色渐变的方向、顶部颜色和底部颜色。 如:background: linear-gradient(to bottom,red,green); to bottom指方向从顶部指向底部,red位置是顶部颜色,green位置是底部颜色。
		<style type="text/css">
			div{

				width: 200px;
				height: 200px;
				border: 1px soild red;
				background: linear-gradient(to bottom,red,green);
			}
		style>
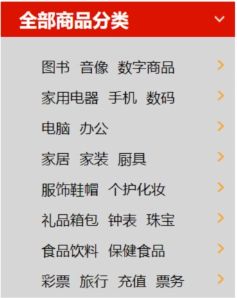
背景实例1----制作一个登录按钮
要求:使用图片作为背景
		<style type="text/css">
			.btn{

				background: url(../img/按钮.png);
				width: 100px;
				height: 50px;
				background-size: 100% 100%;
				border: none;
			}
		style>

		<body>
			<input type="button" class="btn" value="登录"/>
			<input type="button" class="btn" value="注册"/>
		body>
		<style type="text/css">
			/*设置字体大小、添加背景色*/
			.plist{

				width: 240px;
				background-color: gainsboro;
			}
			.plist h2{

				background-color: red;
				color: white;
				line-height: 40px;
				font-size: 20px;
				/*缩进*/
				text-indent: 15px;
				background: url(../img/red.jpg) no-repeat 95% center;
			}
			/*添加右端箭头(url括号中是向右箭头的图片)*/
			.plist ul li{

				 list-style: none;
				 list-height: 30px;
				 font-size: 16px;
				 background: url();
			}
			/*修改a标签字体*/
			.plist ul li a{

				text-decoration: none;
				color: black;
			}
			/*添加鼠标悬浮时字体颜色*/
			.plist ul li a:hover{

				text-decoration: underline;
				color: orange;
			}
		style>

		<body>
			<div class="plist">
				<h2>全部商品分类h2>
				<ul>
					<li>
						<a href="#">图书  a>
						<a href="#">音像  a>
						<a href="#">数字产品a>
					li>
					<li>
						<a href="#">家用电器  a>
						<a href="#">手机  a>
						<a href="#">数码a>
					li>
					<li>
						<a href="#">电脑  a>
						<a href="#">办公a>
					li>
				ul>
			div>
		body>
八、盒子模型
网页中按内容、功能分出一块矩形区域,每一个区域都是一个盒子
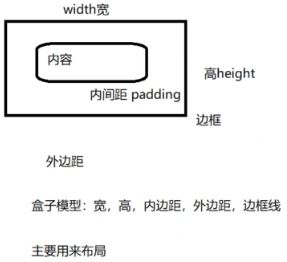
1.盒子模型的一些属性
(1)边框
1)border: 1px solid red; 复合属性,没有前后顺序。
2)border-width 边框宽度,顺序上、右、下、左,缺省找对边。
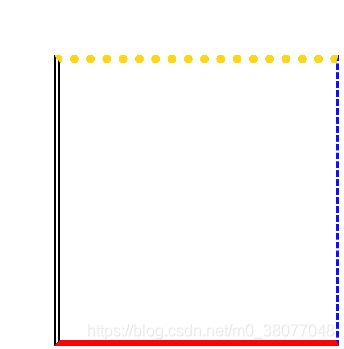
3)border-style 边框类型 【1】dashed 虚线【2】solid 实线【3】dotted 点线【4】none 不显示线条。border-left-style 单独设置边框类型。同样,边线类型也可以混合设置,顺序也是上、右、下、左 border-style: dotted dashed solid double;。
4)border-color: gold;边框颜色,可以分别设置和混合设置。
	<style type="text/css">
			div{

				width: 100px;
				height: 100px;
				border: 1px double green;
				border-width: 3px 1px 2px 2px;
				margin: 20px;
				/*左边框的宽度*/
				/*border-left-width: 2px;*/
				/*右边框的宽度*/
				/*border-right-width: 2px;*/
				/*顶部框的宽度*/
				/*border-top-width: 1px;*/
				/*底部框的宽度*/
				/*border-bottom-width: 1px;*/
				border-style: dotted dashed solid double;
				border-color: gold blue red black;
			}
			span{

				border: 1px red solid;
			}
		style>
		<style>
			span{

				border: 1px red solid;
			}
		style>
		<style type="text/css">
			div{

				width: 100px;
				height: 100px;
				border: 1px double green;
				border-width: 3px 1px 2px 2px;
				margin: 20px;
				}
			span{

				border: 1px red solid;
			}
		style>
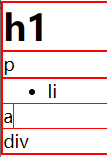
		<style>
			h1,p,ul,a,div{

				border: 1px solid red;
			}
		style>

		<body>
			<h1>h1h1>
			<p>pp>
			<ul>
				<li>lili>
			ul>
			<a>aa>
			<div>divdiv>
		body>

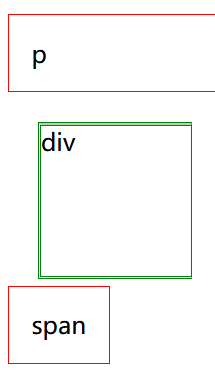
每个标签盒子之间的就是外边距。如果想取消外边距,就把margin设为0。

还有一些外边距没有消除,是因为所有的标签都有外边距,还要消除body的外边距。在选择器上加上body:
		<style>
			body,h1,p,ul,a,div{

				border: 1px solid red;
				margin: 0;
			}
		style>
在margin属性中添加值auto,可以使盒子自动水平居中,前提必须是块元素。

尝试设置span标签的margin属性为0 auto,发现并没有发现变化,因为span元素是靠内容填充的。
(3)内间距
写一个p标签,设置边框;给div标签写入内容。

然后给p标签盒子添加内边距属性
			p{
				border: 1px solid red;
				padding: 20px 10px 5px 5px;
			}

内边距属性也可以实现居中效果,比如上边的值修改为padding: 15px;。
(4)盒子尺寸
1)width height 块元素设置有效,行内设置无效。
2)box-sizing 盒子尺寸,width内容的宽,不包括padding,边线;
border-box width指的是盒子的宽 包括边线,边距;
content-box width 内容的宽,不包括padding,边线。
(5)盒子半径
1)边角半径:值越大,角度越大;方向:左上,右上,右下,左下;缺省的话,找对角。
		<style>
			div{

				border: 1px solid red;
				width: 100px;
				height: 100px;
				border-radius: 5px 10px 15px 20px;
			}
		style>
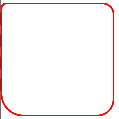
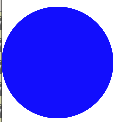
边角半径修改的是区域的边角,不是边框线的边角,可以尝试把边框线去除看看。
		<style>
			div{

				/*border: 1px solid red;*/
				background-color: blue;
				width: 100px;
				height: 100px;
				border-radius: 5px 10px 15px 20px;
			}
		style>
		<style>
			*{

				margin: 0px;
				padding: 0px;
			}
			body{

				background-color: oldlace;
			}
			.plist{

				margin: 15px;
				background-color: white;
				width: 240px;
			}
			.plist dt{

				background-color: deeppink;
				padding: 10px;
				color: white;
				font-weight: bold;
				font-size: 18px;
			}
			/*设置每行之间的虚线*/
			.plist dd{

				padding: 10px 0px;
				font-size: 16px;
				border-bottom: dashed 1px gray;
			}
			.plist dd a{

				color: gray;
				text-decoration: none;
			}
			.plist dd a:hover{

				color: deeppink;
			}
			.plist dd a span{

				width: 20px;
				height: 20px;
				display: inline-block;
				background-color: gray;
				border-radius: 50%;
				color: white;
				text-align: center;
				line-height: 20px;
			}
			/*设置鼠标悬浮时,span也会发生变化。如果选择器是dd a span:hover,span和文字不会同时变化,需要鼠标分别悬浮至文字和span上分别发生变化*/
			.plist dd a:hover span{

				background-color: deeppink;
			}
		style>

