导语
书上讲的很细,还讲了一些原理,原理需要一些线性代数的知识,线代都忘光了,这里都是实例,想看理论知识戳我。
主要内容
- 通过SeekBar调节色调、饱和度、亮度
- 模拟4x5的颜色矩阵
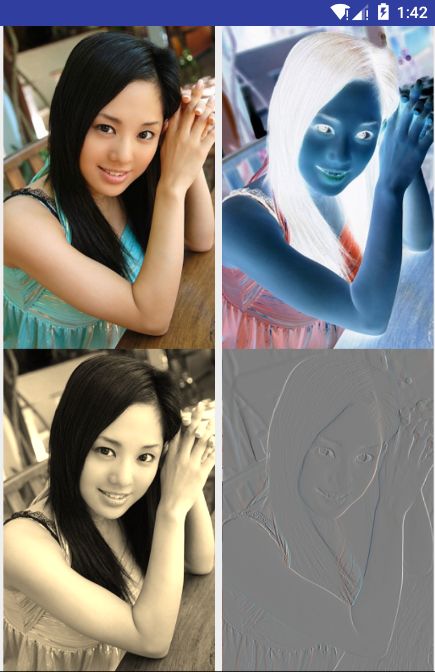
- 底片效果、老照片效果、浮雕效果
- 飘动的旗子
- 刮刮卡效果
- 倒影图片效果
- 正弦曲线
- 绘图板
具体内容
通过SeekBar调节色调、饱和度、亮度
布局:
Activity:
public class PrimaryColor extends Activity implements SeekBar.OnSeekBarChangeListener {

    private static int MAX_VALUE = 255;
    private static int MID_VALUE = 127;
    private ImageView mImageView;
    private SeekBar mSeekbarhue, mSeekbarSaturation, mSeekbarLum;
    private float mHue, mStauration, mLum;
    private Bitmap bitmap;

    @Override
    protected void onCreate(Bundle savedInstanceState) {
        super.onCreate(savedInstanceState);
        setContentView(R.layout.primary_color);
        bitmap = BitmapFactory.decodeResource(getResources(),
                R.drawable.test3);
        mImageView = (ImageView) findViewById(R.id.imageview);
        mSeekbarhue = (SeekBar) findViewById(R.id.seekbarHue);
        mSeekbarSaturation = (SeekBar) findViewById(R.id.seekbarSaturation);
        mSeekbarLum = (SeekBar) findViewById(R.id.seekbatLum);
        mSeekbarhue.setOnSeekBarChangeListener(this);
        mSeekbarSaturation.setOnSeekBarChangeListener(this);
        mSeekbarLum.setOnSeekBarChangeListener(this);
        mSeekbarhue.setMax(MAX_VALUE);
        mSeekbarSaturation.setMax(MAX_VALUE);
        mSeekbarLum.setMax(MAX_VALUE);
        mSeekbarhue.setProgress(MID_VALUE);
        mSeekbarSaturation.setProgress(MID_VALUE);
        mSeekbarLum.setProgress(MID_VALUE);
        mImageView.setImageBitmap(bitmap);
    }

    @Override
    public void onProgressChanged(SeekBar seekBar,
                                  int progress, boolean fromUser) {
        switch (seekBar.getId()) {
            case R.id.seekbarHue:
                mHue = (progress - MID_VALUE) * 1.0F / MID_VALUE * 180;
                break;
            case R.id.seekbarSaturation:
                mStauration = progress * 1.0F / MID_VALUE;
                break;
            case R.id.seekbatLum:
                mLum = progress * 1.0F / MID_VALUE;
                break;
        }
        mImageView.setImageBitmap(ImageHelper.handleImageEffect(
                bitmap, mHue, mStauration, mLum));
    }

    @Override
    public void onStartTrackingTouch(SeekBar seekBar) {
    }

    @Override
    public void onStopTrackingTouch(SeekBar seekBar) {
    }
}
ImageHelper:
public class ImageHelper {

    public static Bitmap handleImageEffect(Bitmap bm,
                                           float hue,
                                           float saturation,
                                           float lum) {
        Bitmap bmp = Bitmap.createBitmap(
                bm.getWidth(), bm.getHeight(), Bitmap.Config.ARGB_8888);
        Canvas canvas = new Canvas(bmp);
        Paint paint = new Paint();

        ColorMatrix hueMatrix = new ColorMatrix();
        hueMatrix.setRotate(0, hue);
        hueMatrix.setRotate(1, hue);
        hueMatrix.setRotate(2, hue);

        ColorMatrix saturationMatrix = new ColorMatrix();
        saturationMatrix.setSaturation(saturation);

        ColorMatrix lumMatrix = new ColorMatrix();
        lumMatrix.setScale(lum, lum, lum, 1);

        ColorMatrix imageMatrix = new ColorMatrix();
        imageMatrix.postConcat(hueMatrix);
        imageMatrix.postConcat(saturationMatrix);
        imageMatrix.postConcat(lumMatrix);

        paint.setColorFilter(new ColorMatrixColorFilter(imageMatrix));
        canvas.drawBitmap(bm, 0, 0, paint);
        return bmp;
    }

}
效果图:
通过SeekBar调节色调、饱和度、亮度
模拟4x5的颜色矩阵
布局:
Activity:
public class ColorMatrix extends Activity {

    private ImageView mImageView;
    private GridLayout mGroup;
    private Bitmap bitmap;
    private int mEtWidth, mEtHeight;
    private EditText[] mEts = new EditText[20];
    private float[] mColorMatrix = new float[20];

    @Override
    protected void onCreate(Bundle savedInstanceState) {
        super.onCreate(savedInstanceState);
        setContentView(R.layout.color_matrix);
        bitmap = BitmapFactory.decodeResource(getResources(),
                R.drawable.test1);
        mImageView = (ImageView) findViewById(R.id.imageview);
        mGroup = (GridLayout) findViewById(R.id.group);
        mImageView.setImageBitmap(bitmap);

        mGroup.post(new Runnable() {
            @Override
            public void run() {
                // 获取宽高信息
                mEtWidth = mGroup.getWidth() / 5;
                mEtHeight = mGroup.getHeight() / 4;
                addEts();
                initMatrix();
            }
        });
    }

    // 获取矩阵值
    private void getMatrix() {
        for (int i = 0; i < 20; i++) {
            mColorMatrix[i] = Float.valueOf(
                    mEts[i].getText().toString());
        }
    }

    // 将矩阵值设置到图像
    private void setImageMatrix() {
        Bitmap bmp = Bitmap.createBitmap(
                bitmap.getWidth(),
                bitmap.getHeight(),
                Bitmap.Config.ARGB_8888);
        android.graphics.ColorMatrix colorMatrix =
                new android.graphics.ColorMatrix();
        colorMatrix.set(mColorMatrix);

        Canvas canvas = new Canvas(bmp);
        Paint paint = new Paint();
        paint.setColorFilter(new ColorMatrixColorFilter(colorMatrix));
        canvas.drawBitmap(bitmap, 0, 0, paint);
        mImageView.setImageBitmap(bmp);
    }

    // 作用矩阵效果
    public void btnChange(View view) {
        getMatrix();
        setImageMatrix();
    }

    // 重置矩阵效果
    public void btnReset(View view) {
        initMatrix();
        getMatrix();
        setImageMatrix();
    }

    // 添加EditText
    private void addEts() {
        for (int i = 0; i < 20; i++) {
            EditText editText = new EditText(ColorMatrix.this);
            mEts[i] = editText;
            mGroup.addView(editText, mEtWidth, mEtHeight);
        }
    }

    // 初始化颜色矩阵为初始状态
    private void initMatrix() {
        for (int i = 0; i < 20; i++) {
            if (i % 6 == 0) {
                mEts[i].setText(String.valueOf(1));
            } else {
                mEts[i].setText(String.valueOf(0));
            }
        }
    }
}
关键点:将一个颜色矩阵传入画笔,然后画出原始的图在新建的图上面。
paint.setColorFilter(new ColorMatrixColorFilter(colorMatrix));
效果图:
底片效果、老照片效果、浮雕效果
布局:
Activity:
public class PixelsEffect extends Activity {

    private ImageView imageView1, imageView2, imageView3, imageView4;

    @Override
    protected void onCreate(Bundle savedInstanceState) {
        super.onCreate(savedInstanceState);
        setContentView(R.layout.pixels_effect);
        Bitmap bitmap = BitmapFactory.decodeResource(getResources(), R.drawable.test2);
        imageView1 = (ImageView) findViewById(R.id.imageview1);
        imageView2 = (ImageView) findViewById(R.id.imageview2);
        imageView3 = (ImageView) findViewById(R.id.imageview3);
        imageView4 = (ImageView) findViewById(R.id.imageview4);

        imageView1.setImageBitmap(bitmap);
        imageView2.setImageBitmap(ImageHelper.handleImageNegative(bitmap));
        imageView3.setImageBitmap(ImageHelper.handleImagePixelsOldPhoto(bitmap));
        imageView4.setImageBitmap(ImageHelper.handleImagePixelsRelief(bitmap));
    }
}
工具类:
public class ImageHelper {

    public static Bitmap handleImageNegative(Bitmap bm) {
        int width = bm.getWidth();
        int height = bm.getHeight();
        int color;
        int r, g, b, a;

        Bitmap bmp = Bitmap.createBitmap(width, height
                , Bitmap.Config.ARGB_8888);

        int[] oldPx = new int[width * height];
        int[] newPx = new int[width * height];
        bm.getPixels(oldPx, 0, width, 0, 0, width, height);

        for (int i = 0; i < width * height; i++) {
            color = oldPx[i];
            r = Color.red(color);
            g = Color.green(color);
            b = Color.blue(color);
            a = Color.alpha(color);

            r = 255 - r;
            g = 255 - g;
            b = 255 - b;

            if (r > 255) {
                r = 255;
            } else if (r < 0) {
                r = 0;
            }
            if (g > 255) {
                g = 255;
            } else if (g < 0) {
                g = 0;
            }
            if (b > 255) {
                b = 255;
            } else if (b < 0) {
                b = 0;
            }
            newPx[i] = Color.argb(a, r, g, b);
        }
        bmp.setPixels(newPx, 0, width, 0, 0, width, height);
        return bmp;
    }

    public static Bitmap handleImagePixelsOldPhoto(Bitmap bm) {
        Bitmap bmp = Bitmap.createBitmap(bm.getWidth(), bm.getHeight(),
                Bitmap.Config.ARGB_8888);
        int width = bm.getWidth();
        int height = bm.getHeight();
        int color = 0;
        int r, g, b, a, r1, g1, b1;

        int[] oldPx = new int[width * height];
        int[] newPx = new int[width * height];

        bm.getPixels(oldPx, 0, bm.getWidth(), 0, 0, width, height);
        for (int i = 0; i < width * height; i++) {
            color = oldPx[i];
            a = Color.alpha(color);
            r = Color.red(color);
            g = Color.green(color);
            b = Color.blue(color);

            r1 = (int) (0.393 * r + 0.769 * g + 0.189 * b);
            g1 = (int) (0.349 * r + 0.686 * g + 0.168 * b);
            b1 = (int) (0.272 * r + 0.534 * g + 0.131 * b);

            if (r1 > 255) {
                r1 = 255;
            }
            if (g1 > 255) {
                g1 = 255;
            }
            if (b1 > 255) {
                b1 = 255;
            }

            newPx[i] = Color.argb(a, r1, g1, b1);
        }
        bmp.setPixels(newPx, 0, width, 0, 0, width, height);
        return bmp;
    }

    public static Bitmap handleImagePixelsRelief(Bitmap bm) {
        Bitmap bmp = Bitmap.createBitmap(bm.getWidth(), bm.getHeight(),
                Bitmap.Config.ARGB_8888);
        int width = bm.getWidth();
        int height = bm.getHeight();
        int color = 0, colorBefore = 0;
        int a, r, g, b;
        int r1, g1, b1;

        int[] oldPx = new int[width * height];
        int[] newPx = new int[width * height];

        bm.getPixels(oldPx, 0, bm.getWidth(), 0, 0, width, height);
        for (int i = 1; i < width * height; i++) {
            colorBefore = oldPx[i - 1];
            a = Color.alpha(colorBefore);
            r = Color.red(colorBefore);
            g = Color.green(colorBefore);
            b = Color.blue(colorBefore);

            color = oldPx[i];
            r1 = Color.red(color);
            g1 = Color.green(color);
            b1 = Color.blue(color);

            r = (r - r1 + 127);
            g = (g - g1 + 127);
            b = (b - b1 + 127);
            if (r > 255) {
                r = 255;
            }
            if (g > 255) {
                g = 255;
            }
            if (b > 255) {
                b = 255;
            }
            newPx[i] = Color.argb(a, r, g, b);
        }
        bmp.setPixels(newPx, 0, width, 0, 0, width, height);
        return bmp;
    }
}
效果图:
飘动的旗子
FlagBitmapMeshView:
public class FlagBitmapMeshView extends View {

    private final int WIDTH = 200;
    private final int HEIGHT = 200;
    private int COUNT = (WIDTH + 1) * (HEIGHT + 1);
    private float[] verts = new float[COUNT * 2];
    private float[] orig = new float[COUNT * 2];
    private Bitmap bitmap;
    private float A;
    private float k = 1;

    public FlagBitmapMeshView(Context context) {
        super(context);
        initView(context);
    }

    public FlagBitmapMeshView(Context context, AttributeSet attrs) {
        super(context, attrs);
        initView(context);
    }

    public FlagBitmapMeshView(Context context, AttributeSet attrs,
                              int defStyleAttr) {
        super(context, attrs, defStyleAttr);
        initView(context);
    }

    private void initView(Context context) {
        setFocusable(true);
        bitmap = BitmapFactory.decodeResource(context.getResources(),
                R.drawable.test);
        float bitmapWidth = bitmap.getWidth();
        float bitmapHeight = bitmap.getHeight();
        int index = 0;
        for (int y = 0; y <= HEIGHT; y++) {
            float fy = bitmapHeight * y / HEIGHT;
            for (int x = 0; x <= WIDTH; x++) {
                float fx = bitmapWidth * x / WIDTH;
                orig[index * 2 + 0] = verts[index * 2 + 0] = fx;
                orig[index * 2 + 1] = verts[index * 2 + 1] = fy + 100;
                index += 1;
            }
        }
        A = 50;
    }

    @Override
    protected void onDraw(Canvas canvas) {
        flagWave();
        k += 0.1F;
        canvas.drawBitmapMesh(bitmap, WIDTH, HEIGHT,
                verts, 0, null, 0, null);
        invalidate();
    }

    private void flagWave() {
        for (int j = 0; j <= HEIGHT; j++) {
            for (int i = 0; i <= WIDTH; i++) {
                verts[(j * (WIDTH + 1) + i) * 2 + 0] += 0;
                float offsetY =
                        (float) Math.sin((float) i / WIDTH * 2 * Math.PI +
                                Math.PI * k);
                verts[(j * (WIDTH + 1) + i) * 2 + 1] =
                        orig[(j * WIDTH + i) * 2 + 1] + offsetY * A;
            }
        }
    }
}
效果图:
飘动的旗子
刮刮卡效果
XfermodeView:
public class XfermodeView extends View {

    private Bitmap mBgBitmap, mFgBitmap;
    private Paint mPaint;
    private Canvas mCanvas;
    private Path mPath;

    public XfermodeView(Context context) {
        super(context);
        init();
    }

    public XfermodeView(Context context, AttributeSet attrs) {
        super(context, attrs);
        init();
    }

    public XfermodeView(Context context, AttributeSet attrs,
                        int defStyleAttr) {
        super(context, attrs, defStyleAttr);
        init();
    }

    private void init() {
        mPaint = new Paint();
        mPaint.setAlpha(0);
        mPaint.setXfermode(
                new PorterDuffXfermode(PorterDuff.Mode.DST_IN));
        mPaint.setStyle(Paint.Style.STROKE);
        mPaint.setStrokeJoin(Paint.Join.ROUND);
        mPaint.setStrokeWidth(50);
        mPaint.setStrokeCap(Paint.Cap.ROUND);
        mPath = new Path();
        mBgBitmap = BitmapFactory.decodeResource(getResources(),
                R.drawable.test);
        mFgBitmap = Bitmap.createBitmap(mBgBitmap.getWidth(),
                mBgBitmap.getHeight(), Bitmap.Config.ARGB_8888);
        mCanvas = new Canvas(mFgBitmap);
        mCanvas.drawColor(Color.GRAY);
    }

    @Override
    public boolean onTouchEvent(MotionEvent event) {
        switch (event.getAction()) {
            case MotionEvent.ACTION_DOWN:
                mPath.reset();
                mPath.moveTo(event.getX(), event.getY());
                break;
            case MotionEvent.ACTION_MOVE:
                mPath.lineTo(event.getX(), event.getY());
                break;
        }
        mCanvas.drawPath(mPath, mPaint);
        invalidate();
        return true;
    }

    @Override
    protected void onDraw(Canvas canvas) {
        canvas.drawBitmap(mBgBitmap, 0, 0, null);
        canvas.drawBitmap(mFgBitmap, 0, 0, null);
    }
}
效果图:
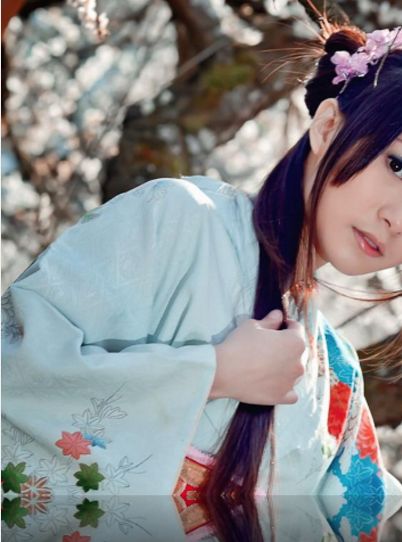
倒影图片效果
ReflectView:
public class ReflectView extends View {
    private Bitmap mSrcBitmap, mRefBitmap;
    private Paint mPaint;
    private PorterDuffXfermode mXfermode;

    public ReflectView(Context context) {
        super(context);
        initRes(context);
    }

    public ReflectView(Context context, AttributeSet attrs) {
        super(context, attrs);
        initRes(context);
    }

    public ReflectView(Context context, AttributeSet attrs,
                       int defStyleAttr) {
        super(context, attrs, defStyleAttr);
        initRes(context);
    }

    private void initRes(Context context) {
        mSrcBitmap = BitmapFactory.decodeResource(getResources(),
                R.drawable.test);
        Matrix matrix = new Matrix();
        matrix.setScale(1F, -1F);
        mRefBitmap = Bitmap.createBitmap(mSrcBitmap, 0, 0,
                mSrcBitmap.getWidth(), mSrcBitmap.getHeight(), matrix, true);

        mPaint = new Paint();
        mPaint.setShader(new LinearGradient(0, mSrcBitmap.getHeight(), 0,
                mSrcBitmap.getHeight() + mSrcBitmap.getHeight() / 4,
                0XDD000000, 0X10000000, Shader.TileMode.CLAMP));
        mXfermode = new PorterDuffXfermode(PorterDuff.Mode.DST_IN);
    }

    @Override
    protected void onDraw(Canvas canvas) {
        canvas.drawColor(Color.BLACK);
        canvas.drawBitmap(mSrcBitmap, 0, 0, null);
        canvas.drawBitmap(mRefBitmap, 0, mSrcBitmap.getHeight(), null);
        mPaint.setXfermode(mXfermode);
        // 绘制渐变效果矩形
        canvas.drawRect(0, mSrcBitmap.getHeight(),
                mRefBitmap.getWidth(), mSrcBitmap.getHeight() * 2, mPaint);
        mPaint.setXfermode(null);
    }
}
效果图:
正弦曲线
SinView:
public class SinView extends SurfaceView
        implements SurfaceHolder.Callback, Runnable {

    private SurfaceHolder mHolder;
    private Canvas mCanvas;
    private boolean mIsDrawing;
    private int x = 0;
    private int y = 0;
    private Path mPath;
    private Paint mPaint;

    public SinView(Context context) {
        super(context);
        initView();
    }

    public SinView(Context context, AttributeSet attrs) {
        super(context, attrs);
        initView();
    }

    public SinView(Context context, AttributeSet attrs, int defStyle) {
        super(context, attrs, defStyle);
        initView();
    }

    private void initView() {
        mHolder = getHolder();
        mHolder.addCallback(this);
        setFocusable(true);
        setFocusableInTouchMode(true);
        this.setKeepScreenOn(true);
        mPath = new Path();
        mPaint = new Paint(Paint.ANTI_ALIAS_FLAG);
        mPaint.setColor(Color.RED);
        mPaint.setStyle(Paint.Style.STROKE);
        mPaint.setStrokeWidth(10);
        mPaint.setStrokeCap(Paint.Cap.ROUND);
        mPaint.setStrokeJoin(Paint.Join.ROUND);
    }

    @Override
    public void surfaceCreated(SurfaceHolder holder) {
        mIsDrawing = true;
        mPath.moveTo(0, 400);
        new Thread(this).start();
    }

    @Override
    public void surfaceChanged(SurfaceHolder holder,
                               int format, int width, int height) {
    }

    @Override
    public void surfaceDestroyed(SurfaceHolder holder) {
        mIsDrawing = false;
    }

    @Override
    public void run() {
        while (mIsDrawing) {
            draw();
            x += 1;
            y = (int) (100*Math.sin(x * 2 * Math.PI / 180) + 400);
            mPath.lineTo(x, y);
        }
    }

    private void draw() {
        try {
            mCanvas = mHolder.lockCanvas();
            // SurfaceView背景
            mCanvas.drawColor(Color.WHITE);
            mCanvas.drawPath(mPath, mPaint);
        } catch (Exception e) {
        } finally {
            if (mCanvas != null)
                mHolder.unlockCanvasAndPost(mCanvas);
        }
    }
}
效果图:
绘图板
SimpleDraw:
public class SimpleDraw extends SurfaceView
        implements SurfaceHolder.Callback, Runnable {

    private SurfaceHolder mHolder;
    private Canvas mCanvas;
    private boolean mIsDrawing;
    private Path mPath;
    private Paint mPaint;

    public SimpleDraw(Context context) {
        super(context);
        initView();
    }

    public SimpleDraw(Context context, AttributeSet attrs) {
        super(context, attrs);
        initView();
    }

    public SimpleDraw(Context context, AttributeSet attrs,
                      int defStyle) {
        super(context, attrs, defStyle);
        initView();
    }

    private void initView() {
        mHolder = getHolder();
        mHolder.addCallback(this);
        setFocusable(true);
        setFocusableInTouchMode(true);
        this.setKeepScreenOn(true);
        mPath = new Path();
        mPaint = new Paint();
        mPaint.setColor(Color.RED);
        mPaint.setStyle(Paint.Style.STROKE);
        mPaint.setStrokeWidth(20);
    }

    @Override
    public void surfaceCreated(SurfaceHolder holder) {
        mIsDrawing = true;
        new Thread(this).start();
    }

    @Override
    public void surfaceChanged(SurfaceHolder holder,
                               int format, int width, int height) {
    }

    @Override
    public void surfaceDestroyed(SurfaceHolder holder) {
        mIsDrawing = false;
    }

    @Override
    public void run() {
        long start = System.currentTimeMillis();
        while (mIsDrawing) {
            draw();
        }
        long end = System.currentTimeMillis();
        // 50 - 100
        if (end - start < 100) {
            try {
                Thread.sleep(100 - (end - start));
            } catch (InterruptedException e) {
                e.printStackTrace();
            }
        }
    }

    private void draw() {
        try {
            mCanvas = mHolder.lockCanvas();
            mCanvas.drawColor(Color.WHITE);
            mCanvas.drawPath(mPath, mPaint);
        } catch (Exception e) {
        } finally {
            if (mCanvas != null)
                mHolder.unlockCanvasAndPost(mCanvas);
        }
    }

    @Override
    public boolean onTouchEvent(MotionEvent event) {
        int x = (int) event.getX();
        int y = (int) event.getY();
        switch (event.getAction()) {
            case MotionEvent.ACTION_DOWN:
                mPath.moveTo(x, y);
                break;
            case MotionEvent.ACTION_MOVE:
                mPath.lineTo(x, y);
                break;
            case MotionEvent.ACTION_UP:
                break;
        }
        return true;
    }
}
效果图:
更多内容戳这里(整理好的各种文集)


