centos安装部署Swarm Bee V0.5.3教程
创建目录
 mkdir -p /mnt/bee
 cd /mnt/bee
1.首先jq安装:
yum install -y jq
2.下载bee和bee-clef安装包:
wget https://github.com/ethersphere/bee/releases/download/v0.5.3/bee_0.5.3_amd64.rpm

wget https://github.com/ethersphere/bee-clef/releases/download/v0.4.9/bee-clef_0.4.9_amd64.rpm
国内下载地址:
wget http://47.113.226.225/bee/bee_0.5.3_amd64.rpm
wget http://47.113.226.225/bee/bee-clef_0.4.9_amd64.rpm
wget http://47.113.226.225/bee/cashout.sh
3.先安装bee-clef:
sudo rpm -i bee-clef_0.4.9_amd64.rpm
再安装bee:
sudo rpm -i bee_0.5.3_amd64.rpm
4.安装完成后,输入命令 获取自己的钱包地址
sudo bee-get-addr
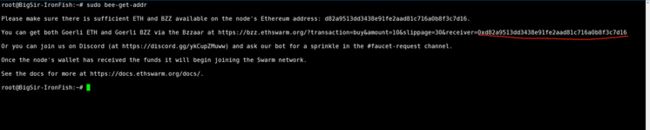
5.拿到自己的钱包地址0xd82a9513dd3438e91fe2aad81c716a0b8f3c7d16(上图红线部分)去水龙头接水,推荐使用官方的discord中#faucet-request频道接水:
接水教程:https://www.yundongfang.com/Yun41872.html
6.在区块浏览器
https://goerli.etherscan.io/address/0xd82a9513dd3438e91fe2aad81c716a0b8f3c7d16
中看到自己的地址已经领到了10个gBZZ:
7.注册一个swap-endpoint地址:https://infura.io
注册视频教程:https://www.bilibili.com/video/BV1EV411Y7yM
第7分钟开始看。
拿到Goerli的的swap-endpoint地址:https://goerli.infura.io/v3/*********
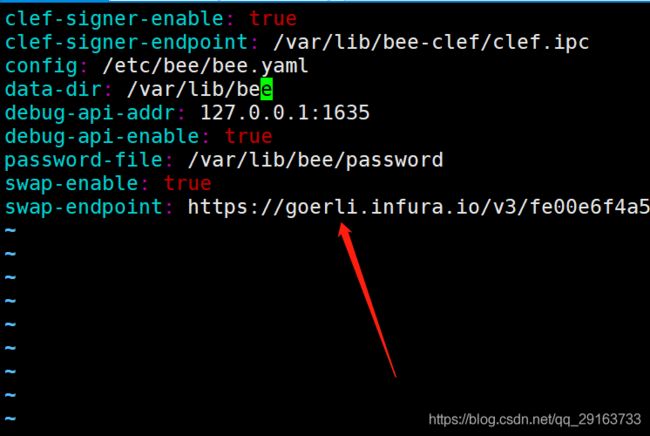
8.编辑bee.yaml
sudo vi /etc/bee/bee.yaml
按一下键盘上的i,找到swap-endpoint 替换为步骤7中的swap-endpoint地址:
之后按一下键盘上的ESC按键,接着按键盘上冒号输入wq,然后按回车键保存成功。
配置文件的文本内容如下:
clef-signer-enable: true
clef-signer-endpoint: /var/lib/bee-clef/clef.ipc
config: /etc/bee/bee.yaml
data-dir: /var/lib/bee
debug-api-addr: 127.0.0.1:1635
debug-api-enable: true
password-file: /var/lib/bee/password
swap-enable: true
swap-endpoint: https://goerli.infura.io/v3/fe00e6f4a50b4a2********
9.启动bee
权限设置
sudo chown -R bee:bee /var/lib/bee
启动bee:
sudo systemctl start bee
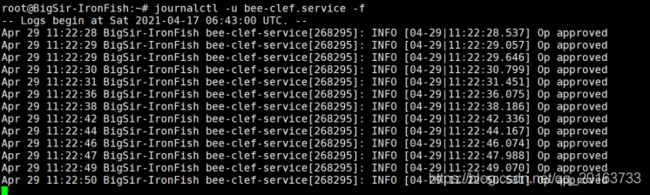
查看bee-clef日志
journalctl -u bee-clef -f
查看bee日志
journalctl -u bee -f

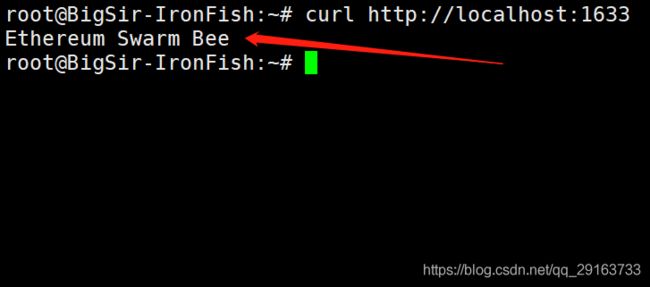
10.查看信息
查看连接bee状态
curl http://localhost:1633
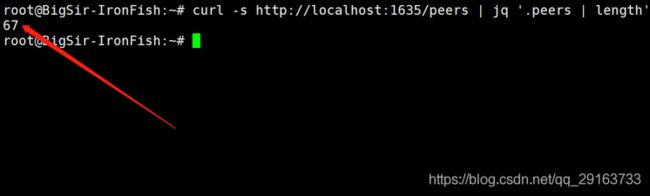
查看连接的对等节点数
curl -s http://localhost:1635/peers | jq '.peers | length'
查看自己的钱包地址
curl -s localhost:1635/addresses | jq .ethereum
查看自己的支票合约账本地址
curl -s http://localhost:1635/chequebook/address | jq .chequebookaddress
查看看票据
curl localhost:1635/chequebook/cheque | jq
11.提取支票操作
下载cashout.sh脚本并赋予执行权限(全部复制下面内容)
wget -O cashout.sh https://gist.githubusercontent.com/ralph-pichler/3b5ccd7a5c5cd0500e6428752b37e975/raw/b40510f1172b96c21d6d20558ca1e70d26d625c4/cashout.sh && chmod +x cashout.sh
由于脚本中默认提取的支票价值最小是1 GBZZ,所以即使有支票也很难达到提取阈值,这里我们稍微修改下提取的最小价值:
sudo vim cashout.sh
按一下键盘上的i,把MIN_AMOUNT改为10000
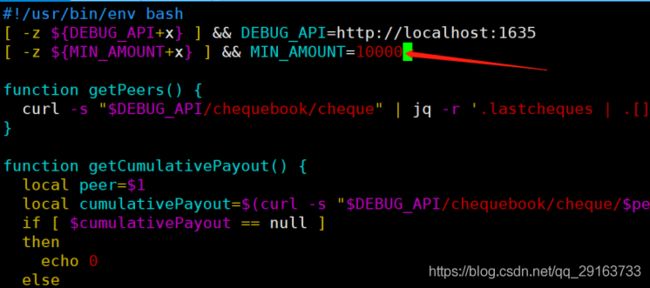
之后按一下键盘上的ESC按键,接着按键盘上冒号输入wq,然后按回车键保存成功。
添加权限
chmod 777 cashout.sh
查看是否有支票
./cashout.sh

目前没有支票,如果上图有返回数据,执行支票提取
./cashout.sh cashout-all

有用的命令
查看bee-clef 和 bee 启动状态
sudo systemctl status bee-clef
sudo systemctl status bee
启动命令需要按照顺序执行,先启动bee-clef 在启动bee
sudo systemctl start bee-clef
sudo systemctl start bee
停止运行
sudo systemctl stopbee
sudo systemctl stop bee-clef
查看bee-clef日志和bee日志
journalctl -u bee-clef -f
journalctl -u bee -f