Django 使用 Haystack 实现检索功能
全文检索和搜索引擎原理
搜索需求
- 当用户再搜索框中输入关键字后,我们要为用户提供相关的搜索结果
搜索实现
- django 中是使用 icontains 去模糊匹配,但是底层会转换成 like 去查询
- 但是 like 关键字的效率很低,如果数据库中有百万计数据,那么 like 查询是很慢的
- 如果查询需要在多个字段中进行,使用 like 关键字也不是很方便
全文搜索方案
- 引入全文检索的方案来实现商品搜索
- 即在指定的任意字段中进行检索查询
- 全文检索需要配合搜索引擎来实现(elasticsearch、solr、whoosh)
搜索引擎原理
-
搜索引擎进行全文搜索时,会对数据库中的数据进行一遍预处理,单独建立起一份索引目录结构
-
目录结构类似于每本书的索引页,里面包含了关键词与词条的对应关系,并记录位置
-
在进行全文检索时,将关键字在索引数据中进行快速对比查找,进而找到数据的存储位置
示例:

1.杯子碰到一起                         关键词:杯子、

2.杯子里面是一杯白开水         关键词:杯子、白开水

3.杯子碎了                                关键词:杯子、碎了

4.玻璃碎了                                 关键词:玻璃、碎了

进行搜索:

杯子-----对应的结果就是 1、2、

碎了-----对应的结果就是 3、4

......
ElasticSearch 介绍
实现全文检索时,首选的就是 ElasticSearch
- 一个 java 实现的开源搜索引擎
- 可以快速的实现储存、搜索和分析海量数据
- ElasticSearch 的底层时开源库 Lucene,必须写代码去调用它的接口
分词说明
- 在对数据构建索引时,需要分词处理
- 分词是指将一句话拆解多个单字或词,这些词便是这句话的关键词(上面有示例)
- ElasticSearch 不支持对中文进行分词建立索引,需要配合扩展 Elasticsearch-analysis-ik
来实现中文分词处理
ElasticSearch 安装
这里采用 docker 安装。
因为ElasticSearch 不支持中文分词,所以要安装他的扩展插件 elasticsearch-ik
拉取镜像:docker pull elasticsearch-ik:2.4.6-1.0
运行:docker run -itd --name es -p 9200:9200 delron/elasticsearch-ik:2.4.6-1.0
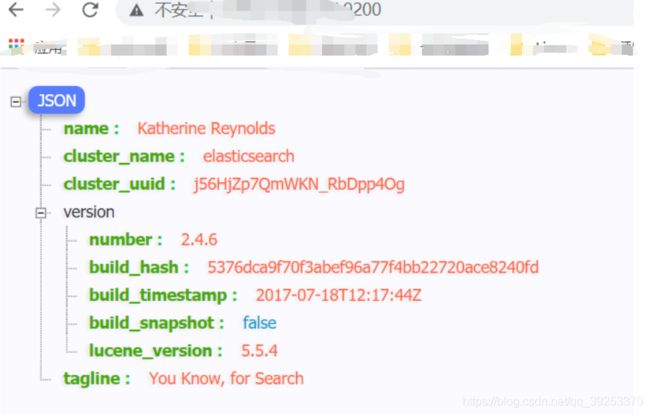
出现如下页面说明 elasticsearch 运行成功:
Haystack介绍和安装
有了搜索引擎了,如何在项目中去对接使用呢?这就用到了 haystack
haystack介绍
haystack 是在 django 中对接搜索引擎的框架,搭建了用户和搜索引擎之间的桥梁,可以使用它来调用Elasticsearch
haystack 可以在不修改代码的情况下使用不同的搜索后端(elasticsearch、solr、whoosh),只需要在配置文件中配置即可
haystack安装
pip install django-haystack

pip install elasticsearch==2.4.1
haystack注册
INSTALL_APPS = [
...
'haystack', # 检索
...
]
haystack配置
官网网址:https://django-haystack.readthedocs.io/en/v2.8.1/tutorial.html
配置搜索引擎 这里使用 elasticsearch:
# 配置搜索引擎 这里使用 elasticsearch
HAYSTACK_CONNECTIONS = {

    'default': {

        'ENGINE': 'haystack.backends.elasticsearch_backend.ElasticsearchSearchEngine',
        'URL': 'http://ip:9200/',
        'INDEX_NAME': 'haystack',
    },
}
安装上述两个包时 windows 下可能会有以下报错:
错误一:
ImportError: cannot import name 'six' from 'django.utils'

将 sit-packages/six.py   拷贝到 django/utils 下

解决方案:

from django.utils import six

将所有上述导入方式改为下面的这种方式:

import six
错误二:
ImportError: cannot import name 'python_2_unicode_compatible' from 'django.utils.encoding' :
# from django.utils.encoding import force_text, python_2_unicode_compatible 注释这个=,改为下面的
from six import python_2_unicode_compatible
错误三:
TypeError: Unknown option(s) for clear_index command: batchsize, workers. Valid options are: commit, force_color, help, interactive, no_color, nocommit, noinput, pythonp
ath, settings, skip_checks, stderr, stdout, traceback, using, verbosity, version.
解决方案:
原因是安装的 django-haystack 不支持 django3.x 需要安装2.8及以上
pip install setuptools_scm
pip install django-haystack==2.8.1 -i https://mirrors.cloud.aliyuncs.com/pypi/simple/
在app应用下创建一个 search_indexes.py 文件,必须叫这个名字。
# search_indexes.py
from haystack import indexes

from gongyequ.models import SurveyItem


class SurveyItemIndex(indexes.SearchIndex, indexes.Indexable):
    text = indexes.CharField(document=True, use_template=True)

    def get_model(self):
        return SurveyItem

    def index_queryset(self, using=None):
        return self.get_model().objects.all()

document=True: 字段名,所有需要索引的字段,一般命名为 text
use_temlate: 允许单独设置一个文件,来指定字段进行检索
    单独的文件怎么设置:模板文件夹下(templates)/search/indexes/application(应用名称)/模型类名小写_text.txt
运行 haystack
上面我们将数据准备好之后,怎么交给搜索引擎呢?
执行流程:数据(定义的search_indexes) ------ haystack --------------- elasticsearch
运行一条命令:
python manager.py rebuild_index(构建索引) 或 python manage.py update_index 更新索引

另外:RealtimeSignalProcessor自动为您处理更新/删除。
settings.py 配置如下:
    HAYSTACK_SIGNAL_PROCESSOR = 'haystack.signals.RealtimeSignalProcessor' # 这样每次数据库改变是会自动更新索引
看到下面两个说明索引数据结构创建成功了,注意:404不是网页找不到的意思,这里表示是成功。
搜索
from haystack.views import SearchView
from django.shortcuts import HttpResponse

class GongyequSearch(SearchView):

    def create_response(self):  # 重写此方法,因为原方法返回的是一个 template 模板,这里我们要以 json 的方式返回
        context = self.get_context()
        for item in context.get('page').object_list:
            print(item.object.name)
            print(item.object.city)

        return HttpResponse('ok')
配置每页的数量,默认20条:
HAYSTACK_SEARCH_RESULTS_PER_PAGE = 10
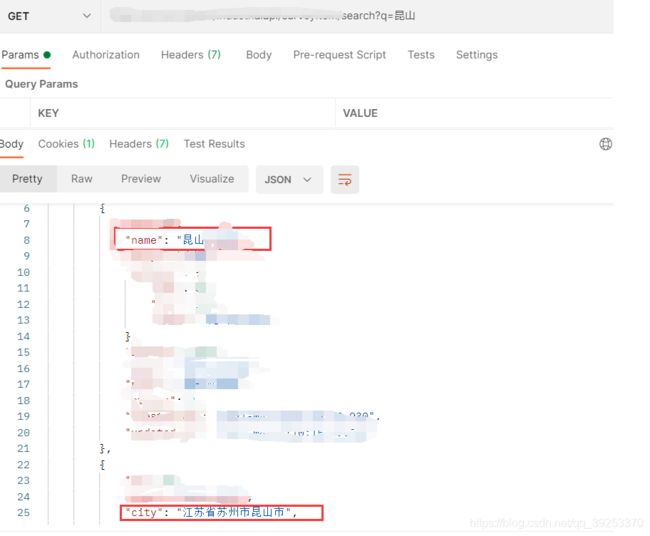
使用 postman 测试:
参考文献
django-haystack :https://django-haystack.readthedocs.io/en/v2.8.1/tutorial.html
haystack + Whoosh :https://alexyanglong.github.io/2018/08/02/Django----%E4%BD%BF%E7%94%A8Haystack+Whoosh%E9%85%8D%E7%BD%AE%E5%85%A8%E6%96%87%E6%90%9C%E7%B4%A2/#%E4%BF%AE%E6%94%B9%E6%90%9C%E7%B4%A2%E5%BC%95%E6%93%8E%E4%B8%BA%E4%B8%AD%E6%96%87%E5%88%86%E8%AF%8D


