Ubuntu18.04安装Fabric和部署链代码------1
Ubuntu18.04安装Fabric和部署链代码
1 Ubuntu18.04部署
参考博客:
https://blog.csdn.net/weixin_44001521/article/details/106469831
1.1 配置源
①配置阿里镜像源
首先进行配置文件的备份
sudo cp /etc/apt/sources.list /etc/apt/sources.list.bak
编辑配置文件
sudo vim /etc/apt/sources.list
之前的源可以注释掉
在配置文件最后添加一下内容:
deb http://mirrors.aliyun.com/ubuntu/ bionic main restricted universe multiverse
deb http://mirrors.aliyun.com/ubuntu/ bionic-security main restricted universe multiverse
deb http://mirrors.aliyun.com/ubuntu/ bionic-updates main restricted universe multiverse
deb http://mirrors.aliyun.com/ubuntu/ bionic-proposed main restricted universe multiverse
deb http://mirrors.aliyun.com/ubuntu/ bionic-backports main restricted universe multiverse
deb-src http://mirrors.aliyun.com/ubuntu/ bionic main restricted universe multiverse
deb-src http://mirrors.aliyun.com/ubuntu/ bionic-security main restricted universe multiverse
deb-src http://mirrors.aliyun.com/ubuntu/ bionic-updates main restricted universe multiverse
deb-src http://mirrors.aliyun.com/ubuntu/ bionic-proposed main restricted universe multiverse
deb-src http://mirrors.aliyun.com/ubuntu/ bionic-backports main restricted universe multiverse
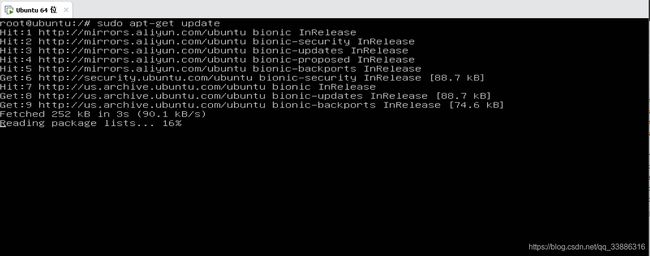
执行命令更新一下
sudo apt-get update
1.2 安装cURL
sudo apt install curl
1.3 安装Git
sudo apt-get install git
1.4 安装Go
下载16.4安装包
wget https://studygolang.com/dl/golang/go1.16.4.linux-amd64.tar.gz
解压安装
sudo tar -C /usr/local -zxf go1.16.4.linux-amd64.tar.gz
配置环境变量
// 以下方式选择一种
// 系统环境变量
vim ~/.bashrc
或gedit  ~/.bashrc
// 用户环境变量
vim /etc/profile
或gedit  /etc/profile
在文件最后添加以下内容
export PATH=$PATH:/usr/local/go/bin
export GOROOT=/usr/local/go
export GOPATH=$HOME/go
export PATH=$PATH:$GOPATH/bin
更新配置文件
source ~/.bashrc
查看go语言是否安装成功
go version
Go1.13以上配置代理
sudo gedit /etc/profile
#针对go1.13.x及以上用户
export GO111MODULE=on
export GOPROXY=https://goproxy.cn,direct
source /etc/profile
1.5 安装Python
安装python3.7
sudo apt install python3.7
设置python3为默认
sudo update-alternatives --install /usr/bin/python python /usr/bin/python3 150
安装pip3
sudo apt install python3-pip
设置pip3默认
sudo update-alternatives --install /usr/bin/pip pip /usr/bin/pip3 150
更新pip
pip install --upgrade pip
更改为阿里源
cd ~
mkdir .pip
cd ~/.pip
touch pip.conf
vim pip.conf

写入
[global]
trusted-host=mirrors.aliyun.com
index-url=https://mirrors.aliyun.com/pypi/simple/
1.6 安装Node
安装最新版node
curl -sL https://deb.nodesource.com/setup_14.x | sudo -E bash -
sudo apt install nodejs -y
安装npm
sudo apt install npm -y
sudo npm install npm@latest -g
可安装淘宝镜像
npm install -g cnpm --registry=https://registry.npm.taobao.org
1.7 安装Docker-CE
卸载旧版本docker
sudo apt-get remove docker docker-engine docker.io
添加HTTPS协议,允许apt从HTTPS安装软件包
sudo apt-get -y install apt-transport-https ca-certificates curl software-properties-common

安装GPG证书
curl -fsSL http://mirrors.aliyun.com/docker-ce/linux/ubuntu/gpg | sudo apt-key add -

写入软件源信息
sudo add-apt-repository "deb [arch=amd64] http://mirrors.aliyun.com/docker-ce/linux/ubuntu $(lsb_release -cs) stable"

更新并安装Docker-CE
sudo apt-get -y update
sudo apt-get -y install docker-ce

将当前用户添加到Docker用户组
1.创建docker用户组
sudo groupadd docker
2.将当前用户添加到docker用户组
sudo usermod -aG docker $USER
3.退出当前终端
Exit

将docker镜像更改为国内镜像
编辑daemon.json文件,如果没有该文件自行创建
sudo vim /etc/docker/daemon.json

文件中添加以下内容
{

"registry-mirrors":["https://obou6wyb.mirror.aliyuncs.com","https://registry.docker-cn.com","http://hub-mirror.c.163.com"]
}

最后重启服务
sudo systemctl daemon-reload
sudo systemctl restart docker

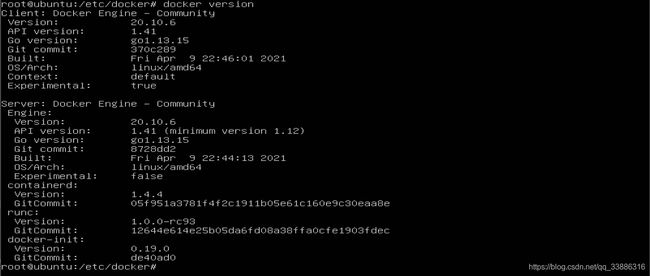
查看docker版本,看是否安装成功
docker version
1.8 安装Docker-Compose
安装Docker-Compose
方法一:
sudo curl -L https://github.com/docker/compose/releases/download/1.24.0/docker-compose-`uname -s`-`uname -m` -o /usr/local/bin/docker-compose
或
sudo curl -L https://get.daocloud.io/docker/compose/releases/download/1.24.0/docker-compose-`uname -s`-`uname -m` > /usr/local/bin/docker-compose

用方法一下载完后要设置权限
sudo chmod +x /usr/local/bin/docker-compose

方法二(本人使用的方法):
sudo apt-get install python-pip
sudo pip install docker-compose
出现错误可更新pip版本
pip install --upgrade pip

下载完成后查看是否安装成功
docker-compose version
1.9 Fabric安装运行
1.9.1 Fabric环境部署
最新版本2.3
创建文件夹
mkdir -p go/src/github.com/hyperledger

进入刚刚创建的文件夹内
cd go/src/github.com/hyperledger

从github上拉取fabric的源码
git clone "https://github.com/hyperledger/fabric.git"

编译二进制文件
make release

查看生成的二进制文件
cd release/linux-amd64/bin
ls

如果文件夹中有以下文件说明编译成功
1.9.2 添加环境变量
vim ~/.profile
在文件最后添加以下内容
export PATH=$PATH:$GOPATH/src/github.com/hyperledger/fabric/release/linux-amd64/bin
更新配置文件
source ~/.profile

将刚刚bin文件夹中的两个证书复制到$GOPATH/bin中
cp cryptogen $GOPATH/bin
cp configtxgen $GOPATH/bin

拉取fabric镜像全部最新(这点一定注意不然后面报错)
一定要下对应版本的最新镜像 比如这里是2.3
docker pull hyperledger/fabric-peer:2.3
docker pull hyperledger/fabric-tools:2.3
docker pull hyperledger/fabric-orderer:2.3
docker pull hyperledger/fabric-javaenv:2.3
docker pull hyperledger/fabric-ccenv:2.3
docker pull hyperledger/fabric-baseos:2.3
docker pull hyperledger/fabric-ca:1.5
docker pull hyperledger/fabric-zookeeper:0.4
docker pull hyperledger/fabric-kafka:0.4
docker pull hyperledger/fabric-couchdb:0.4
docker pull hyperledger/fabric-baseimage:0.4
docker pull hyperledger/fabric-membersrvc:latest
docker pull library/busybox:latest

为了方便配置Docker Compose,将所有镜像的tag都改为latest,执行如下格式的命令:
docker tag IMAGEID(镜像ID) REPOSITORY:TAG(仓库:标签)
例如:
docker tag 1e8e82ab49af hyperledger/fabric-peer:latest
docker tag a206a1593b4c hyperledger/fabric-tools:latest
docker tag 12f8ed297e92 hyperledger/fabric-orderer:latest
docker tag 673235d3d895 hyperledger/fabric-javaenv:latest
docker tag 627c556b15ca hyperledger/fabric-ccenv:latest
docker tag fb85a21d6642 hyperledger/fabric-baseos:latest
docker tag 9d0214fb481b hyperledger/fabric-zookeeper:latest
docker tag e94a8ade54af hyperledger/fabric-kafka:latest
docker tag 339050a439e7 hyperledger/fabric-couchdb:latest
docker tag 50758b890fb9 hyperledger/fabric-baseimage:latest
docker tag 24a7c19a9fd8 hyperledger/fabric-ca:latest

将标签全部更改完后,再次查看镜像库
docker images
开启Docker
sudo systemctl start docker
设置docker开机启动
sudo systemctl enable docker
镜像删除
1.停用全部运行中的容器:
docker stop `docker ps -a -q`
2.删除所有镜像
docker rmi `docker images -q`
1.9.3 安装jq
Optional: Install the latest version of jq if it is not already installed (only required for the tutorials related to channel configuration transactions).

sudo apt-get install jq
1.9.4 安装Fabric-CA
cd $GOPATH/src/github.com/hyperledger/
git clone "https://hub.fastgit.org/hyperledger/fabric-ca.git"
cd fabric-ca
编译
make release
最终我们得到这些程序
configtxlator
cryptogen
discover
idemixgen
orderer
osnadmin
peer
fabric-ca-client
fabric-ca-server
下一篇博客Fabric官方链代码案例部署运行


