本文基于《Spring实战(第4版)》所写。
Spring MVC起步
Spring将请求调度Servlet、处理器映射(handler mapping)、控制器以及视图解析器(view resolver)之间移动。
跟踪Spring MVC的请求
Web请求从离开浏览器开始到获取响应返回,它会经历好多站,每站都会留下一些信息同时带上其他信息。
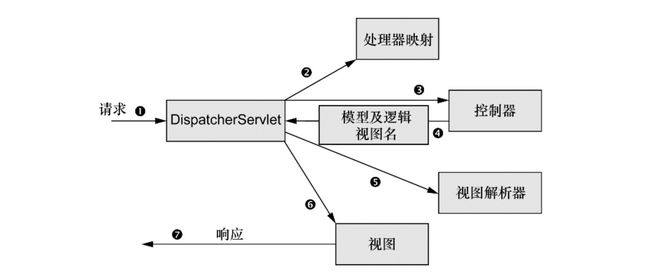
请求带着URL以及其他信息离开浏览器后,第一站是Spring的DispatcherServlet(前端控制器)。它的任务将请求发送给Spring MVC控制器。由于可能有多个控制器,DispatcherServlet会查询一个或多个处理器映射来确定请求的下一站,处理器映射会根据URL信息来决策。选择合适的控制器后,DispatcherServlet将请求发送给选中的控制器。到了控制器,它会处理请求带来的信息。
控制器处理完成后,会将模型数据打包,并且标示出用于渲染输出的视图名。它接下来将请求连同模型和视图名发送回DispatcherServlet,目的是解耦。传递给DispatcherServlet的视图名并不直接标示某个特定的JSP。它仅仅传递了一个逻辑名称,用来查找产生结果的真正视图。DispatcherServlet将会使用视图解析器来将逻辑视图名匹配为一个特定的视图实现(可能是JSP)。
DispatcherServlet的最后一站是视图的实现(可能是JSP),在这里它交付模型数据。视图将使用模型数据渲染输出,通过响应对象传递给客户端。
搭建Spring MVC
首先配置DispatcherServlet,它是Spring MVC的核心。如果按传统方式,DispatcherServlet会配置在web.xml中。另一种方式可以将DispatcherServlet配置在Servlet容器中。
package spittr.config;

import org.springframework.web.servlet.support.AbstractAnnotationConfigDispatcherServletInitializer;

public class SpittrWebAppInitializer extends AbstractAnnotationConfigDispatcherServletInitializer {

    @Override
    protected Class[] getRootConfigClasses() {
        return new Class[] { RootConfig.class };
    }

    @Override   // 指定配置类
    protected Class[] getServletConfigClasses() {
        return new Class[] { WebConfig.class };
    }

    @Override   // 将DispatcherServlet映射到“/”
    protected String[] getServletMappings() {
        return new String[]{ "/"};
    }
}
我们需要知道的是AbstractAnnotationConfigDispatcherServletInitializer的任意类都会自动地配置DispatcherServlet和Spring应用上下文,Spring的应用上下文会位于应用程序的Servlet上下文中。
AbstractAnnotationConfigDispatcherServletInitializer剖析
在Servlet3.0环境中,容器会在类路径中查找实现javax.servlet.ServletContainerInitializer接口的类,如果能发现的话,就会用它来配置Servlet容器。
Spring提供了这个接口的实现,名为SpringServletContainerInitializer,这个类反过来又会查找实现WebApplicationInitializer的类并将配置的任务交给它们来完成。Spring3.2引入了一个便利的WebApplicationInitializer基础实现,也就是AbstractAnnotationConfigDispatcherServletInitializer。因为我们的SpittrWebAppInitializer扩展了AbstractAnnotationConfigDispatcherServletInitializer(同时也就实现了WebApplicationInitializer),因此当部署到Servlet3.0容器中的时候,容器会自动发现它,并用它来配置Servlet上下文。
在本例中,SpittrWebAppInitializer重新了三个方法。
第一个方法是getServletMappings(),它会将一个或多个路径映射到DispatcherServlet上。本例中,它映射的是“/”,这表示它会是应用的默认Servlet。它会处理进入应用的所有请求。
为了理解其他的两个方法,首先要理解DispatcherServlet和一个Servlet监听器(也就是ContextLoaderListener)的关系。
当DispatcherServlet启动时,它会创建Spring应用上下文,并加载配置文件或配置类中所声明的bean。在代码中的getServletConfigClasses()方法中,我们要求DispatcherServlet加载应用上下文时,使用定义在WebConfig配置类(使用Java配置)中的bean。
但是在Spring Web应用中,通常还会有另外一个应用上下文。另外的这个应用上下文是由ContextLoaderListener创建的。
我们希望DispatcherServlet加载包含Web组件的bean,如控制器、视图解析器以及处理器映射,而ContextLoaderListener要加载应用中的其他bean。这些bean通常是驱动应用后端的中间层和数据层组件。
实际上,AbstractAnnotationConfigDispatcherServletInitializer会同时创建
DispatcherServlet和ContextLoaderListener。getServletConfigClasses()方法返回的带有@Configuration注解的类将会用来定义DispatcherServlet应用上下文中的bean。getRootConfigClasses()方法返回的带有@Configuration注解的类将会用来配置ContextLoaderListener创建的应用上下文中bean。
在本例中,根配置定义在RootConfig中,DispatcherServlet的配置声明在WebConfig中。
如果按照这种方式配置DispatcherServlet,它只能部署到支持Servlet 3.0的服务器中才能正常工作,如Tomcat 7或更高版本。
启动Spring MVC
启动Spring MVC组件的方法也不仅一种。除了传统的XML配置,还可选择基于Java进行配置。
package spittr.config;

import org.springframework.context.annotation.Bean;
import org.springframework.context.annotation.ComponentScan;
import org.springframework.context.annotation.Configuration;
import org.springframework.web.servlet.ViewResolver;
import org.springframework.web.servlet.config.annotation.DefaultServletHandlerConfigurer;
import org.springframework.web.servlet.config.annotation.EnableWebMvc;
import org.springframework.web.servlet.config.annotation.WebMvcConfigurerAdapter;
import org.springframework.web.servlet.view.InternalResourceViewResolver;

@Configuration
@ComponentScan("spittr.web") // 启动组件扫描
@EnableWebMvc   // 启动spring mvc
public class WebConfig extends WebMvcConfigurerAdapter{

    @Bean
    public ViewResolver viewResolver(){   // 配置jsp视图解析器
        InternalResourceViewResolver resolver = new InternalResourceViewResolver();
        resolver.setPrefix("/views/");
        resolver.setSuffix(".jsp");
        resolver.setExposeContextBeansAsAttributes(true);
        return resolver;
    }

    // 配置静态资源的处理
    @Override
    public void configureDefaultServletHandling(DefaultServletHandlerConfigurer configurer) {
        configurer.enable();
    }
}
程序中第一件需要注意的事情就是WebConfig添加了@ComponentScan注解,因此将会扫描spitter.web包来查找组件。
接下来,添加了viewResolver bean,表示配置视图解析器。如果没有配置,则Spring默认会使用BeanNameViewResolver,这个视图解析器会查找ID与视图名称匹配的bean,并且查找的bean要实现View接口。而InternalResourceViewResolver会查找JSP文件,在查找的时候,它会在视图名称上加一个特定的前缀和后缀。
最后,新的WebConfig类还扩展了WebMvcConfigurerAdapter并重写了其configureDefaultServletHandling()方法。通过调用DefaultServletHandlerConfigurer的enable()方法,我们要求DispatcherServlet将对静态资源的请求转发到Servlet容器中默认的Servlet上,而不是使用DispatcherServlet本身来处理此类请求。
WebConfig已经就绪,下面来看RootConfig
package spittr.config;

import org.springframework.context.annotation.ComponentScan;
import org.springframework.context.annotation.ComponentScan.Filter;
import org.springframework.context.annotation.Configuration;
import org.springframework.context.annotation.FilterType;

import org.springframework.web.servlet.config.annotation.EnableWebMvc;

@Configuration
@ComponentScan(basePackages = {"spittr"},
        excludeFilters = {@Filter(type = FilterType.ANNOTATION, value = EnableWebMvc.class)})
public class RootConfig {
}
我们基本已经可以使用Spring MVC构建Web应用了。
编写基本的控制器
在Spring MVC中,控制器只是方法上添加了@RequestMapping注解的类,这个注解声明了它们所要处理的请求。
下面是简单的HomeController控制器
package spittr.web;

import org.springframework.stereotype.Controller;
import org.springframework.web.bind.annotation.RequestMapping;
import static org.springframework.web.bind.annotation.RequestMethod.GET;

@Controller   // 声明为一个控制器
public class HomeController {
    @RequestMapping(value = "/",method = GET)  // 处理对“/”的GET请求
    public String home(){
        return "home";   // 视图名为 home
    }
}
@Controller是一个构造型(stereotype)的注解,它基于@Component注解。在这里,它的目的就是辅助实现组件扫描。因为HomeController带有
@Controller注解,因此组件扫描器会自动找到HomeController,并将其声明为Spring应用上下文中的一个bean。其实也可用@Component,但在表意性上可能会差一些,无法确定HomeController是什么组件类型。
HomeController的home()方法带有@RequestMapping注解。它的value属性指定了这个方法所要处理的请求路径,method属性细化了它所要处理的HTTP方法。在本例中,当收到对“/”的HTTP GET请求时,就会调用home()方法。
home()方法其实只是返回了一个String类型的“home”。这个String将会被Spring MVC解读为要渲染的视图名称。DispatcherServlet会要求视图解析器将这个逻辑名称解析为实际的视图。
鉴于我们配置InternalResourceViewResolver的方式,视图名“home”将会解析为“/views/home.jsp”路径的JSP。下面来定义home.jsp
<%@ taglib uri="http://java.sun.com/jsp/jstl/core" prefix="c" %>
<%@ page contentType="text/html;charset=UTF-8" language="java" session="false"%>
Spittr
" />
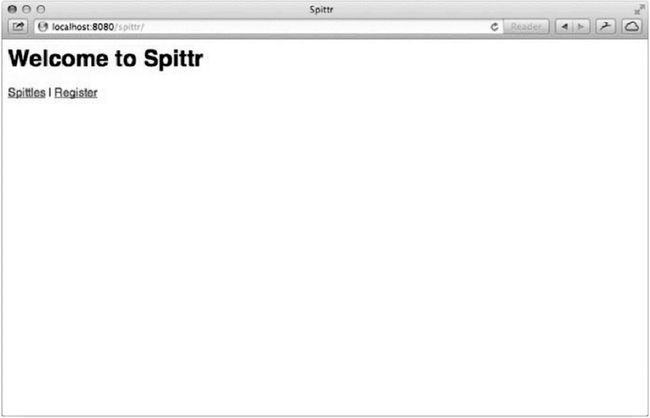
Welcome to Spittr
">Spittles |
">Register
结果显示一个简单的jsp
测试控制器
我们可以编写一个简单的类来测试HomeController,
package spittr.web;

import org.junit.Test;
import static org.junit.Assert.assertEquals;

public class HomeControllerTest {
    @Test
    public void testHomePage() throws Exception {
        HomeController controller = new HomeController();
        assertEquals("home", controller.home());
    }
}
这个测试没有断言当接收到针对“/”的GET请求时会调用home()方法。
从Spring 3.2开始,我们可以按照控制器的方式来测试Spring MVC中的控制器了,就是使用mock Spring MVC测试。
package spittr.web;

import org.junit.Test;
import static org.springframework.test.web.servlet.request.MockMvcRequestBuilders.*;
import static org.springframework.test.web.servlet.result.MockMvcResultMatchers.*;
import static org.springframework.test.web.servlet.setup.MockMvcBuilders.*;
import org.springframework.test.web.servlet.MockMvc;

public class HomeControllerTest {
    @Test
    public void testHomePage() throws Exception {
        HomeController controller = new HomeController();
        MockMvc mockMvc =standaloneSetup(controller).build();  // 搭建MockMvc
        mockMvc.perform(get("/")).   // 对"/"执行GET请求
                andExpect(view().name("home"));  // 预期得到home视图
    }
}
定义类级别的请求处理
我们可以拆分@RequestMapping,并将其路径映射部分放到类级别上。
package spittr.web;

import org.springframework.stereotype.Controller;
import org.springframework.web.bind.annotation.RequestMapping;
import static org.springframework.web.bind.annotation.RequestMethod.GET;

@Controller
@RequestMapping("/")  // 将控制器映射到"/"
public class HomeController {
    @RequestMapping(method = GET)  // 处理GET请求
    public String home(){
        return "home";   // 视图名为 home
    }
}
当控制器在类级别上添加@RequestMapping注解时,这个注解会应用到控制器的所有处理器方法上。处理器方法上的@RequestMapping注解会对类级别上的@RequestMapping的声明进行补充。
我们还可以将它映射到对“/homepage”的请求
@Controller
@RequestMapping({"/","/homepage"})
public class HomeController {
   ...
}
传递模型数据到视图中
我们需要有一个页面展现最近提交的Spittle列表。因此,我们需要一个新的方法来处理这个页面。
首先,需要定义一个数据访问的Repository。为了实现解耦以及避免陷入数据库访问的细节之中,我们将Repository定义为一个接口,并在稍后实现它。
package spittr.data;
import spittr.model.Spittle;
import java.util.List;

public interface SpittleRepository {
    List findSpittles(long max, int count);
}
为了获得最新的20个Spittle对象,我们可以这样调用findSpittles():
List recent = spittleRepository.findSpittles(Long.MAX_VALUE, 20);
下面实现Spittle类
package spittr.model;

import java.util.Date;
import  org.apache.commons.lang3.builder.EqualsBuilder;
import  org.apache.commons.lang3.builder.HashCodeBuilder;

public class Spittle {
    private final Long id;
    private final String message;
    private final Date time;
    private Double latitude;
    private Double longitude;

    public Spittle(String message,Date time){
        this(message, time, null, null);
    }

    public Spittle(String message,Date time, Double longitude, Double latitude){
        this.id = null;
        this.message = message;
        this.time = time;
        this.longitude = longitude;
        this.latitude = latitude;
    }

    public long getId(){
        return id;
    }

    public String getMessage(){
        return message;
    }

    public Date getTime() {
        return time;
    }

    public Double getLatitude() {
        return latitude;
    }

    public Double getLongitude() {
        return longitude;
    }

    @Override
    public boolean equals(Object that){
        return EqualsBuilder.reflectionEquals(this,that,"id", "time");
    }

    @Override
    public int hashCode(){
        return HashCodeBuilder.reflectionHashCode(this,"id", "time");
    }
}
然后我们可以编写测试方法。
@Test
public void shouldShowRecentSpittles() throws Exception{
    List expectedSpittles = createSpittleList(20);
    SpittleRepository mockRepository = mock(SpittleRepository.class);
    when(mockRepository.findSpittles(Long.MAX_VALUE, 20)).thenReturn(expectedSpittles);

    SpittleController controller = new SpittleController(mockRepository);
    MockMvc mockMvc = standaloneSetup(controller).setSingleView(new InternalResourceView("/views/spittles.jsp")).build();
    mockMvc.perform(get("/spittles"))   // 对“/spittles”发起GET请求
                .andExpect(view().name("spittles"))
                .andExpect(model().attributeExists("spittleList"))
                .andExpect(model().attribute("spittleList",hasItems(expectedSpittles.toArray())));
}

....

private List createSpittleList(int count){
    List spittles = new ArrayList();
    for(int i = 0; i < count; i++){
       spittles.add(new Spittle("Spittle " + i, new Date()));
    }
   return spittles;
}
需要注意的是,这个测试在MockMvc构造器上调用了setSingleView()。这样的话,mock框架就不用解析控制器中的视图名了。这个场景下,如果不用这种方式,按照默认的视图解析规则时,MockMvc就会发生失败,因为无法区分视图路径和控制器的路径。在这个测试中,构建InternalResourceView时所设置的实际路径是无关紧要的,但我们将其设置为与InternalResourceViewResolver配置一致。
下一步我们创建SpittleController
package spittr.web;

import org.springframework.beans.factory.annotation.Autowired;
import org.springframework.stereotype.Controller;
import org.springframework.ui.Model;
import org.springframework.web.bind.annotation.*;
import spittr.data.SpittleRepository;
import spittr.model.Spittle;
import java.util.List;

@Controller
@RequestMapping("/spittles")
public class SpittleController {

    private SpittleRepository spittleRepository;

    @Autowired
    public SpittleController(SpittleRepository spittleRepository){
        this.spittleRepository = spittleRepository;
    }

    @RequestMapping(method=RequestMethod.GET)
    public String spittles(Model model) {
        // 将spittle添加到模型中
        model.addAttribute(spittleRepository
                     .findSpittles(Long.MAX_VALUE,20));
        return "spittles";  // 返回视图名
    }
}
需要注意的是,我们在spittles()方法中定了一个Model作为参数。这样,spittles()方法就能将Repository中获取到的Spittle列表填充到模型中。Model实际上就是一个Map(可直接将Model替换为Map类),它会传递给视图,这样数据就能渲染到客户端了,当调用addAttribule()方法并且不指定key的时候,那么key会根据值的对象类型推断确定。在本例中,因为它是一个List
spittles()方法所做的最后一件事是返回spittles作为视图的名字,这个视图会渲染模型。
也可以显示声明模型的key
@RequestMapping(method=RequestMethod.GET)
    public String spittles(Model model) {
        model.addAttribute("spittleList", spittleRepository
                     .findSpittles(Long.MAX_VALUE,20));
        return "spittles";
    }
下面还有另一种方式来编写spittles()方法:
@RequestMapping(method=RequestMethod.GET)
public List spittles(){
    return spittleRepository.findSpittles(Long.MAX_VALUE, 20);
}
当处理器方法像这样返回对象或集合时,这个值会放到模型中,模型的key会根据其类型推断得出(在本例中,也就是spittleList)。
而逻辑视图的名称将会根据请求路径推断得出。因为这个方法处理针对“/spittles”的GET请求,因此视图的名称将会是spittles(去掉开头的斜线)。
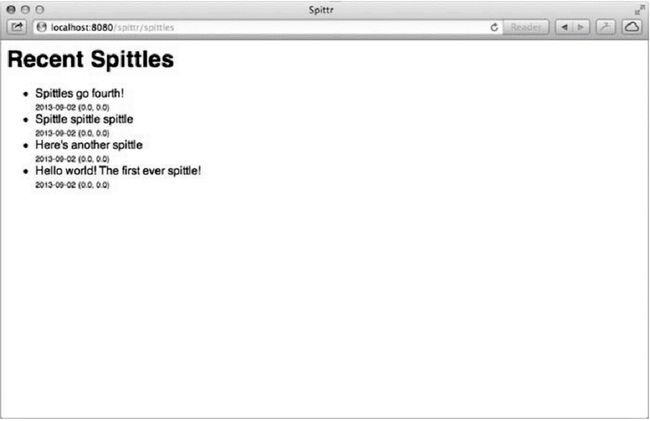
现在,数据已经放到了模型中,当视图是JSP的时候,模型数据会作为请求属性放到请求之中。因此,在spittles.jsp文件中可以使用JSTL的
">
接受请求的输入
Spring MVC允许以多种方式将客户端中的数据传送到控制器的处理方法中,包括:
- 查询参数(Query Parameter)
- 表单参数(Form Parameter)
- 路径变量(Path Variable)
处理查询参数
我们来实现一个查询Spittle列表的分页功能。为了实现这个功能,我们所编写的处理器方法要接受如下的参数:
- before参数(表明结果中所有Spittle的ID均应该在这个值之前)
- count参数(表明在结果中要包含的Spittle数量)
我们首先添加一个测试,这个测试反映了新spittles()方法的功能
    @Test
    public void shouldShowPagedSpittles() throws Exception{
        List expectedSpittles = createSpittleList(50);
        SpittleRepository mockRepository = mock(SpittleRepository.class);
        when(mockRepository.findSpittles(238900,50)).thenReturn(expectedSpittles);

        SpittleController controller = new SpittleController(mockRepository);
        MockMvc mockMvc = standaloneSetup(controller)
                .setSingleView(new InternalResourceView("/views/spittles.jsp")).build();
        mockMvc.perform(get("/spittles?max=238900&count=50"))
                .andExpect(view().name("spittles"))
                .andExpect(model().attributeExists("spittleList"))
                .andExpect(model().attribute("spittleList",hasItems(expectedSpittles.toArray())));
    }
这个测试方法针对“/spittles”发送GET请求,同时还传入了max和count参数。它测试了这些参数存在时的处理器方法。spittles()方法需要改进为以下代码:
    @RequestMapping(method=RequestMethod.GET)
    public List spittles(
            @RequestParam(value="max", defaultValue=MAX_LONG_AS_STRING) long max,
            @RequestParam(value="count", defaultValue="20") int count) {
        return spittleRepository.findSpittles(max, count);
    }
需要注意的是max和count都指定了默认值。
通过路径参数接受输入
假设我们的应用程序需要根据给定的ID来展现某一个Spittle记录。其中一种方法就是编写处理器方法,通过使用@RequestParam注解,让它接受ID作为查询参数。另一种方式,要识别的资源应该通过URL路径进行标示。对“/spittles/12345”发起GET请求要优于对“/spittles/show?spittle_id=12345”发起请求。
我们先将这个需求转换为一个测试
    @Test
    public void testSpittle() throws Exception{
        Spittle expectedSpittle = new Spittle("Hello" , new Date());
        SpittleRepository mockRepository = mock(SpittleRepository.class);
        when(mockRepository.findOne(12345)).thenReturn(expectedSpittle);

        SpittleController controller = new SpittleController(mockRepository);
        MockMvc mockMvc = standaloneSetup(controller).build();

        mockMvc.perform(get("/spittles/12345"))
                .andExpect(view().name("spittle"))
                .andExpect(model().attributeExists("spittle"))
                .andExpect(model().attribute("spittle",expectedSpittle));
    }
在Controller中,添加一个针对这种方式请求的方法
    @RequestMapping(value="/{spittleId}", method=RequestMethod.GET)
    public String spittle(@PathVariable("spittleId") long spittleId, Model model) {
        model.addAttribute(spittleRepository.findOne(spittleId));
        return "spittle";
    }
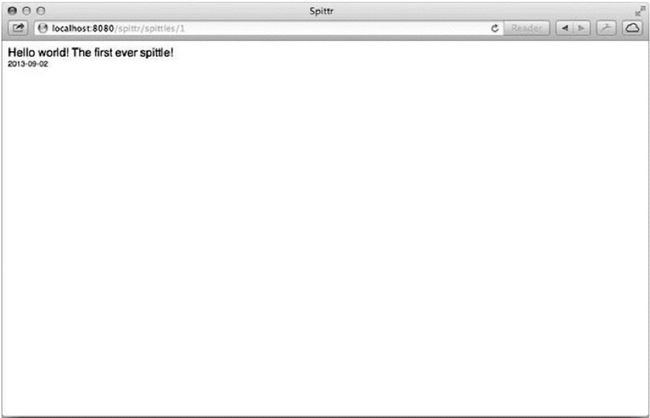
Spring MVC允许我们在@RequestMapping路径中添加占位符。占位符的名称要用大括号(“{”和“}”)括起来。路径中的其他部分要与所处理的请求完全匹配,但是占位符可以是任意的值。
我们可以看到,spittle()方法的spittleId参数上添加了@PathVariable("spittleId")注解,这表明在请求路径中,不管占位符部分的值是什么都会传递到处理器方法的spittleId参数中。
需要注意的是:在样例中spittleId这个词出现了好几次,因为方法的参数名碰巧与占位符的名称相同,因此我们可以去掉@PathVariable中的value属性:
    @RequestMapping(value="/{spittleId}", method=RequestMethod.GET)
    public String spittle(@PathVariable long spittleId, Model model) {
        model.addAttribute(spittleRepository.findOne(spittleId));
        return "spittle";
    }
需要注意的是,如果想要重命名参数时,必须要同时修改占位符的名称,使其互相匹配。如下为渲染Spittle的JSP视图片段:
处理表单
Spring MVC的控制器也为表单处理提供了良好的支持。
使用表单分为两个方面:展现表单以及处理用户通过表单提交的数据。在Spittr应用中,我们需要有个表单让新用户注册。
package spittr.web;

import org.springframework.beans.factory.annotation.Autowired;
import org.springframework.stereotype.Controller;
import org.springframework.ui.Model;
import org.springframework.web.bind.annotation.PathVariable;
import org.springframework.web.bind.annotation.RequestMapping;
import org.springframework.web.bind.annotation.RequestPart;
import spittr.data.SpitterRepository;
import spittr.model.Spitter;
import static org.springframework.web.bind.annotation.RequestMethod.*;

@Controller
@RequestMapping("/spitter")
public class SpitterController {
    @RequestMapping(value="/register", method=GET)
    public String showRegistrationForm(Model model) {
        return "registerForm";
    }
}
因为视图的名称为registerForm,所以JSP的名称需要是registerForm.jsp。如下就是我们现在所要使用的JSP
<%@ taglib uri="http://java.sun.com/jsp/jstl/core" prefix="c" %>
<%@ page session="false" language="java" pageEncoding="UTF-8" contentType="text/html; charset=utf-8"%>
Spitter
" >
Register
需要注意的是:这里的