想做组件化,需要用CocoaPod 远程私有仓库,在此记录一波.
一 .首先建立两个远程仓库
1)存放pod 索引文件库(.podspec)
2)存放代码的仓库
一定要分清这两个仓库
二 .我选用的平台是:码云
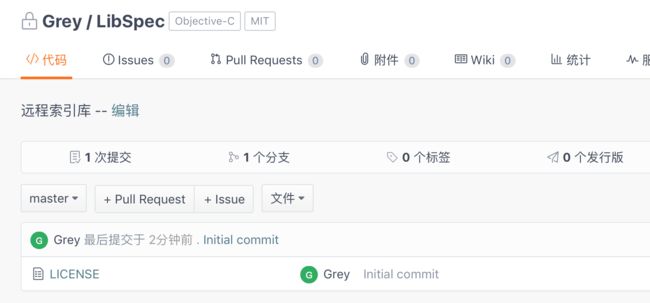
1.索引库
2.代码仓库
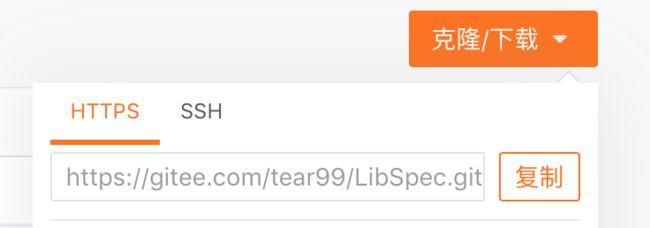
这个很简单不多说,记录仓库的https 地址
三 .pod lib create 你的工程名字 创建pod 测试工程
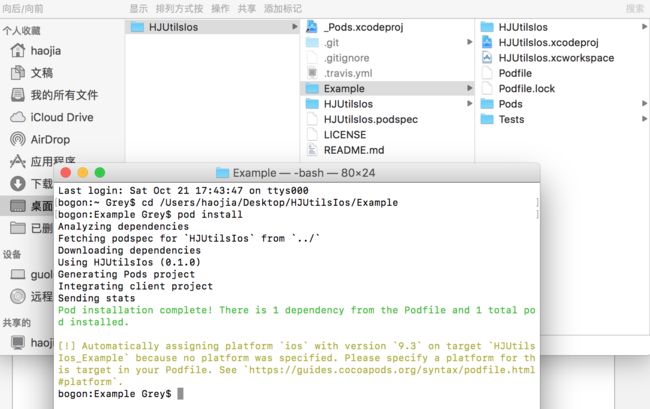
1.Example 是打开工程的位置
HJUtilsIos 是存放你库的位置(里面还有个Classes目录,将你做好的文件放在Classes这个目录下)
pod install 会把库链接到你的工程里,然后我们测试这个库,测试没有bug 就可下一步了.
2.建立和远程仓库的连接
git add .
git commit -m '提交'
git remote 查看远程仓库,应该是没有的
git remote add origin https://.... 建立连接
git pull origin master --allow-unrelated-histories 在push 之前需要pull
git push origin master 将本地代码推到origin远程仓库master分支上
这时候你去码云看看你的代码,已经推上去了.
3.修改 .podspec 文件,在项目目录里,这个地方着重讲一下
Pod::Spec.new do |s|
  s.name             = 'HJUtils'
  s.version          = '0.1.2'
  s.summary          = 'HJUtils.'
  s.description      = <<-DESC
公共类,基础类HJUtils
                       DESC

  s.homepage         = 'https://gitee.com/xxxx/events'
  # s.screenshots     = 'www.example.com/screenshots_1', 'www.example.com/screenshots_2'
  s.license          = { :type => 'MIT', :file => 'LICENSE' }
  s.author           = { 'xxx' => '[email protected]' }
  s.source           = { :git => 'https://gitee.com/xxx/xxx.git', :tag => s.version.to_s ,:submodules => true}
  # s.social_media_url = 'https://twitter.com/'

  s.ios.deployment_target = '8.0'

  s.source_files = 'HJUtils/Classes/HJUtils.h'
  s.requires_arc = true

  # s.resource_bundles = {
  #   'HJUtils' => ['HJUtils/Assets/*.png']
  # }

  # s.public_header_files = 'Pod/Classes/**/*.h'
  # s.frameworks = 'UIKit', 'MapKit'
  # s.dependency 'AFNetworking'


  s.subspec 'Categories' do |ss|
  ss.source_files = 'HJUtils/Classes/Categories/*'
  ss.requires_arc = true
  end

  s.subspec 'NetTool' do |ss|
  ss.dependency 'AFNetworking'
  ss.source_files = 'HJUtils/Classes/NetTool/*'
  ss.requires_arc = true
  end

  s.subspec 'Diff_oc' do |ss|
  ss.source_files = 'HJUtils/Classes/Diff_oc/*'
  ss.requires_arc = false
  end
end
1)s.name :名字
2)s.version :版本
3)s.summary :摘要
4)s.description: 描述必须比s.summary长
5).s.homepage : 远程代码仓库首页地址,可以任意网址
6).s.license : 一般都是这个MIT
7).s.author : 作者信息,照猫画虎
8).s.source :这个比较关键,需要放置htttps的远程代码仓库的地址,公司内部私有仓库SSH的不可以,码云的SSH可以,涉及到一个验证的问题,主要是cocoapod根据你的这个.spec 描述文件,远程验证,公司的属于内部域名,没有外网,所以没办法远程验证.
9).s.ios.deployment_target : 支持的iOS版本
10).s.source_files : 库文件的位置,.podspec 文件的相对目录,也就是类别一些.m .h 文件的位置,也就是刚刚说的classes 目录的位置
11).s.public_header_files : 如果不指明,那么暴露全部.h文件
12).s.requires_arc = true :arc 是true,mrc 是false .
13).s.dependency 'AFNetworking' : 比较重要的一点,比如项目有依赖库,你的network头文件里不能写#import "AFNetworking",
这会导致发布cocoapod 的时候无法通过验证,
14).
  s.subspec 'Categories' do |ss|
  ss.source_files = 'HJUtils/Classes/Categories/*'
  ss.requires_arc = true
  end
: 这个部分主要是建立子模块,ss.source_files:子模块库文件位置,子模块基本内容同上
15).想要分文件夹,关键在于source,注意主模块s.source_files 和 子模块 ss.source_files 不能引用同一块位置的文件,如果发生会优先s.source_files
16).依赖互相文件,得写依赖,子模块依赖另一个子模块
18).s.vendored_frameworks = 'xxxx/Classes/*.{framework}'表示依赖自己的framework,很重要啊
17).s.source = { :git => 'https://gitee.com/xxx/xxxx.git', :tag => s.version.to_s ,:submodules => true} : 注意s.version,是你最开始写的那个版本,我们每次发版都需要给代码仓库打一个tag ,代表是什么版本的
cd 到本地代码库位置
git tag
git tag 0.0.1
git push --tags
然后再远程仓库就能看到tag 0.0.1 版本的文件
podspec文件大概内容就是这些,这些东西必须实践,实践发现问题回头看,才发现写的有用,更具体的用法参考官方文档
四.发布到自己远程索引仓库
1.建立自己的远程索引库
pod repo add 索引库名字 https...
2.pod repo查看一下
两个,第一个是自己的远程索引仓库,
master第二个是官方的索引仓库
3.cd 到 本地代码仓库的位置
pod lib lint 或 pod spec lint :首先要检测Podspec的正确性
pod lib lint不会连接网络,而是检查文件格式
pod spec lint 会读取线上的repo并检查相应的tag
4.发布
pod repo push 自己远程索引仓库 对应的.podspec 推送到远程分支 (master)
如果因为警告没有通过验证可以在最后加上 --allow-warnings
五.在本地建一个项目测试一下自己cocoapod 库,建一个 test 测试工程,然后cd 到该工程目录,然后pod init 创建一个podfile 文件,我直接贴
source 'https://gitee.com/xxx/xxx'
source 'https://github.com/CocoaPods/Specs.git'

platform :ios, '8.0'
use_frameworks!

target 'xxx' do

  pod 'HJUtils'
  pod 'SDWebImage', '~> 3.7.1'

end
开头两个source
一个是自己远程索引仓库的,自己的库,去这里找
一个是CocoaPods官方的,官方的去CocoaPods官方的索引库去找
剩下的就是pod install 将库导入到test 测试工程
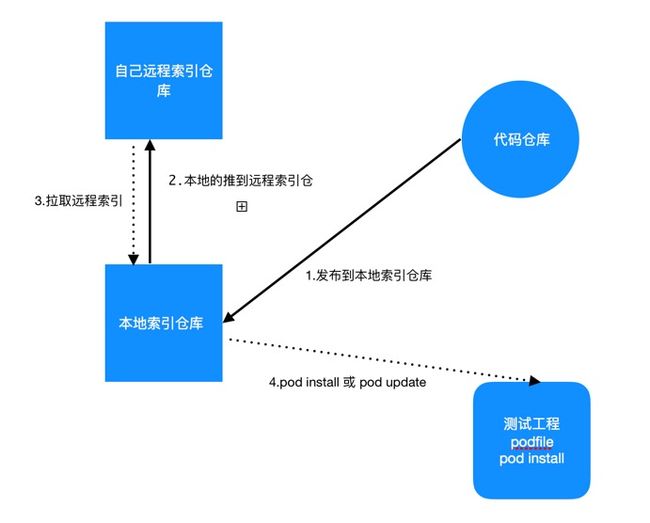
大概流程:
good!
以上就是远程私有仓库的内容,好多细节问题需要自己动手去做,欢迎交流!


