Spring Cloud Alibaba 入门实践
前言
SpringCloudAlibaba实际上对我们的SpringCloud2.x和1.x实现拓展组件功能,相当于对SpringCloud 一代中的一些组件做了一些替代和补充。
| SpringCloud一代 | SpringCloudAlibaba | |
|---|---|---|
| 注册中心 | Eureka | nacos |
| 消息中间件 | 默认三方rabbitmq | RocketMq |
| 分布式事务解决方案 | 第三方替代方案:2pc | Seata |
| 分布式配置中心 | SpringCloudConfig | nacos |
| 熔断降级 | Hystrix | Sentinel |
| 网关 | Zuul | Gateway |
这篇文章主要针对 注册中心、配置中心 nacos ,熔断降级 Sentinel 和网关Gateway进行实践。
准备工作
与一代Spring Cloud 不同,nacos 和 熔断降级展示面板都需要通过部署方式,不再由我们搭建模块来使用。我这里直接使用docker 来对nacos 和sentinel-dashboard 进行部署搭建。
一、安装Docker
 wget https://mirrors.aliyun.com/docker-ce/linux/centos/docker-ce.repo -O /etc/yum.repos.d/docker-ce.repo
 yum -y install docker-ce-18.06.1.ce-3.el7
 systemctl enable docker && systemctl start docker
 docker --version
二、搭建nacos
2、1 拉取镜像文件
docker pull nacos/nacos-server
2、2 创建本地的映射文件,custom.properties
mkdir -p /root/nacos/init.d /root/nacos/logs
touch /root/nacos/init.d/custom.properties
2、3 在custom.properties文件中写入以下配置
management.endpoints.web.exposure.include=*
2、4创建容器:使用standalone模式并开放8848端口,并映射配置文件和日志目录,数据库默认使用 Derby(这里直接使用最为方便一种方式)
docker run -d -p 8848:8848 -e MODE=standalone -e PREFER_HOST_MODE=hostname -v /root/nacos/init.d/custom.properties:/home/nacos/init.d/custom.properties -v /root/nacos/logs:/home/nacos/logs --restart always --name nacos nacos/nacos-server
2、5在页面上输入
http://ip:8848/nacos/ 用户名默认是 nacos 密码 nacos

三、搭建sentinel-dashboard
3、1拉取镜像
docker pull bladex/sentinel-dashboard
3、2 通过镜像运行容器
(通过这种方式页面展示的端口为 8858 API端口为:8719)
docker run --name sentinel -d -p 8858:8858 -d ec702979af42
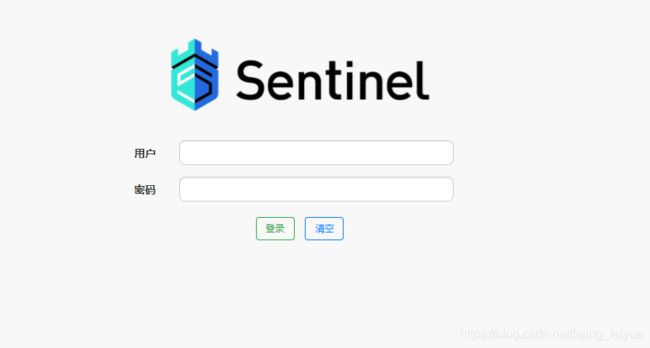
3、3 页面上输入http://IP:8858 用户名默认是 sentinel 密码 sentinel

代码实践
一、搭建maven 父目录
1、搭建父文件pom.xml固定版本号
    com.yin
    springcloud-alibaba
    1.0-SNAPSHOT


        nacos
        nacos_consumer
        gateway


        UTF-8
        1.8
        1.8
        4.12
        1.2.17
        1.16.18
        5.1.47
        1.1.16
        1.3.0
        Hoxton.SR1
        2.2.2.RELEASE


                org.springframework.boot
                spring-boot-dependencies
                2.2.2.RELEASE
                pom
                import


                org.springframework.cloud
                spring-cloud-dependencies
                Hoxton.SR1
                pom
                import


                com.alibaba.cloud
                spring-cloud-alibaba-dependencies
                2.1.0.RELEASE
                pom
                import


                org.mybatis.spring.boot
                mybatis-spring-boot-starter
                ${mybatis.spring.boot.version}


                org.projectlombok
                lombok
                ${lombok.version}
                true
二、搭建服务提供者
2、1 服务提供者pom.xml 文件
            org.springframework.boot
            spring-boot-starter-web


            org.springframework.cloud
            spring-cloud-starter-alibaba-nacos-discovery
            0.9.0.RELEASE


            org.projectlombok
            lombok


            org.springframework.boot
            spring-boot-starter-test
            test


                    org.junit.vintage
                    junit-vintage-engine
2、2 服务提供者application.yml 配置文件
spring:
   application:
      name: nacos-discovery-provider
   profiles:
      active: dev
   cloud:
      nacos:
         discovery:
            server-addr: ip:8848
# server
server:
   port: 9090
2、3 启动方法添加@EnableDiscoveryClient注解
@SpringBootApplication
@EnableDiscoveryClient
public class NacosApplication {

    public static void main(String[] args) {
        SpringApplication.run(NacosApplication.class, args);
    }

}
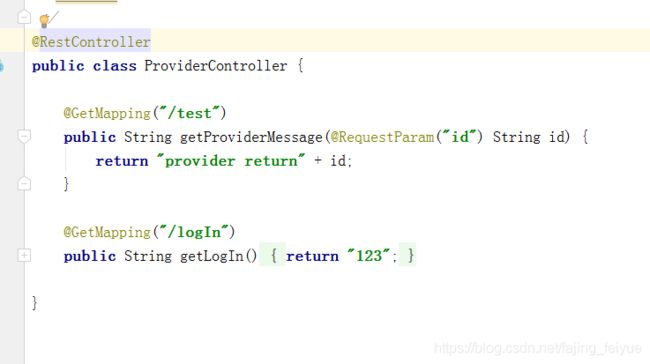
2、4 提供controller 供consumer 测试

2、5 服务启动(可以看到服务提供者已经注册上去了)

三、搭建服务消费者
(使用nacos服务注册发现功能、nacos配置中心 ,fegin 的调用、Sentinel 的 熔断降级 )
3、1 服务提供者pom.xml 文件
                org.springframework.boot
                spring-boot-starter-web


                org.springframework.cloud
                spring-cloud-starter-alibaba-nacos-discovery
                0.9.0.RELEASE


                org.springframework.cloud
                spring-cloud-starter-alibaba-nacos-config
                0.9.0.RELEASE


                org.projectlombok
                lombok


                org.springframework.cloud
                spring-cloud-starter-alibaba-sentinel
                0.9.0.RELEASE


                org.springframework.boot
                spring-boot-starter-actuator


                org.springframework.cloud
                spring-cloud-starter-openfeign


                org.springframework.boot
                spring-boot-starter-test
                test


                        org.junit.vintage
                        junit-vintage-engine
3、2、配置文件application.yml
spring:
   application:
      name: nacos-discovery-consumer
   profiles:
      active: dev
   cloud:
      nacos:
         discovery:
            server-addr: 120.76.142.68:8848
         config:
          #配置中心的地址
            server-addr: 120.76.142.68:8848
            #分组
            group: DEFAULT_GROUP
            #类型
            file-extension: properties
      sentinel:
            transport:
            # 默认为8719,如果被占用会自动+1,直到找到为止
              port: 8719
              dashboard: 120.76.142.68:8858
            eager: true
# server
server:
   port: 9091
构建bootstrap.yml 配置文件
bootstrap与application的区别:
bootstrap.yml 用于应用程序上下文的引导阶段。application.yml 由父Spring ApplicationContext加载。
可以实现动态实现@RefreshScope;可以对配置内容进行监听,察觉到内容被编辑之后会立刻刷新,而不用重启服务器。
spring:
  application:
    name: nnacos-discovery-consumer
  cloud:
    nacos:
      discovery:
      #nacos 注册中心地址
        server-addr: 120.76.142.68:8848
        #是否动态加载
        enabled: true
      config:
      #配置中心的地址
        server-addr: 120.76.142.68:8848
        #分组
        group: DEFAULT_GROUP
        #类型
        file-extension: properties
3、3 启动方法添加@EnableDiscoveryClient、@EnableFeignClients注解
@SpringBootApplication
@EnableFeignClients
@EnableDiscoveryClient
public class NacosConsumerApplication {

    public static void main(String[] args) {
        SpringApplication.run(NacosConsumerApplication.class, args);
    }

}
3、4 使用openFegin 调用provider 代码
@Component
//写provider application name
@FeignClient(name = "nacos-discovery-provider")
public interface HelloService {

    @RequestMapping(value = "/test", method = RequestMethod.GET)
    public String test(@RequestParam("id") String id);
}
@RestController
//配置自动刷新使用nacos 的配置配置代码
@RefreshScope
@NacosConfigurationProperties(dataId = "nacos-discovery-consumer", autoRefreshed = true)
public class ConsumerController {

//application.yml 并未配置,通过nacos 进行配置
    @Value("${nacos.config:1}")
    private String nacosConfig;

    @Resource
    private HelloService helloService;

    @GetMapping("/getProviderData")
    public String getProviderData(@RequestParam("id") String id) {
        return helloService.test(id) + nacosConfig;
    }
}
3、5 在nacos 配置中心配置配置文件
在 Nacos Spring Cloud 中,dataId 的完整格式如下:
${prefix}-${spring.profile.active}.${file-extension}
prefix 默认为 spring.application.name 的值,也可以通过配置项 spring.cloud.nacos.config.prefix来配置。
spring.profile.active 即为当前环境对应的 profile,详情可以参考 Spring Boot文档。 注意:当 spring.profile.active 为空时,对应的连接符 - 也将不存在,dataId 的拼接格式变成 p r e f i x . {prefix}. prefix.{file-extension}
file-exetension 为配置内容的数据格式,可以通过配置项 spring.cloud.nacos.config.file-extension 来配置。目前只支持 properties 和 yaml 类型。

由上图可以看到,springApplication 获取到nacos配置中心的内容,也调用provider 的内容。fegin 其实也集成负载均衡的策略。这个是一代springCould 内容,就不再详细展开了。
3、7 Sentinel 的 熔断降级的集成
a、项目启动成功之后,加载限流规则。
@Component
@Slf4j
public class SentinelApplicationRunner implements ApplicationRunner {
//url 连接
    private static final String GETORDER_KEY = "getOrder";

    @Override
    public void run(ApplicationArguments args) throws Exception {
        List rules = new ArrayList();
        FlowRule rule1 = new FlowRule();
        rule1.setResource(GETORDER_KEY);
        // QPS控制在1以内
        rule1.setCount(1);
        // QPS限流
        rule1.setGrade(RuleConstant.FLOW_GRADE_QPS);
        rule1.setLimitApp("default");
        rules.add(rule1);
        FlowRuleManager.loadRules(rules);
        log.info(">>>限流服务接口配置加载成功>>>");
    }
}
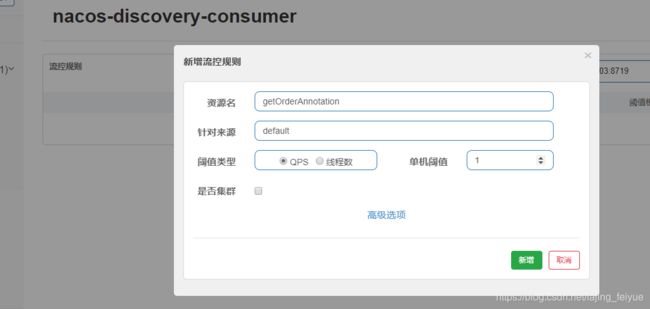
b、注解形式配置管理Api限流
@SentinelResource value参数:流量规则资源名称、
blockHandler 限流/熔断出现异常执行的方法
Fallback 服务的降级执行的方法
@SentinelResource(value = “getOrderAnnotation”, blockHandler = "getOrderQpsException")
@RequestMapping("/getOrderAnnotation")
public String getOrderAnnotation() {
    return "getOrder接口";
}

/**
 * 被限流后返回的提示
 */
public String getOrderQpsException(BlockException e) {
    return "该接口已经被限流啦!";
}
四、搭建gateway 网关
这个有使用gateway 的redis 限流,故引入spring-boot-starter-data-redis-reactive,
如果没有这个需求可以不引入。另外gateway 本省带有mvc组件,不再需要web依赖。
4、1 gateway 的pom.xml文件
            org.springframework.cloud
            spring-cloud-starter-gateway
            2.2.2.RELEASE


            org.springframework.cloud
            spring-cloud-starter-alibaba-nacos-discovery
            0.9.0.RELEASE


            org.springframework.boot
            spring-boot-starter-data-redis-reactive
            2.1.3.RELEASE


            org.springframework.boot
            spring-boot-starter-test
            test


                    org.junit.vintage
                    junit-vintage-engine
4、2 application.yml 配置文件
server:
  port: 80
spring:
  application:
  #spring application name
    name: my-gateway
  cloud:
    nacos:
     discovery:
        server-addr: ip:8848
    gateway:
      globalcors:
        corsConfigurations:
          '[/**]': # 匹配所有请求
              allowedOrigins: "*" #跨域处理 允许所有的域
              allowedMethods: # 支持的方法
                - GET
                - POST
                - PUT
                - DELETE

        ###路由策略
      routes:
        ###路由id
        - id: special_port
          ####转发http://localhost:9090/
          uri: http://localhost:9090/
          ###匹配规则
          predicates:
            - Path=/special_port/**
          filters:
            - StripPrefix=1


        - id: all_prot
          uri: lb://nacos-discovery-consumer
          predicates:
            - Path=/all_port/**
          filters:
            - StripPrefix=1
            - name: RequestRateLimiter #请求数限流 名字不能随便写 ,使用默认的facatory
              args:
                key-resolver: "#{@ipKeyResolver}"
                #允许用户每秒处理多少个请求
                redis-rate-limiter.replenishRate: 1
                #令牌桶的容量,允许在一秒钟内完成的最大请求数
                redis-rate-limiter.burstCapacity: 1
#不使用限流可以去掉redis
  redis:
    port: 6379
    host: 127.0.0.1

#自定义不需要过滤url
custom:
  gateway:
    token-filter:
      noAuthenticationRoutes:
        - /getUser
        - /logIn
4、3 启动main函数
@SpringBootApplication
@EnableDiscoveryClient
public class GatewayApplication {

    public static void main(String[] args) {
        SpringApplication.run(GatewayApplication.class, args);
    }


    /**
     *使用ip限流的方式
     * @return KeyResolver
     */
    @Bean(name="ipKeyResolver")
    public KeyResolver keyResolver(){
        return new KeyResolver() {
            @Override
            public Mono resolve(ServerWebExchange exchange) {
                //1.获取请求request对象
                ServerHttpRequest request = exchange.getRequest();
                //2.从request中获取ip地址
                //Ip地址
                String hostString = request.getRemoteAddress().getHostString();

                //3.返回
                return Mono.just(hostString);
            }
        };
    }

}
附:(这个与用户限流,使用一种)
用户限流
使用这种方式限流,请求路径中必须携带userId参数。
@Bean
KeyResolver userKeyResolver() {
 return exchange -> Mono.just(exchange.getRequest().getQueryParams().getFirst("userId"));
}
接口限流**(这个与用户限流,使用一种)**
获取请求地址的uri作为限流key。
@Bean
KeyResolver apiKeyResolver() {
 return exchange -> Mono.just(exchange.getRequest().getPath().value());
}
4、4 配置不需要过滤url
@Component
@ConfigurationProperties("custom.gateway.token-filter")
public class TokenConfigurationBean {

    public List getNoAuthenticationRoutes() {
        return noAuthenticationRoutes;
    }

    public void setNoAuthenticationRoutes(List noAuthenticationRoutes) {
        this.noAuthenticationRoutes = noAuthenticationRoutes;
    }

    private List noAuthenticationRoutes;
}
4、5 校验过滤器
@Component
public class AuthorizeFilter implements GlobalFilter, Ordered {
    private static final String AUTHORIZE_TOKEN = "Authorization";

    private static final String loginURL = "http://localhost:9090/logIn";

    @Resource
    private TokenConfigurationBean tokenConfigurationBean;
    @Override
    public Mono filter(ServerWebExchange exchange, GatewayFilterChain chain) {

        //1.获取请求对象
        ServerHttpRequest request = exchange.getRequest();
        //2.获取响应对象
        ServerHttpResponse response = exchange.getResponse();

        //3.判断 是否为登录的URL 如果是 放行(判读是否需要过滤)
        if(tokenConfigurationBean.getNoAuthenticationRoutes().contains(request.getURI().toString())){
            return chain.filter(exchange);
        }
        //4.判断 是否为登录的URL 如果不是      权限校验


        //4.1 从头header中获取令牌数据
        String token = request.getHeaders().getFirst(AUTHORIZE_TOKEN);

        if(StringUtils.isEmpty(token)){
            //4.2 从cookie中中获取令牌数据
            HttpCookie first = request.getCookies().getFirst(AUTHORIZE_TOKEN);
            if(first!=null){
                token=first.getValue();//就是令牌的数据
            }
        }

        if(StringUtils.isEmpty(token)){
            //4.3 从请求参数中获取令牌数据
            token= request.getQueryParams().getFirst(AUTHORIZE_TOKEN);
        }

        if(StringUtils.isEmpty(token)){
            //4.4. 如果没有数据    没有登录,要重定向到登录到页面
            response.setStatusCode(HttpStatus.SEE_OTHER);//303 302
            //location 指定的就是路径
            response.getHeaders().set("Location",loginURL+"?From="+request.getURI().toString());
            return response.setComplete();
        }


        //5 解析令牌数据 ( 判断解析是否正确,正确 就放行 ,否则 结束)

        try {
            //Claims claims = JwtUtil.parseJWT(token);

            if (!"123" .equals(token)) {
                throw new RuntimeException("校验失败");
            }

        } catch (Exception e) {
            e.printStackTrace();
            //解析失败
            response.setStatusCode(HttpStatus.UNAUTHORIZED);
            return response.setComplete();
        }

        //添加头信息 传递给 各个微服务()
        request.mutate().header(AUTHORIZE_TOKEN,"Bearer "+ token);


        return chain.filter(exchange);
    }

    @Override
    public int getOrder() {
        return 0;
    }
}

输入http://localhost:80/all_port/getProviderData?id=1,会被转发其他对应路径
携带了校验参数就可以正常获取到值


