vuecli3 实现 移动端和pc端 界面切换(两套代码)
适合场景
多页面多系统应用
所有系统都在同一目录下。配置多入口多出口。每个系统之间可以链接。每个系统内依然采用Vue单页应用开发。
产品需求:一套代码 兼容pc端和移动端 , 移动端和pc端的样式布局差别很大,需要使用多界面,并判断使用手机的时候跳转移动端代码,使用pc端跳转pc端代码。
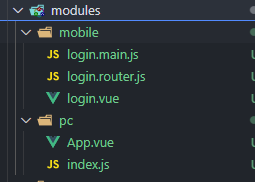
项目目录

分为两部分代码,pc 和mobile
第一步:创建一个登陆页面的文件
在项目public文件夹下创建一个login.html,其实就是将index.html复制一份,将title改一下:
DOCTYPE html>
<html lang="en">

<head>
  <meta charset="UTF-8">
  <meta http-equiv="X-UA-Compatible" content="IE=edge">
  <meta name="viewport" content="width=device-width, initial-scale=1.0">
  <title>Documenttitle>
head>

<body>
  <div id="login">div>

body>

html>
第二步:在src文件夹下创建一个modules文件夹,分别创建login.main.js、login.router.js、login.vue三个文件
三个文件内容如下:
login.main.js: 仿照main.js
import Vue from 'vue'
import App from './login.vue'
import router from './login.router'

Vue.config.productionTip = false

new Vue({

  router,
  render: h => h(App)
}).$mount('#login')
login.router.js (仿照router.js)
router/index.js中需要的设置
import Vue from 'vue'
import VueRouter from 'vue-router'
Vue.use(VueRouter)
// 首页用重定向的方式来进行适配的方案:
const redirectPath = /Android |webos | iphone iPod BlackBerry liPad/i.test(navigator.userAgent) ? '/m_index' : '/index';


import index from '../../components/index.vue'
Vue.use(VueRouter)

const routes = [
 {
    path: "/",
    redirect: redirectPath,

  },
  {
    path: '/index',
    name: index,
    component: index
  },

]
const router = new VueRouter({
  // 去掉路由中的#号
  mode: 'history',
  routes
})
router.beforeEach((to, from, next) => {

  if (/Android|webOS|iPhone|iPod|BlackBerry/i.test(navigator.userAgent)) {
    window.location.href = '/m_index.html/'
    return
  }
  next()
})
export default router
login.router.js
import Vue from 'vue'
import VueRouter from 'vue-router'
import login from '../../components/login.vue'
Vue.use(VueRouter)

const routes = [
  {
    path: '/login',
    name: login,
    component: login
  },

]

const router = new VueRouter({
  mode: 'history',
  base: process.env.BASE_URL,
  routes
})

export default router
界面自行配置
vue.config.js
const path = require('path')
const debug = process.env.NODE_ENV !== 'production'
module.exports = {

  publicPath: '/', // 根域上下文目录
  outputDir: 'dist', // 构建输出目录
  assetsDir: 'static', // 静态资源目录 (js, css, img, fonts)
  lintOnSave: false, // 是否开启eslint保存检测,有效值:ture | false | 'error'
  runtimeCompiler: true, // 运行时版本是否需要编译
  transpileDependencies: [], // 默认babel-loader忽略mode_modules,这里可增加例外的依赖包名
  productionSourceMap: true, // 是否在构建生产包时生成 sourceMap 文件,false将提高构建速度
  configureWebpack: config => { // webpack配置,值位对象时会合并配置,为方法时会改写配置
    if (debug) { // 开发环境配置
      config.devtool = 'cheap-module-eval-source-map'
    } else { // 生产环境配置
    }
    Object.assign(config, { // 开发生产共同配置
      resolve: {
        // 起别名
        alias: {
          '@': path.resolve(__dirname, './src'),
          '@c': path.resolve(__dirname, './src/components'),
          'vue$': 'vue/dist/vue.esm.js',
          'assets': '@/assets',
          'common': '@/common',
          'components': '@/components',
          'network': '@/network',
          'router': '@router',
          'views': '@views',
        }
      },

    })
  },
  // css: {
  //   loaderOptions: {
  //     css: {},
  //     postcss: {
  //       plugins: [
  //         require('postcss-px2rem')({
  //           remUnit: 37.5
  //         })
  //       ]
  //     }
  //   }
  // },
  pages: {
    //(1)输出一个页面
    //  main: {
    //    entry: 'src/main.js',
    //    template: 'public/index.html',
    //    filename: 'maker.html',
    //    chunks: ['chunk-vendors', 'chunk-common', 'index']
    //  },
    //(2)输出多个页面
    login: {
      template: "public/login.html",
      entry: "src/modules/mobile/login.main.js",
      filename: "login.html",
      title: "login",
      keywords: "333",
      description: "444",
    },
    index: {
      template: "public/index.html",
      entry: "src/modules/pc/main.js",
      filename: "index.html",
      title: "index",
      keywords: "333",
      description: "444",
    }
  },
  chainWebpack: config => { // webpack链接API,用于生成和修改webapck配置,https://github.com/vuejs/vue-cli/blob/dev/docs/webpack.md
    // 这里是对环境的配置,不同环境对应不同的BASE_URL,以便axios的请求地址不同
    config.plugin('define').tap(args => {
      args[0]['process.env'].BASE_URL = JSON.stringify(process.env.BASE_URL)
      return args
    })


    if (debug) {
      // 本地开发配置
    } else {
      // 生产开发配置
    }
  },
  parallel: require('os').cpus().length > 1, // 构建时开启多进程处理babel编译
  pluginOptions: { // 第三方插件配置
  },
  pwa: {
  },

  devServer: {
    open: false,
    host: 'localhost',
    port: 80,
    https: false,
    hotOnly: false,
    // 注意下面 需要写入接口 , 如果没有接口则进行注释即可
    proxy: { // 配置跨域
      '/api': {
        target: 'https://127.0.0.1:80',	//接口域名
        ws: true,	//是否代理websockets
        changOrigin: true,	//是否跨域
        pathRewrite: {		//重置路径
          '^/api': ''
        }
      }
    },
  }
}
即可完成