Flutter学习(四)Http请求库 dio代码封装
第一步 依赖库
打开flutter package网站,入口,找到dio这个组件,查看最新版本
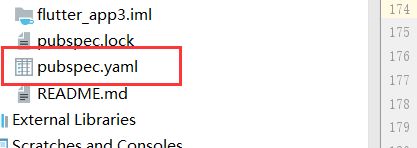
打开 项目根目录下 ** pubspec.yaml ** 文件
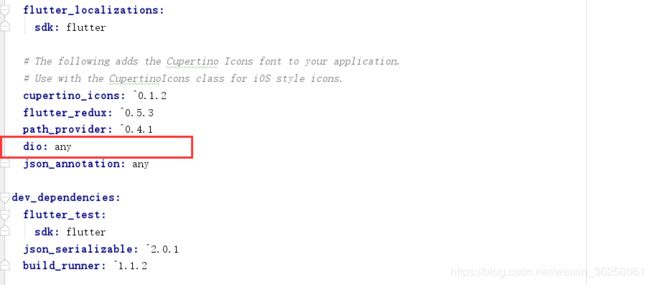
添加库名,添加库名
最好是填写 any(** 添加兼容版本 **),也或者直接从网站复制最新版本即可,
执行 packages get 命令,安装依赖
代码部分
import 'package:dio/dio.dart';
import 'config.dart';//用于配置公用常量
class Http{
static Http instance;
static String token;
static Config _config = new Config();
static Dio _dio;
Options _options;
static Http getInstance(){
print("getInstance");
if(instance == null){
instance = new Http();
}
}
Http(){
// 初始化 Options
_options =new Options(
baseUrl: _config.base_url,
connectTimeout: _config.connectTimeout,
receiveTimeout: _config.receiveTimeout,
headers: {}
);
_dio = new Dio(_options);
//发送请求拦截处理,例如:添加token使用
_dio.interceptor.request.onSend = (Options options) async{
print(options.baseUrl);
return options;
};
//请求成功拦截,简化代码中调用难度
_dio.interceptor.response.onSuccess = (Response response) async{
print(response.statusCode);
return response;
};
//请求失败拦截
_dio.interceptor.response.onError = (DioError e) {
print(e);
return e;
};
}
// get 请求封装
get(url,{ options, cancelToken, data=null}) async {
print('get:::url:$url ,body: $data');
Response response;
try{
response = await _dio.get(
url,
data:data,
cancelToken:cancelToken
);
}on DioError catch(e){
if(CancelToken.isCancel(e)){
print('get请求取消! ' + e.message);
}else{
print('get请求发生错误:$e');
}
}
return response.data;
}
// post请求封装
post(url,{ options, cancelToken, data=null}) async {
print('post请求::: url:$url ,body: $data');
Response response;
try{
response = await _dio.post(
url,
data:data !=null ? data : {},
cancelToken:cancelToken
);
print(response);
}on DioError catch(e){
if(CancelToken.isCancel(e)){
print('get请求取消! ' + e.message);
}else{
print('get请求发生错误:$e');
}
}
return response.data;
}
}
调用
页面中引入文件:
import ‘util/http.dart’;
var response = await Http().get(
"tree/json",
data: {'pageIndex': 1, 'pageSize': 10});
print(response);
6.解析数据
官方推荐使用json_serializable进行数据解析
下一章节贴上json_serializable的使用方法供大家参考,欢迎指正和互相交流;


