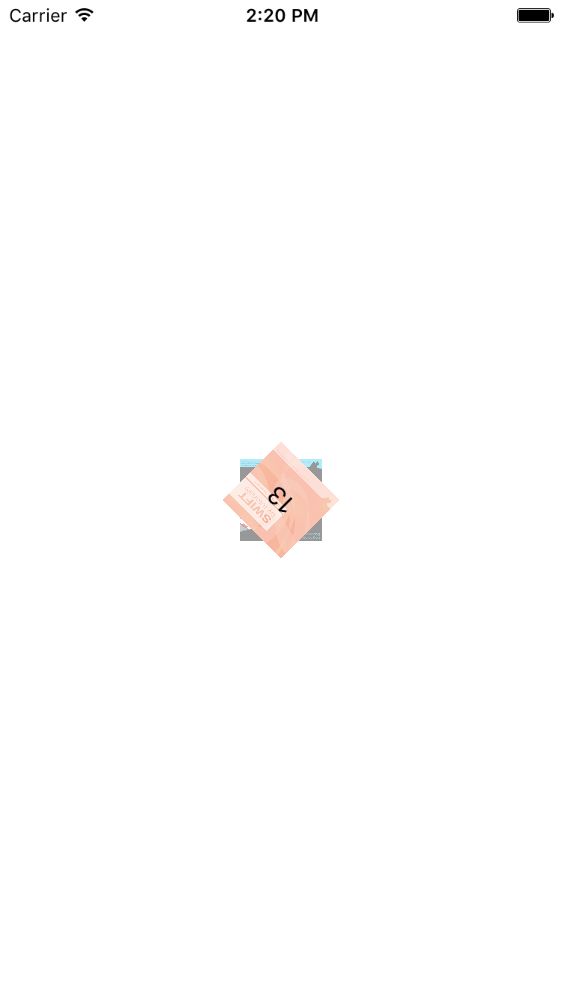
最终效果如下所示:
这个效果是我们公司的一个模块的效果, 当时没有由于没有对 collectionView 仔细研究,所以对这个界面的实现机制并不是很熟悉, 到现在已经有段时间了, 这段时间对 collectionView 也加深了解了一些, 于是试着自己写一下试试(当时使我们公司一个大牛写的)
我打算分一下几步来实现这个效果:
- 实现圆形布局(这个布局效果在 Apple 的实例代码中有, 具体代码请自行 Google)
- 实现圆形的风火轮效果
- 对有些需要隐藏的位置进行隐藏
环形布局之前Apple 提供的代码中是直接根据角度计算的每个 Item 的位置, 我们也用同样的思考, 不同的是我们要将角度记录下来, 这个角度是跟 collectionView 的 contentOffset 有关的, 因为当用户在滑动的时候, contentOffset 在更新,这个时候应该重新根据 contentOffset 计算每个 Item 的角度 --- 在心中有个印象
- 创建自定义布局
    #import

    @interface CircleCollectionViewLayout : UICollectionViewLayout
    /**
     *   半径
     */
    @property (nonatomic, assign) CGFloat radius;
    /**
         *  大小
     */
    @property (nonatomic, assign) CGSize itemSize;
    @end


    - (instancetype)init {
        if (self = [super init]) {
            [self initial];
        }
        return self;
    }

    - (instancetype)initWithCoder:(NSCoder *)aDecoder {
        if (self = [super initWithCoder:aDecoder]) {
            [self initial];
        }
        return self;
    }

    - (void)initial {
        self.itemSize = CGSizeMake(ItemWidth, ItemHieght);
        self.radius = (CGRectGetWidth([UIScreen mainScreen].bounds))* 0.5f - ItemWidth - RightMargin;
    }
定义好半径大小之后, 我们还需要个属性 相邻两个 Item之间的夹角是多少度于是我们在 extension 中定义 anglePerItem属性, 存储夹角, 并在 initial 中做初始化
    // item 大小 55 * 55
    #define ItemWidth 55
    #define ItemHieght ItemWidth
    #define RightMargin 5

    @interface CircleCollectionViewLayout ()
    // 单位夹角
    @property (nonatomic, assign) CGFloat anglePerItem;

    @end

    - (void)initial {
        self.itemSize = CGSizeMake(ItemWidth, ItemHieght);
        self.radius = (CGRectGetWidth([UIScreen mainScreen].bounds) - ItemWidth)* 0.5f - RightMargin;
        // 单位夹角为 45度
        self.anglePerItem = M_PI_2 / 2;
    }
我们之前说过, 每个 Item 要有一个 angle, 用来确定在 contentOffset 时, 对应的 item 的角度是多少, 所以这个时候我们需要自定义 LayoutAttributes
自定义 LayoutAttributes
#import

@interface CircleCollectionViewLayoutAttributes : UICollectionViewLayoutAttributes
// 锚点
@property (nonatomic, assign) CGPoint anchorPoint;
// 角度
@property (nonatomic, assign) CGFloat angle;

@end


#import "CircleCollectionViewLayoutAttributes.h"

@implementation CircleCollectionViewLayoutAttributes

- (instancetype)init {
    if (self = [super init]) {
        self.anchorPoint = CGPointMake(0.5, 0.5);
        self.angle = 0;
    }
    return self;
}

- (void)setAngle:(CGFloat)angle {
    _angle = angle;

    self.zIndex = angle * 1000000;
    // 将角度同时用做item 的旋转
    self.transform = CGAffineTransformMakeRotation(angle);
}
// UICollectionViewLayoutAttributes 实现  协议
- (id)copyWithZone:(NSZone *)zone {
    CircleCollectionViewLayoutAttributes *copyAttributes = (CircleCollectionViewLayoutAttributes *)[super copyWithZone:zone];
    copyAttributes.anchorPoint = self.anchorPoint;
    copyAttributes.angle = self.angle;
    return copyAttributes;
}

@end
回到 Layout 类
因为我们自定义了 Attributes 类, 所以此时要告知 Layout 类, 我们自定义的 Attributes
+ (Class)layoutAttributesClass {
    return [CircleCollectionViewLayoutAttributes class];
}
因为需要用户去滑动, 又因为 CollectionView 继承自 ScrollView, 运行滑动的一个必要条件就是 contentSize某一个方向的值大于 scrollView.bounds 对应方向的值
- (CGSize)collectionViewContentSize {
    NSInteger numberOfItem = [self.collectionView numberOfItemsInSection:0];
    return CGSizeMake(numberOfItem * ItemWidth , self.collectionView.bounds.size.height);
}
好了准备工作基本完成, 接下来开始布局
在这里必须要了解 collectionView 的布局步骤
- prepareLayout 每次布局触发时,就会调用该方法
- layoutAttributesForElementsInRect:(CGRect)rect 返回在 rect 矩形内的 item 的布局属性数组
- layoutAttributesForItemAtIndexPath:(NSIndexPath *)indexPath 返回在某个 indexPath 的 item 的布局属性
我们需要一个布局属性数组, 来存储所有 item 的布局属性
于是我们在 extension 中添加一个布局属性数组
@interface CircleCollectionViewLayout ()
@property (nonatomic, assign) CGFloat anglePerItem;
@property (nonatomic, copy) NSArray
@end
我们直接在layoutAttributesForElementsInRect中返回该数组, 因为我将要在 prepareLayout 中将该数组填充进布局属性的值
- (NSArray *)layoutAttributesForElementsInRect:(CGRect)rect {
    return self.attributesList;
}
同理我们直接将某个位置的布局属性从 attributesList 中取出
- (UICollectionViewLayoutAttributes *)layoutAttributesForItemAtIndexPath:(NSIndexPath *)indexPath {
    return self.attributesList[indexPath.row];
}
OK, 开始进行布局
- (void)prepareLayout {
    // 调用父类的
    [super prepareLayout];
    // x 始终确保在屏幕中间
    CGFloat centerX = self.collectionView.contentOffset.x + CGRectGetWidth(self.collectionView.bounds) * .5f;
    NSInteger numberOfItem = [self.collectionView numberOfItemsInSection:0];

    NSMutableArray *mAttributesList = [NSMutableArray arrayWithCapacity:numberOfItem];
    for (NSInteger index = 0; index < numberOfItem; index++) {
        NSIndexPath *indexPath = [NSIndexPath indexPathForItem:index inSection:0];
        CircleCollectionViewLayoutAttributes *attributes = [CircleCollectionViewLayoutAttributes layoutAttributesForCellWithIndexPath:indexPath];
        attributes.size = self.itemSize;
        attributes.center = CGPointMake(centerX, CGRectGetMidY(self.collectionView.bounds));
        attributes.angle = self.anglePerItem * index;
        [mAttributesList addObject:attributes];
    }
    self.attributesList = [mAttributesList copy];
}
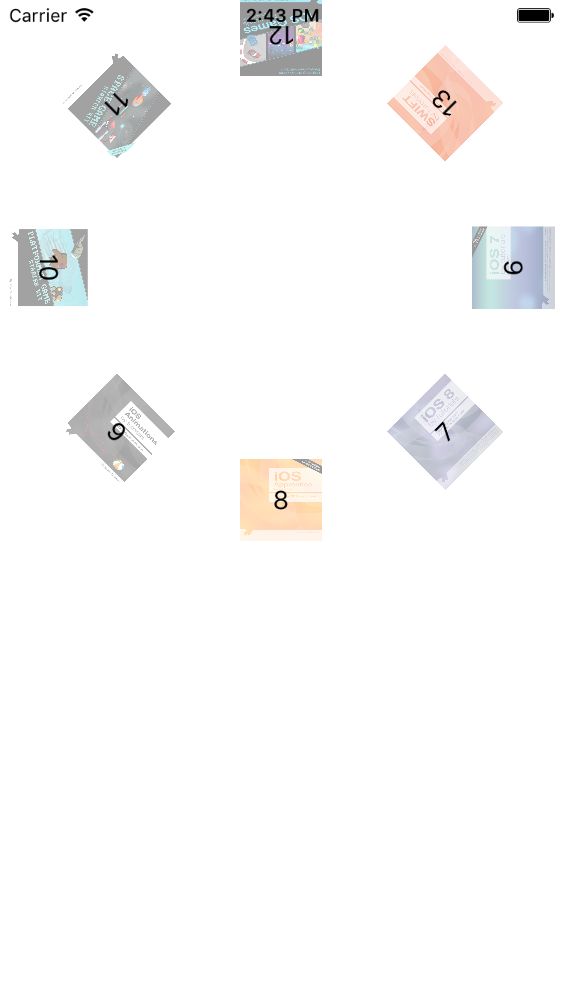
如下图:
看来我们的思路是正确的, 接下来, 我们所需要的就是在 prepareLayout 中进行布局, 使布局更接近我们的目标效果
-
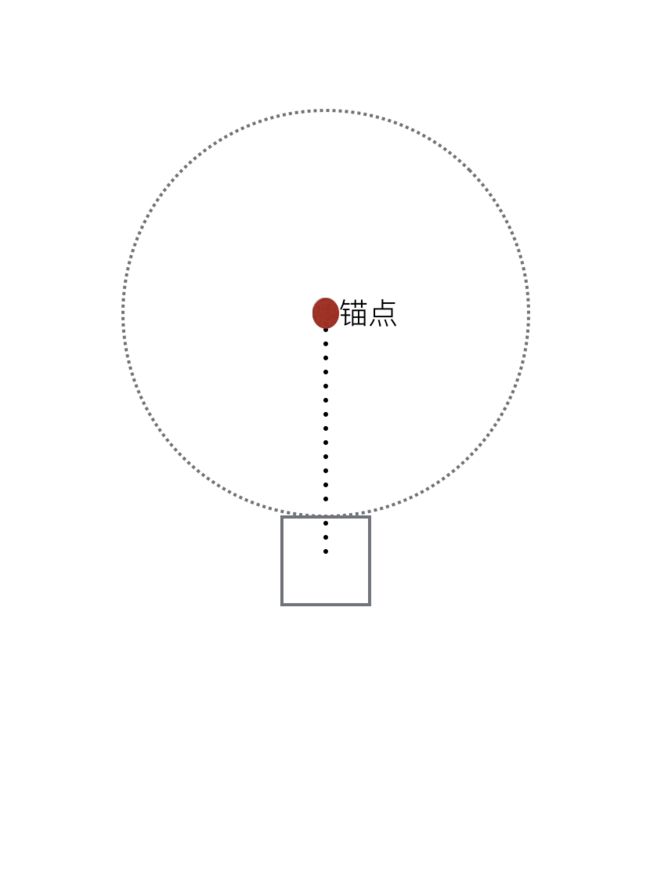
先形成圆形布局, 这个容易, 我们首先需要调整锚点, 将锚点调整的屏幕中间, 半径我们之间就定义过了, 屏幕宽度减去一个间隙的一半, 我们将目光放在第一个 Item, 要将第一个 item 放在屏幕下方, 同时锚点应该处于屏幕正中间, 所以锚点的 y 值应小于0, 锚点又是相对于自身的高度来的推出锚点的计算公式
 ==>

 CGFloat anchorPointY =  -(self.radius) / self.itemSize.height;

 在 for 循环中设置 item 属性的锚点
 attributes.anchorPoint = CGPointMake(0.5, anchorPointY);
效果如图所示
我们发现整个圆弧向上偏移了, 所以接下来就是调整每个 item 的中心点, 是之下移
同样在 for 循环中, 修改设置 center 的值
attributes.center = CGPointMake(centerX, CGRectGetMidY(self.collectionView.bounds) + self.radius);
OK, 圆环效果成功做出, 第一步 OK, 细心的同学发现, 界面上显示的 Item 并不是从0开始, 那么试着将 numberOfItem 改成 8, 此时就是 0~8 显示, 之前之所以不是从零开始, 是因为我们的圆环一次最多显示8个, 而我们的 numberOfItem 有13个, 导致之后的 item 将前面的 item 覆盖
接下来我们实现滑动
滑动是跟 contentOffset 有关, 同时我们还需要设置一个方法
// 当 bounds 改变时, 使当前布局无效, 这便会触发 prepareLayout 进行重新布局
- (BOOL)shouldInvalidateLayoutForBoundsChange:(CGRect)newBounds {
    return YES;
}
要想达到项目中滑动的效果, 我们需要设置 Item 布局属性的 angle, 并且这个 angle 是与 contentOffset 有关的
先来几条准备知识
- 以第0个 item 为起点, 它的角度此时为0度, 当滑动到最后一个 item 时, 我们让最后一个 item 位置与第0个位置重合, 此时第0个 item 总共经过了 -(numberOfItem * anglePerItem), 因为是逆时针转动, 所以是负值
- 由 1. 我们得到滑动到最后, 第0个 item 总共偏移了多少角度, 所以我们很容易得到单位偏移的角度, 总偏移角度 * (contentOffset.x 所占的比例)
由以上两点产生两个属性
@interface CircleCollectionViewLayout ()
/**
 *  单位夹角
 */
@property (nonatomic, assign) CGFloat anglePerItem;
/**
 *  布局属性数组
 */
@property (nonatomic, copy) NSArray  *attributesList;
/**
 *  单位偏移角度
 */
@property (nonatomic, assign) CGFloat angle;
/**
 *  总偏移角度
 */
@property (nonatomic, assign) CGFloat angleAtExtreme;
@end

//  -M_PI_2的原因是使每个 Item向右偏移 90 度角
- (CGFloat)angle {
    return self.angleAtExtreme * self.collectionView.contentOffset.x / ([self collectionViewContentSize].width - CGRectGetWidth(self.collectionView.bounds)) - M_PI_2;
}

- (CGFloat)angleAtExtreme {
    return [self.collectionView numberOfItemsInSection:0] > 0 ?
    -([self.collectionView numberOfItemsInSection:0]) * self.anglePerItem : 0;
}
修改 prepareLayout 中布局属性的 angle, 使之与 contentOffset 建立联系
attributes.angle = self.anglePerItem * index + self.angle;;
效果如下

可以滑动
接下来, 我们进行最后的完善, 定义两个属性 startIndex, endIndex
- (void)prepareLayout {
    [super prepareLayout];
    CGFloat centerX = self.collectionView.contentOffset.x + CGRectGetWidth(self.collectionView.bounds) * .5f;
    NSInteger numberOfItem = [self.collectionView numberOfItemsInSection:0];
    CGFloat anchorPointY =  -(self.radius) / self.itemSize.height;

    self.startIndex = 0, self.endIndex = [self.collectionView numberOfItemsInSection:0] - 1;

    NSMutableArray *mAttributesList = [NSMutableArray arrayWithCapacity:numberOfItem];
    self.endIndex = self.startIndex + 7;
    for (NSInteger index = self.startIndex; index < self.endIndex; index++) {
        NSIndexPath *indexPath = [NSIndexPath indexPathForItem:index inSection:0];
        CircleCollectionViewLayoutAttributes *attributes = [CircleCollectionViewLayoutAttributes layoutAttributesForCellWithIndexPath:indexPath];
        attributes.size = self.itemSize;
        attributes.center = CGPointMake(centerX, CGRectGetMidY(self.collectionView.bounds) + self.radius);
        attributes.anchorPoint = CGPointMake(0.5, anchorPointY);
        attributes.angle = self.anglePerItem * index + self.angle;
                // 当小于某个角度是, 将 item 逐渐隐藏, 同时多布局一个 item, endIndex++
    if (attributes.angle <= -(M_PI * 2) / 3) {
        self.endIndex++;
        CGFloat alpha = (((M_PI * 2) / 3 + M_PI / 8.0) + attributes.angle)/(M_PI/8.0);
        attributes.alpha = alpha;

        if (self.endIndex >= numberOfItem) {
            self.endIndex = numberOfItem;

        }
    } else if (attributes.angle > (M_PI_2) + M_PI_2 * .5) { // 出现时, 逐渐出现
        CGFloat alpha = (M_PI - attributes.angle) / M_PI_4;
        attributes.alpha = alpha;
    }
        [mAttributesList addObject:attributes];
    }
    self.attributesList = [mAttributesList copy];
}
在上面的 prepareLayout 中我们添加了一个 if-else, 目的是当 item 的角度小于某个值时将其隐藏, 因为是逆时针转动, 所以角度是成减小趋势, 当隐藏一个 item 时, 要多布局一个 item, 即 endIndex++, 显示同理, 根据 contentOffset 设置 alpha

但这是会发现, 最后一个 item 可以被滑动的不见, 我们只需要调整一个地方即可, 及第0个 item 的总偏移量, 因为他是根据个数, 让其减去5个 item, 此时便可达到效果, 需要确保总数 > 5
- (CGFloat)angleAtExtreme {
    return [self.collectionView numberOfItemsInSection:0] > 0 ?
        -([self.collectionView numberOfItemsInSection:0] - 5) * self.anglePerItem : 0;
}
如图所示

第一部分只完成 collectionView 布局, 在下一部分讲解, 选择 item 进行切换的效果
我觉得这个布局可以优化, 但目前还没来得及, 如果您有更好的方式, 欢迎交流; 如果您有不明白的地方欢迎提问; 如果您有不满意的地方, 欢迎吐槽; 共同学习, 共同进步
Demo 地址: https://github.com/X-Liang/CircleCollectionView.git