你可能需要:
NO1:使用 Node.js + Express 开发服务端
一、安装项目:
step1: install express module
step2: install express-generator module
step3: create project myapp with command
step4: setup all file
step5: open project in editor
- 安装node+express项目
并将项目views文件夹转换为ejs格式
$ npm install express -g
$ npm install express-generator -g
$ express --view=ejs Node //Node为项目名称
参考 使用 Node.js + Express 开发服务端
- 安装mysql
参考:
https://www.jianshu.com/p/957026a0af8c
https://www.runoob.com/mysql/mysql-install.html
二、安装相关依赖
step6: install mysql module
step7: install nodemon module
npm install mysql nodemon
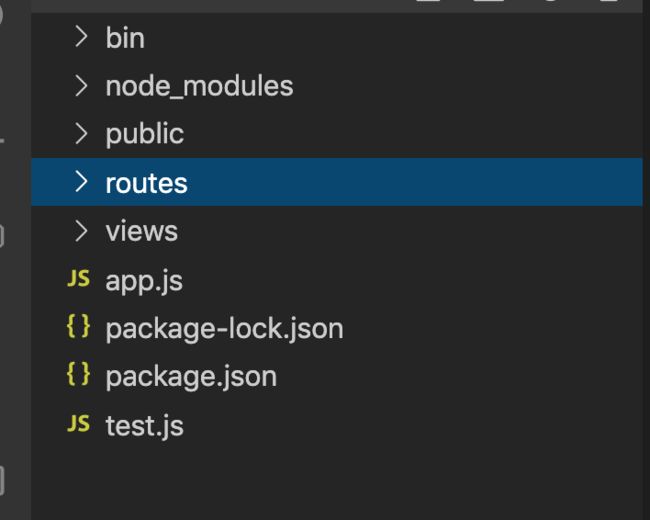
项目初始化成功之后,结构如下
step8: start server with npx nodemon
终端执行命令npx nodemon启动项目
step9: test server with localhost:3000
在浏览器中访问http://localhost:3000,可以看到
step10: connect mysql database - create Database - create table
- create Database
- 安装mysql可视化工具:Navicat Premium
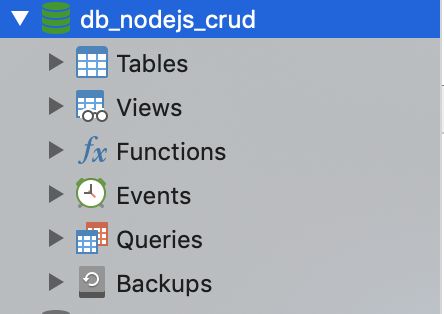
名为tb_book
- 通过代码创建数据库+table
继续向下看
三、连接数据库 并 实现Insert, Update, Select, Delete
在routes/index.js据你的实际配置修改数据库用户名、及密码及数据库名:
通过代码创建数据库
// index.js
var express = require('express');
var router = express.Router();
var mysql = require('mysql');
var db = mysql.createConnection({
  host     : 'localhost',
  user     : 'root',
  password : '1234567w',
})

// connect
db.connect((err) => {
  if (err) {
    throw err;
  }
  console.log('Mysql Connected ...')
});

// Create DB
router.get('/createdb', (req,res)=> {
  let sql = 'CREATE DATABASE nodemysql';
  db.query(sql, (err, result) => {
    if (err) throw err;
    console.log(result)
    res.send('database created...')
  })
})
/* GET home page. */
router.get('/', function(req, res, next) {
  res.render('index', { title: 'Express' });
});

module.exports = router;
在终端可以看到连接成功
在浏览器中访问
http://localhost:3000/createdb,可以看到数据库创建成功!
在终端可以看到
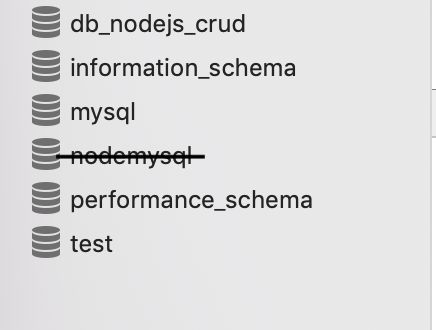
同样打开可视化工具也可以看到
nodemysql创建成功
通过代码创建table
// index.js
var express = require('express');
var router = express.Router();
var mysql = require('mysql');
var db = mysql.createConnection({
  host     : 'localhost',
  user     : 'root',
  password : '1234567w',
  database : 'nodemysql'
})
// Create table
router.get('/createpoststable', (req,res)=> {
  let sql = 'CREATE TABLE posts(id int AUTO_INCREMENT, title VARCHAR(255), body VARCHAR(255), PRIMARY KEY (id))';
  db.query(sql, (err, result) => {
    if (err) throw err;
    console.log(result)
    res.send('Posts table created...')
  })
})
...
在浏览器中访问http://localhost:3000/createpoststable,可以看到table创建成功!
同样打开可视化工具也可以看到
posts创建成功
通过代码向table中插入数据
// index.js
var express = require('express');
var router = express.Router();
var mysql = require('mysql');
var db = mysql.createConnection({
  host     : 'localhost',
  user     : 'root',
  password : '1234567w',
  database : 'nodemysql'
})
// Inset posts 1
router.get('/addpost1', (req,res)=> {
  let post = {title: 'Post One', body: 'This is post number one'}
  let sql = 'INSERT INTO posts SET ?';
  let query = db.query(sql, post, (err, result) => {
    if (err) throw err;
    console.log(result)
    res.send('Posts 1 added...')
  })
})
...
在浏览器中访问http://localhost:3000/addpost1,可以看到插入数据成功!
同样打开可视化工具也可以看到
posts数据插入成功
通过代码读取table中数据
- 读取表中全部数据
// index.js
...
// SELECT posts
router.get('/getposts', (req,res)=> {
  let sql = 'SELECT * FROM posts';
  let query = db.query(sql, (err, results) => {
    if (err) throw err;
    console.log(results)
    res.send('Posts fetched...')
  })
})...
在浏览器中访问http://localhost:3000/getposts,可以看到读取数据成功!
终端可以看到读取的数据:
- 根据id读取表中部分数据
//index.js
// SELECT Single post
router.get('/getpost/:id', (req,res)=> {
  let sql = `SELECT * FROM posts WHERE id = ${req.params.id}`;
  let query = db.query(sql, (err, result) => {
    if (err) throw err;
    console.log(result)
    res.send('Post fetched...')
  })
})
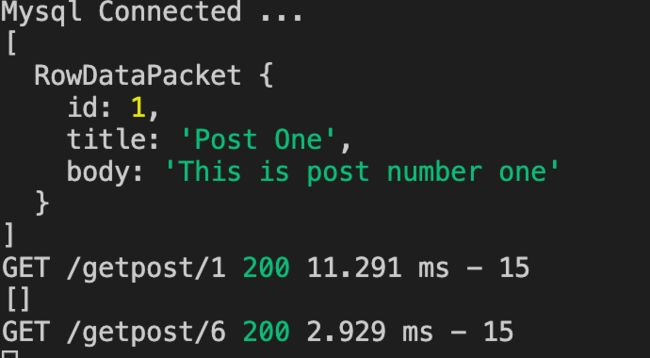
在浏览器中访问http://localhost:3000/getpost/1 + http://localhost:3000/getpost/6,可以看到读取数据成功!
终端可以看到读取的数据:
通过代码更新table中数据
// index.js
// UPDATE Single post
router.get('/updatepost/:id', (req,res)=> {
  let newTitle = 'Updated Title'
  let sql = `UPDATE posts SET title = '${newTitle}' WHERE id = ${req.params.id}`;
  let query = db.query(sql, (err, result) => {
    if (err) throw err;
    console.log(result)
    res.send('Post updated...')
  })
})
在浏览器中访问[http://localhost:3000/updatepost/1](http://localhost:3000/updatepost/1),可以看到更新数据成功
同样打开可视化工具也可以看到posts数据更新成功
通过代码删除table中数据
// index.js
// DELETE post
router.get('/deletepost/:id', (req,res)=> {
  let newTitle = 'Updated Title'
  let sql = `DELETE FROM posts WHERE id = ${req.params.id}`;
  let query = db.query(sql, (err, result) => {
    if (err) throw err;
    console.log(result)
    res.send('Post updated...')
  })
})
在浏览器中访问[http://localhost:3000/deletepost/1](http://localhost:3000/updatepost/1),可以看到删除数据成功
四、通过模版语言展示数据库数据
**step11: show data **
在routes/index.js新增如下内容
// SHOW posts
router.get('/getpostsData', (req,res)=> {
  let sql = 'SELECT * FROM posts';
  let query = db.query(sql, (err, results) => {
    if (err) throw err;
    console.log(results)
    res.render('select', { books:results });
  })
})
新建views/select.ejs
Books Data


    id
    title
    body

  <% books.forEach(function(item) { %>

      <%= item.id %>
      <%= item.title %>
      <%= item.body %>

  <% }); %>
在浏览器中访问http://localhost:3000/getpostsData,可以看到数据展示成功!
我们同样可以使用模版语言实现通过页面进行增删改查操作。
再见。
你可能需要:
NO3:Node.js + mysql+Sequelize实现注册接口及校验逻辑


