原文
https://medium.com/flutterdev...
代码
https://github.com/flutter-de...
参考
正文
在 Flutter 中,Flutter 应用程序屏幕上的每个组件都是一个小工具。屏幕的透视图完全依赖于用于构建应用程序的小部件的选择和分组。此外,应用程序代码的结构是一个小部件树。
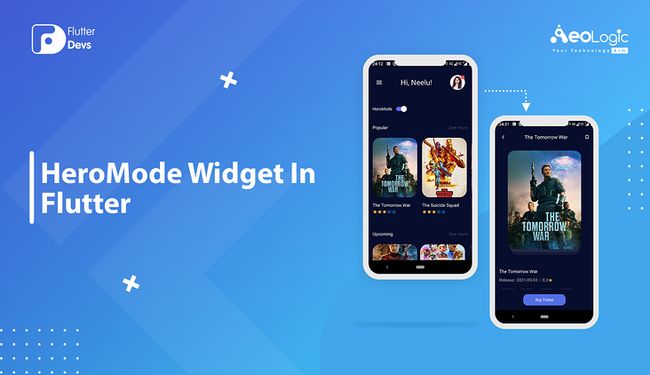
在本博客中,我们将了解 HeroMode 小部件及其在 flutter 中的功能。我们将在这个 HeroMode 小部件的演示程序的实现中看到。
“ Flutter 是谷歌的 UI 工具包,它可以帮助你在创纪录的时间内用一个代码库为移动设备、网络和桌面构建漂亮的本地组合应用程序。”
它是免费和开源的。它最初是由谷歌发展而来,目前由 ECMA 标准监管。 Flutter 应用程序利用达特编程语言来制作应用程序。这个 dart 编程和其他编程语言有一些相同的亮点,比如 Kotlin 和 Swift,并且可以被转换成 JavaScript 代码。
如果你想探索更多关于 Flutter ,请访问 Flutter 的官方网站,以获得更多的信息。 Flutter’s official website
以下这些公司和产品正在使用 Flutter —— Flutter 展示
HeroMode 小部件
Hero 小部件是一个伟大的开箱即用的动画,用于通信小部件从一个页面飞到另一个页面的导航动作。英雄动画是两个不同页面之间共享的元素过渡(动画)。现在来看看这个,想象一个超级英雄在行动中飞行。例如,您必须有一个图像列表。当我们用英雄标签包装它的时候。现在我们点击一个项目清单。而且当被敲击时。然后图像列表项目的土地其位置在详细页面。当我们取消它并返回到列表页面,然后 hero 小部件返回到它的页面。
HeroMode 小部件具有动画功能,可以在两个屏幕之间启用或禁用元素。基本上,当你想禁用 Hero 小部件的动画功能时,这个小部件是必需的。如果您想了解 Hero 模式小部件,那么首先您需要了解 Hero 小部件。
是 Hero 小部件的一部分,引入这个小部件的目的是启用和禁用 Hero 小部件的动画---- 如果你不想在两个屏幕之间动画元素,然后用 HeroMode 小部件包装 Hero 小部件,我们可以通过使用它们的静态属性或动态地启用和禁用它们,然后通过包装这个小部件,当你仔细看下面的例子视频时发生了什么,那么你就可以看到这个动画中的可衡量的区别。
演示模块:
如何实现 dart 文件中的代码:
你需要分别在你的代码中实现它:
首先,我为集合创建了一个 ViewModel 类,并在开关按钮上获得一个布尔值。这是我在 HeroMode Widget 中通过的。
bool _isHeroModeEnable= true;
bool get isHeroModeEnable => _isHeroModeEnable;set isHeroModeEnable(bool value) {
  _isHeroModeEnable = value;
}
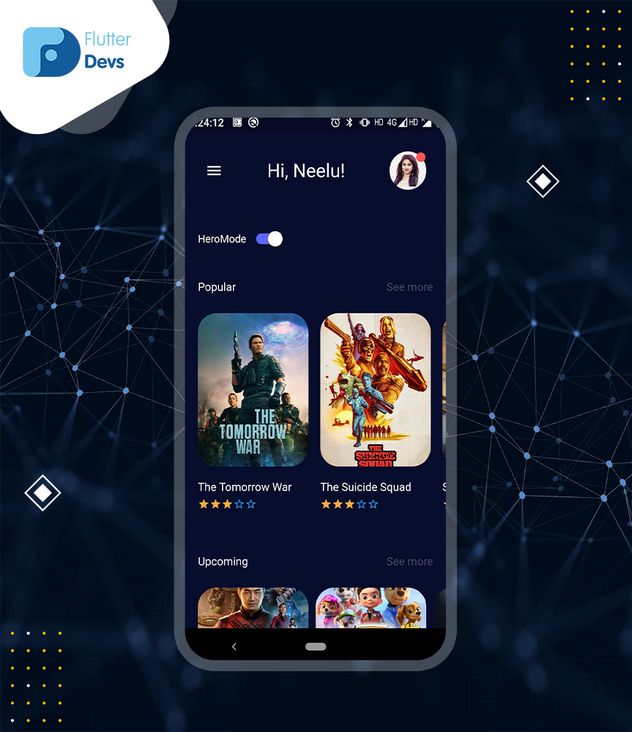
当我们运行应用程序时,我们应该得到屏幕的输出,就像下面的屏幕截图一样。
然后,我必须添加一个文本和开关按钮来显示 HeroMode 小部件的启用和禁用功能。
Widget buildCategoriesSection() {
  return Container(
    padding: EdgeInsets.only(left: 20),
    child: Row(
      _//mainAxisAlignment: MainAxisAlignment.center,_ children: [
        Container(
          child: Text("Hero Mode",
            style: TextStyle(
                color: Colors._white_,
              fontSize: 18,
              fontWeight: FontWeight._bold_ ),),
        ),
        Switch(
          value: model!=null && model!.isHeroModeEnable,
          onChanged:(value){
            print("value:$value");
            model!.isHeroModeEnable=value;
          },  activeTrackColor: Color(ColorConstants._light_blue_),
         activeColor: Color(ColorConstants._pure_white_),
        ),

      ],
    ),
  );}
然后,我用电影标题 API 创建了一个列表视图,但是您可以根据需要为测试目的使用一个虚拟图像列表。在此之后,我用 Hero 小部件包装图像,用 HeroMode 小部件包装 Hero 小部件。禁用 Hero 小部件的动画。基本上,这是一个媒介,以启用和禁用动画的英雄小部件。您不能直接从 Hero Widget 禁用动画。
Widget _buildPopularSection() {
  return Container(
    height: 300,
    padding: EdgeInsets.only(left: 20, top: 5),
    width: MediaQuery._of_(context).size.width,
    child: model != null && model!.isPopularLoading ? Center(child: CircularProgressIndicator())
        : Provider.value(
            value: Provider._of_(context),
            child: Consumer(
              builder: (context, value, child) => Container(
                child: ListView.builder(
                  shrinkWrap: true,
                  itemCount: model != null &&   model!.popularMovies != null ? model!.popularMovies!.results!.length : 0,
                  scrollDirection: Axis.horizontal,
                  itemBuilder: (context, index) {
                    return _buildPopularItem(
                        index, model!.popularMovies!.results![index]);
                  },
                ),
              ),
            ),
          ),
  );
}Widget _buildPopularItem(int index, Results result) {
  return GestureDetector(
    onTap: () {
      Navigator._push_(
        context,
        MaterialPageRoute(
            builder: (context) => MovieDetailView(movieDataModel: result)),
      );
    },
    child: Column(
      crossAxisAlignment: CrossAxisAlignment.start,
      children: [
        Container(
          height: 200,
          width: 150,
          margin: EdgeInsets.only(right: 16),
          child: HeroMode(
            child: Hero(
                tag: '${result.id}',
              child: ClipRRect(
                borderRadius: BorderRadius.circular(25.0),
                child: Image.network(
                  Constants._IMAGE_BASE_URL_ +
                      Constants._IMAGE_SIZE_1_ +
                      '${result.posterPath}',
                  fit: BoxFit.cover,
                ),
              ),
            ),
            enabled: true,
            _//enabled:model.isHeroModeEnabled,_ ),
        ),
        SizedBox(
          height: 18,
        ),
        Container(
          child: Text(
            result.title!,
            style: TextStyle(color: Colors._white_, fontSize: 15),
          ),
        ),
        SizedBox(
          height: 5,
        ),
        Container(
          child: GFRating(
            value: _rating,
            color: Color(ColorConstants._orange_),
            size: 16,
            onChanged: (value) {
              setState(() {
                _rating = value;
              });
            },
          ),
        )
      ],
    ),
  );
}
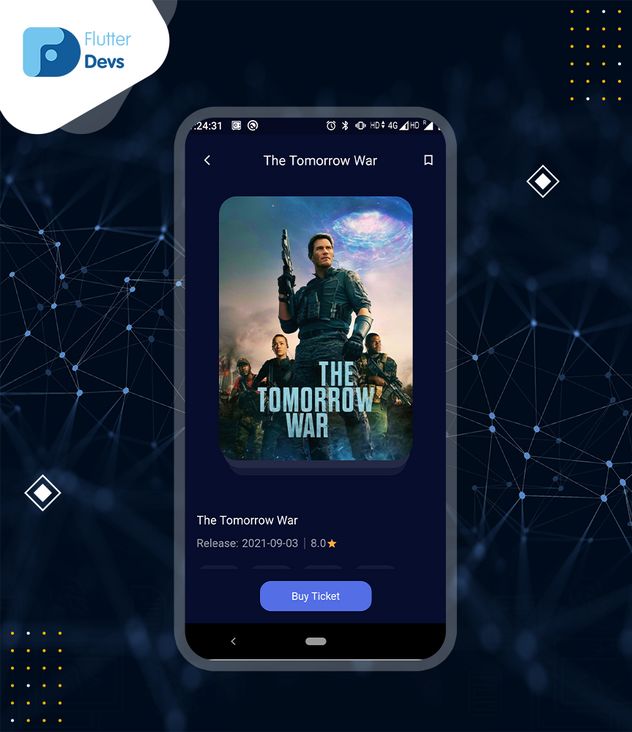
当我们运行应用程序时,我们应该得到屏幕的输出,就像下面的屏幕截图一样。
最后,我创建了第二个省道文件,在这个文件中,我制作了一个方法来显示图像动画。然后使用相同标记的 Hero 小部件包装图像。当您有多个图像时,然后传递图像列表 id。
Widget _buildMovieBanner(Results movieItems) {
  return Container(
    height: 380,
    child: Stack(
      children: [
        Positioned(
          top: 20,
          child: Container(
            height: 350,
            width: 240,
            margin: EdgeInsets.only(left: 28, right: 30),
            decoration: BoxDecoration(
              borderRadius: BorderRadius.circular(22),
              color: Color(ColorConstants._saphire_blue2_),
            ),
          ),
        ),
        Positioned(
          top: 10,
          child: Container(
            height: 350,
            width: 250,
            margin: EdgeInsets.only(left: 22, right: 25),
            decoration: BoxDecoration(
              borderRadius: BorderRadius.circular(22),
              color: Color(ColorConstants._cobaltBlue_),
            ),
          ),
        ),
        Container(
          height: 350,
          width: 260,
          margin: EdgeInsets.only(left: 16, right: 16),
          decoration: BoxDecoration(
            borderRadius: BorderRadius.circular(20),
          ),
          child: ClipRRect(
            borderRadius: BorderRadius.circular(24),
            child: Hero(
              tag: '${widget.movieDataModel.id}',
              child: Image.network(
                Constants._IMAGE_BASE_URL_ +
                    Constants._IMAGE_SIZE_1_ +
                    widget.movieDataModel.posterPath!,
                fit: BoxFit.cover,
              ),
            ),
          ),
        ),
      ],
    ),
  );
}
结语:
In this article, I have explained the basic overview of the HeroMode Widget in a flutter, you can modify this code according to your choice. This was a small introduction to HeroMode Widget On User Interaction from my side, and it’s working using Flutter.
在本文中,我已经简单介绍了 HeroMode 小部件的基本概况,您可以根据自己的选择修改这段代码。这是一个小的介绍 HeroMode 小部件用户交互从我这边,它的工作使用 Flutter。
I hope this blog will provide you with sufficient information on Trying up the Explore, HeroMode Widget in your flutter projects.
我希望这个博客将提供您尝试在您的 Flutter 项目的探索,HeroMode 小部件充足的信息。
❤ ❤ Thanks for reading this article ❤❤
❤ Thanks for reading this article ❤❤
If I got something wrong? Let me know in the comments. I would love to improve.
如果我做错了什么,请在评论中告诉我,我很乐意改进。
Clap If this article helps you.
鼓掌如果这篇文章对你有帮助的话。
GitHub 链接
https://github.com/flutter-de...
© 猫哥
- https://ducafecat.tech/
- https://github.com/ducafecat
- 微信群 ducafecat
- b 站 https://space.bilibili.com/40...
往期
开源
GetX Quick Start
https://github.com/ducafecat/...
新闻客户端
https://github.com/ducafecat/...
strapi 手册译文
微信讨论群 ducafecat
系列集合
译文
https://ducafecat.tech/catego...
开源项目
https://ducafecat.tech/catego...
Dart 编程语言基础
https://space.bilibili.com/40...
Flutter 零基础入门
https://space.bilibili.com/40...
Flutter 实战从零开始 新闻客户端
https://space.bilibili.com/40...
Flutter 组件开发
https://space.bilibili.com/40...
Flutter Bloc
https://space.bilibili.com/40...
Flutter Getx4
https://space.bilibili.com/40...


