手把手教你用鸿蒙HarmonyOS实现微信聊天界面(二)
简介
本系列文章记录作者大三开学第一个月中学习HarmonyOS移动应用开发学习经历,此篇为《微信聊天界面》项目,实现功能有
1、聊天信息功能,包括图片、文字
2、发送定位功能
3、选择发送本机图片功能
4、拍照并发送图片功能
如果在真机调试请将config文件中包名换成自己的应用包名即可,申请权限有文件读写、位置获取、相机调用、麦克风调用。
之前文章
手把手教你用鸿蒙HarmonyOS实现微信聊天界面(一)_hys1124388788的博客-CSDN博客
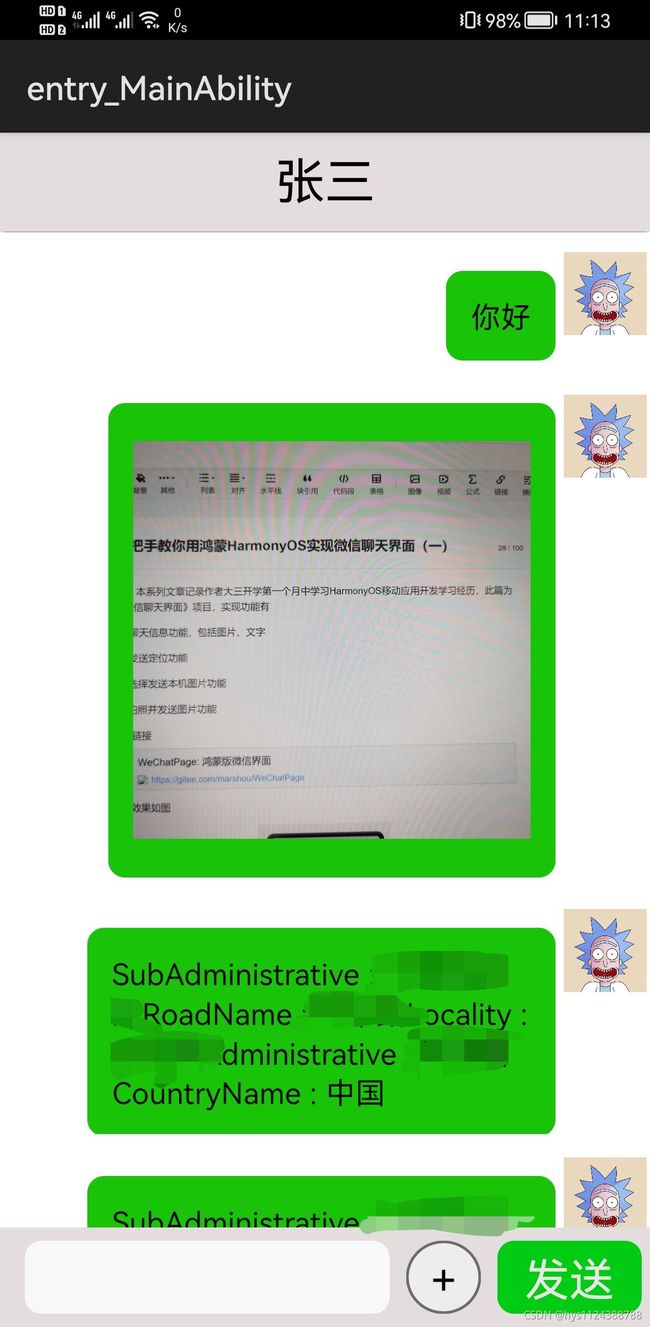
聊天界面效果如图
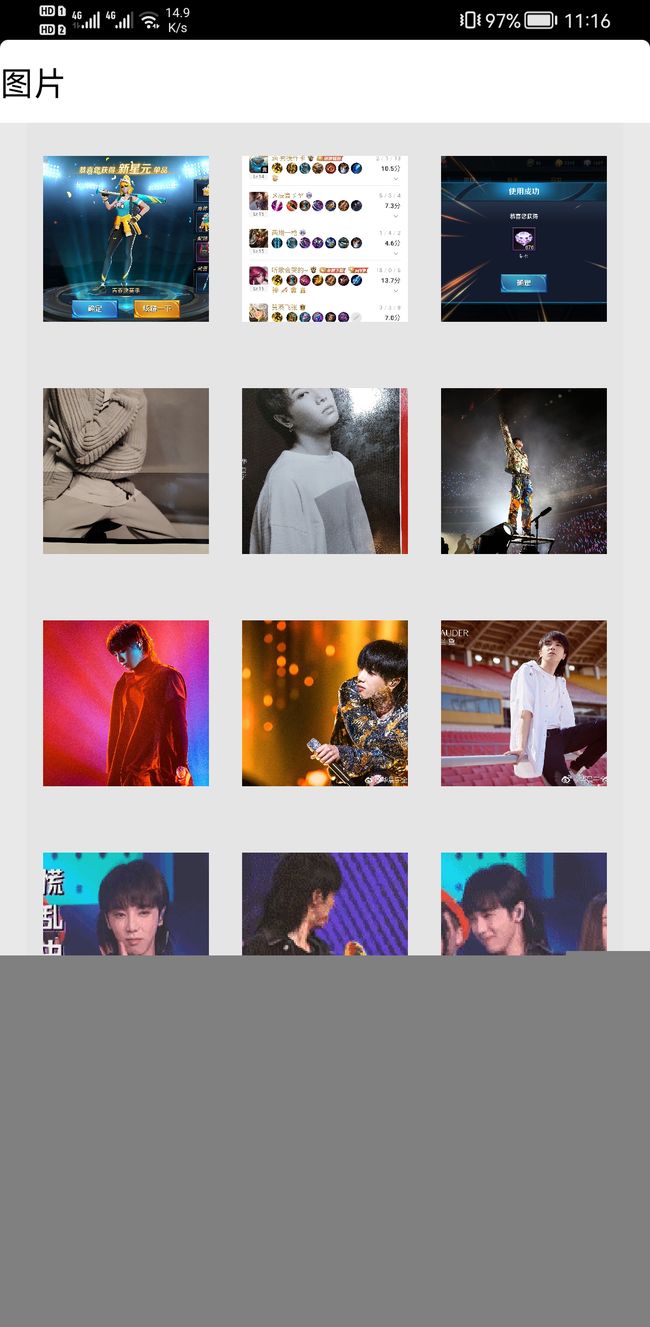
图片选择效果如图
图片获取
本篇讲关于图片的获取。一种方式是在项目中放置静态资源,另一种则是从本机中获取图片。
第一种
第一种方式使用很简单,只需要在Image组件添加src属性即可。
第二种
第二种的使用场景更加普遍,是根据图片文件的uri来访问媒体资源转换为PixelMap对象传给Image组件实现的。
 Component container = LayoutScatter.getInstance(context).parse(ResourceTable.Layout_image_message_list_item, null, false);
            Image image = (Image) container.findComponentById(ResourceTable.Id_image_message);

            DataAbilityHelper helper=DataAbilityHelper.creator(context);
            ImageSource imageSource;
            Uri uri = Uri.parse(aMessage.getMessage());
            FileDescriptor fd = null;
            try {
                fd = helper.openFile(uri, "r");
            } catch (DataAbilityRemoteException | FileNotFoundException e) {
                e.printStackTrace();
            }
            imageSource = ImageSource.create(fd, null);
            //创建位图
            PixelMap pixelMap = imageSource.createPixelmap(null);
            image.setPixelMap(pixelMap);
            imageSource.release();
            helper.release();

            return container;
获取Uri
如何获取图片的Uri呢?是通过DataAbilityHelper这个类查询本机的资源(参考官方文档文档中心),媒体存储相关类AVStorage类中AVStorage.Images.Media.EXTERNAL_DATA_ABILITY_URI是获取用于处理图像媒体信息的Uri,视频资源也类似,根据查询结果获取到的资源id拼接处Uri
Uri.appendEncodedPathToUri(AVStorage.Images.Media.EXTERNAL_DATA_ABILITY_URI, String.valueOf(id));项目中获取图片URI资源的类
public class PictureManager {
    private static final String TAG = PictureManager.class.getSimpleName();

    private List imagePathElements = new ArrayList<>();

    private Context context;

    /**
     * The construction method of this class
     *
     * @param context Context
     */
    public PictureManager(Context context) {
        this.context = context;
        loadFromMediaLibrary(context);
    }

    private void loadFromMediaLibrary(Context context) {
        Uri remoteUri = AVStorage.Images.Media.EXTERNAL_DATA_ABILITY_URI;
        DataAbilityHelper helper = DataAbilityHelper.creator(context, remoteUri, false);
        try {
            ResultSet resultSet = helper.query(remoteUri, null, null);
            LogUtil.info(TAG, "The result size: " + resultSet.getRowCount());
            processResult(resultSet);
            resultSet.close();
        } catch (DataAbilityRemoteException e) {
            LogUtil.error(TAG, "Query system media failed.");
        } finally {
            helper.release();
        }
    }

    private void processResult(ResultSet resultSet) {
        while (resultSet.goToNextRow()) {
            String path = resultSet.getString(resultSet.getColumnIndexForName(AVStorage.AVBaseColumns.DATA));
            String title = resultSet.getString(resultSet.getColumnIndexForName(AVStorage.AVBaseColumns.TITLE));
            String id = resultSet.getString(resultSet.getColumnIndexForName(AVStorage.Images.Media.ID));
            Uri uri = Uri.appendEncodedPathToUri(AVStorage.Images.Media.EXTERNAL_DATA_ABILITY_URI, String.valueOf(id));

            LogUtil.info(TAG, "The title is: " + title);
            LogUtil.info(TAG, "The path is: " + path);
            LogUtil.info(TAG, "The id is: " + id);
            LogUtil.info(TAG, "The uri is: " + uri);
            imagePathElements.add(uri);
        }
    }

    public List getimageElements() {
        LogUtil.info(TAG, "The size is: " + imagePathElements.size());
        return imagePathElements;
    }
}
Uri转图片
具体怎么选择图片是通过ListContiner组件将图片按行展示在手机上,通过添加图片的点击方法调用发送消息方法将图片发出。
如何将Uri显示为图片?在鸿蒙中Image组件可通过调用setPixelMap方法设置,参数是PixMap对象。可以通过ImageSource根据FileDescriptor 创建位图
DataAbilityHelper helper=DataAbilityHelper.creator(slice.getContext());
ImageSource imageSource;
FileDescriptor fd = null;
fd = helper.openFile(uri, "r");
imageSource = ImageSource.create(fd, null);
PixelMap pixelMap = imageSource.createPixelmap(null);
image.setPixelMap(pixelMap);
以下是在项目中将图片一行三张展示所以Uri采用数组存储,如果只想显示一张将数组换为单个对象即可。
DataAbilityHelper helper=DataAbilityHelper.creator(slice.getContext());
        //定义图片来源对象
        ImageSource imageSource;
        Uri[] uris = imageLineItem.getUris();
        FileDescriptor fd = null;

        image1.setClickedListener(component1 -> {
            mainAbilitySlice.addAndUpdateMessage(mainAbilitySlice.getMessageDataSize(), String.valueOf(uris[0]),"image");
            mainAbilitySlice.getDialog().destroy();
        });

try {
            fd = helper.openFile(uris[0], "r");
        } catch (DataAbilityRemoteException | FileNotFoundException e) {
            e.printStackTrace();
        }
        imageSource = ImageSource.create(fd, null);
        //创建位图
        PixelMap pixelMap = imageSource.createPixelmap(null);
        image1.setPixelMap(pixelMap);
        imageSource.release();
        helper.release();
ListContiner的内容实体类
public class ImageLineItem {
    private int index;
    private Uri[] uris;

    public ImageLineItem(int index) {
        this.index = index;
    }

    public int getIndex() {
        return index;
    }

    public void setIndex(int index) {
        this.index = index;
    }

    public Uri[] getUris() {
        return uris;
    }

    public void setUris(Uri[] uris) {
        this.uris = uris;
    }
}
Provider类
public class ImageLineProvider extends BaseItemProvider {
    private static final String TAG = ImageLineProvider.class.getSimpleName();
    private List list;
    private AbilitySlice slice;

    private MainAbilitySlice mainAbilitySlice;

    public void setMainAbilitySlice(MainAbilitySlice mainAbilitySlice){
        this.mainAbilitySlice = mainAbilitySlice;
    }

    public ImageLineProvider(List list, AbilitySlice slice) {
        LogUtil.info(TAG,"list.size() : "+list.size());
        this.list = list;
        this.slice = slice;
    }

    @Override
    public int getCount() {
        return list == null ? 0 : list.size();
    }

    @Override
    public Object getItem(int position) {
        if (list != null && position >= 0 && position < list.size()){
            return list.get(position);
        }
        return null;
    }

    @Override
    public long getItemId(int position) {
        return position;
    }

    private Component getItemComponent(int position) {
        return getComponent(position);
    }

    private Component getComponent(int position) {
        LogUtil.info(TAG,"list.size()"+list.size());
        final Component cpt;
        cpt = LayoutScatter.getInstance(slice).parse(ResourceTable.Layout_images_line, null, false);
        ImageLineItem imageLineItem = list.get(position);
        Image image1,image2,image3;
        image1 = (Image) cpt.findComponentById(ResourceTable.Id_image1);
        image2 = (Image) cpt.findComponentById(ResourceTable.Id_image2);
        image3 = (Image) cpt.findComponentById(ResourceTable.Id_image3);

        DataAbilityHelper helper=DataAbilityHelper.creator(slice.getContext());
        //定义图片来源对象
        ImageSource imageSource;
        Uri[] uris = imageLineItem.getUris();
        FileDescriptor fd = null;

        image1.setClickedListener(component1 -> {
            mainAbilitySlice.addAndUpdateMessage(mainAbilitySlice.getMessageDataSize(), String.valueOf(uris[0]),"image");
            mainAbilitySlice.getDialog().destroy();
        });
        image2.setClickedListener(component1 -> {
            mainAbilitySlice.addAndUpdateMessage(mainAbilitySlice.getMessageDataSize(), String.valueOf(uris[1]),"image");
            mainAbilitySlice.getDialog().destroy();
        });
        image3.setClickedListener(component1 -> {
            mainAbilitySlice.addAndUpdateMessage(mainAbilitySlice.getMessageDataSize(), String.valueOf(uris[2]),"image");
            mainAbilitySlice.getDialog().destroy();
        });

        try {
            fd = helper.openFile(uris[0], "r");
        } catch (DataAbilityRemoteException | FileNotFoundException e) {
            e.printStackTrace();
        }
        imageSource = ImageSource.create(fd, null);
        //创建位图
        PixelMap pixelMap = imageSource.createPixelmap(null);
        image1.setPixelMap(pixelMap);
        imageSource.release();
        helper.release();

        try {
            fd = helper.openFile(uris[1], "r");
        } catch (DataAbilityRemoteException | FileNotFoundException e) {
            e.printStackTrace();
        }
        imageSource = ImageSource.create(fd, null);
        //创建位图
        pixelMap = imageSource.createPixelmap(null);
        image2.setPixelMap(pixelMap);
        imageSource.release();
        helper.release();

        try {
            fd = helper.openFile(uris[2], "r");
        } catch (DataAbilityRemoteException | FileNotFoundException e) {
            e.printStackTrace();
        }
        imageSource = ImageSource.create(fd, null);
        //创建位图
        pixelMap = imageSource.createPixelmap(null);
        image3.setPixelMap(pixelMap);
        imageSource.release();
        helper.release();

        return cpt;
    }

    @Override
    public Component getComponent(int position, Component convertComponent, ComponentContainer componentContainer) {
        return getItemComponent(position);
    }
}
到此图片获取的方式讲完了,下篇讲前边图片中展示的效果怎么实现。
Gitee链接
WeChatPage: 鸿蒙版微信界面

