牛客网后端项目实战(八):开发注册功能
牛客网后端项目实战(八):开发注册功能
- 发送邮件
-
- 邮箱设置
- Spring Email
-
- 导入jar包
- 邮箱参数配置
- 使用JavaMailSender
- 使用模板引擎
- 开发注册功能
-
- 访问注册页面
- 提交注册数据
-
- 工具类
- 注册服务
- 激活注册账号
发送邮件
- 邮箱设置
- 启用客户端SMTP服务
- Spring Email
- 导入 jar 包
- 邮箱参数配置
- 使用 JavaMailSender 发送邮件
- 模板引擎
- 使用 Thymeleaf 发送 HTML 邮件
邮箱设置
首先启用邮箱的SMTP服务,我直接使用我个人的qq邮箱。进入qq邮箱设置帐户页面,开启POP3/SMTP服务,按照下方提示生成授权码,qq邮箱强制使用授权码代替邮箱密码。
[外链图片转存失败,源站可能有防盗链机制,建议将图片保存下来直接上传(img-akqubXzR-1584504195819)(http://cdn.neuswc2019.xyz/20200313105819.png)]
Spring Email
导入jar包
首先,在之前提到的搜索包的网站mvn上搜索spring mail,把配置复制到pom里。
<dependency>
            <groupId>org.springframework.bootgroupId>
            <artifactId>spring-boot-starter-mailartifactId>
            <version>2.2.5.RELEASEversion>
        dependency>
邮箱参数配置
在properties里配置。前两项根据使用的邮箱修改,密码有的邮箱使用登录密码,大部分使用授权码
# MailProperties
spring.mail.host=smtp.qq.com	//邮箱服务器
spring.mail.port=465	//服务器端口
[email protected]	//邮箱
spring.mail.password=aaaaaaaaaaaaaaaa	//密码/授权码
spring.mail.protocol=smtps	//协议,加密
spring.mail.properties.mail.smtp.ssl.enable=true	//开启ssl
使用JavaMailSender
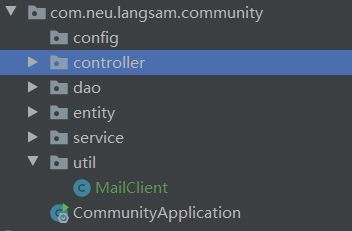
将发送邮件封装成一个工具类,新建一个util包,包下新建mailClient类。因为发送邮件实际是邮箱服务器进行,我们这里写的实际是客户端。
package com.neu.langsam.community.util;

import org.slf4j.Logger;
import org.slf4j.LoggerFactory;
import org.springframework.beans.factory.annotation.Autowired;
import org.springframework.beans.factory.annotation.Value;
import org.springframework.mail.javamail.JavaMailSender;
import org.springframework.mail.javamail.MimeMailMessage;
import org.springframework.mail.javamail.MimeMessageHelper;
import org.springframework.stereotype.Component;

import javax.mail.MessagingException;
import javax.mail.internet.MimeMessage;

@Component
public class MailClient {


    //启用日志
    private static final Logger logger= LoggerFactory.getLogger(MailClient.class);

    //注入JavaMailSender
    @Autowired
    private JavaMailSender mailSender;

    //注入properties里的username值给from
    @Value("${spring.mail.username}")
    private String from;

    public void senMail(String to,String subject,String content){


        try {

            //邮件内容
            MimeMessage message=mailSender.createMimeMessage();
            //帮助构建邮件内容
            MimeMessageHelper helper=new MimeMessageHelper(message);
            helper.setFrom(from);	//发件人
            helper.setTo(to);	//收件人
            helper.setSubject(subject);	//主题
            helper.setText(content,true);	//内容和开启html
            mailSender.send(helper.getMimeMessage());
        } catch (MessagingException e) {

            logger.error("发送邮件失败:"+e.getMessage());
        }
    }

}
然后写一个测试类来测试一下有没有问题。被qq邮箱分类到垃圾箱中了,尴尬。
@Test
    public void testTextMail(){

        mailClient.senMail("[email protected]","你是一个大帅哥","你好帅");
    }
使用模板引擎
我们使用thymeleaf模板引擎生成一个html文件作为邮件内容。
在templates/mail下新建一个demo.html
<html lang="en" xmlns:th="http://www.thymeleaf.org">
<head>
    <meta charset="UTF-8">
    <title>邮件示例title>
head>
<body>
    <p>欢迎你, <span style="color:red;" th:text="${username}">span>!p>
body>
html>
再写一个测试类来试试,这里需要注入模板引擎,不能直接返回html文件路径。
    @Autowired
    private TemplateEngine templateEngine;

	@Test
    public void testHtmlMail(){

        Context context=new Context();
        context.setVariable("username","langsam");
        String content=templateEngine.process("/mail/demo",context);
        mailClient.senMail("[email protected]","欢迎",content);
    }
开发注册功能
- 访问注册页面
- 点击顶部区域内的链接,打开注册页面。
- 提交注册数据
- 通过表单提交数据。
- 服务端验证账号是否已存在、邮箱是否已注册。
- 服务端发送激活邮件。
- 激活注册账号
- 点击邮件中的链接,访问服务端的激活服务。
访问注册页面
同样,前端html使用写好的模板,在我的gayhub相应目录下。
在controller包下新建一个LoginController,返回一下注册页面,在首页index里,点击注册默认跳转的是register页面。
package com.neu.langsam.community.controller;


import org.springframework.stereotype.Controller;
import org.springframework.web.bind.annotation.RequestMapping;
import org.springframework.web.bind.annotation.RequestMethod;

@Controller
public class LoginController {


    @RequestMapping(path = "/register",method = RequestMethod.GET)
    public String getRegisterPage(){

        return "site/register";
    }
}
提交注册数据
工具类
首先我们封装一个工具类,便于后面的一些开发。
- 第一个是生成随机字符串,利用UUID,为了简单,把生成的字符串里的短横线去掉
- 第二个是MD5加密,对密码进行加密处理,同一个密码计算出来的MD5值是一样的,所以还是不够安全,我们对密码进行加盐,也就是在用户的密码后面拼接一个随机字符串后再进行MD5计算。
package com.neu.langsam.community.util;

import org.apache.commons.lang3.StringUtils;
import org.springframework.util.DigestUtils;

import java.util.UUID;

public class CommunityUtil {


    //生成随机字符串
    public static String generateUUID(){

        return UUID.randomUUID().toString().replaceAll("-","");
    }

    //MD5加密
    //hello -> abc123def456
    //hello + 3e4a8(salt) -> abd123def456abc
    public static String md5(String key){

        if(StringUtils.isBlank(key)){

            return null;
        }
        return DigestUtils.md5DigestAsHex(key.getBytes());
    }

}
注册服务
我们在properties里配置一个项目地址,也就是我们的访问路径变成localhost:8080/community/index
再配置一下域名,这里在本地部署,就写localhost就行
server.servlet.context-path=/community
# Community
community.path.domain=http://localhost:8080
- 首先用注解引入项目路径和域名
- 写注册方法,返回值用map返回对应的消息。
- 首先对传进来的user对象做一个空值的判断
- 然后再验证账号和邮箱是否已注册过了
- 再补全user对象的值,生成盐然后对密码进行加密
- 注册用户都是普通用户,type设为0,状态设置为未激活0,再生成一个激活码随机字符串
- 头像使用牛客网的默认头像,0-1000号头像都可以使用
- 注册时间生成后插入对象就可以了
- 最后用模板引擎生成html邮件,进行发送。
前端html由于不是本次学习的重点,都不进行讲解,但还是需要自己看一看,前端时怎么处理后端提供的数据的
package com.neu.langsam.community.service;


import com.neu.langsam.community.dao.UserMapper;
import com.neu.langsam.community.entity.User;
import com.neu.langsam.community.util.CommunityUtil;
import com.neu.langsam.community.util.MailClient;
import org.apache.commons.lang3.StringUtils;
import org.springframework.beans.factory.annotation.Autowired;
import org.springframework.beans.factory.annotation.Value;
import org.springframework.stereotype.Service;
import org.thymeleaf.TemplateEngine;
import org.thymeleaf.context.Context;

import java.util.Date;
import java.util.HashMap;
import java.util.Map;
import java.util.Random;

@Service
public class UserService {


    @Autowired
    private UserMapper userMapper;

    @Autowired
    private MailClient mailClient;

    @Autowired
    private TemplateEngine templateEngine;

    @Value("${community.path.domain}")
    private String domain;

    @Value("${server.servlet.context-path}")
    private String contextPath;


    public User findUserById(int id) {

        return userMapper.selectById(id);
    }

    public Map<String, Object> register(User user) {

        Map<String, Object> map = new HashMap<>();
        //空值处理
        if (user == null) {

            throw new IllegalArgumentException("参数不能为空!");
        }
        if (StringUtils.isBlank(user.getUsername())) {

            map.put("usernameMsg", "账号不能为空");
            return map;
        }
        if (StringUtils.isBlank(user.getUsername())) {

            map.put("passwordMsg", "密码不能为空");
            return map;
        }
        if (StringUtils.isBlank(user.getUsername())) {

            map.put("emailMsg", "邮箱不能为空");
            return map;
        }

        //验证账号
        User u = userMapper.selectByName(user.getUsername());
        if (u != null) {

            map.put("usernameMsg", "该账号已存在");
            return map;
        }
        //验证邮箱
        u = userMapper.selectByEmail(user.getEmail());
        if (u != null) {

            map.put("emailMsg", "该邮箱已被注册");
            return map;
        }


        //注册用户
        user.setSalt(CommunityUtil.generateUUID().substring(0, 5));
        user.setPassword(CommunityUtil.md5(user.getPassword() + user.getSalt()));
        user.setType(0);
        user.setStatus(0);
        user.setActivationCode(CommunityUtil.generateUUID());
        user.setHeaderUrl(String.format("http://images.nowcoder.com/head/%dt.png", new Random().nextInt(1000)));
        user.setCreateTime(new Date());
        userMapper.insertUser(user);


        //激活邮件
        Context context=new Context();
        context.setVariable("email",user.getEmail());
        // http://localhost:8080/community/activation/101/code
        String url=domain+contextPath+"/activation/"+user.getId()+"/"+user.getActivationCode();
        context.setVariable("url",url);
        String content=templateEngine.process("mail/activation",context);
        mailClient.senMail(user.getEmail(),"激活账号",content);
        return map;
    }

}
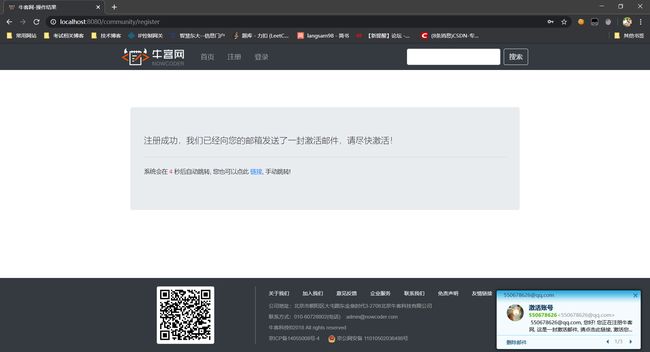
然后在LoginController里写控制方法,首先调用service的register方法返回map消息。如果map为空,就返回注册成功的页面
    @RequestMapping(path = "/register",method = RequestMethod.POST)
    public String register(Model model, User user){

        Map<String,Object> map=userService.register(user);
        if (map==null||map.isEmpty()){

            model.addAttribute("msg","注册成功,我们已经向您的邮箱发送了一封激活邮件,请尽快激活!");
            model.addAttribute("target","/index");
            return "/site/operate-result";
        }else {

            model.addAttribute("usernameMsg",map.get("usernameMsg"));
            model.addAttribute("passwordMsg",map.get("passwordMsg"));
            model.addAttribute("emailMsg",map.get("emailMsg"));
            return "site/register";
        }
    }
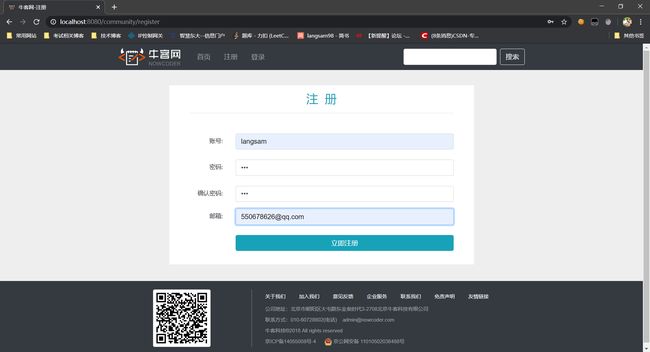
输入信息进行注册,注册完后可以用重复的用户名或者邮箱进行测试。
[外链图片转存失败,源站可能有防盗链机制,建议将图片保存下来直接上传(img-BsLISXwo-1584504195832)(http://cdn.neuswc2019.xyz/20200318112026.png)]
注册就完成了。
激活注册账号
激活注册账号,有几种情况,成功激活,重复激活和激活失败。
我们先写一个接口类来声明一下这几种情况。在util包下写CommunityUtil。
package com.neu.langsam.community.util;

public interface CommunityConstant {

    /**
     * 激活成功
     */
    int ACTIVATION_SUCCESS=0;

    /**
     * 重复激活
     */
    int ACTIVATION_REPEAT=1;

    /**
     * 激活失败
     */
    int ACTIVATION_FAILURE=2;

}
然后我们还是在userService里写激活方法,首先实现上面写的接口。这个功能比较简单,用传进来的id找出用户,然后判断状态,返回相应情况。
public class UserService implements CommunityConstant{


public int activation(int userId,String code){

        User user=userMapper.selectById(userId);
        if(user.getStatus()==1){

            return ACTIVATION_REPEAT;
        }else if (user.getActivationCode().equals(code)){

            userMapper.updateStatus(userId,1);
            return ACTIVATION_SUCCESS;
        }else {

            return ACTIVATION_FAILURE;
        }
    }

}
然后是LoginController,也实现接口。
- 访问路径在之前激活邮件那里定义过了,参数是直接拼接到路径后面的。
- 使用@PathVariable注解获取路径中的参数值
- 调用刚刚写好的activation方法,返回结果值
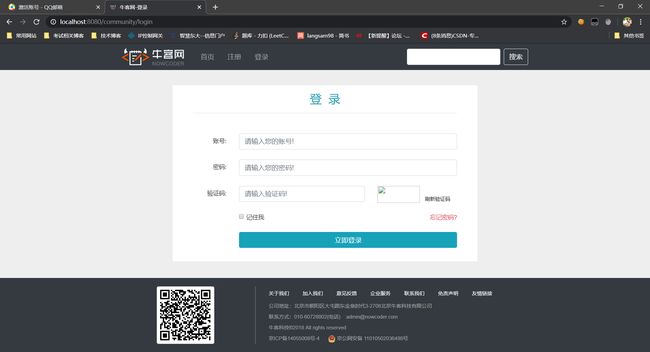
- 判断结果值,处理不同情况,成功激活就返回登录页面,重复激活返回首页,激活失败也返回首页
- 这里还需要处理一下返回登录页面的方法
// http://localhost:8080/community/activation/101/code
    @RequestMapping(path = "/activation/{userId}/{code}",method = RequestMethod.GET)
    public String activation(Model model, @PathVariable("userId") int userId,@PathVariable("code") String code){

        int result = userService.activation(userId,code);
        if (result==ACTIVATION_SUCCESS){

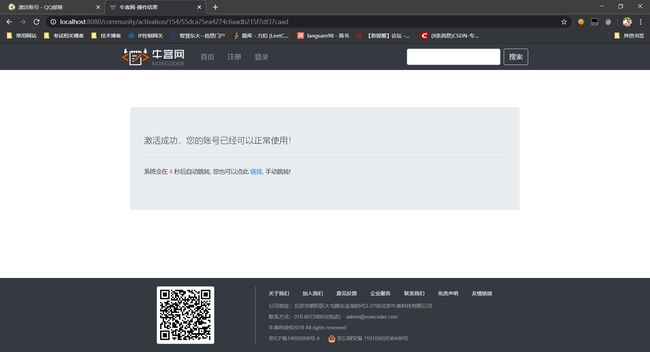
            model.addAttribute("msg","激活成功,您的账号已经可以正常使用!");
            model.addAttribute("target","/login");
        }else if (result==ACTIVATION_REPEAT){

            model.addAttribute("msg","无效操作,您的账号已经激活!");
            model.addAttribute("target","/index");
        }else {

            model.addAttribute("msg","激活失败,您的激活码不正确!");
            model.addAttribute("target","/index");
        }

        return "/site/operate-result";
    }
@RequestMapping(path = "/login",method = RequestMethod.GET)
    public String getLoginPage(){

        return "site/login";
    }

