ELK日志分析系统--centos搭建ELK(elasticsearch7+logstash7+kibana7)
搭建ELK
有什么问题可以微信联系我 (文章末尾)
采用yum安装,并且采用国内镜像源安装,提高安装速度。
Elasticsearch7.x 清华大学开源镜像站:https://mirror.tuna.tsinghua.edu.cn/elasticstack/7.x/yum/
环境:
centos7:
- 防火墙和selinux关闭
- IP:192.66.66.101
- 修改主机名
- hostnamectl set-hostname elk-node1
安装elasticsearch
1、配置yum源(国内源)
cd /etc/yum.repos.d
vim elasticsearch7.repo

[elasticsearch-7.x]
name=Elasticsearch repository for 7.x packages
baseurl=https://mirror.tuna.tsinghua.edu.cn/elasticstack/7.x/yum/
gpgcheck=0
gpgkey=https://artifacts.elastic.co/GPG-KEY-elasticsearch
enabled=1
autorefresh=1
type=rpm-md
2、安装:
yum install -y elasticsearch redis nginx java
3、配置elasticsearch
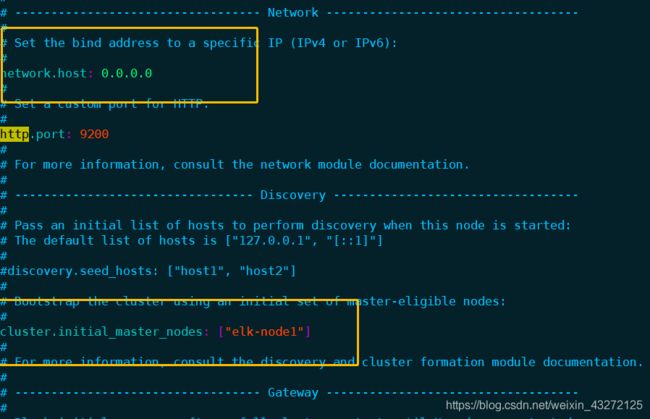
编辑vim /etc/elasticsearch/elasticsearch.yml ,注意冒号后面有个空格
vim /etc/elasticsearch/elasticsearch.yml
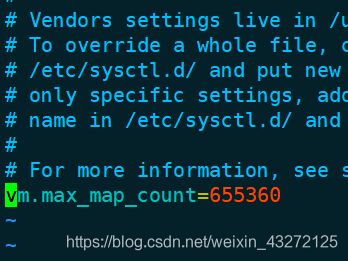
修改/etc/sysctl.conf
末尾添加:vm.max_map_count=655360
vim /etc/sysctl.conf
sysctl -p
修改/etc/security/limits.conf
vim /etc/security/limits.conf

*               soft    nofile          65536
*               hard    nofile          65536
*               soft    nproc           4096
*               hard    nproc           4096
systemctl start elasticsearch		#启动
systemctl status elasticsearch 		#查看
systemctl enable elasticsearch		#开机启动
systemctl stop elasticsearch		#停止

出现此页面表示完成

安装插件:
最实用的通过web界面来查看elasticsearch集群状态信息
安装elasticsearch-head插件
 增加参数,使head插件可以访问es
 vim /etc/elasticsearch/elasticsearch.yml
http.cors.enabled: true
http.cors.allow-origin: "*"
systemctl restart elasticsearch 重启
yum install git npm -y
git clone git://github.com/mobz/elasticsearch-head.git
cd  elasticsearch-head
npm install


vim  Gruntfile.js
95行左右
	hostname: '*',


npm run start &  启动
安装Logstash
安装测试
yum install logstash
systemctl restart elasticsearch
测试:
/usr/share/logstash/bin/logstash  -e 'input { stdin{} } output {  elasticsearch { hosts => ["192.66.66.102:9200"]} }'

数据收集:logstash的配置文件的编写
1)编写logstash的配置文件
这个文件写哪都行
vim  file.conf
input {

    file {

      path => "/var/log/messages"
      type => "system"
      start_position => "beginning"
    }
}
output {

    elasticsearch {

           hosts => ["192.66.66.102:9200"]
           index => "system-%{+YYYY.MM.dd}"
    }
}
2)执行
/usr/share/logstash/bin/logstash -f file.conf &
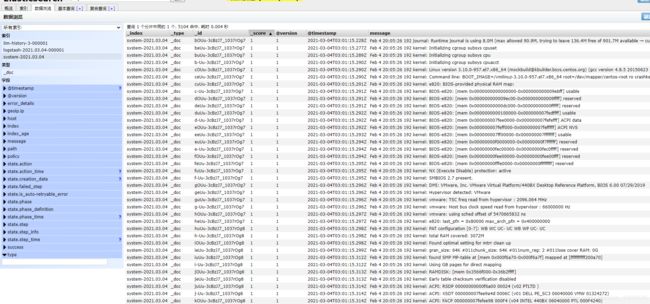
登陆elasticsearch界面,查看本机系统日志的信息:

安装Kibana
安装ES时添加清华yum源中已经包含了kibana,下面直接使用yum安装即可。
安装配置
yum install -y kibana
使用yum安装的kibana,默认安装的主目录在/usr/share/kibana中。kibana配置文件的位置为/etc/kibana/kibana.yml。
配置:
cd /etc/kibana/
cp kibana.yml kibana.yml.bak
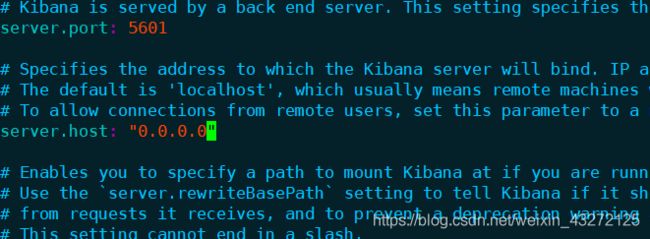
vim kibana.yml
2,7行

28行

107行
systemctl start kibana		#启动
systemctl enable kibana		#开机启动
systemctl status kibana		#查看
systemctl stop kibana		#停止
访问http://192.66.66.102:5601,即可看到安装成功

微信:1986367606


