“毕设,私活极优Spring Boot+Spring Cloud分布式微服务架构快速搭建”
目录
#平台简介
#系统模块
#架构图
#内置功能
#在线体验
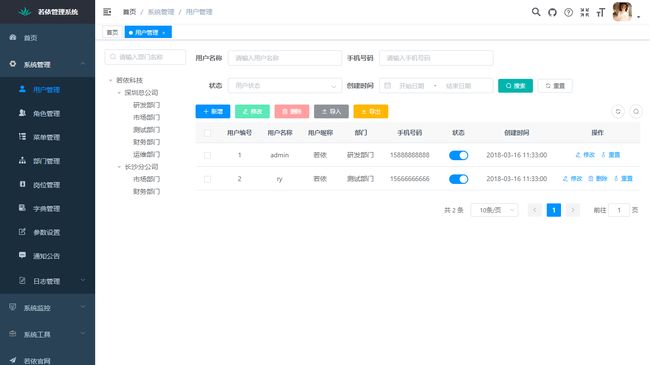
#演示图
#技术选型
#准备工作
#运行系统
#必要配置
#部署系统
#常见问题
#配置文件
源码获取地址
平台简介
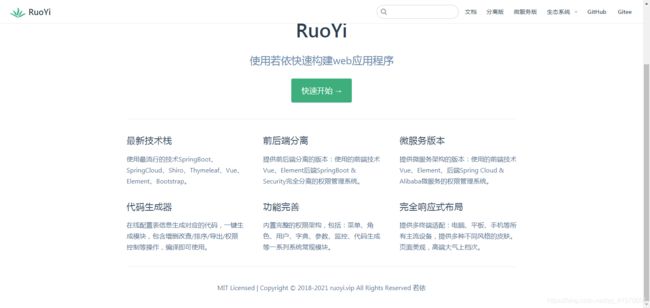
若依是一套全部开源的快速开发平台,毫无保留给个人及企业免费使用。
- 采用前后端分离的模式,微服务版本前端(基于 RuoYi-Vue)。
- 后端采用Spring Boot、Spring Cloud & Alibaba。
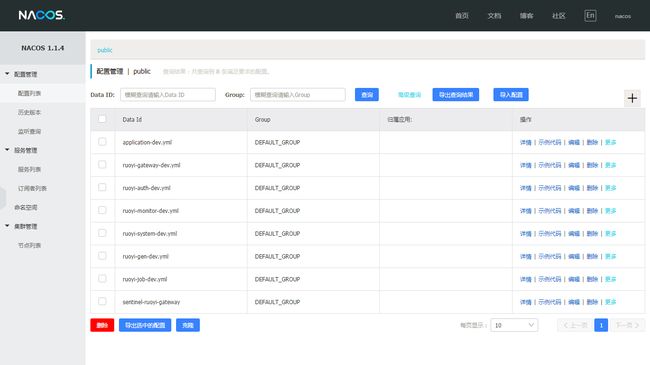
- 注册中心、配置中心选型Nacos,权限认证使用Redis。
- 流量控制框架选型Sentinel,分布式事务选型Seata。
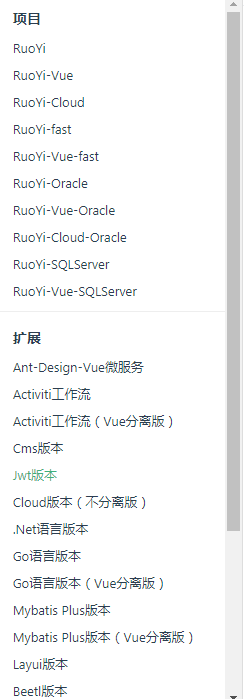
- 如需不分离应用,请移步 RuoYi,如需分离应用,请移步 RuoYi-Vue
友情链接 若依/RuoYi-Cloud Ant Design版本。
系统模块
com.ruoyi
├── ruoyi-ui              // 前端框架 [80]
├── ruoyi-gateway         // 网关模块 [8080]
├── ruoyi-auth            // 认证中心 [9200]
├── ruoyi-api             // 接口模块
│       └── ruoyi-api-system                          // 系统接口
├── ruoyi-common          // 通用模块
│       └── ruoyi-common-core                         // 核心模块
│       └── ruoyi-common-datascope                    // 权限范围
│       └── ruoyi-common-datasource                   // 多数据源
│       └── ruoyi-common-log                          // 日志记录
│       └── ruoyi-common-redis                        // 缓存服务
│       └── ruoyi-common-security                     // 安全模块
│       └── ruoyi-common-swagger                      // 系统接口
├── ruoyi-modules         // 业务模块
│       └── ruoyi-system                              // 系统模块 [9201]
│       └── ruoyi-gen                                 // 代码生成 [9202]
│       └── ruoyi-job                                 // 定时任务 [9203]
│       └── ruoyi-file                                // 文件服务 [9300]
├── ruoyi-visual          // 图形化管理模块
│       └── ruoyi-visual-monitor                      // 监控中心 [9100]
├──pom.xml                // 公共依赖
架构图
内置功能
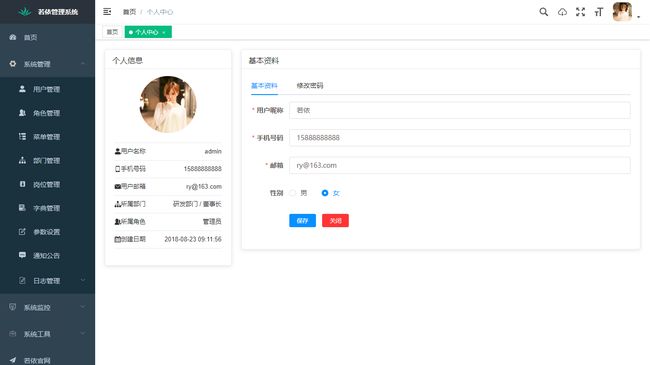
- 用户管理:用户是系统操作者,该功能主要完成系统用户配置。
- 部门管理:配置系统组织机构(公司、部门、小组),树结构展现支持数据权限。
- 岗位管理:配置系统用户所属担任职务。
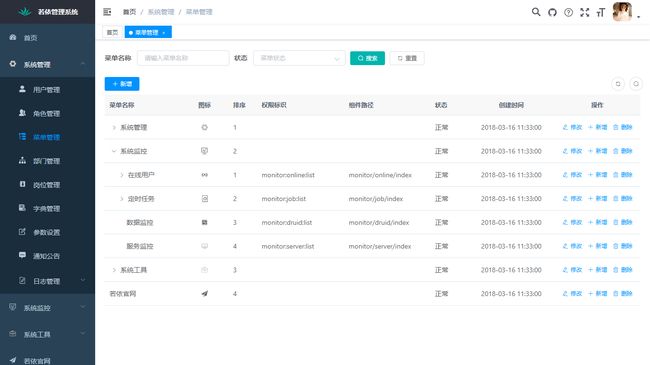
- 菜单管理:配置系统菜单,操作权限,按钮权限标识等。
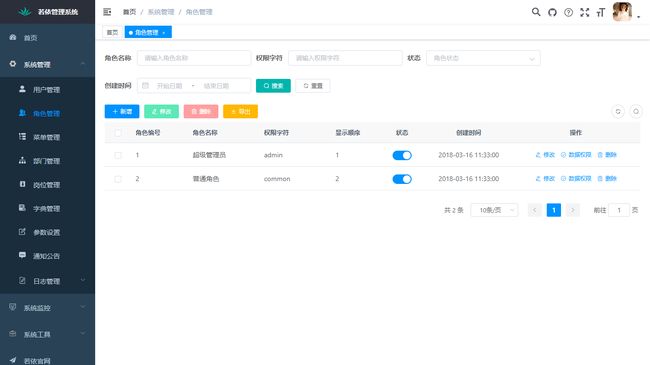
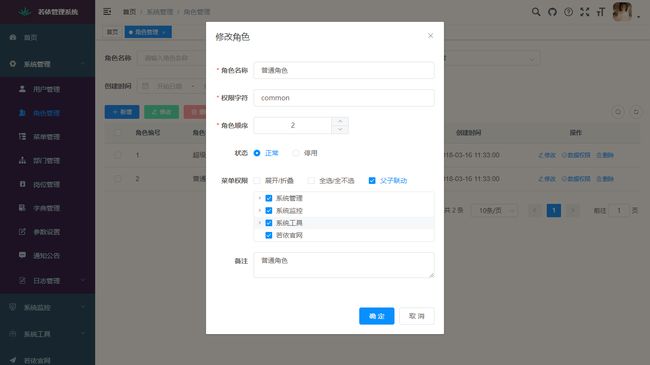
- 角色管理:角色菜单权限分配、设置角色按机构进行数据范围权限划分。
- 字典管理:对系统中经常使用的一些较为固定的数据进行维护。
- 参数管理:对系统动态配置常用参数。
- 通知公告:系统通知公告信息发布维护。
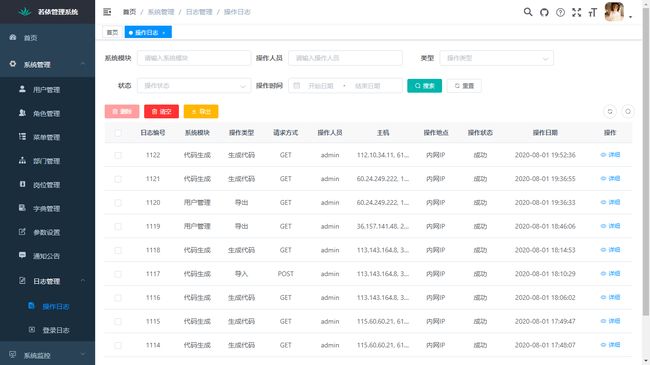
- 操作日志:系统正常操作日志记录和查询;系统异常信息日志记录和查询。
- 登录日志:系统登录日志记录查询包含登录异常。
- 在线用户:当前系统中活跃用户状态监控。
- 定时任务:在线(添加、修改、删除)任务调度包含执行结果日志。
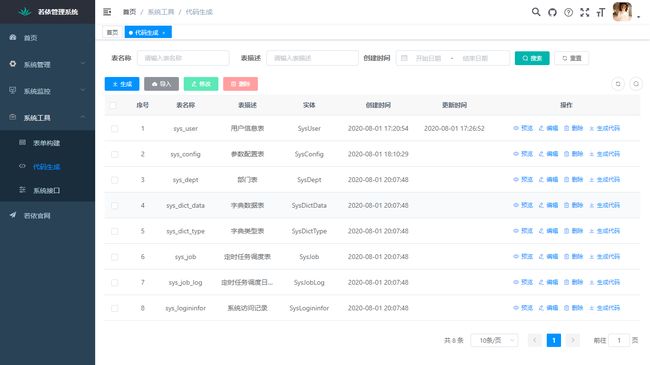
- 代码生成:前后端代码的生成(java、html、xml、sql)支持CRUD下载 。
- 系统接口:根据业务代码自动生成相关的api接口文档。
- 服务监控:监视当前系统CPU、内存、磁盘、堆栈等相关信息。
- 在线构建器:拖动表单元素生成相应的HTML代码。
- 连接池监视:监视当前系统数据库连接池状态,可进行分析SQL找出系统性能瓶颈。
在线体验
- admin/admin123
- 陆陆续续收到一些打赏,为了更好的体验已用于演示服务器升级。谢谢各位小伙伴。
演示地址:http://ruoyi.vip
文档地址:http://doc.ruoyi.vip
演示图
技术选型
1、系统环境
- Java EE 8
- Servlet 3.0
- Apache Maven 3
2、主框架
- Spring Boot 2.2.x
- Spring Framework 5.2.x
- Apache Shiro 1.7
3、持久层
- Apache MyBatis 3.5.x
- Hibernate Validation 6.0.x
- Alibaba Druid 1.2.x
4、视图层
- Bootstrap 3.3.7
- Thymeleaf 3.0.x
准备工作
JDK >= 1.8 (推荐1.8版本)
Mysql >= 5.7.0 (推荐5.7版本)
Maven >= 3.0
运行系统
1、前往Gitee下载页面(https://gitee.com/y_project/RuoYi (opens new window))下载解压到工作目录
2、导入到Eclipse,菜单 File -> Import,然后选择 Maven -> Existing Maven Projects,点击 Next> 按钮,选择工作目录,然后点击 Finish 按钮,即可成功导入。Eclipse会自动加载Maven依赖包,初次加载会比较慢(根据自身网络情况而定)
3、创建数据库ry并导入数据脚本ry_2021xxxx.sql,quartz.sql
4、打开项目运行com.ruoyi.RuoYiApplication.java,出现如下图表示启动成功。
(♥◠‿◠)ノ゙  若依启动成功   ლ(´ڡ`ლ)゙
 .-------.       ____     __
 |  _ _   \      \   \   /  /
 | ( ' )  |       \  _. /  '
 |(_ o _) /        _( )_ .'
 | (_,_).' __  ___(_ o _)'
 |  |\ \  |  ||   |(_,_)'
 |  | \ `'   /|   `-'  /
 |  |  \    /  \      /
 ''-'   `'-'    `-..-'
5、打开浏览器,输入:(http://localhost:80 (opens new window)) (默认账户/密码 admin/admin123)
若能正确展示登录页面,并能成功登录,菜单及页面展示正常,则表明环境搭建成功
建议使用Git克隆,因为克隆的方式可以和RuoYi随时保持更新同步。使用Git命令克隆
git clone https://gitee.com/y_project/RuoYi.git
#必要配置
- 修改数据库连接,编辑
resources目录下的application-druid.yml
# 数据源配置
spring:
    datasource:
        type: com.alibaba.druid.pool.DruidDataSource
        driverClassName: com.mysql.cj.jdbc.Driver
        druid:
            # 主库数据源
            master:
                url: 数据库地址
                username: 数据库账号
                password: 数据库密码
- 修改服务器配置,
编辑resources目录下的application.yml
# 开发环境配置
server:
  # 服务器的HTTP端口,默认为80
  port: 端口
  servlet:
    # 应用的访问路径
    context-path: /应用路径
#部署系统
- 打包工程文件
在ruoyi项目的bin目录下执行package.bat打包Web工程,生成war/jar包文件。
然后会在项目下生成target文件夹包含war或jar
提示
多模块版本会生成在ruoyi/ruoyi-admin模块下target文件夹
- 部署工程文件
1、jar部署方式
使用命令行执行:java –jar ruoyi.jar 或者执行脚本:ruoyi/bin/run.bat
2、war部署方式ruoyi/pom.xml中的packaging修改为war,放入tomcat服务器webapps
war
提示
多模块版本在ruoyi/ruoyi-admin模块下修改pom.xml
SpringBoot去除内嵌Tomcat(PS:此步骤不重要,因为不排除也能在容器中部署war)
	org.springframework.boot
	spring-boot-starter-web


			org.springframework.boot
			spring-boot-starter-tomcat


		spring-boot-starter-tomcat
		org.springframework.boot
#常见问题
- 如果使用
Mac需要修改application.yml文件路径profile - 如果使用
Linux提示表不存在,设置大小写敏感配置在/etc/my.cnf添加lower_case_table_names=1,重启MYSQL服务 - 如果提示当前权限不足,无法写入文件请检查
application.yml中的profile路径或logback.xml中的log.path路径是否有可读可写操作权限
配置文件
- 通用配置
application.yml# 项目相关配置 ruoyi: # 名称 name: RuoYi # 版本 version: 4.6.0 # 版权年份 copyrightYear: 2021 # 实例演示开关 demoEnabled: true # 文件路径 示例( Windows配置D:/ruoyi/uploadPath,Linux配置 /home/ruoyi/uploadPath) profile: D:/ruoyi/uploadPath # 获取ip地址开关 addressEnabled: false # 开发环境配置 server: # 服务器的HTTP端口,默认为80 port: 80 servlet: # 应用的访问路径 context-path: / tomcat: # tomcat的URI编码 uri-encoding: UTF-8 # tomcat最大线程数,默认为200 max-threads: 800 # Tomcat启动初始化的线程数,默认值25 min-spare-threads: 30 # 日志配置 logging: level: com.ruoyi: debug org.springframework: warn # 用户配置 user: password: # 密码错误{maxRetryCount}次锁定10分钟 maxRetryCount: 5 # Spring配置 spring: # 模板引擎 thymeleaf: mode: HTML encoding: utf-8 # 禁用缓存 cache: false # 资源信息 messages: # 国际化资源文件路径 basename: static/i18n/messages jackson: time-zone: GMT+8 date-format: yyyy-MM-dd HH:mm:ss profiles: active: druid # 文件上传 servlet: multipart: # 单个文件大小 max-file-size: 10MB # 设置总上传的文件大小 max-request-size: 20MB # 服务模块 devtools: restart: # 热部署开关 enabled: true # MyBatis mybatis: # 搜索指定包别名 typeAliasesPackage: com.ruoyi.**.domain # 配置mapper的扫描,找到所有的mapper.xml映射文件 mapperLocations: classpath*:mapper/**/*Mapper.xml # 加载全局的配置文件 configLocation: classpath:mybatis/mybatis-config.xml # PageHelper分页插件 pagehelper: helperDialect: mysql reasonable: true supportMethodsArguments: true params: count=countSql # Shiro shiro: user: # 登录地址 loginUrl: /login # 权限认证失败地址 unauthorizedUrl: /unauth # 首页地址 indexUrl: /index # 验证码开关 captchaEnabled: true # 验证码类型 math 数组计算 char 字符 captchaType: math cookie: # 设置Cookie的域名 默认空,即当前访问的域名 domain: # 设置cookie的有效访问路径 path: / # 设置HttpOnly属性 httpOnly: true # 设置Cookie的过期时间,天为单位 maxAge: 30 # 设置密钥,务必保持唯一性(生成方式,直接拷贝到main运行即可)KeyGenerator keygen = KeyGenerator.getInstance("AES"); SecretKey deskey = keygen.generateKey(); System.out.println(Base64.encodeToString(deskey.getEncoded())); cipherKey: zSyK5Kp6PZAAjlT+eeNMlg== session: # Session超时时间,-1代表永不过期(默认30分钟) expireTime: 30 # 同步session到数据库的周期(默认1分钟) dbSyncPeriod: 1 # 相隔多久检查一次session的有效性,默认就是10分钟 validationInterval: 10 # 同一个用户最大会话数,比如2的意思是同一个账号允许最多同时两个人登录(默认-1不限制) maxSession: -1 # 踢出之前登录的/之后登录的用户,默认踢出之前登录的用户 kickoutAfter: false # 防止XSS攻击 xss: # 过滤开关 enabled: true # 排除链接(多个用逗号分隔) excludes: /system/notice/* # 匹配链接 urlPatterns: /system/*,/monitor/*,/tool/* # Swagger配置 swagger: # 是否开启swagger enabled: true - 数据源配置
application-druid.yml# 数据源配置 spring: datasource: type: com.alibaba.druid.pool.DruidDataSource driverClassName: com.mysql.cj.jdbc.Driver druid: # 主库数据源 master: url: jdbc:mysql://localhost:3306/ry?useUnicode=true&characterEncoding=utf8&zeroDateTimeBehavior=convertToNull&useSSL=true&serverTimezone=GMT%2B8 username: root password: password # 从库数据源 slave: # 从数据源开关/默认关闭 enabled: false url: username: password: # 初始连接数 initialSize: 5 # 最小连接池数量 minIdle: 10 # 最大连接池数量 maxActive: 20 # 配置获取连接等待超时的时间 maxWait: 60000 # 配置间隔多久才进行一次检测,检测需要关闭的空闲连接,单位是毫秒 timeBetweenEvictionRunsMillis: 60000 # 配置一个连接在池中最小生存的时间,单位是毫秒 minEvictableIdleTimeMillis: 300000 # 配置一个连接在池中最大生存的时间,单位是毫秒 maxEvictableIdleTimeMillis: 900000 # 配置检测连接是否有效 validationQuery: SELECT 1 FROM DUAL testWhileIdle: true testOnBorrow: false testOnReturn: false webStatFilter: enabled: true statViewServlet: enabled: true # 设置白名单,不填则允许所有访问 allow: url-pattern: /druid/* # 控制台管理用户名和密码 login-username: login-password: filter: stat: enabled: true # 慢SQL记录 log-slow-sql: true slow-sql-millis: 1000 merge-sql: true wall: config: multi-statement-allow: true - 代码生成配置
generator.yml# 代码生成 gen: # 作者 author: ruoyi # 默认生成包路径 system 需改成自己的模块名称 如 system monitor tool packageName: com.ruoyi.system # 自动去除表前缀,默认是false autoRemovePre: false # 表前缀(生成类名不会包含表前缀,多个用逗号分隔) tablePrefix: sys_源码获取地址:
若依管理系统(基于SpringBoot的权限管理系统)
Vue前端分离版(基于SpringBoot的权限管理系统)
Cloud微服务版(基于SpringCloud的权限管理系统)
![]()
![]()
五年从程序员到架构师!这是我见过史上最好的程序员职业规划
(下一篇) 16 条 yyds 的代码规范
40 个 SpringBoot 常用注解
别慌,在Java面试的时候,面试官会这样问关于框架的问题?
![]()
想要实时关注更多干货好文,扫描下图关注或微信搜索【万言尽书上】关注公众公众号:


