我们知道 Spring Boot 已经提供了一套默认的异常处理机制,但是 Spring Boot 提供的默认异常处理机制却并不一定适合我们实际的业务场景,因此,我们通常会根据自身的需要对 Spring Boot 全局异常进行统一定制,例如定制错误页面,定制错误数据等。
定制错误页面
我们可以通过以下 3 种方式定制 Spring Boot 错误页面:
- 自定义 error.html
- 自定义动态错误页面
- 自定义静态错误页面
自定义 error.html
我们可以直接在模板引擎文件夹(/resources/templates)下创建 error.html ,覆盖 Spring Boot 默认的错误视图页面(Whitelabel Error Page)。
示例 1
1. 在 spring-boot-adminex 的模板引擎文件夹(classpath:/resources/templates)下,创建一个 error.html,代码如下。
    自定义 error.html


自定义 error.html
status:
error:
timestamp:
message:
path:
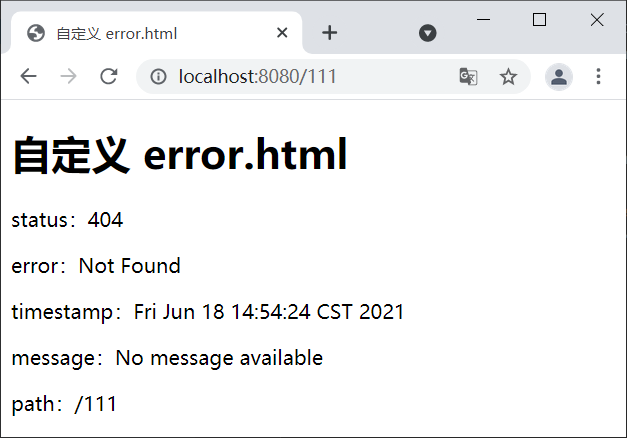
2. 启动 Spring Boot,在完成登陆跳转到主页后,使用浏览器地访问“http://localhost:8080/111”,结果如下图。
图1:自定义 error.html
由图 1 可以看出,Spring Boot 使用了我们自定义的 error.html 覆盖了默认的错误视图页面(Whitelabel Error Page)。
自定义动态错误页面
如果 Sprng Boot 项目使用了模板引擎,当程序发生异常时,Spring Boot 的默认错误视图解析器(DefaultErrorViewResolver)就会解析模板引擎文件夹(resources/templates/)下 error 目录中的错误视图页面。
精确匹配
我们可以根据错误状态码(例如 404、500、400 等等)的不同,分别创建不同的动态错误页面(例如 404.html、500.html、400.html 等等),并将它们存放在模板引擎文件夹下的 error 目录中。当发生异常时,Spring Boot 会根据其错误状态码精确匹配到对应的错误页面上。
示例 2
1. 在 spring-boot-adminex 的模板引擎文件夹下 error 目录中,创建一个名为 404.html 的错误页面,代码如下。
自定义动态错误页面 404.html
status:
error:
timestamp:
message:
path:
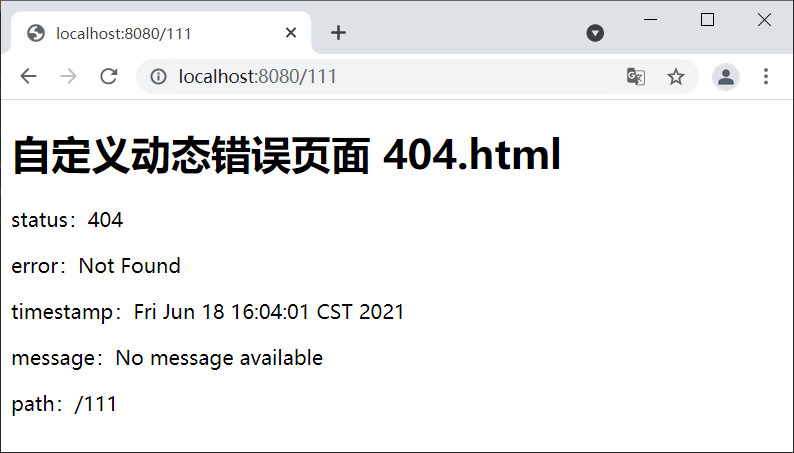
2. 启动 Spring Boot,在完成登陆跳转到主页后,在浏览器地址栏输入“http://localhost:8080/111”,结果如下图。
图2:自定义动态错误页面(精确匹配)
模糊匹配
我们还可以使用 4xx.html 和 5xx.html 作为动态错误页面的文件名,并将它们存放在模板引擎文件夹下的 error 目录中,来模糊匹配对应类型的所有错误,例如 404、400 等错误状态码以“4”开头的所有异常,都会解析到动态错误页面 4xx.html 上。
示例 3
在 spring-boot-adminex 的模板引擎文件夹下 error 目录中,创建一个名为 4xx.html 的错误页面,代码如下。
自定义动态错误页面 4xx.html
status:
error:
timestamp:
message:
path:
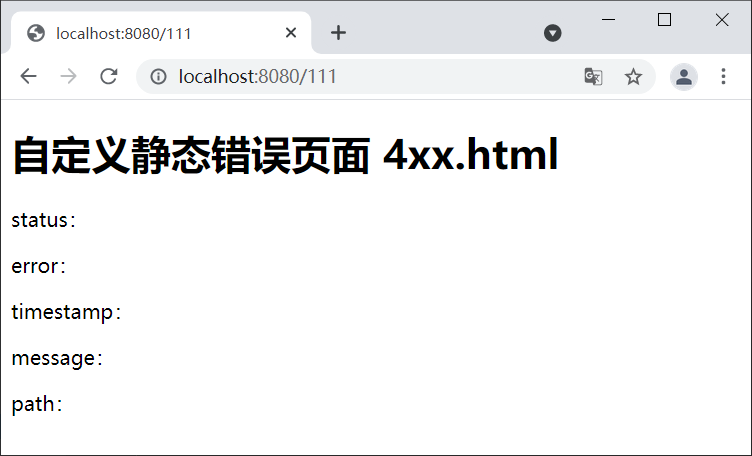
2. 启动 Spring Boot,在完成登陆跳转到主页后,使用浏览器访问“http://localhost:8080/111”,结果如下图。
图3:自定义动态错误页面(模糊匹配)
自定义静态错误页面
若 Sprng Boot 项目没有使用模板引擎,当程序发生异常时,Spring Boot 的默认错误视图解析器(DefaultErrorViewResolver)则会解析静态资源文件夹下 error 目录中的静态错误页面。
精确匹配
我们可以根据错误状态码(例如 404、500、400 等等)的不同,分别创建不同的静态错误页面(例如 404.html、500.html、400.html 等等),并将它们存放在静态资源文件夹下的 error 目录中。当发生异常时,Spring Boot 会根据错误状态码精确匹配到对应的错误页面上。
示例 4
1. 在 spring-boot-adminex 的静态资源文件夹 src/recources/static 下的 error 目录中,创建一个名为 404.html 的静态错误页面,代码如下。
自定义静态错误页面 404.html
status:
error:
timestamp:
message:
path:
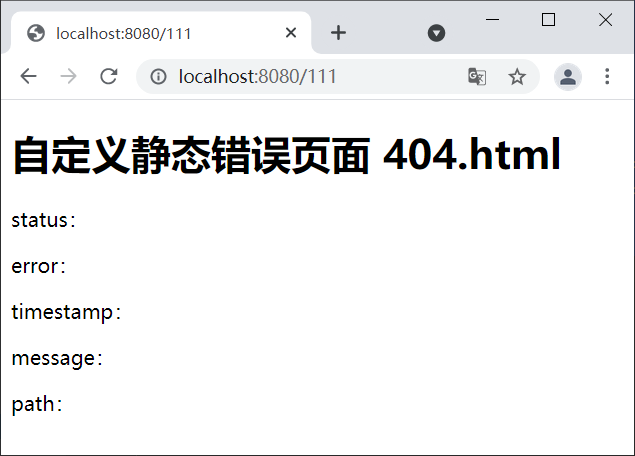
2. 启动 Spring Boot,在完成登陆跳转到主页后,使用浏览器访问“http://localhost:8080/111”,结果如下图。
图3:自定义静态错误页面(精确匹配)
由于该错误页为静态页面,无法识别 Thymeleaf 表达式,因此无法展示与错误相关的错误信息。
模糊匹配
我们还可以使用 4xx.html 和 5xx.html 作为静态错误页面的文件名,并将它们存放在静态资源文件夹下的 error 目录中,来模糊匹配对应类型的所有错误,例如 404、400 等错误状态码以“4”开头的所有错误,都会解析到静态错误页面 4xx.html 上。
示例 3
在 spring-boot-adminex 的模板引擎文件夹下的 error 目录中,创建一个名为 4xx.html 的错误页面,代码如下。
自定义静态错误页面 4xx.html
status:
error:
timestamp:
message:
path:
2. 启动 Spring Boot,在完成登陆跳转到主页后,使用浏览器访问“http://localhost:8080/111”,结果如下图。
图3:自定义静态错误页面(模糊匹配)
错误页面优先级
以上 5 种方式均可以定制 Spring Boot 错误页面,且它们的优先级顺序为:自定义动态错误页面(精确匹配)>自定义静态错误页面(精确匹配)>自定义动态错误页面(模糊匹配)>自定义静态错误页面(模糊匹配)>自定义 error.html。
当遇到错误时,Spring Boot 会按照优先级由高到低,依次查找解析错误页,一旦找到可用的错误页面,则直接返回客户端展示。
定制错误数据
我们知道,Spring Boot 提供了一套默认的异常处理机制,其主要流程如下:
- 发生异常时,将请求转发到“/error”,交由 BasicErrorController(Spring Boot 默认的 Error 控制器) 进行处理;
- BasicErrorController 根据客户端的不同,自动适配返回的响应形式,浏览器客户端返回错误页面,机器客户端返回 JSON 数据。
- BasicErrorController 处理异常时,会调用 DefaultErrorAttributes(默认的错误属性处理工具) 的 getErrorAttributes() 方法获取错误数据。
我们还可以定制 Spring Boot 的错误数据,具体步骤如下。
- 自定义异常处理类,将请求转发到 “/error”,交由 Spring Boot 底层(BasicErrorController)进行处理,自动适配浏览器客户端和机器客户端。
- 通过继承 DefaultErrorAttributes 来定义一个错误属性处理工具,并在原来的基础上添加自定义的错误数据。
1. 自定义异常处理类
被 @ControllerAdvice 注解的类可以用来实现全局异常处理,这是 Spring MVC 中提供的功能,在 Spring Boot 中可以直接使用。
1)在 net.biancheng.net.exception 包内,创建一个名为 UserNotExistException 的异常类,代码如下。
package net.biancheng.www.exception;
/**
* 自定义异常
*/
public class UserNotExistException extends RuntimeException {
    public UserNotExistException() {
        super("用户不存在!");
    }
}
2)在 IndexController 添加以下方法,触发 UserNotExistException 异常,代码如下。
@Controller
public class IndexController {
    ......
    @GetMapping(value = {"/testException"})
    public String testException(String user) {
        if ("user".equals(user)) {
            throw new UserNotExistException();
        }
        //跳转到登录页 login.html
        return "login";
    }
}
3)在 net.biancheng.www.controller 中,创建一个名为 MyExceptionHandler 异常处理类,代码如下。
package net.biancheng.www.controller;
import net.biancheng.www.exception.UserNotExistException;
import org.springframework.web.bind.annotation.ControllerAdvice;
import org.springframework.web.bind.annotation.ExceptionHandler;
import javax.servlet.http.HttpServletRequest;
import java.util.HashMap;
import java.util.Map;
@ControllerAdvice
public class MyExceptionHandler {
    @ExceptionHandler(UserNotExistException.class)
    public String handleException(Exception e, HttpServletRequest request) {
        Map map = new HashMap<>();
        //向 request 对象传入错误状态码
        request.setAttribute("javax.servlet.error.status_code",500);
        //根据当前处理的异常,自定义的错误数据
        map.put("code", "user.notexist");
        map.put("message", e.getMessage());
        //将自定的错误数据传入 request 域中
        request.setAttribute("ext",map);
        return "forward:/error";
    }
}
2. 自定义错误属性处理工具
1)在 net.biancheng.www.componet 包内,创建一个错误属性处理工具类 MyErrorAttributes(继承 DefaultErrorAttributes ),通过该类我们便可以添加自定义的错误数据,代码如下。
package net.biancheng.www.componet;
import org.springframework.boot.web.error.ErrorAttributeOptions;
import org.springframework.boot.web.servlet.error.DefaultErrorAttributes;
import org.springframework.stereotype.Component;
import org.springframework.web.context.request.WebRequest;
import java.util.Map;
//向容器中添加自定义的储物属性处理工具
@Component
public class MyErrorAttributes extends DefaultErrorAttributes {
    @Override
    public Map getErrorAttributes(WebRequest webRequest, ErrorAttributeOptions options) {
        Map errorAttributes = super.getErrorAttributes(webRequest, options);
        //添加自定义的错误数据
        errorAttributes.put("company", "www.biancheng.net");
        //获取 MyExceptionHandler 传入 request 域中的错误数据
        Map ext = (Map) webRequest.getAttribute("ext", 0);
        errorAttributes.put("ext", ext);
        return errorAttributes;
    }
}
2)在 templates/error 目录下,创建动态错误页面 5xx.html,代码如下。
    自定义 error.html


status:
error:
timestamp:
message:
path:

以下为定制错误数据:
company:
code:
path:
3)启动 Spring Boot,访问“http://localhost:8080/testException?user=user”,结果如下图。
图4:定制错误数据
注意:为了避免拦截器干扰,建议先将拦截器屏蔽掉。
以上就是SpringBoot自定义三种错误页面及错误数据方法示例的详细内容,更多关于SpringBoot 自定义错误页面、错误数据的资料请关注脚本之家其它相关文章!


