一天记录一点,方便查用,怕忘了。
lnmp=linux+nginx+mariadb(or mysql)+php
前期准备工作:
因为nginx在yum中是没有的,所以需要换其他方式安装,这里用的是源码安装。
源码安装需要解决的依赖:
1、nginx 的 http 模块使用 pcre 来解析正则表达式,所以需要在 linux 上安装 pcre 库,pcre-devel 是使用 pcre 开发的一个二次开发库。nginx也需要此库
2、zlib 库提供了很多种压缩和解压缩的方式, nginx 使用 zlib 对 http 包的内容进行 gzip ,所以需要在 Centos 上安装 zlib 库
安装包的准备:https://pan.baidu.com/s/1P8n0BDnkzh80nA9VBPZDMQ
也可以去nginx官网下载:https://nginx.org/en/download.html
前边个有依赖包。
搭建步骤:
一、安装nginx
1、 gcc gcc-c++安装
安装 nginx 需要先将下载的源码进行编译,编译依赖 gcc 环境,原本我没有 gcc 环境,所以需要安装,有就不用装了
[root@localhost ~]# yum -y install gcc gcc-c++
2、lrzsz安装
因为我是把安装包下载在电脑上的,需要上传到linux所以需要先安装这个工具,如果本来就有,那就不用安装了。
[root@localhost ~]# yum -y install lrzsz
3、上传安装包
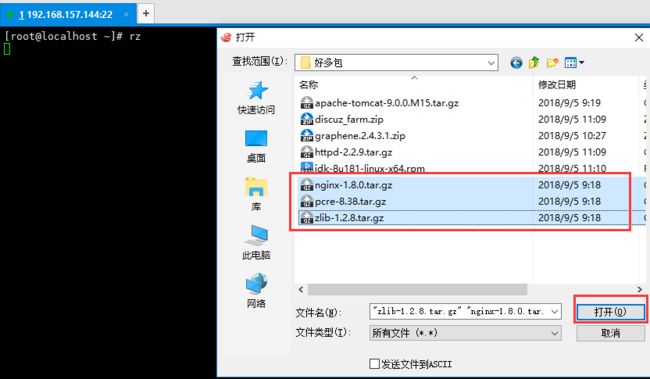
把刚下载好的安装包传到linux上,任何一个目录都可以,我传到了家目录。上传很简单,直接到家目录,用命令rz就好。
rz
接下来就是安装这三个包zlib和pcre没有顺序关系,nginx必须在他们两个安装完之后才安,不然zlib和pcre怎么叫nginx的依赖呢。
4、安装zlib
因为都是tar压缩包所以需要先用tar解压,源码安装一般都是下边这个操作
[root@localhost ~]# tar -xzvf zlib-1.2.8.tar.gz    //解压
[root@localhost ~]# cd zlib-1.2.8    //进入zlib-1.2.8目录
[root@localhost zlib-1.2.8]# ./configure    //运行配置文件,使用默认配置
[root@localhost zlib-1.2.8]# make    //编译
[root@localhost zlib-1.2.8]# make install   //安装
怎么知道成没成功
[root@localhost zlib-1.2.8]# echo $?   //这个命令的意思就是看上一条命令有没有成功,是0就是成功,0以外的其他任何数字都不成功
0
5、安装pcre
[root@localhost zlib-1.2.8]# cd ..  //先回到家目录,pcre在家目录,不在其他地方
[root@localhost ~]# tar -xzvf pcre-8.38.tar.gz  //解压
[root@localhost ~]# cd pcre-8.38  //进到 pcre-8.38目录
[root@localhost pcre-8.38]# ./configure   //运行配置文件,使用默认配置
[root@localhost pcre-8.38]# make  //编译
[root@localhost pcre-8.38]# make install  //安装
6、安装nginx
[root@localhost pcre-8.38]# cd ..
[root@localhost ~]# tar xzvf nginx-1.8.0.tar.gz   //解压
[root@localhost ~]# cd nginx-1.8.0   //进到 nginx-1.8.0 目录
[root@localhost nginx-1.8.0]# ./configure   //运行配置文件,使用默认配置
[root@localhost nginx-1.8.0]# make   //编译
[root@localhost nginx-1.8.0]# make install   //安装
nginx的启动在/usr/local/nginx/sbin/下边 nginx的配置文件在/usr/local/nginx/conf下边
7、启动nginx
[root@localhost nginx-1.8.0]# cd /usr/local/nginx/sbin   //进入/usr/local/nginx/sbin
[root@localhost sbin]# ls  //看下里边有啥
nginx   //nginx的启动文件
[root@localhost sbin]# ./nginx  //启动nginx
8、关闭防火墙还和selinux
这一点很重要,一定要记得
[root@localhost sbin]# systemctl stop firewalld  //关闭防火墙
[root@localhost sbin]# setenforce 0   //关闭selinux
到这里就算是基本成功了。
nginx的网页主目录是在/usr/local/nginx/html下
[root@localhost sbin]# cd /usr/local/nginx//html/
[root@localhost html]# ls
50x.html  index.html
这个index.html就是我们访问ip看到的页面,尝试改一下试试
[root@localhost html]# vi index.html
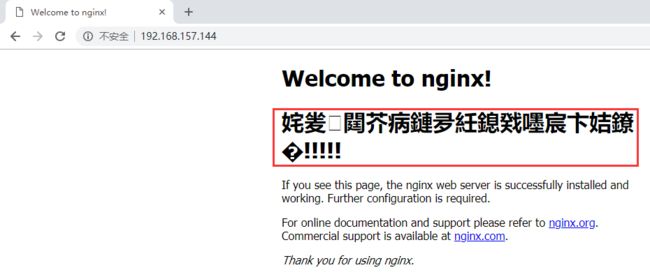
在里边加入红框中的两条语句,第一条是解决中文乱码的,第二条是自己加的中文内容,不加第一句看到的是这样的 修正后
nginx到这里也就算是安装完成了。
二、安装mariadb
[root@localhost ~]# yum -y install mariadb mariadb-server  //安装mariadb
[root@localhost ~]# systemctl start mariadb.service  //启动mariadb
[root@localhost ~]# mysql -u root -p   //连接数据库测试,密码那里直接回车,没设置密码
Enter password:
Welcome to the MariaDB monitor.  Commands end with ; or \g.
Your MariaDB connection id is 2
Server version: 5.5.60-MariaDB MariaDB Server

Copyright (c) 2000, 2018, Oracle, MariaDB Corporation Ab and others.

Type 'help;' or '\h' for help. Type '\c' to clear the current input statement.

MariaDB [(none)]>     //看到这里就说明数据库安装成功了,输入exit退出,或者ctrl+c退出命令行
三、安装php
[root@localhost ~]# yum -y install php  //下载并安装php
[root@localhost ~]# yum -y install php-mysql//下载并安装php-mysql,php连接数据库的一个模块
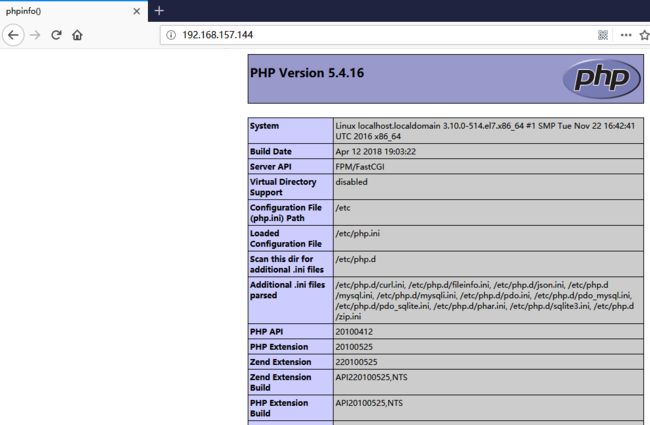
按照惯例在html中编辑php测试一下
[root@localhost html]# vim index.php  //下边的代码会输出php的一些信息
"""

"""
http://192.168.157.138/index.php 时直接下载了index.php,并没有我们想要的效果这是因为nginx无法直接对php进行解析,还需要下载php-fpm包和对配置文件进行更改。
不然访问http://192.168.157.144/index.php 时会直接下载index.php
[root@localhost ~]# yum -y install php-fpm  //可以让nginx解析php代码
[root@localhost ~]# systemctl start php-fpm  //启动服务
安装好这个之后还是不能直接解析php代码,还需要改一下nginx的配置文件,路径/usr/local/nginx/conf/里边的nginx.conf
配置nginx支持php
配置文件路径:/usr/local/nginx/conf/nginx.conf
在默认主页 index 后添加 index.php ,这样做的目的是为了可以在删掉index.html之后,直接通过ip访问index.php
删掉index.html
[root@localhost html]# rm -rf index.html
更改配置文件
[root@localhost ~]#vim /usr/local/nginx/conf/nginx.conf
将
 #location ~ \.php$ {

 # root html;

 # fastcgi_pass 127.0.0.1:9000;

 # fastcgi_index index.php;

 # fastcgi_param SCRIPT_FILENAME /scripts$fastcgi_script_name;

 # include fastcgi_params;

 # }
改为
 location ~ \.php$ {

 root     /usr/share/nginx/html;

 fastcgi_pass 127.0.0.1:9000;

 fastcgi_index index.php;

 fastcgi_param SCRIPT_FILENAME $document_root$fastcgi_script_name;

 include fastcgi_params;

 }
重启nginx
[root@localhost sbin]# ./nginx -s reload
接下来测试一下php是否可以连接上数据库,到/usr/local/nginx/html下编写如下的代码测试:
[root@localhost ~]#cd  /usr/local/nginx/html
[root@localhost html]# vim index.php
输入以下代码
"""

"""
接下来就是部署dz论坛
将upload.zip拷贝到/usr/local/nginx/html目录下边
后边的步骤就和Centos7下的lamp搭建后边的部署步骤一样了。


