基于Tensorflow2 Lite在Android手机上实现时间序列温度预测(二)
前言
Tensorflow2之后,训练保存的模型也有所变化,基于Keras接口搭建的网络模型默认保存的模型是h5格式的,而之前的模型格式是pb。Tensorflow2的h5格式的模型转换成tflite格式模型非常方便。本教程就是介绍如何使用Tensorflow2的Keras接口训练分类模型并使用Tensorflow Lite部署到Android设备上。
github android源码
训练和转换模型
以下是使用Tensorflow2的keras搭建的一个Lstm模型实现温度预测,本教程主要是介绍如何在Android设备上使用Tensorflow Lite部署训练好的模型,所以关于训练模型只是简单介绍,完整代码见基于Tensorflow的时间序列温度预测。通过下面的训练模型,我们最终会得到一个mutli_step_tempter.h5模型。
### 建模
```python
multi_step_model = tf.keras.models.Sequential()
multi_step_model.add(tf.keras.layers.LSTM(32,
                                          return_sequences=True,
                                          input_shape=x_train_multi.shape[-2:]))
multi_step_model.add(tf.keras.layers.LSTM(16, activation='relu'))
multi_step_model.add(tf.keras.layers.Dense(72))
multi_step_model.compile(optimizer=tf.keras.optimizers.RMSprop(clipvalue=1.0), loss='mae')
#训练模型
multi_step_history = multi_step_model.fit(train_data_multi, epochs=EPOCHS,
                                          steps_per_epoch=EVALUATION_INTERVAL,
                                          validation_data=val_data_multi,
                                          validation_steps=50)
mutli_step_model.save('mutli_tempter.h5')
通过上面得到的mutli_tempter.h5模型,我们需要转换为tflite格式的模型,在Tensorflow2之后,这个转换就变动很简单了,通过下面的几行代码即可完成转换,最终我们会得到一个mutli_step_tempter.tflite模型。
import tensorflow as tf

# 加载模型
model = tf.keras.models.load_model('mutli_step_tempter.h5')

# 生成非量化的tflite模型
converter = tf.lite.TFLiteConverter.from_keras_model(model)
tflite_model = converter.convert()
open(cfg.TFLITE_MODEL_FILE, 'wb').write(tflite_model)
print('saved tflite model!')
但实际转换过程中,经常会遇到问题,比如提示‘input size should be static ,not dynamic’,所以需要对模型的输入大小进行定义。此时转换tflite模型通过如下代码可实现,详见基于Tensorflow的时间序列温度预测及tflite模型转换:
run_model=tf.function(lambda x:multi_step_model(x))
# This is import,let's fix the input size (需要固定模型输入的大小,不然调用tflite模型会报错:"Error:size should be keep static not dynamic")
BATCH_SIZE=1
STEPS=120
INPUT_SIZE=3

concrete_func=run_model.get_concrete_function(
		tf.TensorSpec([BATCH_SIZE,STEPS,INPUT_SIZE],multi_step_model.inputs[0].dtype)
)

#model directory
MODEL_DIR="keras_lstm"
multi_step_model.save(MODEL_DIR,save_format="tf",signatures=concrete_func)

converter=tf.lite.TFLiteConverter.from_saved_model(MODEL_DIR)
tflite_model=converter.convert()
open('multi_tempter.tflite','wb').write(tflite_model)
print('saved tflite model!')
验证python 调取tflite模型
Now load TensorFlow Lite model and use the Tensorflow Lite python interpreter to verify the results
# Run the model with Tensorflow to get expected results
TEST_CASES = 10

#Run the model with Tensorflow Lite
interpreter=tf.lite.Interpreter(model_content=tflite_model)
interpreter.allocate_tensors()
input_details=interpreter.get_input_details()
output_details=interpreter.get_output_details()

print("input_details",input_details)
print("output_details",output_details)

for i in range(TEST_CASES):
	expected=mutli_step_model.predict(x_val_multi[i:i+1])
	interpreter.set_tensor(input_details[0]["index"],x_val_multi[i:i+1,:,:].astype(np.float32))
	interpreter.invoke()
	result=interpreter.get_tensor(output_details[0]["index"])

	#Assert if the result of TFLite model is consistent with the tf model
	np.testing.assert_almost_equal(expected,result)
	print("Down.The reuslt of Tensorflow matches the result of Tensorflow Lite")
	#Please note:TFLite fused Lstm kernel is stateful.so we need to reset the states
	#Clean up internal states
	interpreter.reset_all_variable()
在部署到Android中可能需要到输入输出层的名称,通过下面代码可以获取到输入输出层的名称和shape。
import tensorflow as tf

model_path = 'models/mutli_step_tempter.tflite'

interpreter = tf.lite.Interpreter(model_path=model_path)
interpreter.allocate_tensors()

# 获取输入和输出张量。
input_details = interpreter.get_input_details()
output_details = interpreter.get_output_details()

print(input_details)
print(output_details)
部署到Android设备
首先要在build.gradle导入这三个库,如果不使用GPU可以只导入两个库。
implementation 'org.tensorflow:tensorflow-lite:2.3.0'
implementation 'org.tensorflow:tensorflow-lite-gpu:2.3.0'
implementation 'org.tensorflow:tensorflow-lite-support:0.1.0-rc1'
在以前还需要在android下添加以下代码,避免在打包apk的是对模型有压缩操作,损坏模型。现在好像不加也没有关系,但是为了安全起见,还是添加上去。
 aaptOptions {
        noCompress "tflite"
    }
复制转换的预测模型到app/src/main/assets目录下
Tensorflow Lite工具
编写一个TFLiteUtil工具类,关于Tensorflow Lite的操作都在这里完成,如加载模型、预测。在构造方法中,通过参数传递的模型路径加载模型,在加载模型的时候配置预测信息,例如是否使用Android底层神经网络APINnApiDelegate或者是否使用GPUGpuDelegate,同时获取网络的输入输出层。
public class TFLiteUtil {

    private static final String TAG=TFLiteUtil.class.getName();
    private Interpreter tfLite;
    private TensorBuffer inputBuffer;
    private  TensorBuffer outputBuffer;
    private static final int NUM_THREADS=4;
//    float[][][] data = new float[1][120][3];

//    测试数据,shape{1,120,3} {batch_size,step,input_size}
    float[][][] data= {{{996.52f,-8.02f,93.3f},
        {996.57f,-8.41f,93.4f},
        {996.53f,-8.51f,93.9f},
        {996.51f,-8.31f,94.2f},
        {996.51f,-8.27f,94.1f},
        {996.5f,-8.05f,94.4f},
        {996.5f,-7.62f,94.8f},
        {996.5f,-7.62f,94.4f},
        {996.5f,-7.91f,93.8f},
        {996.53f,-8.43f,93.1f},
        {996.62f,-8.76f,93.1f},
        {996.62f,-8.88f,93.2f},
        {996.63f,-8.85f,93.5f},
        {996.74f,-8.83f,93.5f},
        {996.81f,-8.66f,93.9f},
        {996.81f,-8.66f,93.6f},
        {996.86f,-8.7f,93.5f},
        {996.84f,-8.81f,93.5f},
        {996.87f,-8.84f,93.5f},
        {996.97f,-8.94f,93.3f},
        {997.08f,-8.94f,93.4f},
        {997.1f,-8.86f,93.1f},
        {997.06f,-8.99f,92.4f},
        {996.99f,-9.05f,92.6f},
        {997.05f,-9.23f,92.2f},
        {997.11f,-9.49f,92f},
        {997.19f,-9.5f,92.3f},
        {997.24f,-9.35f,92.8f},
        {997.37f,-9.47f,92.4f},
        {997.46f,-9.63f,92.2f},
        {997.43f,-9.67f,92.6f},
        {997.42f,-9.68f,92f},
        {997.53f,-9.9f,91.7f},
        {997.6f,-9.91f,92.4f},
        {997.62f,-9.51f,93.4f},
        {997.71f,-9.67f,92.7f},
        {997.81f,-9.59f,93.2f},
        {997.86f,-9.15f,93.3f},
        {998f,-8.91f,92.5f},
        {998.14f,-9.04f,91.9f},
        {998.21f,-9.43f,91.3f},
        {998.33f,-9.17f,92.9f},
        {998.5f,-8.71f,93f},
        {998.59f,-8.55f,93f},
        {998.79f,-8.4f,93.1f},
        {998.86f,-8.3f,93.1f},
        {999.04f,-8.13f,93.2f},
        {999.17f,-8.1f,92.8f},
        {999.27f,-8.14f,92.6f},
        {999.33f,-8.06f,92.7f},
        {999.44f,-7.95f,92.6f},
        {999.46f,-7.74f,93f},
        {999.59f,-7.57f,92f},
        {999.69f,-7.66f,91.2f},
        {999.79f,-7.71f,91.3f},
        {999.81f,-7.56f,91.7f},
        {999.83f,-7.29f,92.2f},
        {999.96f,-7.15f,92.1f},
        {1000.13f,-7.02f,92.2f},
        {1000.27f,-7.04f,91.6f},
        {1000.43f,-7.03f,91.6f},
        {1000.54f,-7.15f,91.1f},
        {1000.68f,-7.26f,91f},
        {1000.78f,-7.34f,90.8f},
        {1000.83f,-7.35f,90.9f},
        {1000.87f,-7.41f,90.7f},
        {1000.81f,-7.48f,90.5f},
        {1000.74f,-7.38f,90.6f},
        {1000.61f,-7.21f,90.2f},
        {1000.5f,-7.16f,89.8f},
        {1000.36f,-7.03f,89.6f},
        {1000.3f,-6.87f,89.6f},
        {1000.21f,-6.77f,89.5f},
        {1000.18f,-6.7f,89.8f},
        {1000.14f,-6.61f,89.7f},
        {1000.02f,-6.51f,89.5f},
        {1000.02f,-6.21f,89.4f},
        {1000.03f,-5.89f,88.6f},
        {999.97f,-5.83f,87.8f},
        {999.97f,-5.76f,87.7f},
        {1000.02f,-5.9f,87.5f},
        {999.89f,-5.97f,88.5f},
        {999.81f,-5.88f,88.6f},
        {999.81f,-5.94f,89.1f},
        {999.81f,-5.84f,89.6f},
        {999.8f,-5.76f,89.8f},
        {999.81f,-5.75f,89.8f},
        {999.82f,-5.76f,90.2f},
        {999.83f,-5.73f,90.3f},
        {999.88f,-5.69f,90.4f},
        {999.98f,-5.53f,90.2f},
        {1000.06f,-5.57f,89.8f},
        {1000.04f,-5.43f,90f},
        {1000f,-5.32f,89.5f},
        {999.95f,-5.36f,89.2f},
        {999.94f,-5.4f,89.4f},
        {1000.05f,-5.31f,89.9f},
        {1000.05f,-5.28f,89.8f},
        {1000.1f,-5.32f,89.5f},
        {1000.17f,-5.29f,89.7f},
        {1000.13f,-5.33f,89.2f},
        {1000.17f,-5.37f,89.4f},
        {1000.17f,-5.43f,89.3f},
        {1000.18f,-5.28f,89.8f},
        {1000.18f,-5.21f,89.2f},
        {1000.17f,-5.21f,88.9f},
        {1000.16f,-5.24f,88.9f},
        {1000.16f,-5.25f,89.1f},
        {1000.13f,-5.16f,89.1f},
        {1000.07f,-5.12f,89.1f},
        {1000.11f,-5.04f,88.9f},
        {1000.18f,-5.01f,88.7f},
        {1000.23f,-5.12f,88.7f},
        {1000.22f,-5.11f,89.4f},
        {1000.3f,-4.9f,89.4f},
        {1000.19f,-4.86f,88.9f},
        {1000.18f,-4.9f,88.7f},
        {1000.14f,-4.97f,88.7f},
        {1000.18f,-4.99f,89f},
        {1000.22f,-4.9f,89.3f}}};


    /*
     *@param modelPath  model path
     */
    public TFLiteUtil(String modelPath) throws Exception{

        File file=new File(modelPath);

        if(!file.exists()){
            throw new Exception("model file is not exists!");
        }

        try{
            Interpreter.Options options=new Interpreter.Options();
//            使用多线程预测
            options.setNumThreads(NUM_THREADS);
//            使用Android自带的API 或者GPU进行加速
//            NnApiDelegate delegate =new NnApiDelegate();
            GpuDelegate delegate1=new GpuDelegate();
//            options.addDelegate(delegate);
            tfLite=new Interpreter(file,options);

            //获取lstm数据的输入,shape={1,steps,input_size}
            int[] inputShape=tfLite.getInputTensor(tfLite.getInputIndex("serving_default_x:0")).shape();
            DataType inputDataType=tfLite.getInputTensor(tfLite.getInputIndex("serving_default_x:0")).dataType();
            inputBuffer= TensorBuffer.createFixedSize(inputShape, inputDataType);
            int[] outputShape=tfLite.getOutputTensor(tfLite.getOutputIndex("StatefulPartitionedCall:0")).shape();
            DataType outputDataType=tfLite.getOutputTensor(tfLite.getOutputIndex("StatefulPartitionedCall:0")).dataType();
            outputBuffer = TensorBuffer.createFixedSize(outputShape, outputDataType);

        } catch (Exception e) {
            e.printStackTrace();
            throw new Exception("load model fail!");
        }
    }

    public float[] predict() throws  Exception{
        try{
            tfLite.run(data,outputBuffer.getBuffer().rewind());
//            tfLite.run(inputBuffer.getBuffer(),outputBuffer.getBuffer().rewind());
        }catch (Exception e){
            throw new Exception("predict image fail! log:" + e);
        }

        float[] results=outputBuffer.getFloatArray();

        return results;
    }

}
调用tflite,进行结果推理
public float[] predict() throws  Exception{
        try{
            tfLite.run(data,outputBuffer.getBuffer().rewind());
//            tfLite.run(inputBuffer.getBuffer(),outputBuffer.getBuffer().rewind());
        }catch (Exception e){
            throw new Exception("predict image fail! log:" + e);
        }

        float[] results=outputBuffer.getFloatArray();

        return results;
    }
android 结果显示页面
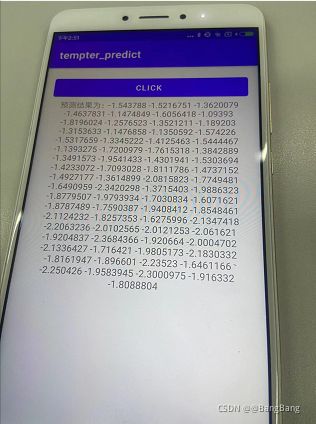
本教程有一个页面,点击按钮,并将预测结果信息显示。以下为activity_main.xml的代码:
<?xml version="1.0" encoding="utf-8"?>
<LinearLayout xmlns:android="http://schemas.android.com/apk/res/android"
    android:layout_width="match_parent"
    android:layout_height="match_parent"
    android:orientation="vertical"
    android:paddingBottom="16dp"
    android:paddingLeft="16dp"
    android:paddingRight="16dp"
    android:paddingTop="16dp">
    <Button
        android:id="@+id/res_btn"
        android:onClick="click01"
        android:layout_width="match_parent"
        android:layout_height="wrap_content"
        android:text="click" />
    <TextView
        android:id="@+id/txt_id"
        android:layout_width="match_parent"
        android:layout_height="wrap_content"
        android:gravity="center"
        android:text="结果为:"/>
</LinearLayout>
在MainActivity.java中,进入到页面我们就要先加载模型,我们是把模型放在Android项目的assets目录的,但是Tensorflow Lite并不建议直接在assets读取模型,所以我们需要把模型复制到一个缓存目录,然后再从缓存目录加载模型。
# 缓存目录
 String classificationModelPath = getCacheDir().getAbsolutePath() + File.separator + "multi_tempter_back.tflite";
        Utils.copyFileFromAsset(MainActivity.this, "multi_tempter_back.tflite", classificationModelPath);
        try {
            tfUtil = new TFLiteUtil(classificationModelPath);
            Toast.makeText(MainActivity.this, "模型加载成功!", Toast.LENGTH_SHORT).show();
        } catch (Exception e) {
            Toast.makeText(MainActivity.this, "模型加载失败!", Toast.LENGTH_SHORT).show();
            e.printStackTrace();
            finish();
        }
添加按钮点击事件,可以对温度进行预测
   // 获取控件
        Button res_btn = findViewById(R.id.res_btn);
        // 获取控件
        TextView txt=(TextView)findViewById(R.id.txt_id);


        String TAG="results";

        res_btn.setOnClickListener(new View.OnClickListener() {
            @Override
            public void onClick(View v) {

                try {
                    String res="预测结果为:";
                    float[] results= tfUtil.predict();
                    for (int i=0;i<results.length;i++){
                        Log.i(TAG, res+results[i] );
                        res=res+String.valueOf(results[i])+" ";
                    }
                    txt.setText(res);
                } catch (Exception e) {
                    e.printStackTrace();
                }
            }
        });
如果在项目中使用的了读取图片的权限和打开相机的权限,所以不要忘记在AndroidManifest.xml添加以下权限申请。
<uses-permission android:name="android.permission.CAMERA"/>
<uses-permission android:name="android.permission.READ_EXTERNAL_STORAGE"/>
<uses-permission android:name="android.permission.WRITE_EXTERNAL_STORAGE"/>
如果是Android 6 以上的设备还要动态申请权限。
    // check had permission
    private boolean hasPermission() {
        if (Build.VERSION.SDK_INT >= Build.VERSION_CODES.M) {
            return checkSelfPermission(Manifest.permission.CAMERA) == PackageManager.PERMISSION_GRANTED &&
                    checkSelfPermission(Manifest.permission.READ_EXTERNAL_STORAGE) == PackageManager.PERMISSION_GRANTED &&
                    checkSelfPermission(Manifest.permission.WRITE_EXTERNAL_STORAGE) == PackageManager.PERMISSION_GRANTED;
        } else {
            return true;
        }
    }

    // request permission
    private void requestPermission() {
        if (Build.VERSION.SDK_INT >= Build.VERSION_CODES.M) {
            requestPermissions(new String[]{Manifest.permission.CAMERA,
                    Manifest.permission.READ_EXTERNAL_STORAGE,
                    Manifest.permission.WRITE_EXTERNAL_STORAGE}, 1);
        }
    }
时间序列温度预测结果展示
- 界面

- 预测结果
参考
基于Tensorflow2 Lite在Android手机上实现图像分类