序言
Android应用中经常可以看见各种动画,丰富的动画效果可以给用户带来更好的体验。而Android中动画的种类和实现方式很多。下面我们一起学习一下。
动画分类及使用
了解Android的同学都知道,动画分为三类,分别是帧动画、补间动画、属性动画,帧动画和补间动画又属于View动画。View动画作用对象是View,支持四种动画,分别是平移、旋转、缩放、透明度变化动画。由于帧动画的表现形式与其他View动画不太一样,所以把它们区分来介绍。
1. 帧动画
帧动画是通过顺序 播放一系列图像产生的动画效果,类似于播放动画片。
怎么通过代码实现帧动画呢?
首先在drawable目录下新建一个animation-list标签的xml文件my_love.xml:
其中每个item代表一张图片,要按顺序排列图片。

之后在布局文件中使用这个xml文件:
最后在代码中获取这个AnimationDrawable文件,并且启动动画:
override fun onCreate(savedInstanceState: Bundle?) {
    super.onCreate(savedInstanceState)
    setContentView(R.layout.activity_main)

    val icLove = findViewById(R.id.ic_love)
    val background = icLove.background as AnimationDrawable
    background.start()
}
最后的效果是这样纸的:
用法很简单,就不做过多的介绍,使用帧动画需要注意一个问题,如果图片过多过大会引发OOM,所以尽量使用尺寸较小的图片。
2. View动画
View动画支持四种动画:平移
View动画的基类是Animation,四种动画对应的子类分别是:TranslateAnimation、ScaleAnimation、RotateAnimation、AlphaAnimation。既可以通过xml定义,也可以在代码中动态创建,建议通过xml定义View动画,可读性更好。
xml定义view动画
先定义标签为set的xml文件scale_anim.xml:
在代码中加载动画并应用到View上面:
/**
 * 通过xml加载View动画,不能设置动画重复次数
 */
private fun loadXmlScaleAnimation(): Animation {
    return AnimationUtils.loadAnimation(this@MainActivity, R.anim.scale_anim);
}

//应用动画到View上
val tvScale = findViewById(R.id.tv_scale)
tvScale.setOnClickListener {
    tvScale.startAnimation(loadXmlScaleAnimation())
}
动态创建动画
直接上代码:
/**
 * 代码中动态定义View动画
 */
private fun createScaleAnimation(): Animation {
    val scaleAnimation = ScaleAnimation(1f, 2f, 1f, 2f, Animation.RELATIVE_TO_SELF, 0.5f, Animation.RELATIVE_TO_SELF, 0.5f)
    scaleAnimation.repeatMode = Animation.REVERSE
    scaleAnimation.repeatCount = -1
    scaleAnimation.duration = 2000
    return scaleAnimation
}

//应用动画到View上
val tvScale = findViewById(R.id.tv_scale)
tvScale.setOnClickListener {
    tvScale.startAnimation(createScaleAnimation())
}
解释一下xml中的部分属性,pivotX和pivotY。他们的作用是指定动画的中心点,有三种指定方式:
- 绝对位置:比如 (100, 100),这个点是相对于动画View的左上角来说的。
- 相对自身百分比:比如 (0.5f, 0.5f),这个点是View的中心点。
- 相对父View的百分比:比如 (0.5f, 0.5f),这个点是View所在parent的中心点。
其他三种动画类似,就不一一举例介绍了,上面代码对应的效果图如下:
3. 属性动画
属性动画是Api11(Android3.0)新加入的特性,相比于View动画,属性动画可以对任何对象做动画,而且动画效果也得到加强,不再像View动画只能支持四种简单动画。通过属性动画,我们可以实现更加绚丽的动画效果。
属性动画的基类是ValueAnimator,还有一个重要的子类ObjectAnimator。
那么怎么使用属性动画呢,也可以通过xml和代码中动态创建两种方式,此处主要介绍代码中动态创建方式。
private fun createPropertyAnimator(target: View): Animator {
    val red = resources.getColor(R.color.red, null)
    val blue = resources.getColor(R.color.blue, null)
    val green = resources.getColor(R.color.green, null)
    val colorAnim = ObjectAnimator.ofInt(target, "backgroundColor", red, blue, green)
    colorAnim.setEvaluator(ArgbEvaluator())
    colorAnim.repeatMode = ValueAnimator.REVERSE
    colorAnim.repeatCount = -1
    colorAnim.duration = 4000
    return colorAnim
}

//属性动画
val vBack = findViewById(R.id.v_back)
createPropertyAnimator(vBack).start()
repeatCount = -1表示无限循环动画,默认值是0,属性动画启动方式与View动画有区别:
- View动画:view.startAnimation(xxx)
- 属性动画:animator.start()
可以看到,代码中还设置了一个Evaluator,它的作用我们后面分析。看一下效果图:

动画原理分析
下面,通过阅读源码分析View动画和属性动画的原理。对于动画原理,我们主要关心两个点:
- 属性值如何改变并且作用到对象上
- 如何保证动画时间内不停更新属性值,从而形成动画效果
1. View动画
View动画的启动方式是view.startAnimation(xxx),我们就从这个地方入手:
/**
 * Start the specified animation now.
 *
 * @param animation the animation to start now
 */
public void startAnimation(Animation animation) {
    //设置动画开始时间
    animation.setStartTime(Animation.START_ON_FIRST_FRAME);
    //对View设置动画
    setAnimation(animation);
    //刷新父类缓存
    invalidateParentCaches();
    //刷新View本身及子类
    invalidate(true);
}
可以看到View会请求刷新视图,最后会调用View的draw方法:
 /**
 * This method is called by ViewGroup.drawChild() to have each child view draw itself.
 *
 * This is where the View specializes rendering behavior based on layer type,
 * and hardware acceleration.
 */
boolean draw(Canvas canvas, ViewGroup parent, long drawingTime) {
    ...
    boolean more = false;
    final boolean childHasIdentityMatrix = hasIdentityMatrix();
    final int parentFlags = parent.mGroupFlags;
    //查看是否需要清除动画信息
    if ((parentFlags & ViewGroup.FLAG_CLEAR_TRANSFORMATION) != 0) {
        parent.getChildTransformation().clear();
        parent.mGroupFlags &= ~ViewGroup.FLAG_CLEAR_TRANSFORMATION;
    }
    ...
    //获取View上的动画信息
    final Animation a = getAnimation();
    if (a != null) {
        //绘制动画
        more = applyLegacyAnimation(parent, drawingTime, a, scalingRequired);
        concatMatrix = a.willChangeTransformationMatrix();
        if (concatMatrix) {
            mPrivateFlags3 |= PFLAG3_VIEW_IS_ANIMATING_TRANSFORM;
        }
        transformToApply = parent.getChildTransformation();
    } else {
        ....
    }
    ....
}
接下来看一下applyLegacyAnimation方法是怎么绘制动画的:
/**
 * Utility function, called by draw(canvas, parent, drawingTime) to handle the less common
 * case of an active Animation being run on the view.
 */
private boolean applyLegacyAnimation(ViewGroup parent, long drawingTime,
        Animation a, boolean scalingRequired) {
    Transformation invalidationTransform;
    final int flags = parent.mGroupFlags;
    final boolean initialized = a.isInitialized();
    //判断动画是否已经初始化过了
    if (!initialized) {
        a.initialize(mRight - mLeft, mBottom - mTop, parent.getWidth(), parent.getHeight());
        a.initializeInvalidateRegion(0, 0, mRight - mLeft, mBottom - mTop);
        if (mAttachInfo != null) a.setListenerHandler(mAttachInfo.mHandler);
        //设置了动画监听,则触发回调
        onAnimationStart();
    }

    final Transformation t = parent.getChildTransformation();
    //获取Transformation对象,存储动画信息
    boolean more = a.getTransformation(drawingTime, t, 1f);
    if (scalingRequired && mAttachInfo.mApplicationScale != 1f) {
        if (parent.mInvalidationTransformation == null) {
            parent.mInvalidationTransformation = new Transformation();
        }
        invalidationTransform = parent.mInvalidationTransformation;
        a.getTransformation(drawingTime, invalidationTransform, 1f);
    } else {
        invalidationTransform = t;
    }

    //根据more判断动画是否需要继续进行
    if (more) {
        //判断当前动画是否需要进行位置大小调整,然后刷新不同区域
        if (!a.willChangeBounds()) {
            ...
        } else {
            if (parent.mInvalidateRegion == null) {
                parent.mInvalidateRegion = new RectF();
            }
            final RectF region = parent.mInvalidateRegion;
            //获取需要重绘的区域
            a.getInvalidateRegion(0, 0, mRight - mLeft, mBottom - mTop, region,
                    invalidationTransform);

            // The child need to draw an animation, potentially offscreen, so
            // make sure we do not cancel invalidate requests
            parent.mPrivateFlags |= PFLAG_DRAW_ANIMATION;

            //重新计算有效区域
            final int left = mLeft + (int) region.left;
            final int top = mTop + (int) region.top;
            //更新这块区域
            parent.invalidate(left, top, left + (int) (region.width() + .5f),
                    top + (int) (region.height() + .5f));
        }
    }
    return more;
}
这个方法基本就把整个动画流程串起来了,a.getTransformation方法会返回一个布尔值,表示是否需要继续动画,一旦为true,则父控件会重新计算需要动画需要刷新的区域并且更新该区域。在动画结束之前会不断重绘,从而形成连续的动画效果。
那么,动画的具体实现就在a.getTransformation方法中,我们看一下:
public boolean getTransformation(long currentTime, Transformation outTransformation,
            float scale) {
    mScaleFactor = scale;
    return getTransformation(currentTime, outTransformation);
}
继续跟中getTransformation方法:
public boolean getTransformation(long currentTime, Transformation outTransformation) {
    if (mStartTime == -1) {
        mStartTime = currentTime;
    }

    final long startOffset = getStartOffset();
    final long duration = mDuration;
    float normalizedTime;
    if (duration != 0) {
        normalizedTime = ((float) (currentTime - (mStartTime + startOffset))) /
                (float) duration;
    } else {
        // time is a step-change with a zero duration
        normalizedTime = currentTime < mStartTime ? 0.0f : 1.0f;
    }

    final boolean expired = normalizedTime >= 1.0f || isCanceled();
    mMore = !expired;
    if (!mFillEnabled) normalizedTime = Math.max(Math.min(normalizedTime, 1.0f), 0.0f);

    if ((normalizedTime >= 0.0f || mFillBefore) && (normalizedTime <= 1.0f || mFillAfter)) {
        ...
        final float interpolatedTime = mInterpolator.getInterpolation(normalizedTime);
        applyTransformation(interpolatedTime, outTransformation);
    }
    if (!mMore && mOneMoreTime) {
        mOneMoreTime = false;
        return true;
    }

    return mMore;
}
在这个方法中,根据流逝的时间计算当前动画时间百分比,然后通过插值器(Interpolator)重新计算这个百分比,并且以此来计算当前动画属性值。后面介绍插值器的作用。
继续看一下applyTransformation的作用:
/**
 * Helper for getTransformation. Subclasses should implement this to apply
 * their transforms given an interpolation value.  Implementations of this
 * method should always replace the specified Transformation or document
 * they are doing otherwise.
 *
 * @param interpolatedTime The value of the normalized time (0.0 to 1.0)
 *        after it has been run through the interpolation function.
 * @param t The Transformation object to fill in with the current
 *        transforms.
 */
protected void applyTransformation(float interpolatedTime, Transformation t) {
}
是个空方法,那么实现肯定在子类中,我们就以ScaleAnimation为例:
@Override
protected void applyTransformation(float interpolatedTime, Transformation t) {
    float sx = 1.0f;
    float sy = 1.0f;
    float scale = getScaleFactor();

    if (mFromX != 1.0f || mToX != 1.0f) {
        sx = mFromX + ((mToX - mFromX) * interpolatedTime);
    }
    if (mFromY != 1.0f || mToY != 1.0f) {
        sy = mFromY + ((mToY - mFromY) * interpolatedTime);
    }

    //通过Matrix实现View的缩放
    if (mPivotX == 0 && mPivotY == 0) {
        t.getMatrix().setScale(sx, sy);
    } else {
        t.getMatrix().setScale(sx, sy, scale * mPivotX, scale * mPivotY);
    }
}
可以看到,执行完applyTransformation之后,View的属性就发生了变化。
2. 插值器和估值器
上面代码中提到过插值器(TimeInterpolator),它一般是和估值器(TypeEvaluator)配合使用,我们看一下它究竟是个什么东西。
/**
 * The interpolator used by the animation to smooth the movement.
 */
Interpolator mInterpolator;
看一下Interpolator定义:
public interface Interpolator extends TimeInterpolator {
    // A new interface, TimeInterpolator, was introduced for the new android.animation
    // package. This older Interpolator interface extends TimeInterpolator so that users of
    // the new Animator-based animations can use either the old Interpolator implementations or
    // new classes that implement TimeInterpolator directly.
}
继承自TimeInterpolator:
/**
 * A time interpolator defines the rate of change of an animation. This allows animations
 * to have non-linear motion, such as acceleration and deceleration.
 */
public interface TimeInterpolator {

    float getInterpolation(float input);
}
TimeInterpolator是一个接口,只有一个方法getInterpolation(float input),它的实现类有很多:

我们挑选AccelerateInterpolator看其实现:
public float getInterpolation(float input) {
    if (mFactor == 1.0f) {
        return input * input;
    } else {
        return (float)Math.pow(input, mDoubleFactor);
    }
}
从名字能看出来是加速插值器,其getInterpolation方法是对传入的数值(动画时间百分比)做平方并返回,它的作用是对动画做加速。为什么说是加速呢,用下表来说明:
| 时间百分比 | 0.1 | 0.2 | 0.3 | 0.4 |
|---|---|---|---|---|
| 计算插值 | 0.01 | 0.04 | 0.09 | 0.16 |
| 相邻差距 | 0.01 | 0.03 | 0.05 | 0.07 |
数据表明,随着时间流逝,插值越来越大,导致动画效果越来越明显,展示出来的效果就是加速动画。
除了加速插值器,系统还提供了其他几种,如减速插值器、先加后减插值器、线性插值器......
插值器只是根据时间百分比计算出一个属性值百分比,而把属性值百分比转换为真正属性值则交给估值器来做
估值器对应的类是TypeEvaluator,定义如下:
public interface TypeEvaluator {

    public T evaluate(float fraction, T startValue, T endValue);
}
里面有一个泛型方法evaluate用来计算属性值,它的实现类有:
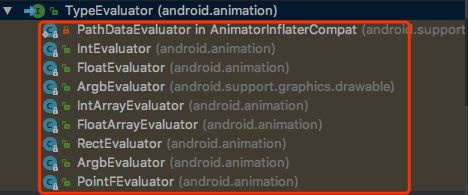
我们选取FloatEvaluator来看一下:
/**
 * This evaluator can be used to perform type interpolation between float values.
 */
public class FloatEvaluator implements TypeEvaluator {
    public Float evaluate(float fraction, Number startValue, Number endValue) {
        float startFloat = startValue.floatValue();
        return startFloat + fraction * (endValue.floatValue() - startFloat);
    }
}
evaluate方法做的事情很简单,就是把一个属性值百分比fraction,结合开始值startValue和结束值endValue一起计算出当前的属性值。
插值器和估值器都是接口,支持自定义。
3. 属性动画原理
我们从ObjectAnimator.ofInt方法开始分析:
public static ObjectAnimator ofInt(Object target, String propertyName, int... values) {
    ObjectAnimator anim = new ObjectAnimator(target, propertyName);
    anim.setIntValues(values);
    return anim;
}
构建一个属性动画对象,并且设置一些属性,着重看setIntValues方法:
@Override
public void setIntValues(int... values) {
    if (mValues == null || mValues.length == 0) {
        // No values yet - this animator is being constructed piecemeal. Init the values with
        // whatever the current propertyName is
        if (mProperty != null) {
            setValues(PropertyValuesHolder.ofInt(mProperty, values));
        } else {
            setValues(PropertyValuesHolder.ofInt(mPropertyName, values));
        }
    } else {
        super.setIntValues(values);
    }
}
方法中出现了一个PropertyValuesHolder类,这个类是该动画库的一个核心类,它的作用是保存属性的名称和它的setter、getter方法,以及它的目标值。
继续跟setValues方法:
public void setValues(PropertyValuesHolder... values) {
    int numValues = values.length;
    mValues = values;
    mValuesMap = new HashMap(numValues);
    for (int i = 0; i < numValues; ++i) {
        PropertyValuesHolder valuesHolder = values[i];
        mValuesMap.put(valuesHolder.getPropertyName(), valuesHolder);
    }
    // New property/values/target should cause re-initialization prior to starting
    mInitialized = false;
}
保存PropertyValuesHolder在数组mValues和Map mValuesMap中。从上面代码中可以看出,PropertyValuesHolder.ofInt(mPropertyName, values)会构建一个PropertyValueHolder对象。
public static PropertyValuesHolder ofInt(String propertyName, int... values) {
    return new IntPropertyValuesHolder(propertyName, values);
}
IntPropertyValuesHolder是PropertyValuesHolder的子类,接着看IntPropertyValuesHolder构造方法:
public IntPropertyValuesHolder(String propertyName, int... values) {
    //保存属性名
    super(propertyName);
    setIntValues(values);
}
看setIntValues方法:
@Override
public void setIntValues(int... values) {
    super.setIntValues(values);
    mIntKeyframes = (Keyframes.IntKeyframes) mKeyframes;
}
会调用super(PropertyValuesHolder)的setIntValues方法:
public void setIntValues(int... values) {
    //保存属性的类型
    mValueType = int.class;
    mKeyframes = KeyframeSet.ofInt(values);
}
这个方法中会根据传入的值生成关键帧集合mKeyframes,它保存的是在每个时刻该属性对应的值:
public class KeyframeSet implements Keyframes {

    int mNumKeyframes;

    Keyframe mFirstKeyframe;
    Keyframe mLastKeyframe;
    TimeInterpolator mInterpolator; // only used in the 2-keyframe case
    List mKeyframes; // only used when there are not 2 keyframes
    TypeEvaluator mEvaluator;


    public KeyframeSet(Keyframe... keyframes) {
        mNumKeyframes = keyframes.length;
        // immutable list
        mKeyframes = Arrays.asList(keyframes);
        mFirstKeyframe = keyframes[0];
        mLastKeyframe = keyframes[mNumKeyframes - 1];
        mInterpolator = mLastKeyframe.getInterpolator();
    }

    public static KeyframeSet ofInt(int... values) {
        int numKeyframes = values.length;
        IntKeyframe keyframes[] = new IntKeyframe[Math.max(numKeyframes,2)];
        if (numKeyframes == 1) {
            keyframes[0] = (IntKeyframe) Keyframe.ofInt(0f);
            keyframes[1] = (IntKeyframe) Keyframe.ofInt(1f, values[0]);
        } else {
            keyframes[0] = (IntKeyframe) Keyframe.ofInt(0f, values[0]);
            for (int i = 1; i < numKeyframes; ++i) {
                keyframes[i] =
                        (IntKeyframe) Keyframe.ofInt((float) i / (numKeyframes - 1), values[i]);
            }
        }
        return new IntKeyframeSet(keyframes);
    }
}
上面介绍的是创建ObjectAnimator对象的过程,ObjectAnimator创建完毕之后就可以通过start()方法启动动画,我们跟一下:
@Override
public void start() {
    AnimationHandler.getInstance().autoCancelBasedOn(this);
    ...
    super.start();
}
会调用父类ValueAnimator的start方法:
@Override
public void start() {
    start(false);
}

private void start(boolean playBackwards) {
    //检查Looper是否为空,此处的Looper是UI线程的Looper
    if (Looper.myLooper() == null) {
        throw new AndroidRuntimeException("Animators may only be run on Looper threads");
    }
    //设置一些基本状态
    mReversing = playBackwards;
    mSelfPulse = !mSuppressSelfPulseRequested;
    // Special case: reversing from seek-to-0 should act as if not seeked at all.
    if (playBackwards && mSeekFraction != -1 && mSeekFraction != 0) {
        if (mRepeatCount == INFINITE) {
            // Calculate the fraction of the current iteration.
            float fraction = (float) (mSeekFraction - Math.floor(mSeekFraction));
            mSeekFraction = 1 - fraction;
        } else {
            mSeekFraction = 1 + mRepeatCount - mSeekFraction;
        }
    }
    mStarted = true;
    mPaused = false;
    mRunning = false;
    mAnimationEndRequested = false;
    // Resets mLastFrameTime when start() is called, so that if the animation was running,
    // calling start() would put the animation in the
    // started-but-not-yet-reached-the-first-frame phase.
    mLastFrameTime = -1;
    mFirstFrameTime = -1;
    mStartTime = -1;
    //添加动画回调到AnimationHandler中
    addAnimationCallback(0);

    if (mStartDelay == 0 || mSeekFraction >= 0 || mReversing) {
        // If there's no start delay, init the animation and notify start listeners right away
        // to be consistent with the previous behavior. Otherwise, postpone this until the first
        // frame after the start delay.
        //触发动画监听的回调方法
        startAnimation();
        //开始执行第一帧动画
        if (mSeekFraction == -1) {
            // No seek, start at play time 0. Note that the reason we are not using fraction 0
            // is because for animations with 0 duration, we want to be consistent with pre-N
            // behavior: skip to the final value immediately.
            setCurrentPlayTime(0);
        } else {
            setCurrentFraction(mSeekFraction);
        }
    }
}
实际上setCurrentPlayTime方法调用的也是setCurrentFraction方法,我们直接看setCurrentFraction方法:
public void setCurrentFraction(float fraction) {
    initAnimation();
    fraction = clampFraction(fraction);
    mStartTimeCommitted = true; // do not allow start time to be compensated for jank
    if (isPulsingInternal()) {
        long seekTime = (long) (getScaledDuration() * fraction);
        long currentTime = AnimationUtils.currentAnimationTimeMillis();
        // Only modify the start time when the animation is running. Seek fraction will ensure
        // non-running animations skip to the correct start time.
        mStartTime = currentTime - seekTime;
    } else {
        // If the animation loop hasn't started, or during start delay, the startTime will be
        // adjusted once the delay has passed based on seek fraction.
        mSeekFraction = fraction;
    }
    mOverallFraction = fraction;
    final float currentIterationFraction = getCurrentIterationFraction(fraction, mReversing);
    animateValue(currentIterationFraction);
}
该方法计算出当前动画时间百分比,然后通过animateValue来改变属性的值:
@CallSuper
void animateValue(float fraction) {
    fraction = mInterpolator.getInterpolation(fraction);
    mCurrentFraction = fraction;
    int numValues = mValues.length;
    for (int i = 0; i < numValues; ++i) {
        mValues[i].calculateValue(fraction);
    }
    if (mUpdateListeners != null) {
        int numListeners = mUpdateListeners.size();
        for (int i = 0; i < numListeners; ++i) {
            mUpdateListeners.get(i).onAnimationUpdate(this);
        }
    }
}
这个方法就是调用PropertyValuesHolder来改改变属性的值,并且调用属性动画监听的回调方法。
到这里,我们知道了属性的值是如何改变的。接下来分析在动画时间内怎样保证动画持续进行。在ValueAnimator的start方法中有一句addAnimationCallback(0);,我们跟踪看一下:
private void addAnimationCallback(long delay) {
    if (!mSelfPulse) {
        return;
    }
    getAnimationHandler().addAnimationFrameCallback(this, delay);
}
调用了AnimationHandler的addAnimationFrameCallback方法:
public void addAnimationFrameCallback(final AnimationFrameCallback callback, long delay) {
    if (mAnimationCallbacks.size() == 0) {
        getProvider().postFrameCallback(mFrameCallback);
    }
    if (!mAnimationCallbacks.contains(callback)) {
        mAnimationCallbacks.add(callback);
    }

    if (delay > 0) {
        mDelayedCallbackStartTime.put(callback, (SystemClock.uptimeMillis() + delay));
    }
}
假设当前callback数量为0,就会调用getProvider().postFrameCallback方法,getProvider方法如下:
private AnimationFrameCallbackProvider getProvider() {
    if (mProvider == null) {
        mProvider = new MyFrameCallbackProvider();
    }
    return mProvider;
}
它是一个MyFrameCallbackProvider对象,我们就来看一下MyFrameCallbackProvider的postFrameCallback方法:
/**
 * Default provider of timing pulse that uses Choreographer for frame callbacks.
 */
private class MyFrameCallbackProvider implements AnimationFrameCallbackProvider {

    final Choreographer mChoreographer = Choreographer.getInstance();

    @Override
    public void postFrameCallback(Choreographer.FrameCallback callback) {
        mChoreographer.postFrameCallback(callback);
    }

    @Override
    public void postCommitCallback(Runnable runnable) {
        mChoreographer.postCallback(Choreographer.CALLBACK_COMMIT, runnable, null);
    }

    @Override
    public long getFrameTime() {
        return mChoreographer.getFrameTime();
    }

    @Override
    public long getFrameDelay() {
        return Choreographer.getFrameDelay();
    }

    @Override
    public void setFrameDelay(long delay) {
        Choreographer.setFrameDelay(delay);
    }
}
postFrameCallback中会调用Choreographer.postFrameCallback方法:
public void postFrameCallback(FrameCallback callback) {
    postFrameCallbackDelayed(callback, 0);
}
接着跟:
public void postFrameCallbackDelayed(FrameCallback callback, long delayMillis) {
    if (callback == null) {
        throw new IllegalArgumentException("callback must not be null");
    }

    postCallbackDelayedInternal(CALLBACK_ANIMATION,
            callback, FRAME_CALLBACK_TOKEN, delayMillis);
}
继续:
private void postCallbackDelayedInternal(int callbackType,
            Object action, Object token, long delayMillis) {
    if (DEBUG_FRAMES) {
        Log.d(TAG, "PostCallback: type=" + callbackType
                + ", action=" + action + ", token=" + token
                + ", delayMillis=" + delayMillis);
    }

    synchronized (mLock) {
        final long now = SystemClock.uptimeMillis();
        final long dueTime = now + delayMillis;
        mCallbackQueues[callbackType].addCallbackLocked(dueTime, action, token);

        if (dueTime <= now) {
            scheduleFrameLocked(now);
        } else {
            Message msg = mHandler.obtainMessage(MSG_DO_SCHEDULE_CALLBACK, action);
            msg.arg1 = callbackType;
            msg.setAsynchronous(true);
            mHandler.sendMessageAtTime(msg, dueTime);
        }
    }
}
因为延时为0,所以dueTime = now,就回调用scheduleFrameLocked(now)方法:
private void scheduleFrameLocked(long now) {
    if (!mFrameScheduled) {
        mFrameScheduled = true;
        if (USE_VSYNC) {
            if (DEBUG_FRAMES) {
                Log.d(TAG, "Scheduling next frame on vsync.");
            }

            // If running on the Looper thread, then schedule the vsync immediately,
            // otherwise post a message to schedule the vsync from the UI thread
            // as soon as possible.
            if (isRunningOnLooperThreadLocked()) {
                scheduleVsyncLocked();
            } else {
                Message msg = mHandler.obtainMessage(MSG_DO_SCHEDULE_VSYNC);
                msg.setAsynchronous(true);
                mHandler.sendMessageAtFrontOfQueue(msg);
            }
        } else {
            final long nextFrameTime = Math.max(
                    mLastFrameTimeNanos / TimeUtils.NANOS_PER_MS + sFrameDelay, now);
            if (DEBUG_FRAMES) {
                Log.d(TAG, "Scheduling next frame in " + (nextFrameTime - now) + " ms.");
            }
            Message msg = mHandler.obtainMessage(MSG_DO_FRAME);
            msg.setAsynchronous(true);
            mHandler.sendMessageAtTime(msg, nextFrameTime);
        }
    }
}
这个方法中USE_VSYNC默认为true,所以会走scheduleVsyncLocked方法,这个方法是一个native方法,我们就不跟了。在这里着重看注释,它的意思是:如果运行在UI线程中,会立刻调用VSYNC机制。而VSYNC是Android系统用来更新界面的信号,每16ms一次。说明属性动画是通过VSYNC信号来持续改变属性值进行动画的。
到这里,总算把属性动画的原理解释完毕了。文章很长,大家可以对着源码一步步来看,能够更好的理解属性动画。
总结
这篇文章很长,主要介绍了Android中的动画分类和各种动画的原理,对于大家理解动画很有帮助。希望各位小伙伴能够耐心看完,相信对大家会很有帮助的。
关于动画还有几个点需要大家去了解,都比较简单,这里只列举不做介绍:
- ViewPropertyAnimator:只能对View进行动画,但使用很简单,支持链式调用,而且性能有做过调优。
- 自定义View中实现动画
- 动画的组合播放
今天的介绍到此为止,能读到这里的小伙伴,你们很棒,哈哈!!