前言
最近冰墩墩一墩难求,大家开始通过各种方式打造自己的冰墩墩,各种冰墩墩开始出现,粘土冰墩墩,橘子冰墩墩,3D打印冰墩墩。这次通过前端的方式展示一个3D冰墩墩,现在开始吧。
声明:本文涉及奥运元素3D模型仅用于个人学习、研究和欣赏,请勿二次修改、非法传播、转载、出版、商用、及进行其他获利行为。
技术栈
本文使用Three.js + React 技术栈,实现冬日和奥运元素,制作了一个充满趣味和纪念意义的冬奥主题 3D 页面。本文涉及到的知识点主要包括:TorusGeometry 圆环面、MeshLambertMaterial 非光泽表面材质、MeshDepthMaterial 深度网格材质、custromMaterial 自定义材质、Points 粒子、PointsMaterial 点材质等。
实现效果

在线预览
https://yjlaugus.gitee.io/bdd/
模型墩墩
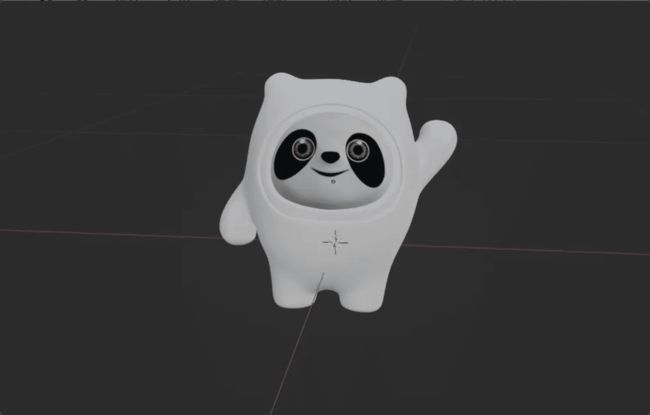
现在添加可爱的冬奥会吉祥物熊猫冰墩墩 ,冰墩墩同样是使用 glb 格式模型加载的。原模型是使用 3D max 建的我发现并不能直接用在网页中,需要在 Blender 中转换模型格式,还需要调整调整模型的贴图法线,才能还原渲染图效果。
HTML结构
YJLAugus的专属冰墩墩❤
部分样式
body {
	-webkit-font-smoothing: antialiased;
	-moz-osx-font-smoothing: grayscale;
	background: #212121;
	font-family: -apple-system,BlinkMacSystemFont,Segoe UI,Roboto,Oxygen,Ubuntu,Cantarell,Fira Sans,Droid Sans,Helvetica Neue,sans-serif;
	margin: 0
}

code {
	font-family: source-code-pro,Menlo,Monaco,Consolas,Courier New,monospace
.App {
	text-align: center
.App-logo {
	height: 40vmin;
	pointer-events: none
@media (prefers-reduced-motion:no-preference) {
	.App-logo {
		-webkit-animation: App-logo-spin 20s linear infinite;
		animation: App-logo-spin 20s linear infinite
	}
.App-header {
	align-items: center;
	background-color: #282c34;
	color: #fff;
	display: flex;
	flex-direction: column;
	font-size: calc(10px + 2vmin);
	justify-content: center;
	min-height: 100vh
.App-link {
	color: #61dafb
@-webkit-keyframes App-logo-spin {
	0% {
		-webkit-transform: rotate(0deg);
		transform: rotate(0deg)
	to {
		-webkit-transform: rotate(1turn);
		transform: rotate(1turn)
@keyframes App-logo-spin {
::-webkit-scrollbar {
	background: 0 0!important;
	cursor: pointer!important;
	width: 4px!important
::-webkit-scrollbar-thumb {
	background-clip: padding-box!important;
	border: 1px solid transparent!important;
	border-radius: 4px!important
::-webkit-scrollbar-thumb,::-webkit-scrollbar-thumb:active {
	background-color: rgba(3,192,60,.5)!important
::-webkit-scrollbar-thumb:active,body.platform-win32 ::-webkit-scrollbar-thumb:hover {
	background-color: rgba(3,192,60,.5)!important;
	border-width: 1px!important;
	cursor: pointer!important
.page_title {
	font-size: 56px;
	letter-spacing: .1em;
	margin: 8px 0 16px;
	text-align: center;
	text-shadow: 0 1px 0 #c9cfce,0 2px 0 #bcc2c2,0 3px 0 #afb6b6,0 4px 0 #a4adac,0 5px 0 #9fa8a7,0 6px 0 #99a3a2,0 7px 0 #97a1a0,0 8px 0 #949e9d,0 0 5px rgba(0,0,0,.05),0 1px 3px rgba(0,0,0,.2),0 3px 5px rgba(0,0,0,.2),0 5px 10px rgba(0,0,0,.2),0 10px 10px rgba(0,0,0,.2),0 20px 20px rgba(0,0,0,.3);
	top: 10%;
	width: 100%
部署
打包下载:https://www.123pan.com/s/afh9-CvUgH
下载好冰墩墩资源包即可部署,可以部署在在github或者码云,也可以直接丢到服务器上~如果觉得不错烦请点个推荐~
参考
https://github.com/dragonir/3d/tree/master/src/containers/Olympic
到此这篇关于使用Three.js和React把冰墩墩部署在网页上!实现人手一墩!的文章就介绍到这了,更多相关Three.js和React冰墩墩内容请搜索脚本之家以前的文章或继续浏览下面的相关文章希望大家以后多多支持脚本之家!