概述
IntentService是Service是子类,内置一个请求队列来按序处理请求(一般都为异步请求),一次只执行一个请求,全部请求执行完成后IntentService自己会自动关闭,无需我们操心。
使用方法
我们首先关心的当然是它的用法,IntentService的用法其实很简单,创建一个类去继承它就可以了:
public class DownService extends IntentService {

   private static final String Tag = "DownService";

   public DownService() {
        super(Tag);
    }

   @Override
    public void onCreate() {
        super.onCreate();
        Log.e(Tag, "onCreate");
    }

    @Override
    protected void onHandleIntent(Intent intent) {
        Log.e(Tag, "onHandleIntent");
        //主要处理逻辑写在这里
    }

    @Override
    public int onStartCommand(Intent intent, int flags, int startId) {
        Log.e(Tag, "onStartCommand");
    }

    @Override
    public void onDestroy() {
        super.onDestroy();
       Log.e(Tag, "onDestroy");
    }
}
这里需要提醒一件事,那就是上面的构造方法DownService() 里面的super()需要一个String参数,但是按照Android Studio生产的构造方法:
public DownService(String name) {
         super(name);
}
只要启动IntentService就会报错:
所以记得按照上面一开始的写法去处理构造方法,只要随便给个String参数就可以了。
类创建好了记得到清单文件中注册Service:
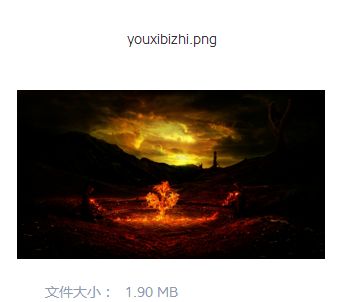
接下来就在DownService里面写一个下载逻辑吧,我在七牛放了一张图片,它的总字节数为1,991,650 字节:
现在就开始在DownService里下载这张图片:
public class DownService extends IntentService {

    private static final String Tag = "DownService";
    private static final String key = "key";
    private File destFile;
    private float fileLength;//文件总长度
    private float downloadLength;//文件当前下载

    //简单工厂
    public static Intent newIntent(Context context, String url) {
        Intent intent = new Intent(context, DownService.class);
        intent.putExtra(key, url);
        return intent;
    }

    @Override
    public void onCreate() {
        super.onCreate();
        Log.e(Tag, "onCreate");
        // 设置文件下载后的保存路径
        destFile = new File(getCacheDir() + File.separator + "Service.png");
    }

    @Override
    protected void onHandleIntent(Intent intent) {
        Log.e(Tag, "onHandleIntent");
        String url = intent.getStringExtra(key);
        downFile(url);
    }

    private void downFile(String Url) {
        HttpURLConnection mConnection = null;
        FileOutputStream fos = null;
        InputStream inputStream = null;
        try {
            mConnection = (HttpURLConnection) new URL(Url).openConnection();
            mConnection.setRequestMethod("GET");
            mConnection.setConnectTimeout(Constants.CONTENT_TIMEOUT);
            mConnection.setReadTimeout(Constants.READ_TIME);
            int responseCode = mConnection.getResponseCode();
            fileLength = mConnection.getContentLength();
            if (responseCode == HttpURLConnection.HTTP_OK) {
                fos = new FileOutputStream(destFile);
                inputStream = mConnection.getInputStream();
                byte[] bytes = new byte[2048];
                int len = -1;
                while ((len = inputStream.read(bytes)) != -1) {
                    fos.write(bytes, 0, len);
                    downloadLength = downloadLength + len;
                    Log.e(Tag, "fileLength:" + fileLength + ";downloadLength:" + downloadLength);
                }
                fos.close();
                inputStream.close();
            }
        } catch (IOException e) {
            e.printStackTrace();
        } finally {
            if (mConnection != null) {
                mConnection.disconnect();
            }
        }
    }

    @Override
    public int onStartCommand(@Nullable Intent intent, int flags, int startId) {
        Log.e(Tag, "onStartCommand");
        if (destFile.exists()) {
            destFile.delete();
        }
        return super.onStartCommand(intent, flags, startId);
    }

    @Override
    public void onDestroy() {
        super.onDestroy();
        Log.e(Tag, "onDestroy");
    }
}
接着申请上网权限,在Activity中启动DownService:
就可以看到下面的打印了:
这里可以看到当下载任务执行完成后IntentService就自动关闭了,不用再操心线程回收的问题了。
刷新UI
图片下载功能是完成了,但是一般而言,我们总得让用户知道当前的下载情况吧,不然这种两眼一黑的体验,估计很少用户会喜欢的。那么,在使用IntentService下载的过程中,该怎么刷新UI?
刷新UI的方法其实还是不少的,可以用广播,可以用EventBus,也可以使用Handler。这里我选择使用Handler的方法。
首先,创建被观察者和观察者这两个类:
public class DownChanger extends Observable {

    private static DownChanger mInstance;

    private DownChanger() {
    }

    //单例
    public static DownChanger getInstance() {
        if (mInstance == null) {
            mInstance = new DownChanger();
        }
        return mInstance;
    }

    public void setPostChange(int progress) {
        //调用方法通知观察者去获取更新数据
        setChanged();
        notifyObservers(progress);
    }
}
接着是观察者类:
public abstract class DownWatcher implements Observer {

    @Override
    public void update(Observable o, Object arg) {
        if (arg instanceof Integer) {
            int progress = Integer.parseInt(arg.toString());
            notifyUpData(progress);
        }
    }

    public abstract void notifyUpData(int progress);
}
这里写了一个抽象方法给Activity更新UI用的。
然后在DownService里面创建Handler对象并用DownChanger通知外层了:
public class DownService extends IntentService {
..........
 //Service运行在主线程,所以这里不需要配置Looper
  private Handler mHandler = new Handler(){
        @Override
        public void handleMessage(Message msg) {
            super.handleMessage(msg);
            DownChanger.getInstance().setPostChange(msg.what);
        }
    };
..........
private void downFile(String Url) {
..........
  mHandler.sendEmptyMessage((int) (downloadLength*100/fileLength));
..........
}
最后就是在Activity中刷新UI了:
public class MainActivity extends AppCompatActivity {
........
      private TextView tvProgress;

    private DownWatcher mWatcher = new DownWatcher() {
        @Override
        public void notifyUpData(int progress) {
            tvProgress.setText("当前下载进度:" + progress + "%");
        }
    };

    @Override
    protected void onCreate(Bundle savedInstanceState) {
        super.onCreate(savedInstanceState);
        setContentView(R.layout.activity_intent);
        tvProgress = (TextView) findViewById(R.id.tv_progress);
        DownChanger.getInstance().addObserver(mWatcher);
    }

    public void start(View view){
        startService(DownService.newIntent(this, Url));
    }

    @Override
    protected void onDestroy() {
        super.onDestroy();
        DownChanger.getInstance().deleteObserver(mWatcher);
    }
}
这时就可以看到运行效果了:


