chromebook刷机_删除后如何还原Chromebook的原始BIOS和软件
chromebook刷机
If you’ve tampered with your Chromebook—to install Windows on your Chromebook, for example—you may have replaced its BIOS with a third-party option. Here’s how to roll all your changes back and turn that Windows or Linux PC back into a Chromebook.
如果您篡改了Chromebook (例如,要在Chromebook上安装Windows) ,则可能已将其BIOS替换为第三方选件。 以下是回滚所有更改并将Windows或Linux PC还原为Chromebook的方法。
If you haven’t tampered this heavily with your Chromebook, you can factory reset it the normal way. The following guide is intended for those that have installed a different BIOS and operating system altogether.
如果您尚未对Chromebook进行过大幅改动,则可以通过正常方式将其恢复出厂设置。 以下指南适用于完全安装了不同BIOS和操作系统的用户。
第一步:还原Chromebook的原始BIOS (Step One: Restore Your Chromebook’s Original BIOS)
You can restore the BIOS using the same script you used to replace your BIOS in the first place. That script, if you recall from our guide, creates a backup copy of your BIOS, making it easy to restore. However, this script must be run from a Linux system with a full Bash shell, so you won’t perform this step from within Windows.
您可以使用与替换BIOS相同的脚本还原BIOS。 如果您从我们的指南中回忆起,该脚本会创建BIOS的备份副本,从而使其易于还原。 但是,此脚本必须在具有完整Bash shellLinux系统上运行,因此您不会在Windows内部执行此步骤。
Instead, you’ll want to boot your Chromebook into a Linux environment. We’ll use Ubuntu as the example, but other Linux distributions should also work fine. Download an Ubuntu ISO and the Rufus utility. Launch Rufus, select a USB drive, and pick “GPT partition scheme for UEFI” as well as “FAT32”. Click the button to the right of “Create a bootable disk using” and select your downloaded Ubuntu ISO. Click “Start” when you’re ready.
相反,您需要将Chromebook引导到Linux环境中。 我们将以Ubuntu为例,但是其他Linux发行版也应该可以正常工作。 下载Ubuntu ISO和Rufus实用程序。 启动Rufus,选择一个USB驱动器,然后选择“ UEFI的GPT分区方案”以及“ FAT32”。 单击“使用创建可引导磁盘”右边的按钮,然后选择下载的Ubuntu ISO。 准备就绪后,单击“开始”。
Rufus will ask you if you want to copy the image in ISO mode or DD mode. You can choose the default “ISO image mode” and continue.
Rufus将询问您是否要以ISO模式或DD模式复制图像。 您可以选择默认的“ ISO图像模式”并继续。
NOTE: If you reinstalled your Chromebook’s BIOS write protect screw, you’ll need to remove it before flashing the original BIOS. If you left the write protect screw off, you can continue.
注意:如果您重新安装了Chromebook的BIOS写保护螺钉,则需要先将其卸下,然后再刷新原始BIOS。 如果未拧开写保护螺钉,则可以继续。
When you’re done, connect the USB drive to your Chromebook and reboot. The BIOS should automatically boot from the USB drive. If it doesn’t, press any key at the start of the boot process, select “Boot Manager”, and select your USB drive. Select “Try Ubuntu Without Installing” to get a live Ubuntu desktop.
完成后,将USB驱动器连接到Chromebook并重新启动。 BIOS应该自动从USB驱动器启动。 如果不是,请在启动过程开始时按任意键,选择“启动管理器”,然后选择您的USB驱动器。 选择“尝试不安装Ubuntu”即可获得一个实时Ubuntu桌面。
Click the Wi-Fi icon at the top right corner of your screen and connect to your Wi-Fi network when you reach the desktop. This will give the Linux system internet access, which it needs to download the script.
单击屏幕右上角的Wi-Fi图标,并在到达桌面时连接到Wi-Fi网络。 这将使Linux系统具有Internet访问权限,需要下载脚本。
You now now run the same script you ran earlier. Open a Terminal window in Ubuntu and paste the following command, pressing Enter afterwards.
现在,您运行与之前运行的脚本相同的脚本。 在Ubuntu中打开终端窗口,然后粘贴以下命令,然后按Enter。
cd ~; curl -L -O http://mrchromebox.tech/firmware-util.sh; sudo bash firmware-util.sh
This command changes to your home directory, downloads the http://mrchromebox.tech/firmware-util.sh script file, and runs it with root privileges. Consult the developer’s website for more documentation about how the script works.
该命令将切换到您的主目录,下载http://mrchromebox.tech/firmware-util.sh脚本文件,并以root特权运行它。 有关该脚本如何工作的更多文档,请查阅开发者的网站。
The script will download and run, presenting you with a helpful menu.
该脚本将下载并运行,为您提供有用的菜单。
Use the “Restore Stock Firmware (full)” option. Type “9” and press “Enter” to run it.
使用“还原库存固件(完整)”选项。 输入“ 9”并按“ Enter”运行它。
Answer the script’s questions, connecting the USB drive containing your BIOS backup file and pointing the script at it. The script will flash the backup BIOS back onto your Chromebook.
回答脚本的问题,连接包含BIOS备份文件的USB驱动器,然后将脚本指向它。 该脚本会将备份BIOS刷新回Chromebook。
If you’ve lost your backup copy of the original BIOS firmware, the script can attempt to download and install copies from the Internet. Just tell the script you do not have a firmware backup file when it asks. Downloading the original BIOS from the Internet only works for devices using the Haswell, Broadwell, or Baytrail architectures at the moment, according to the script’s documentation.
如果您丢失了原始BIOS固件的备份副本,则脚本可以尝试从Internet下载并安装副本。 只需在脚本询问时告诉脚本您没有固件备份文件即可。 根据脚本的文档,当前从Internet下载原始BIOS仅适用于使用Haswell,Broadwell或Baytrail体系结构的设备。
The process should complete successfully. You’ll be told you need to restore Chrome OS using the Chrome OS recovery media, and then re-run this script to reset the firmware boot flags.
该过程应成功完成。 系统将告知您需要使用Chrome操作系统恢复媒体还原Chrome操作系统,然后重新运行此脚本以重置固件启动标志。
You can now shut down your Chromebook.
现在,您可以关闭Chromebook。
第二步:还原Chrome操作系统 (Step Two: Restore Chrome OS)
You’ll now need to create the Chrome OS operating system using recovery media. You can do it on any computer—Windows, Mac, Linux, or Chromebook—with the Chrome browser installed. Head to the Chrome Web Store and install the Chromebook Recovery Utility Chrome app to get started.
现在,您需要使用恢复媒体创建Chrome操作系统。 您可以在安装了Chrome浏览器的任何计算机(Windows,Mac,Linux或Chromebook)上执行此操作。 前往Chrome网上应用店并安装Chromebook Recovery Utility Chrome应用程序以开始使用。
Launch the app and connect a USB drive. This USB drive will be erased as part of this process. You can use the same USB drive you used for Ubuntu earlier, if you like—Ubuntu will be erased from it, but you won’t need Ubuntu again for this process.
启动应用程序并连接USB驱动器。 此过程将删除此USB驱动器。 如果愿意,您可以使用先前用于Ubuntu的USB驱动器,Ubuntu将从其中删除,但在此过程中无需再次使用Ubuntu。
Find your Chromebook model in the Chromebook Recovery Utility application. You can pick it from the list or just enter the codename.
在Chromebook Recovery Utility应用程序中找到您的Chromebook型号。 您可以从列表中选择它,也可以只输入代号。
If you don’t remember your model of Chromebook, you can turn on your Chromebook and you’ll see the model number displayed at the bottom of the recovery screen.
如果您不记得自己的Chromebook型号,可以打开Chromebook,然后会在恢复屏幕的底部看到型号。
Go through Chromebook Recovery Utility wizard. The application will wipe the attached USB drive and place Chrome OS recovery media on it. If your Chromebook has an SD card slot, you can also use this utility to place the recovery media on an SD card instead.
经历Chromebook Recovery Utility向导。 该应用程序将擦除连接的USB驱动器,并将Chrome操作系统恢复媒体放在其上。 如果您的Chromebook具有SD卡插槽,则也可以使用此实用程序将恢复媒体放置在SD卡上。
When the tool finishes creating recovery media, you can remove the USB drive from your computer and connect it to your Chromebook.
工具完成恢复媒体的创建后,您可以从计算机中删除USB驱动器,然后将其连接到Chromebook。
With your Chromebook still powered off, press and hold the Esc and Refresh keys (the Refresh key is where the F3 key would be on a normal keyboard). Press the Power button while holding these keys and then let go of the power button. Release the Esc and Refresh keys when you see a message appear on your screen.
在Chromebook仍关闭电源的情况下,按住Esc键和“刷新”键(“刷新”键是F3键在普通键盘上的位置)。 在按住这些键的同时按电源按钮,然后放开电源按钮。 当屏幕上显示一条消息时,松开Esc和Refresh键。
Your Chromebook will boot into recovery mode and you’ll see a message telling you to insert a recovery drive to continue. Connect the USB drive you created to your Chromebook.
您的Chromebook将启动进入恢复模式,并且您会看到一条消息,提示您插入恢复驱动器以继续。 将您创建的USB驱动器连接到Chromebook。
Your Chromebook will automatically detect the recovery media and use it to restore your device. Ensure the Chromebook is plugged in and allow it to automatically restore the operating system.
您的Chromebook会自动检测恢复媒体,并使用它来恢复设备。 确保已插入Chromebook,并允许其自动还原操作系统。
If your Chromebook doesn’t automatically detect the connected drive and start the recovery process, there may be something wrong with your recovery media. You may also need to remove any other SD cards, USB drives, and USB devices before starting the recovery drive. Ensure you only have the one USB drive connected to avoid confusing the system.
如果您的Chromebook无法自动检测到已连接的驱动器并开始恢复过程,则恢复媒体可能有问题。 在启动恢复驱动器之前,您可能还需要卸下所有其他SD卡,USB驱动器和USB设备。 确保仅连接一个USB驱动器,以免造成系统混乱。
When it’s done, your Chromebook will ask you to remove the recovery media. Your Chromebook will then restart automatically.
完成后,您的Chromebook会要求您删除恢复媒体。 然后,您的Chromebook将自动重启。
Press Ctrl+D to agree to continue in developer mode when you see the “OS verification is OFF” warning. You don’t want to re-enable OS verification just yet!
当您看到“操作系统验证已关闭”警告时,请按Ctrl + D同意在开发人员模式下继续。 您现在还不想重新启用OS验证!
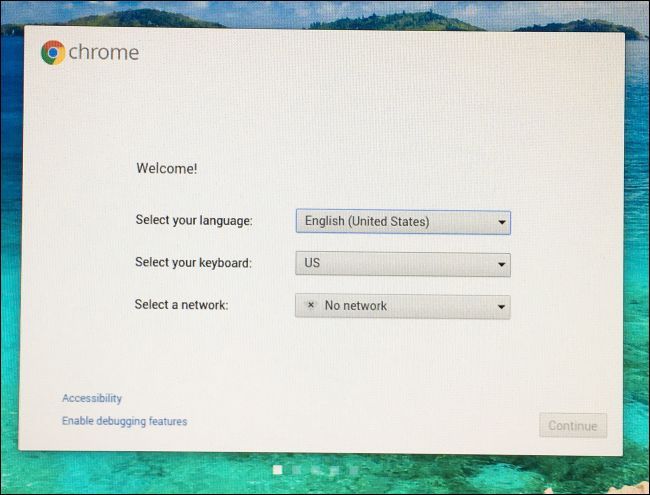
Boot into Chrome OS, where you’ll see the Chrome OS installation wizard. Sign in and set up Chrome OS normally.
引导至Chrome操作系统,您将在其中看到Chrome操作系统安装向导。 登录并正常设置Chrome操作系统。
第三步:还原固件启动标志 (Step Three: Restore Your Firmware Boot Flags)
As the script mentioned earlier, you’ll need to reset the firmware boot flags to their default settings.
如前面提到的脚本,您需要将固件启动标志重置为其默认设置。
From within Chrome OS, press Ctrl+Alt+T to open a terminal window. Type shell and press Enter to access a full shell.
在Chrome操作系统中,按Ctrl + Alt + T打开终端窗口。 键入shell ,然后按Enter键访问完整的shell。
Paste the following command and press Enter to download and run the firmware script one last time:
粘贴以下命令,然后按Enter键以最后一次下载并运行固件脚本:
cd ~; curl -L -O http://mrchromebox.tech/firmware-util.sh; sudo bash firmware-util.sh
When the script interface appears, choose the “Set Boot Options (GBB Flags)” option by typing “4” and pressing Enter.
出现脚本界面时,通过键入“ 4”并按Enter键来选择“设置启动选项(GBB标志)”选项。
Tell the script you want to “Reset to factory default” by typing “5” and pressing Enter.
通过输入“ 5”并按Enter来告诉脚本您要“重置为出厂默认值”。
第四步:禁用开发人员模式(可选) (Step Four: Disable Developer Mode (Optional))
At this point, you may or may not want to disable Developer Mode.
此时,您可能会或可能不想禁用开发人员模式。
Developer Mode is a special mode that allows you to modify your Chromebook’s system software. It’s another way of saying the “OS verification” feature is off, allowing you to tamper with the OS. While Developer Mode is enabled, you have to press Ctrl+D to boot your Chromebook every time it boots.
开发人员模式是一种特殊模式,可让您修改Chromebook的系统软件。 这是说“操作系统验证”功能已关闭的另一种方式,可让您篡改操作系统。 启用开发人员模式后,您必须在每次引导时按Ctrl + D来启动Chromebook。
If you don’t want to mess with the Chromebook’s software, you’ll want to disable Developer Mode. If you plan on installing Linux on your Chromebook using something like Crouton, you’ll want to leave Developer Mode enabled.
如果您不想弄乱Chromebook的软件,可以禁用开发人员模式。 如果您打算使用Crouton之类的东西在Chromebook上安装Linux ,则需要保持“开发人员模式”启用。
If you do want to disable Developer Mode, restart your Chromebook and press the Space bar when the “OS verification if OFF” screen appears.
如果您确实想禁用开发人员模式,请重新启动Chromebook并在显示“如果关闭时进行操作系统验证”屏幕时按空格键。
(If you don’t want to disable Developer Mode, just keep pressing Ctrl+D each time your Chromebook boots.)
(如果您不想禁用开发人员模式,只需在每次启动Chromebook时按住Ctrl + D。)
Press the “Enter” key to confirm you want to disable developer mode when your Chromebook asks.
在Chromebook询问时,按“ Enter”键确认您要禁用开发人员模式。
Your Chromebook will wipe its internal drives and re-enable OS verification, which prevents you (or malware) from modifying the system partition and operating system files. You also won’t have to press Ctrl+D every time you boot.
Chromebook会擦除其内部驱动器并重新启用OS验证,从而阻止您(或恶意软件)修改系统分区和操作系统文件。 您也不必每次启动时都按Ctrl + D。
You’ll have to sign back into Chrome OS after you do this, as disabling Developer Mode wipes your internal storage.
完成此操作后,您必须重新登录Chrome操作系统,因为禁用“开发人员模式”会清空您的内部存储空间。
第五步:重新安装BIOS写保护螺钉(可选) (Step Five: Reinstall the BIOS Write Protect Screw (Optional))
You may want to re-enable the BIOS write protection, too. This doesn’t require that you disable developer mode. In fact, you can flash anything you want to your BIOS and then reinstall the screw to protect your modified BIOS from changes.
您可能也想重新启用BIOS写保护。 不需要禁用开发人员模式。 实际上,您可以将所需的任何内容刷新到BIOS,然后重新安装螺钉以保护修改后的BIOS不受更改。
If you’ve flashed the original BIOS, you can reinstall the screw to protect the original BIOS from modification. Your Chromebook will be back to the same state it was in when you bought it, running the original BIOS and protecting it from modification.
如果您刷新了原始BIOS,则可以重新安装螺钉以保护原始BIOS不被修改。 Chromebook将恢复为购买时的状态,并运行原始BIOS并防止其被修改。
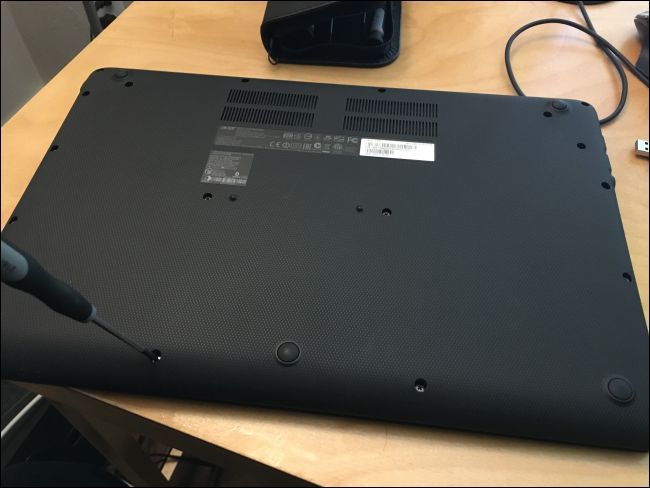
Just do the same thing you did when you removed the screw. First, shut down the Chromebook—don’t just put it to sleep, but shut it down completely. Turn the Chromebook over and unscrew the bottom.
只需执行与卸下螺钉相同的操作即可。 首先,关闭Chromebook,不要只是让它进入睡眠状态,而是要完全关闭它。 翻转Chromebook,然后拧开底部。
Locate the screw hole you unscrewed the BIOS write protect screw from previously. Take the exact same screw you unscrewed earlier and screw it back into the hole.
找到您之前拧下的BIOS写保护螺钉的螺钉Kong。 取与您先前拧下的螺丝完全相同的螺丝,然后将其重新拧入Kong中。
Once it’s secure, reattach the bottom to your Chromebook and boot back up. The BIOS will be write-protected and you’ll be using a stock Chrome OS operating system. Your Chromebook will be in the same state it was in when you purchased it.
安全后,将底部重新连接到Chromebook并重新启动。 BIOS将受写保护,并且您将使用传统的Chrome OS操作系统。 Chromebook的状态与购买时相同。
翻译自: https://www.howtogeek.com/279308/how-to-restore-your-chromebooks-original-bios-and-software/
chromebook刷机


