需要安装的包:
tkinter pickle wordcloud pylab matplotlib jieba PIL numpy os imageio
(ps:若包未安装,请使用pip install package_name进行包的安装.)
最为核心的函数详解:WorldCloud函数
wc = WordCloud(background_color="white",random_state =2,scale=1,mask=alice_coloring,stopwords=stopwords,collocations=False, font_path=myfont, width=1400, height=1400, margin=2)
关于WorldCloud函数的简单讲解:
1. background_color来改变背景颜色,只实验了white和black其他未验证.
2. 使用scale来改变词云图像的精细度(数值越大越精细也越耗时;>8可能要长达数分钟(测试集为10w字的说说)
3. 使用font_path = myfont来改变词云的字体(汉语词云必须依赖自定义的字体库)
4. min_font_size最小字体大小(默认是4)
5. contour_width词云轮廓的描绘,默认是0不描绘
6.关于WorldCloud函数的详解在文章的最后
词云生成的核心代码:
def wordcloud(d,str1,str2):
    alice_coloring = np.array(Image.open(path.join(d,str2)))#背景图片
    stopwords=set(STOPWORDS)
    stopwords.add("said")
    image_colors = ImageColorGenerator(alice_coloring)
    myfont = (r'tyj.ttf')
    wc = WordCloud(background_color="white",random_state =2,scale=1,mask=alice_coloring,stopwords=stopwords,collocations=False, font_path=myfont, width=1400, height=1400, margin=2)
    txt = open(path.join(d,str1),encoding='utf-8').read()
    txt_jieba = jieba.cut(txt,cut_all = True)
    txt_finish = " ".join(txt_jieba)

    wc.generate(txt_finish)
    plt.imshow(alice_coloring)
    plt.imshow(wc)
    plt.axis("off")
    plt.show()
    wc.to_file(path.join("名称.jpg"))
wordcloud(d,txt,picture
完整代码:
import tkinter.messagebox
import pickle
from wordcloud import WordCloud ,STOPWORDS, ImageColorGenerator
from pylab import matplotlib,mpl
from matplotlib.font_manager import FontManager
import matplotlib.pyplot as plt
import matplotlib
import jieba
from PIL import Image
import numpy as np
from os import path
from imageio import *

window = tk.Tk()

window.title('WordCloud Demo Application')

window.geometry('400x300')  # 这里的乘是小x

canvas = tk.Canvas(window, width=400, height=135, bg='green')
image_file = tk.PhotoImage(file='pic.gif')
image = canvas.create_image(200, 0, anchor='n', image=image_file)
canvas.pack(side='top')
tk.Label(window, text='Welcome',font=('Arial', 16)).pack()

tk.Label(window, text='Txt_Input    ', font=('Arial', 14)).place(x=10, y=170)
tk.Label(window, text='Picture_Input', font=('Arial', 14)).place(x=10, y=210)

var_txt = tk.StringVar()
var_txt.set('1.txt')
entry_txt = tk.Entry(window, textvariable=var_txt, font=('Arial', 14))
entry_txt.place(x=130,y=175)
var_picture = tk.StringVar()
var_picture.set('love.png')
entry_picture = tk.Entry(window, textvariable=var_picture, font=('Arial', 14))
entry_picture.place(x=130,y=215)

d = path.dirname(__file__) if "__file__" in locals() else os.getcwd()#这部没有明白,是从官方文档中抄过来的

def submit():

    # 这两行代码就是获取用户输入的txt和picture
    txt = var_txt.get()
    picture = var_picture.get()
    print(txt,picture)
    def wordcloud(d,str1,str2):
        alice_coloring = np.array(Image.open(path.join(d,str2)))#背景图片
        stopwords=set(STOPWORDS)
        stopwords.add("said")
        image_colors = ImageColorGenerator(alice_coloring)

        myfont = (r'tyj.ttf')
        wc = WordCloud(background_color="white",random_state =2,scale=1,mask=alice_coloring,stopwords=stopwords,collocations=False, font_path=myfont, width=1400, height=1400, margin=2)
        txt = open(path.join(d,str1),encoding='utf-8').read()
        txt_jieba = jieba.cut(txt,cut_all = True)
        txt_finish = " ".join(txt_jieba)

        wc.generate(txt_finish)
        plt.imshow(alice_coloring)
        plt.imshow(wc)
        plt.axis("off")
        plt.show()
        wc.to_file(path.join("名称.jpg"))
    wordcloud(d,txt,picture)
btn_login = tk.Button(window, text='Submit', command=submit)
btn_login.place(x=190, y=240)
window.mainloop()
使用说明
纯用户的使用说明
- 在安装好相应的开发环境和扩展包之后, 并确认你也已经可以成功的运行hello_world.py程序.
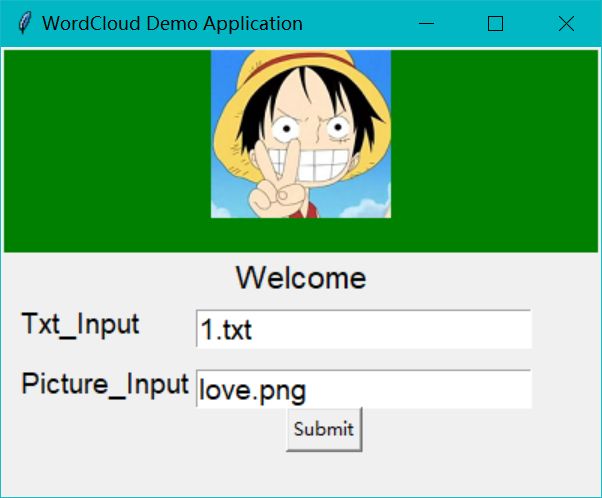
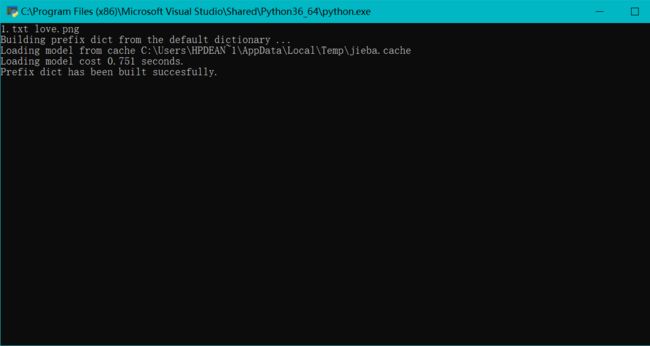
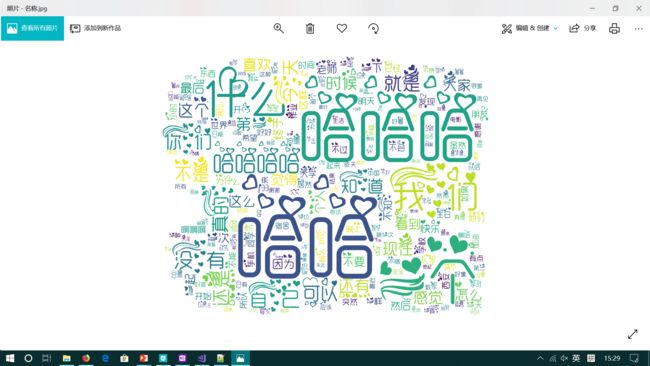
1.1.在此基础上,将全部代码复制粘贴到你的hello_world.py文件中解释并运行.若能出现如下的图片则表示运行成功
1.2这时候需要将您希望制作的文档和图片放在和.py文件的文件夹中;在txt_input和picture_input中输入你的文档名称和图片名称(名称都需要带.txt和.png,目前只支持这两种格式)
1.3点击submit并耐心等待1~2min程序给出词云.
放大后的图像.png
1.4关于python小白制作词云,我建议去一下两个网站免费网站:图悦, 收费网站:易词云. 如果你坚持要使用这个程序,并且觉得花费时间是值得的,那我只能说咱们私聊;邮件请发[email protected].个人感觉易词云的功能比这个库函数的功能只多不少.
程序员的使用指南
- 参阅github网站https://github.com/amueller/word_cloud
- 与我交流[email protected](只回复技术交流贴,别问我怎么用)
关于WorldCloud函数的详解:
font_path : string
Font path to the font that will be used (OTF or TTF).
Defaults to DroidSansMono path on a Linux machine. If you are on
another OS or don't have this font, you need to adjust this path.
将使用的字体的字体路径(OTF或TTF)。
默认为Linux机器上的DroidSansMono路径。如果你在
另一个操作系统或没有此字体,您需要调整此路径。
width : int (default=400)
Width of the canvas.
画布的宽度 默认是400
height : int (default=200)
Height of the canvas.
画布的高度 默认是200
prefer_horizontal : float (default=0.90)
The ratio of times to try horizontal fitting as opposed to vertical.
If prefer_horizontal < 1, the algorithm will try rotating the word
if it doesn't fit. (There is currently no built-in way to get only
vertical words.)
尝试水平拟合该词(画布中有些词是歪的的始作俑者),>1就尽量使词语水平;默认0.9.
mask : nd-array or None (default=None)
If not None, gives a binary mask on where to draw words. If mask is not
None, width and height will be ignored and the shape of mask will be
used instead. All white (#FF or #FFFFFF) entries will be considerd
"masked out" while other entries will be free to draw on. [This
changed in the most recent version!]
面具是用来设置词云的底图的,注意透明的底图会无法识别.
contour_width: float (default=0)
If mask is not None and contour_width > 0, draw the mask contour.
如果mask不是none并且contour_width>0会描述词云的轮廓,默认为0不描绘轮廓
contour_color: color value (default="black")
Mask contour color.
轮廓的颜色,默认是黑色
scale : float (default=1)
Scaling between computation and drawing. For large word-cloud images,
using scale instead of larger canvas size is significantly faster, but
might lead to a coarser fit for the words.
精细度设置(越打越精细,速度越慢)
min_font_size : int (default=4)
Smallest font size to use. Will stop when there is no more room in this
size.
最小字体
font_step : int (default=1)
Step size for the font. font_step > 1 might speed up computation but
give a worse fit.
字体增长的步长
max_words : number (default=200)
The maximum number of words.
最大的单词数
stopwords : set of strings or None
The words that will be eliminated. If None, the build-in STOPWORDS
list will be used. Ignored if using generate_from_frequencies.
停用字
字符串集或无将要消除的话。如果为None,则内置STOPWORDS
列表将被使用。如果使用generate_from_frequencies则忽略。
笔者也不知道这玩意儿干什么用的
background_color : color value (default="black")
Background color for the word cloud image.
背景色:默认黑
max_font_size : int or None (default=None)
Maximum font size for the largest word. If None, height of the image is
used.
最大的字体大小
mode : string (default="RGB")
Transparent background will be generated when mode is "RGBA" and background_color is None.
无背景色,模式选择为RGBA时将生成透明背景
relative_scaling : float (default='auto')
Importance of relative word frequencies for font-size. With
relative_scaling=0, only word-ranks are considered. With
relative_scaling=1, a word that is twice as frequent will have twice
the size. If you want to consider the word frequencies and not only
their rank, relative_scaling around .5 often looks good.
If 'auto' it will be set to 0.5 unless repeat is true, in which
case it will be set to 0.
.. versionchanged: 2.0
Default is now 'auto'.
字出现的频率和它尺寸的相关程度。�若为relative_scaling = 0,则只考虑单词排名(单词出现次数与字体大小无关)。
若为relative_scaling = 1,则单词的大小与出现次数全相关。如果你想考虑单词频率而不仅仅是他们的排名,相对于.5左右,通常看起来不错。如果'auto',它将被设置为0.5,除非repeat为true,其中case它将被设置为0。.. versionchanged:2.0默认现在是“自动”。
color_func : callable, default=None
Callable with parameters word, font_size, position, orientation,
font_path, random_state that returns a PIL color for each word.
Overwrites "colormap".
See colormap for specifying a matplotlib colormap instead.
To create a word cloud with a single color, use
color_func=lambda *args, **kwargs: "white".
The single color can also be specified using RGB code. For example
color_func=lambda *args, **kwargs: (255,0,0) sets color to red.
regexp : string or None (optional)
Regular expression to split the input text into tokens in process_text.
If None is specified, r"\w[\w']+" is used. Ignored if using
generate_from_frequencies.
每个词的色彩映射:
可以使用参数word,font_size,position,orientation,
font_path,random_state,返回每个单词的PIL颜色。覆盖“色彩映射”。
请参阅colormap以指定matplotlib色彩映射。
要创建单色的文字云,请使用color_func = lambda * args,** kwargs:“white”。也可以使用RGB代码指定单色。例如color_func = lambda * args,** kwargs:(255,0,0)将颜色设置为红色。
regexp:string或None(可选)正则表达式将输入文本拆分为process_text中的标记。如果指定None,则使用r“\ w [\ w'] +”。
collocations : bool, default=True
Whether to include collocations
(bigrams) of two words. Ignored if using
generate_from_frequencies.
是否搭配两个字(组成词组),如果使用频率省成法可忽略此项
(笔者猜测是英语的专用形式,汉语应该没啥用)
来自 https://github.com/amueller/word_cloud/blob/master/wordcloud/wordcloud.py
https://github.com/amueller/word_cloud
复现程序功能需要用到的素材
文本数据 和字体数据移步百度云盘进行下载:
链接: https://pan.baidu.com/s/14Q6Gt6GCjPcC3uYd5VrpNQ 提取码: pihb
致谢和引用
- 引用了和CSDN三位作者的代码;但是我忘了他们的原文链接了,如有冒犯,我会进行覆写.
- 如果原作者想要被挂表扬墙,我一定会乐意效劳的
- 主引还是tkinter的官方开发文档和wordcloud的github文档


