前言
我很好奇Jetpack Compose作为一个新的界面工具包,在TV端使用体验会如何,毕竟现有的leanback库并不是很好用,而且自定义难度很大,导致大多个人开源的TV项目都长得差不多;
随着正式版的发布,我想在被大浪卷走之前努力一下,学习Jetpack Compose并开发一款简单的TV端应用;
同时听取巨佬的建议-养成写文章的习惯对技能会有所提升,尝试写下这篇文章做些经验总结。
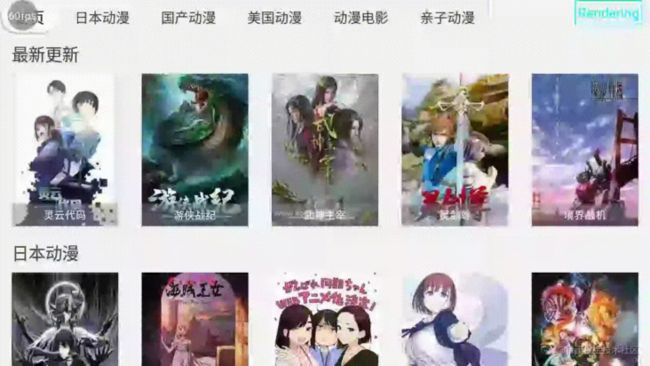
预览
项目地址:compose-anime-tv
喜欢的话,欢迎点个Star。

1. 副作用(Effect)
放在第一个说主要是我觉得副作用对Jetpack Compose真的很重要,不需要很了解,但一定要知道这是啥;
Jetpack Compose两大标签声明式与函数式,尤其是函数式是我们主要需要适应的;@Composable函数会根据UI刷新而重复运行,但是里面的一些如初始化、绑定等行为,或者是一些定义的变量,他们是不可以跟随UI刷新而重新初始化、重复绑定或重新生成的;
为了能让它们在合适的时间运行,就需要使用副作用Effect;
这里推荐下fundroid大佬的这篇文章,写得非常好,连(副作用)的命名都有解释;
Jetpack Compose Side Effect:如何处理副作用 @fundroid
2. 按键传递(KeyEvent)
为了尽量使用现有的Modifier扩展,我首先在官方文档查阅了下KeyEvent,看到了下面这段代码:
Box(
    Modifier
        .onPreviewKeyEvent { keyEvent1 -> false }
        // .onKeyEvent { keyEvent5 -> false }
        .onKeyEvent { keyEvent4 -> false }
) {
    Box(
        Modifier
            .onPreviewKeyEvent { keyEvent2 -> false }
            .onKeyEvent { keyEvent3 -> false }
            .focusable()
    )
}我非常喜欢上面这段代码,只有onKeyEvent()、onPreviewKeyEvent()两个扩展、而且基本能满足开发需要。
- 焦点处理(Focus)
官方sample:androidx.compose.ui.samples.FocusableSample
3.1 Modifier扩展
主要为下面这几个:
- Modifier.focusTarget()、Modifier.focusable()
- Modifier.onFocusEvent()、Modifier.onFocusChange()
- Modifier.focusRequester()、Modifier.focusOrder()
3.1.1 focusable()与focusTarget()
focusable()是对focusTarget()的进一步封装,必须配置focusTarget()才能获取焦点,正常使用onFocusChange()、onKeyEvent()等;
官方建议使用focusable()而不是直接使用focusTarget(),但是我在使用中遇到过下面这个错误,加上封装的功能我还不是很需要,所以项目中我还是主要使用了focusTarget();
kotlin.UninitializedPropertyAccessException: lateinit property relocationRequesterNode has not been initialized
    at androidx.compose.ui.layout.RelocationRequesterModifier.getRelocationRequesterNode(RelocationRequesterModifier.kt:32)
    at androidx.compose.ui.layout.RelocationRequester.bringIntoView(RelocationRequester.kt:61)
    at androidx.compose.ui.layout.RelocationRequester.bringIntoView$default(RelocationRequester.kt:59)
    at androidx.compose.foundation.FocusableKt$focusable$2$4$1.invokeSuspend(Focusable.kt:108)
    at kotlin.coroutines.jvm.internal.BaseContinuationImpl.resumeWith(ContinuationImpl.kt:33)
    at kotlinx.coroutines.DispatchedTask.run(DispatchedTask.kt:106)
    ...
PS:focusTarget()曾经叫focusModifier(),我感觉旧名字更能体现为啥一定要配置了才能使用相关方法,所以这里提一下。
3.1.2 onFocusChange()与onFocusEvent()
onFocusEvent()作用是回调焦点状态FocusState;
interface FocusState {
    val isFocused: Boolean
    val hasFocus: Boolean
    val isCaptured: Boolean
}onFocusChange()则是对onFocusEvent()的封装,只有变化回调FocusState,类似于Flow.distinctUntilChanged;
一般onFocusChange()用的比较多;
3.1.3 focusOrder()与focusRequester()
focusRequester()用于给控件配置FocusRequester类:
class FocusRequester {
    fun requestFocus()
    fun captureFocus(): Boolean
    fun freeFocus(): Boolean
}FocusRequester.requestFocus()是给控件获取焦点的唯一手段;captureFocus()和freeFocus()分别是锁定与释放焦点;focusOrder()用于确定下一个获取焦点的控件:
@Composable
fun FocusOrderSample() {
  val (item1, item2, item3, item4) = remember { FocusRequester.createRefs() }
  Box(
    Modifier
      .focusOrder(item1) {
        next = item2
        right = item2
        down = item3
        previous = item4
      }
      .focusable()
  )
  ...
}官方为了便于focusOrder()使用,加了下面这个扩展,为此在项目里我偷懒了下,都使用了focusOrder()配置FocusRequester;
fun Modifier.focusOrder(focusRequester: FocusRequester): Modifier = focusRequester(focusRequester)简化一下,平时使用较多的Modifier扩展就减成了三大件:focusTarget()、focusOrder()、onFocusChange()
3.2 FocusManager
interface FocusManager {
    fun clearFocus(force: Boolean)
    fun moveFocus(focusDirection: FocusDirection): Boolean
}通过LocalFocusManager.current获取,实现类FocusManagerImpl是私有的,同时内部很多变量也是私有的,不便于自定义FocusManager,能做的事情就比较有限了。
4. Jetpack Compose中的按键&焦点传递
进入AndroidComposeView,从dispatchKeyEvent()开始大致预览下实现:
androidx.compose.ui.platform.AndroidComposeView.android.kt
override fun dispatchKeyEvent(event: AndroidKeyEvent) =
if (isFocused) {
    sendKeyEvent(KeyEvent(event))
} else {
    super.dispatchKeyEvent(event)
}
override fun sendKeyEvent(keyEvent: KeyEvent): Boolean {
return keyInputModifier.processKeyInput(keyEvent)}
private val keyInputModifier: KeyInputModifier = KeyInputModifier(
onKeyEvent = {
    val focusDirection = getFocusDirection(it)
    if (focusDirection == null || it.type != KeyDown) return@KeyInputModifier false

    // Consume the key event if we moved focus.
    focusManager.moveFocus(focusDirection)
},
onPreviewKeyEvent = null
)
复制代码
androidx.compose.ui.input.key.KeyInputModifier.kt
internal class KeyInputModifier(
val onKeyEvent: ((KeyEvent) -> Boolean)?,
val onPreviewKeyEvent: ((KeyEvent) -> Boolean)?
) : Modifier.Element {
lateinit var keyInputNode: ModifiedKeyInputNode

fun processKeyInput(keyEvent: KeyEvent): Boolean {
    val activeKeyInputNode = keyInputNode.findPreviousFocusWrapper()
        ?.findActiveFocusNode()
        ?.findLastKeyInputWrapper()
        ?: error("KeyEvent can't be processed because this key input node is not active.")
    return with(activeKeyInputNode) {
        val consumed = propagatePreviewKeyEvent(keyEvent)
        if (consumed) true else propagateKeyEvent(keyEvent)
    }
}
}
fun Modifier.onPreviewKeyEvent(onPreviewKeyEvent: (KeyEvent) -> Boolean): Modifier = composed {
KeyInputModifier(onKeyEvent = null, onPreviewKeyEvent = onPreviewKeyEvent)}
fun Modifier.onKeyEvent(onKeyEvent: (KeyEvent) -> Boolean): Modifier = composed {
KeyInputModifier(onKeyEvent = onKeyEvent, onPreviewKeyEvent = null)}
复制代码
上面的代码结合官方KeyEvent的使用示例,可以判断出:
Jetpack Compose会先把KeyEvent交给Focus链上配置了onKeyEvent()的控件们消费,没有控件消费就会走默认的onKeyEvent(),约等于focusManager.moveFocus(focusDirection);
再看下focusManager是大致是怎么处理的:
androidx.compose.ui.focus.FocusManager
class FocusManagerImpl(
private val focusModifier: FocusModifier = FocusModifier(Inactive)) : FocusManager {
...
override fun moveFocus(focusDirection: FocusDirection): Boolean {
    val source = focusModifier.focusNode.findActiveFocusNode() ?: return false

    val nextFocusRequester = source.customFocusSearch(focusDirection, layoutDirection)
    if (nextFocusRequester != FocusRequester.Default) {
        nextFocusRequester.requestFocus()
        return true
    }

    val destination = focusModifier.focusNode.focusSearch(focusDirection, layoutDirection)
    if (destination == null || destination == source) {
      return false
    }

    // We don't want moveFocus to set focus to the root, as this would essentially clear focus.
    if (destination.findParentFocusNode() == null) {
      return when (focusDirection) {
        // Skip the root and proceed to the next/previous item from the root's perspective.
        Next, Previous -> {
          destination.requestFocus(propagateFocus = false)
          moveFocus(focusDirection)
        }
        // Instead of moving out to the root, we return false.
        // When we return false the key event will not be consumed, but it will bubble
        // up to the owner. (In the case of Android, the back key will be sent to the
        // activity, where it can be handled appropriately).
        @OptIn(ExperimentalComposeUiApi::class)
        Out -> false
        else -> error("Move focus landed at the root through an unknown path.")
      }
    }

    // If we found a potential next item, call requestFocus() to move focus to it.
    destination.requestFocus(propagateFocus = false)
    return true
}
}
复制代码
nextFocusRequester就是通过focusOrder配置的下一个目标,如果返回的不是FocusRequester.Default,就直接requestFocus();
否则就通过focusModifier.focusNode.focusSearch()寻找焦点:
internal fun ModifiedFocusNode.focusSearch(
focusDirection: FocusDirection,
layoutDirection: LayoutDirection
): ModifiedFocusNode? {
return when (focusDirection) {
    Next, Previous -> oneDimensionalFocusSearch(focusDirection)
    Left, Right, Up, Down -> twoDimensionalFocusSearch(focusDirection)
    @OptIn(ExperimentalComposeUiApi::class)
    In -> {
        // we search among the children of the active item.
        val direction = when (layoutDirection) { Rtl -> Left; Ltr -> Right }
        findActiveFocusNode()?.twoDimensionalFocusSearch(direction)
    }
    @OptIn(ExperimentalComposeUiApi::class)
    Out -> findActiveFocusNode()?.findParentFocusNode()
    else -> error(invalidFocusDirection)
}
}
internal fun ModifiedFocusNode.findActiveFocusNode(): ModifiedFocusNode? {
return when (focusState) {
    Active, Captured -> this
    ActiveParent -> focusedChild?.findActiveFocusNode()
    Inactive, Disabled -> null
}
}
复制代码
findActiveFocusNode()方法主要还是确定当前的焦点,基于当前焦点去寻找下一个目标;
oneDimensionalFocusSearch()与twoDimensionalFocusSearch()都是往child寻找下一个目标,我想的传递方案和这个是相反的,所以这两个方法我没过多研究;
findParentFocusNode()则是把焦点传给parent,这个会是我比较常用的,我查了下这个方法的引用,目前好像只能通过focusManager.moveFocus(FocusDirection.Out)去触发;
做个小总结:
基于focusOrder()确定下一个目标是最直接、最稳定的,不会走后面那些较为复杂的判断,上层方便配置的话尽量配置;
虽然我很喜欢onKeyEvent(),但是onKeyEvent()初步看来只适合在Focus链的两端使用,不然很可能判断不足,把原本想让focusManager.moveFocus()消费的行为给抢走;
可以通过focusManager.moveFocus(FocusDirection.Out)把当前焦点传给parent。
- 焦点传递实践
我预期的传递方案大致就是:
每个组件各自处理焦点,焦点从最外层逐步传入;移动焦点时,当前组件不消费就传给父组件处理。
以示例来说,先自定义两个组件Box1与Box2:
@Composable
fun AppScreen() {
val (focus1, focus2) = remember { FocusRequester.createRefs() }
Row(
modifier = Modifier.fillMaxSize(),
horizontalArrangement = Arrangement.SpaceAround,
verticalAlignment = Alignment.CenterVertically
) {
Box1(Modifier.focusOrder(focus1) {
  right = focus2
  // left = focus2
})
Box2(Modifier.focusOrder(focus2) {
  left = focus1
  // right = focus1
})
}
SideEffect {
focus1.requestFocus()}
}
@Composable
fun Box1(modifier: Modifier = Modifier) {
var isParentFocused by remember { mutableStateOf(false) }
Box(
modifier = modifier
  // .background(Color.Green)
  // .size(200.dp)
  .onFocusChanged { isParentFocused = it.isFocused }
  .focusTarget(),
// contentAlignment = Alignment.Center
) {
Text(
  if (isParentFocused) "Focused" else "",
  // color = Color.White,
  // style = MaterialTheme.typography.h3
)
}
}
@Composable
fun Box2(modifier: Modifier = Modifier) {
...
}
复制代码
其他不变的情况下,把Box1改成一个List:
@Composable
fun Box1(modifier: Modifier = Modifier) {
var isParentFocused by remember { mutableStateOf(false) }
var focusIndex by remember { mutableStateOf(0) }
LazyColumn(
modifier = modifier
  .onFocusChanged { isParentFocused = it.isFocused }
  .focusTarget(),
) {
items(10) { index ->
  val focusRequester = remember { FocusRequester() }
  var isFocused by remember { mutableStateOf(false) }
  Text(
    if (isFocused) "Focused" else "",
    // color = Color.Black,
    // style = MaterialTheme.typography.h5,
    // textAlign = TextAlign.Center,
    modifier = Modifier
      // .padding(10.dp)
      // .background(Color.Green)
      // .width(120.dp)
      // .padding(vertical = 10.dp)
      .onFocusChanged {
        isFocused = it.isFocused
        if (isFocused) focusIndex = index
      }
      .focusOrder(focusRequester)
      .focusTarget(),
  )

  if (isParentFocused && focusIndex == index) {
    SideEffect {
      focusRequester.requestFocus()
    }
  }
}
}
}
复制代码
看似没什么问题,但其实向右的跳转并不是根据AppScreen中的配置而跳转的,给Box1配置focusOrder(focus1) { left = focus2 },按左键并不能找到focus2;
这里就需要手动去把焦点传给parent,借助onKeyEvent()在按键传递过程中触发focusManager.moveFocus(FocusDirection.Out)把焦点返给parent,并返回false让这个按键继续传递下去;
...
val focusManager = LocalFocusManager.current
LazyColumn(
modifier = modifier
// .onFocusChanged { isParentFocused = it.isFocused }
.onKeyEvent {
  when (it) {
    Key.DirectionRight,
    Key.DirectionLeft -> {
      focusManager.moveFocus(FocusDirection.Out)
    }
  }
  false
}
// .focusTarget(),
) {
...
}
复制代码
我在项目中使用的焦点传递方案大致就是这样,目前只能应付一些较为简单的场景,由于有返回焦点给parent的行为,单个组件不适合有两层Focus的传递,需要把多的一层再拆成组件,不过好在Jetpack Compose写一个组件成本很低。
- 列表滚动
焦点传递方式虽然大致确定了,但是在焦点移动时,列表也是需要跟着滚动的;
通过官方文档,很快就找到了相关代码:
val listState = rememberLazyListState()
val coroutineScope = rememberCoroutineScope()
LazyColumn(state = listState) {
// ...}
ScrollToTopButton(
onClick = {
    coroutineScope.launch {
        // Animate scroll to the first item
        listState.animateScrollToItem(index = 0)
    }
}
)
复制代码
借助LazyListState就能实现列表的滚动,相关方法大概有:
listState.scrollBy(value)
listState.scrollToItem(index, offset)
listState.animateScrollBy(value, animationSpec)
listState.animateScrollToItem(index, offset)
复制代码
单从使用上看animateScrollToItem()比较符合需要,给上面的Box1添加相关配置,并在focusIndex变化时触发滚动:
val listState = rememberLazyListState()
...
LazyColumn(
state = listState
...
) {
...
}
LaunchedEffect(focusIndex) {
listState.animateScrollToItem(focusIndex)
}
复制代码
可以看到animateScrollToItem()滚动效果不尽人意,所以我们需要自己去算滚动距离并使用animateScrollBy()来滚动;
这方面的实现我基本就抄了SampleComposeApp:
interface ScrollBehaviour {
suspend fun onScroll(state: LazyListState, focusIndex: Int)
}
object VerticalScrollBehaviour : ScrollBehaviour {
override suspend fun onScroll(state: LazyListState, focusIndex: Int) {
val focusItem = state.layoutInfo.visibleItemsInfo.find { focusIndex == it.index } ?: return

val viewStart = state.layoutInfo.viewportStartOffset
val viewEnd = state.layoutInfo.viewportEndOffset
val viewSize = viewEnd - viewStart

val itemStart = focusItem.offset
val itemEnd = focusItem.offset + focusItem.size

// 这里加点距离主要是为了让下一个目标控件绘制出来,不然在visibleItemsInfo会找不到
val offSect = 80

val value = when {
  itemStart < viewStart -> itemStart.toFloat() - offSect
  itemEnd > viewStart + viewSize -> (itemEnd - viewSize - viewStart).toFloat() + offSect
  else -> return
}
state.animateScrollBy(value, tween(150, 0, LinearEasing))
}
}
suspend fun LazyListState.animateScrollToItem(focusIndex: Int, scrollBehaviour: ScrollBehaviour) {
scrollBehaviour.onScroll(this, focusIndex)
}
复制代码
再把Box1里的滚动代码修改下就完成了:
listState.animateScrollToItem(focusIndex, VerticalScrollBehaviour)
复制代码
- 播放器
这块我基本都是参照了ComposeVideoPlayer,它的结构设计的非常好,我只把它里面触摸部分换成了按键的;
大致如下,界面方面最外层一个Box,里面个三个控件分别是:
第一层 画面MediaPlayerLayout()
第二层 按钮、进度条等小组件MediaControlLayout()
第三层 监听KeyEventMediaControlKeyEvent()
@Composable
fun TvVideoPlayer(
player: Player,
controller: VideoPlayerController,
modifier: Modifier = Modifier,
) {
CompositionLocalProvider(
LocalVideoPlayerController provides controller) {
Box(modifier = modifier.background(Color.Black)) {
  MediaPlayerLayout(player, modifier = Modifier.matchParentSize())
  MediaControlLayout(modifier = Modifier.matchParentSize())
  MediaControlKeyEvent(modifier = Modifier.matchParentSize())
}
}
}
internal val LocalVideoPlayerController =
compositionLocalOf
复制代码
使用VideoPlayerController去控制播放和获取当前播放状态:
interface VideoPlayerController {
val state: StateFlow
val isPlaying: Boolean
fun play()
fun pause()
fun playToggle()
fun reset()
fun seekTo(positionMs: Long)
fun seekForward()
fun seekRewind()
fun seekFinish()
fun showControl()
fun hideControl()
}
复制代码
8.1 MediaPlayerLayout
播放器使用常规的Exoplayer,通过AndroidView去加载它;
@Composable
fun PlayerSurface(
modifier: Modifier = Modifier,
onPlayerViewAvailable: (PlayerView) -> Unit = {}
) {
AndroidView(
modifier = modifier,
factory = { context ->
  PlayerView(context).apply {
    useController = false // 关闭默认的控制界面
    onPlayerViewAvailable(this)
  }
}
)
}
复制代码
基于VideoPlayerController类,再对PlayerSurface做个封装,在onStart、onStop、onDestory做些常规处理:
@Composable
fun MediaPlayerLayout(player: Player, modifier: Modifier = Modifier) {
val controller = LocalVideoPlayerController.current
val state by controller.state.collectAsState()
val lifecycle = LocalLifecycleOwner.current.lifecycle
PlayerSurface(modifier) { playerView ->
playerView.player = player

lifecycle.addObserver(object : LifecycleObserver {
  @OnLifecycleEvent(Lifecycle.Event.ON_START)
  fun onStart() {
    playerView.keepScreenOn = true
    playerView.onResume()
    if (state.isPlaying) {
      controller.play()
    }
  }

  @OnLifecycleEvent(Lifecycle.Event.ON_STOP)
  fun onStop() {
    playerView.keepScreenOn = false
    playerView.onPause()
    controller.pause()
  }
})
}
DisposableEffect(Unit) {
onDispose {
  player.release()
}
}
}
复制代码
8.2 MediaControlLayout
根据当前播放状态,显示播放/暂停按钮、快进/快退按钮、进度条等;
@Composable
fun MediaControlLayout(modifier: Modifier = Modifier) {
val controller = LocalVideoPlayerController.current
val state by controller.state.collectAsState()
val isSeeking by remember(state.seekDirection) {
mutableStateOf(state.seekDirection.isSeeking)}
if (!state.controlsVisible && !isSeeking) {
return}
val position = remember(state.currentPosition) { getDurationString(state.currentPosition) }
val duration = remember(state.duration) { getDurationString(state.duration) }
Box(modifier = modifier) {
Column(
  modifier = Modifier
    .fillMaxWidth()
    .align(Alignment.BottomCenter)
    .padding(4.dp)
) {
  TimeTextBar(
    modifier = Modifier
      .fillMaxWidth()
      .padding(bottom = 4.dp),
    position = position,
    duration = duration
  )
  SmallSeekBar(
    modifier = Modifier
      .fillMaxWidth(),
    secondaryProgress = state.bufferedPosition,
    progress = state.currentPosition,
    max = state.duration,
  )
}

if (!isSeeking) {
  PlayToggleButton(
    modifier = Modifier.align(Alignment.Center),
    isPlaying = state.isPlaying,
    playbackState = state.playbackState
  )
}
}
}
复制代码
8.3 MediaControlKeyEvent
定义个空白的Box并监听onKeyEvent,这里就不用考虑传给FocusManager了,直接消费掉按键;
@Composable
fun MediaControlKeyEvent(modifier: Modifier = Modifier) {
val controller = LocalVideoPlayerController.current
val state by controller.state.collectAsState()
val focusRequester = remember { FocusRequester() }
Box(
modifier = modifier
  .onFocusDirection {
    when (it) {
      FocusDirection.In -> {
        if (state.isPlaying) {
          controller.pause()
          controller.showControl()
        } else {
          controller.play()
          controller.hideControl()
        }
        true
      }
      FocusDirection.Down -> {
        if (state.controlsVisible) {
          controller.hideControl()
        } else {
          controller.showControl()
        }
        true
      }
      FocusDirection.Left -> {
        controller.seekRewind()
        true
      }
      FocusDirection.Right -> {
        controller.seekForward()
        true
      }
      FocusDirection.Out -> {
        if (state.controlsVisible) {
          controller.hideControl()
          true
        } else false
      }
      else -> false
    }
  }
  .focusRequester(focusRequester)
  .focusTarget(),
) {
VideoSeekAnimation(
  modifier = Modifier.matchParentSize(),
  seekDirection = state.seekDirection,
)
}
SideEffect {
focusRequester.requestFocus()}
}
复制代码
Jetpack Compose中使用ViewModel
9.1 一般 ViewModel
// implementation("androidx.lifecycle:lifecycle-viewmodel-compose:2.4.0-beta01")
val viewModel: FeedViewModel = viewModel()
复制代码
9.2 Hilt Inject ViewModel
目前官方好像只提供了基于navigation的实现版本:Dagger/Hilt ViewModel Injection (with compose and navigation-compose)
// implementation("androidx.hilt:hilt-navigation-compose:1.0.0-alpha03")
val viewModel: FeedViewModel = hiltViewModel()
复制代码
9.3 Hilt AssistedInject ViewModel
逛Github的时候看到有大佬在Jetpack Compose中使用了这种方式,我觉得还是很不错的,对于函数式的Jetpack Compose来说,在创建ViewModel的时候传入参数是比较合适的;
class DetailViewModel @AssistedInject constructor(
@Assisted id: Long,
...
) : ViewModel() {
...@dagger.assisted.AssistedFactory
interface AssistedFactory {
fun create(id: Long): DetailViewModel
}
}
复制代码
缺点是用AssistedInject注入要写的代码会多一些,有时候使用像produceState这种方式会更简单,具体就看情况使用;
@Composable
fun DetailScreen(id: Long) {
val viewState by produceState(initialValue = DetailViewState.Empty) {
viewModel.loadState(id).collect {value = it}
}
...
}
复制代码
如何注入可参考:AssistedInject viewModel with Jetpack Compose
参考里面可以做一些下面的调整:
把@IntoMap改成@IntoSet就可以不用配置@AssistedFactoryKey;
AssistedFactoryModule.kt可以使用ksp去生成,我是这么写的AssistedFactoryProcessor,生成的hilt代码大致如下:
@InstallIn(SingletonComponent::class)
@Module
public interface DetailViewModelFactoryModule {
@Binds
@IntoMap
@AssistedFactoryQualifier
@AssistedFactoryKey(DetailViewModel.AssistedFactory::class)
public fun bindDetailViewModelFactory(factory: DetailViewModel.AssistedFactory): Any
}
复制代码
还有我跑了下--dry-run好像kapt task有依赖ksp task,这样用ksp生成hilt module在task执行顺序上应该没问题,目前试下来也没遇到什么问题。
./gradlew app:kaptDebugKotlin --dry-run
// ....
// :app:kspDebugKotlin SKIPPED
// :app:kaptGenerateStubsDebugKotlin SKIPPED
// :app:kaptDebugKotlin SKIPPED
复制代码
也可以使用Tlaster大佬在TwidereProject中的方案收集AssistedFactory。
其他
- 使用Jetpack Compose制作图标
前段时间抄fundroid大佬的俄罗斯方块代码时,发现了一个很有趣的小技巧:
编写一个@Composable fun AppIcon() {...},通过预览功能右击"copy image"保存图片,就可以简单制作一个App图标;对于像我这样不会ps的来说还是挺有用的。
- 查看Icons
在使用Icons图标的时候,因为看不到预览挺麻烦的,在官方上找到了这个网站Google Fonts,目前我是在这里搜索和预览的,不知道有没有更好的方式。 屏幕适配
在Jetpack Compose中提供了.dp、.sp扩展,换算则是借助了Density这个类,在Android中这个类是这样创建的:
fun Density(context: Context): Density =
Density(
context.resources.displayMetrics.density,
context.resources.configuration.fontScale
)
复制代码
可以看出直接使用AndroidAutoSize这类库就能达到效果,但是为了项目能更Compose些,我这里还是自定义了下Density:
fun autoSizeDensity(context: Context, designWidthInDp: Int): Density =
with(context.resources) {
val isVertical = configuration.orientation == Configuration.ORIENTATION_PORTRAITval scale = displayMetrics.run {
val sizeInDp = if (isVertical) widthPixels else heightPixels
sizeInDp.toFloat() / density / designWidthInDp
}Density(
density = displayMetrics.density * scale,
fontScale = configuration.fontScale * scale
)
}
// 使用
setContent {
...
CompositionLocalProvider(
LocalDensity provides autoSizeDensity(this@AnimeTvActivity, 480)) {
...}
}
复制代码
PS: 上面的方法只能适配Compose,不支持AndroidView。
取消点击波纹
Jetpack Compose在点击时默认有波纹的,对TV来说并不需要;
一开始我是参照stackoverflow.com/a/66839858/… 处理的:
@SuppressLint("UnnecessaryComposedModifier")
fun Modifier.clickableNoRipple(onClick: () -> Unit): Modifier = composed {
clickable(
indication = null,
interactionSource = remember { MutableInteractionSource() },
onClick = onClick
)
}
复制代码
但是每个点击都这么配置太麻烦了,所以我还是自定义了LocalIndication:
object NoRippleIndication : Indication {
private object NoIndicationInstance : IndicationInstance {
override fun ContentDrawScope.drawIndication() {
drawContent()
}
}@Composable
override fun rememberUpdatedInstance(interactionSource: InteractionSource): IndicationInstance {
return NoIndicationInstance
}
}
// 使用
setContent {
...
MaterialTheme {
CompositionLocalProvider(
  LocalIndication provides NoRippleIndication
) {
  ...
}
}
}
复制代码
注意MaterialTheme会配置LocalIndication,所以要放在MaterialTheme里面去CompositionLocalProvider() {};
@Composable
fun MaterialTheme(
...) {
...
CompositionLocalProvider(
    LocalColors provides rememberedColors,
    LocalContentAlpha provides ContentAlpha.high,
    LocalIndication provides rippleIndication,
    LocalRippleTheme provides MaterialRippleTheme,
    LocalShapes provides shapes,
    LocalTextSelectionColors provides selectionColors,
    LocalTypography provides typography
) {
    ...
}
}
复制代码
- 注入小组件
我尝试在界面上加载一些小组件,如fps等;一开始我是放在app里的,后面就想着把它放入其他module里面通过注入的方式去加载它,主要想研究下这方面的可行性;
一开始我想着使用ASM去收集这些小组件的@Composable函数,好在巨佬给了建议,ASM入局太晚,彼时的Compose代码是比较复杂的,要实现并不容易, 对于还没写过ASM的我来说这条路≈不可能,及时止损没有误入歧途(怂了);
之后我还是用了老方法:使用ksp生成hilt代码来注入Composable组件;
@Retention(AnnotationRetention.SOURCE)
@Target(AnnotationTarget.FUNCTION)
annotation class CollectCompose(
val qualifier: KClass
)
interface CollectComposeOwner
@Composable
fun Show(scope: T)
}
@Composable
fun
owners.forEach { owner -> owner.Show(this) }
}
复制代码
我本来是不想写CollectComposeOwner接口的,但是@Composable是kcp处理的,而kapt晚于kcp,所以对hilt来说,@Composable (BoxScope) -> Unit已经通过编译变成Function3
ksp收集@CollectCompose 我是这么写的:CollectComposeProcessor,生成的hilt代码大致如下:
@InstallIn(ActivityComponent::class)
@Module
object FpsScreenComponentModule {
@Provides
@IntoSet
@CollectScreenComponentQualifier
fun provideFpsScreenComponent() = object : CollectComposeOwner
@Composable
override fun Show(scope: BoxScope) {
  scope.FpsScreenComponent()
}
}
}
复制代码
大致使用:
@CollectCompose(CollectScreenComponentQualifier::class)
@Composable
fun BoxScope.FpsScreenComponent() {
...
}
复制代码
@AndroidEntryPoint
class AnimeTvActivity : ComponentActivity() {
@Inject
@CollectScreenComponentQualifier
lateinit var collectScreenComponents: Set<@JvmSuppressWildcards CollectComposeOwner
override fun onCreate(savedInstanceState: Bundle?) {
super.onCreate(savedInstanceState)
setContent {
  Box() {
    AppScreen()
    Show(collectScreenComponents)
  }
}
}
}
复制代码
除了在界面显示fps,我也尝试以此实现Compose Toast(只是尝试,不建议这么用):
object ToastUtils {
fun showToast(msg: String?) {
if (msg == null) return
channel.trySend(msg)
}
}
private val channel = Channel
@CollectCompose(CollectScreenComponentQualifier::class)
@Composable
fun BoxScope.ToastScreenComponent() {
var isShown by remember { mutableStateOf(false) }
var showMsg by remember { mutableStateOf("") }
LaunchedEffect(Unit) {
channel.receiveAsFlow().collect {
  showMsg = it
  isShown = true
}
}
AnimatedVisibility(
visible = isShown,
modifier = Modifier
  .padding(10.dp)
  .padding(bottom = 50.dp)
  .align(Alignment.BottomCenter),
enter = fadeIn(),
exit = fadeOut()
) {
Text(
  text = showMsg,
  modifier = Modifier
    .shadow(1.dp, CircleShape)
    .background(MaterialTheme.colors.surface, CircleShape)
    .padding(horizontal = 20.dp, vertical = 10.dp)
)
}
if (isShown) {
LaunchedEffect(isShown) {
  delay(1500)
  isShown = false
}
}
}
复制代码
右上角加了一个按钮是想试这个radiography,很不错的一个库,输出当前界面的Tree,支持Compose,效果如下:
参考
文章
Jetpack Compose 博物馆
Jetpack Compose 在Twidere X中的实践总结 @Tlaster
Jetpack Compose 中显示富文本 @Tlaster
Jetpack Compose Side Effect:如何处理副作用 @fundroid
Focus in Jetpack Compose @Jamie Sanson
android-rethinking-package-structure @Joe Birch
Hilt 实战 | 创建应用级别 CoroutineScope
项目
TwidereX-Android @Tlaster
Dota-Info @Mitch Tabian
SampleComposeApp @Akila
ComposeVideoPlayer @Halil Ozercan
dpad-compose @Walter Berggren
原文:Seiko