Node.js后台项目搭建使用Express+TypeORM+TypeScript+MySQL
介绍相关库:
- Express:基于 Node.js 平台,快速、开放、极简的 Web 开发框架
- TypeORM:较新的 ORM 框架,对 TypeScript 支持良好
- TypeScript:JavaScript 的超集,在 JavaScript 基础上新增了一些用法
- MySQL:MySQL 是一个关系型数据库管理系统,比较流行的数据库之一
环境准备
- Node.js(此文章使用v12.16.3版本)
- Visual Studio Code(非必须 此文章使用1.50.1版本)
- MySQL(此文章使用5.7版本)
- MySQL可以使用小皮面板(PHPStudy)或宝塔面板里面集成的环境
- Node.js如果下载过慢,可以从淘宝镜像下载
全局安装 TypeScript
npm install -g typescript
请注意必须要加上 -g 以全局安装
此时输入 tsc --version 可查看 TypeScript 版本号,此示例的版本号为4.0.3
创建项目文件夹
在能找到的地方创建一个文件夹,名字随意
初始化项目
进入项目文件夹输入 npm init 创建 package.json(如果不想输入相关的信息可以输入 npm init -y )
安装相关依赖 npm install body-parser express mysql typeorm typescript 或使用 yarn add .... (yarn需要单独安装:npm install -g yarn )
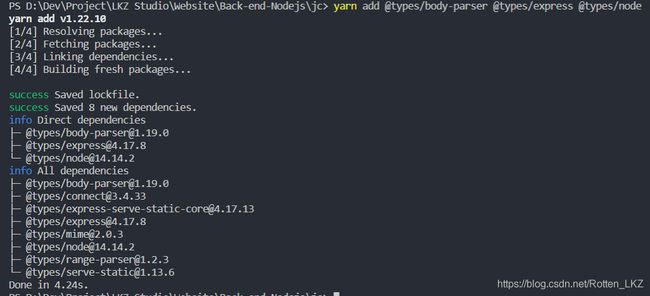
为了支持 TypeScript 使用,需要安装 npm install @types/body-parser @types/express @types/node 或 yarn add ...
(检查的时候发现还有个包没装:
npm install reflect-metadata 或用 yarn add reflect-metadata 安装)
配置环境
输入 tsc --init 初始化TypeScript项目,将会新建 tsconfig.json 文件,更改成这样(只需要找到对应的键,取消注释就可以,当然也可以全部删掉之后再次输入)(如果有特别需求可以自己设置)
{
  "compilerOptions": {
    "module": "commonjs",
    "outDir": "./dist",
    "rootDir": "./src",
    "strict": true,
    "esModuleInterop": true,
    "experimentalDecorators": true,
    "emitDecoratorMetadata": true,
    "skipLibCheck": true,
    "forceConsistentCasingInFileNames": true
  }
}
然后在项目根目录下新建 ormconfig.json ,设置成下面示例(如果有特别需求可以自己设置):
{
  "type": "mysql",
  "host": "localhost",
  "port": 3306,
  "username": "root",
  "password": "root",
  "database": "test",
  "synchronize": true,
  "logging": false,
  "entities": [
    "./dist/entity/**/*.js"
  ],
  "migrations": [
    "./dist/migration/**/*.js"
  ],
  "subscribers": [
    "./dist/subscriber/**/*.js"
  ],
  "cli": {
    "entitiesDir": "dist/entity",
    "migrationsDir": "dist/migration",
    "subscribersDir": "dist/subscriber"
  }
}
- host:地址
- port:端口
- username:用户名
- password:密码
- database:数据库
注意修改这些内容
然后新建src目录放置源代码,新建 app.ts 作为主入口,并且在 src 创建 entity 文件夹。现在的目录结构如下图所示:
(可能会出现 yarn.lock package-lock.json ,但并不影响使用)
书写代码
修改 app.ts 如以下示例:
import "reflect-metadata";
import express from 'express';
import bodyParser from 'body-parser';
import { createConnection } from 'typeorm';
import { User } from './entity/User';

let port = 8753; // 填写端口号

const app = express();

app.use(bodyParser.urlencoded({ extended: true }));

app.get('/', function(request, response) {
  console.log('Home Page');
  response.send('Welcome to this page');
});

app.get('/user', async function(request, response) {
  const connection = await createConnection();
  const repository = connection.getRepository(User);
  const user = new User();

  user.name = request.body['name'];
  user.email = request.body['email'];

  await repository.save(user);
  connection.close();
  response.send('save ok');
});

app.listen(port, () => {
  console.log(`Application has started on Port ${port}`);
});
然后在 entity 里面新建文件 User.ts 并修改成如下:
import { Entity, Column, PrimaryGeneratedColumn } from 'typeorm';

@Entity()
export class User {
  @PrimaryGeneratedColumn()
  id!: number;

  @Column()
  name!: string;

  @Column()
  email!: string
}
然后在项目根目录打开控制台输入 tsc 就会编译 TypeScript 代码(可以使用 tsc -w 实时编译)
之后再输入:node dist/app.js 就可以运行代码了
访问 http://localhost:port 或 http://127.0.0.1:port (port为端口号)就可以出现 Welcome to this page
之后再访问
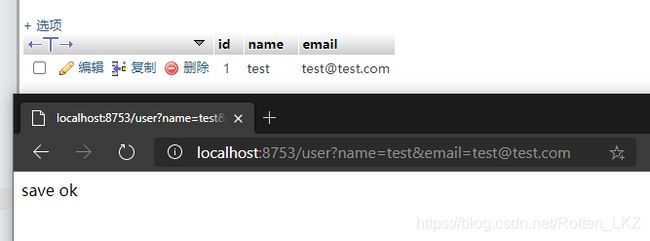
http://localhost:port/user 插入新用户
用 GET 请求输入相应参数,然后就会插入一行数据,如果没有此数据表 TypeORM 会帮我们新建数据表
这样每次要输入 tsc node dist/app.js,我们可以打开 package.json ,编辑 script 如下:
"scripts": {
  "run": "tsc && node dist/app.js",
  "build": "tsc",
  "build:w": "tsc -w",
  "run:w": "supervisor dist/app.js"
}
- run:编译一次便执行
- build:只编译
- build:w:实时编译
- run:w:实时运行(tsc编译后
dist里面文件更改会实时运行)
然后使用 npm run xxx 或 yarn run xxx(可以 yarn xxx 只不过有时候会冲突)就可以执行 scripts 对应指令
注意 supervisor 需要另外安装:
npm install -g supervisor
到这里就可以开始根据这个目录结构开始开发了,下面是一些提升开发效率的配置和工具,可以不看
开发小工具
module-alias
可以在不使用 webpack 的情况下使用别名,不用再写出 import xxx from '../../../../../' 这样的代码了
开发小配置
路由
要写 app.get app.post 等比较麻烦,我写了个小工具可以使它更加简便:
router.ts
import express from 'express';
import { routes } from './routes';

let router = express.Router();

routes.map((value) => {
  const { path, type, cb } = value;
  if (type === "GET") {
    router.get(path, cb);
  }
  if (type === "POST") {
    router.post(path, cb);
  }
  if (type === "DELETE") {
    router.delete(path, cb);
  }
  if (type === "PUT") {
    router.put(path, cb);
  }
});

export default router;
routes.ts
import express from 'express';

interface callback {
  (request: express.Request, response: express.Response): void;
}

type Routes = {
  path: string;
  type: "GET" | "POST" | "DELETE" | "PUT";
  cb: callback;
}[];

export const routes: Routes = [
  { path: "/", type: "GET", cb: (requst, response) => {response.send("Welcome to home page.")} },
];
app.ts
...
import router from './router';
...
app.use('/', router);
这样就可以在 routes.ts 配置就可以添加路由了
注意事项
- 上传 Git 的时候注意不要上传
dist和node_modules目录!!! -
ormconfig.json的配置指向的目录是打包后的dist目录,而不是写代码的src目录
总结
- 安装环境
- 创建项目文件并初始化
- 配置 TypeScript 和 TypeORM
- 编写代码
- 配置
package.json的 scripts 以方便运行 - 就根据需求开发吧!
如果嫌麻烦不想配置,可以到 GitHub 或者 Gitee 来下载此框架(包括路由和 module-alias)
GitHub:https://github.com/Rotten-LKZ/Express-TypeORM-demo
Gitee:https://gitee.com/rotten_lkz/Express-TypeORM-demo


