话说“一图胜千言”,在各类数据分析报告中经常会看见各种各样的图形,例如折线图、条形图、箱线图、点图等。
其中折线图可以反映某种现象的趋势,本文利用R语言的ggplot2包,从头带您绘制各式各样的线形图。
一 绘制单条折线图
载入数据及函数包
library(ggplot2)df <- data.frame(dose=c("A", "B", "C"), len=c(5.16, 10.10, 30))head(df)dose len1 A 5.162 B 10.103 C 30.00
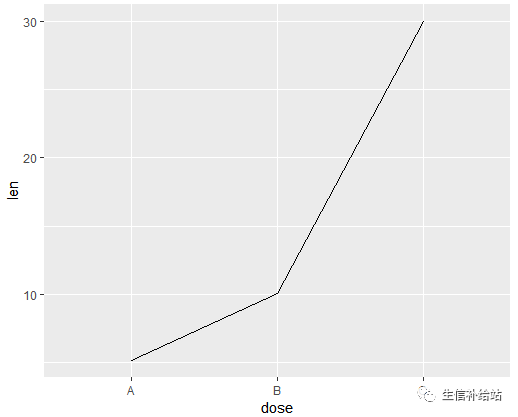
1.1 绘制基本的折线图
ggplot(data=df, aes(x=dose, y=len, group=1)) +geom_line()1.2 添加点,并更改线型 和颜色
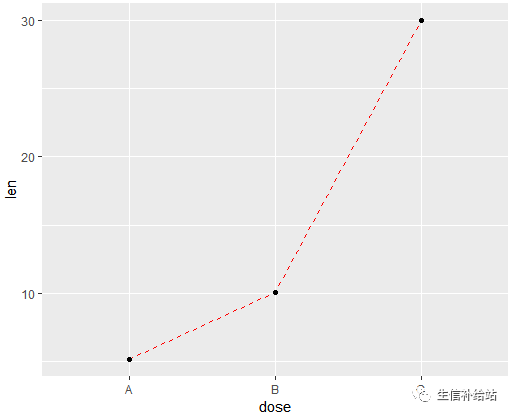
ggplot(data=df, aes(x=dose, y=len, group=1)) +geom_line(linetype = "dashed",color="red")+ geom_point()1.3 添加箭头
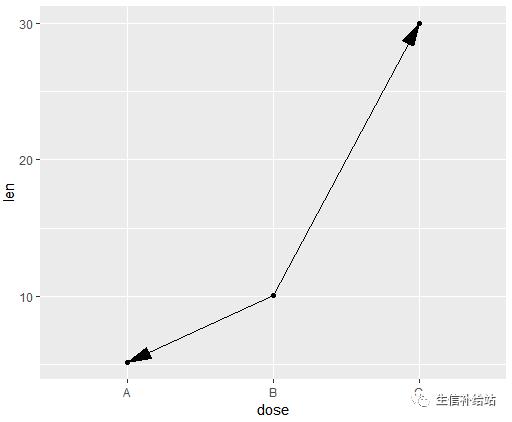
library(grid)ggplot(data=df, aes(x=dose, y=len, group=1))+geom_line(arrow = arrow())+geom_point()#自定义箭头类型myarrow=arrow(angle = 15, ends = "both", type = "closed")ggplot(data=df, aes(x=dose, y=len, group=1)) +geom_line(arrow=myarrow)+geom_point()
1.4 附赠
ggplot(data=df, aes(x=dose, y=len, group=1)) + geom_step()+ geom_point()注:因为横坐标的属性为因子(离散型的字符转换为因子),所以需要添加‘group = 1’的设置。
二 绘制多条折线图
设置数据
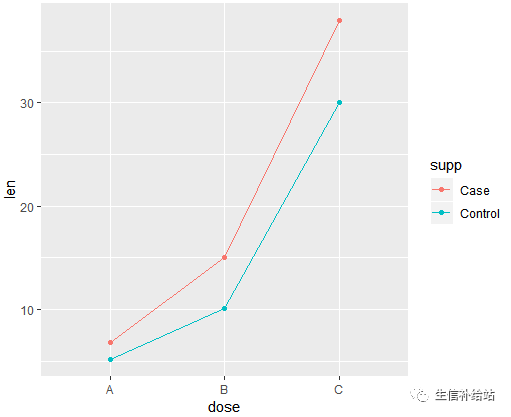
df2 <- data.frame(supp=rep(c("Case", "Control"), each=3), dose=rep(c("A", "B", "C"),2),len=c(6.8, 15, 38, 5.16, 10.10, 30))head(df2)supp dose len1 Case A 6.802 Case B 15.003 Case C 38.004 Control A 5.165 Control B 10.106 Control C 30.00
2.1 绘制多条折线图,更改线型
ggplot(data=df2, aes(x=dose, y=len, group=supp))+geom_line(linetype="dashed", color="blue", size=1.2)+geom_point(color="red", size=3)
2.2 分组更改线型和点的形状
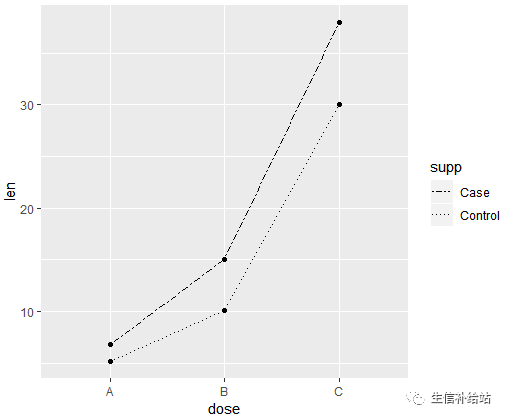
ggplot(df2, aes(x=dose, y=len, group=supp)) +geom_line(aes(linetype=supp))+geom_point(aes(shape=supp))
2.3 自定义更改线型
ggplot(df2, aes(x=dose, y=len, group=supp)) +geom_line(aes(linetype=supp))+geom_point()+scale_linetype_manual(values=c("twodash", "dotted"))
2.4 更改颜色
p <- ggplot(df2, aes(x=dose, y=len, group=supp)) +geom_line(aes(color=supp))+geom_point(aes(color=supp))p
其他自定义颜色方式:
# Use custom color palettesp+scale_color_manual(values=c("#E69F00", "#56B4E9"))# Use brewer color palettesp+scale_color_brewer(palette="Dark2")# Use grey scalep +scale_color_grey() + theme_classic()
2.5 添加误差棒
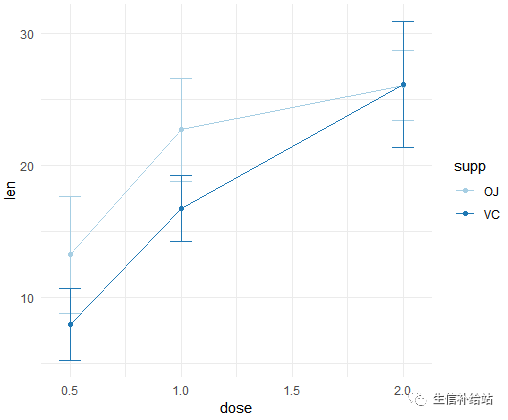
利用ToothGrowth数据集,首先分组计算每一分组的均值和标准差,整理成如下格式:
supp dose len sd1 OJ 0.5 13.23 4.4597092 OJ 1.0 22.70 3.9109533 OJ 2.0 26.06 2.6550584 VC 0.5 7.98 2.7466345 VC 1.0 16.77 2.5153096 VC 2.0 26.14 4.797731
绘制添加误差棒的折线图
ggplot(df3, aes(x=dose, y=len, group=supp, color=supp)) +geom_errorbar(aes(ymin=len-sd, ymax=len+sd), width=.1) +geom_line() +geom_point()+scale_color_brewer(palette="Paired")+theme_minimal()
注:可以使用position_dodge 参数,防止errorbars重叠
三 折线图汇总展示
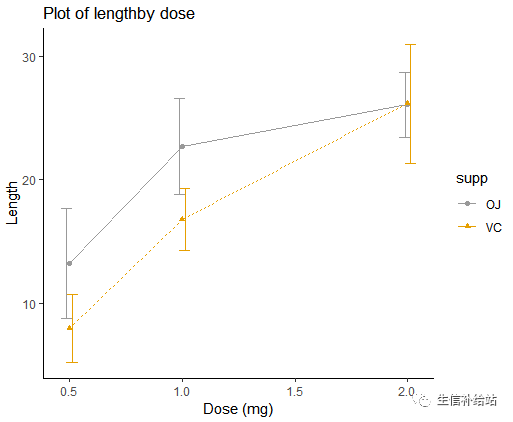
ggplot(df3, aes(x=dose, y=len, group = supp, color=supp))+geom_errorbar(aes(ymin=len-sd, ymax=len+sd), width=.1,position=position_dodge(0.05)) +geom_line(aes(linetype=supp)) +geom_point(aes(shape=supp))+labs(title="Plot of lengthby dose",x="Dose (mg)", y = "Length")+theme_classic()+scale_color_manual(values=c('#999999','#E69F00'))
四 参考资料
ggplot2:数据分析与图形艺术
http://www.sthda.com/english/wiki/ggplot2-essentials
好了,就是这么简单,输出基本图形后,根据自己的喜好进行细节的调整即可。
