1. Java JUC 简介
在 Java 5.0 提供了 java.util.concurrent (简称JUC )包,在此包中增加了在并发编程中很常用的实用工具类,用于定义类似于线程的自定义子系统,包括线程池、异步 IO 和轻量级任务框架。提供可调的、灵活的线程池。还提供了设计用于多线程上下文中的 Collection 实现等
2. volatile 关键字-内存可见性
内存可见性(Memory Visibility)是指当某个线程正在使用对象状态而另一个线程在同时修改该状态,需要确保当一个线程修改了对象状态后,其他线程能够看到发生的状态变化。
可见性错误是指当读操作与写操作在不同的线程中执行时,我们无法确保执行读操作的线程能适时地看到其他线程写入的值,有时甚至是根本不可能的事情。
我们可以通过同步来保证对象被安全地发布。除此之外我们也可以使用一种更加轻量级的 volatile 变量。
Java 提供了一种稍弱的同步机制,即 volatile 变量,用来确保将变量的更新操作通知到其他线程。可以将 volatile 看做一个轻量级的锁,但是又与锁有些不同:
对于多线程,不是一种互斥关系
不能保证变量状态的“原子性操作”
public class Test1 {
    public static void main(String[] args) {
        ThreadDemo threadDemo = new ThreadDemo();
        Thread t1 = new Thread(threadDemo);
        t1.start();

        while (true){
            if (threadDemo.isFlag()){
                System.out.println("------------");
                break;
            }
        }
    }
}

class ThreadDemo implements Runnable{
    private boolean flag = false;

    public boolean isFlag() {
        return flag;
    }

    public void setFlag(boolean flag) {
        this.flag = flag;
    }

    @Override
    public void run() {
        try {
            Thread.sleep(1000);
        } catch (InterruptedException e) {
            e.printStackTrace();
        }
        flag = true;
        System.out.println(flag);
    }
}
解决方案1 使用 synchronized 加锁
public class Test1 {
    public static void main(String[] args) {
        ThreadDemo threadDemo = new ThreadDemo();
        Thread t1 = new Thread(threadDemo);
        t1.start();

        while (true){
            synchronized (threadDemo){
                if (threadDemo.isFlag()){
                    System.out.println("------------");
                    break;
                }
            }
        }
    }
}

class ThreadDemo implements Runnable{
    private boolean flag = false;

    public boolean isFlag() {
        return flag;
    }

    public void setFlag(boolean flag) {
        this.flag = flag;
    }

    @Override
    public void run() {
        try {
            Thread.sleep(1000);
        } catch (InterruptedException e) {
            e.printStackTrace();
        }
        flag = true;
        System.out.println(flag);
    }
}
解决方案2 volatile 关键字 当多个线程进行操作共享数据的时候,可以保证内存中的数据可见 相较于 synchronized 是一种较为轻量级的锁
注意: volatile 不具备"互斥性" volatile 不能保证变量"原子性"
public class Test1 {
    public static void main(String[] args) {
        ThreadDemo threadDemo = new ThreadDemo();
        Thread t1 = new Thread(threadDemo);
        t1.start();

        while (true) {
            if (threadDemo.isFlag()) {
                System.out.println("------------");
                break;
            }
        }
    }
}

class ThreadDemo implements Runnable {
    private volatile boolean flag = false;

    public boolean isFlag() {
        return flag;
    }

    public void setFlag(boolean flag) {
        this.flag = flag;
    }

    @Override
    public void run() {
        try {
            Thread.sleep(1000);
        } catch (InterruptedException e) {
            e.printStackTrace();
        }
        flag = true;
        System.out.println(flag);
    }
}
3. 原子变量-CAS算法
- CAS (Compare-And-Swap) 是一种硬件对并发的支持,针对多处理器操作而设计的处理器中的一种特殊指令,用于管理对共享数据的并发访问。
- CAS 是一种无锁的非阻塞算法的实现。
- CAS 包含了 3 个操作数:
需要读写的内存值 V
进行比较的值 A
拟写入的新值 B - 当且仅当 V 的值等于 A 时,CAS 通过原子方式用新值 B 来更新 V 的值,否则不会执行任何操作。
案例
package cn.icanci.juc;

public class Test2 {
    public static void main(String[] args) {
        AtmoicDemo atmoicDemo = new AtmoicDemo();
        for (int i = 0; i < 20; i++) {
            new Thread(atmoicDemo).start();
        }

    }
}

class AtmoicDemo implements Runnable {
    private int i = 0;

    public int getI() {
        return i++;
    }

    public void setI(int i) {
        this.i = i;
    }

    @Override
    public void run() {
        try {
            Thread.sleep(1000);

        } catch (InterruptedException e) {
            e.printStackTrace();
        }
        System.out.println(Thread.currentThread().getName() + ":" + getI());
    }
}
此操作不可以保证原子性 但是保证了内存可见性 原因 i++ 的底层实现为
    //读 改 写
    int temp = i;
    i = i + 1;  //这是i++执行之后的值
    i = temp; //这是 i++的返回值
JDK5.0 之后 就有了原子变量 java.util.concurrent.atomic 包
1. volatile 保证内存可见性
2.CAS 算法保证 数据的原子性
CAS算法是硬件对于并发操作共享的支持
CAS包含3个操作数
内存之 V
预估值 A
更新值 B
当且仅当 V == A 的时候,V = B 否则不执行任何操作
解决
public class Test2 {
    public static void main(String[] args) {
        AtmoicDemo atmoicDemo = new AtmoicDemo();
        for (int i = 0; i < 20; i++) {
            new Thread(atmoicDemo).start();
        }

    }
}

/**
 * JDK5.0 之后 就有了原子变量  java.util.concurrent.atomic 包
 *      1. volatile 保证内存可见性
 *      2.CAS 算法保证 数据的原子性
 *              CAS算法是硬件对于并发操作共享的支持
 *              CAS包含3个操作数
 *              内存之 V
 *              预估值 A
 *              更新值 B
 *              当且仅当 V == A 的时候,V = B 否则不执行任何操作
 *
 */
class AtmoicDemo implements Runnable {
   private AtomicInteger i = new AtomicInteger(0);

    public int getI() {
        return i.getAndIncrement();
    }

    public void setI(AtomicInteger i) {
        this.i = i;
    }

    @Override
    public void run() {
        try {
            Thread.sleep(1000);

        } catch (InterruptedException e) {
            e.printStackTrace();
        }
        System.out.println(Thread.currentThread().getName() + ":" + getI());
    }
}
模拟CAS算法
public class Test3 {
    public static void main(String[] args) {
        final CompareAndSwap cas = new CompareAndSwap();
        for (int i = 0; i < 10; i++) {
            new Thread(new Runnable() {
                @Override
                public void run() {
                    int expectValue =  cas.getInt();
                    boolean b = cas.compareAndSet(expectValue, (int) (Math.random() * 101));
                    System.out.println(b);
                }
            }).start();
        }
    }
}

class CompareAndSwap {
    private int value ;
    //获取内存值
    public synchronized int getInt(){
        return value;
    }

    //比较
    public synchronized int compareAndSwap(int expectValue, int newValue){
        int oldValue = value;
        if (oldValue == expectValue){
            this.value = newValue;
        }
        return oldValue;
    }

    //设置
    public synchronized boolean compareAndSet(int expectValue, int newValue){
        return expectValue == compareAndSwap(expectValue,newValue);
    }
}
原子变量
类的小工具包,支持在单个变量上解除锁的线程安全编程。事实上,此包中的类可将 volatile 值、字段和数组元素的概念扩展到那些也提供原子条件更新操作的类。
类 AtomicBoolean、AtomicInteger、AtomicLong 和 AtomicReference 的实例各自提供对相应类型单个变量的访问和更新。每个类也为该类型提供适当的实用工具方法。
AtomicIntegerArray、AtomicLongArray 和 AtomicReferenceArray 类进一步扩展了原子操作,对这些类型的数组提供了支持。这些类在为其数组元素提供 volatile 访问语义方面也引人注目,这对于普通数组来说是不受支持的。
核心方法:
boolean compareAndSet(expectedValue, updateValue)
java.util.concurrent.atomic 包下提供了一些原子操作的常用类:
AtomicBoolean 、AtomicInteger 、AtomicLong 、 AtomicReference
AtomicIntegerArray 、AtomicLongArray
AtomicMarkableReference
AtomicReferenceArray
AtomicStampedReference
4. ConcurrentHashMap 锁分段机制
Java 5.0 在 java.util.concurrent 包中提供了多种并发容器类来改进同步容器的性能。
ConcurrentHashMap 同步容器类是Java 5 增加的一个线程安全的哈希表。对与多线程的操作,介于 HashMap 与 Hashtable 之间。内部采用“锁分段”机制替代 Hashtable 的独占锁。进而提高性能。
此包还提供了设计用于多线程上下文中的 Collection 实现:ConcurrentHashMap、ConcurrentSkipListMap、ConcurrentSkipListSet、CopyOnWriteArrayList 和 CopyOnWriteArraySet。当期望许多线程访问一个给定 collection 时,ConcurrentHashMap 通常优于同步的 HashMap,ConcurrentSkipListMap 通常优于同步的 TreeMap。当期望的读数和遍历远远大于列表的更新数时,CopyOnWriteArrayList 优于同步的 ArrayList。
如果有添加操作多的时候 每次添加都会进行复制 开销非常大 适合于 迭代多
public class Test5 {
    public static void main(String[] args) {
//        CopyOnWriteArrayList list
        HelloThhread helloThhread = new HelloThhread();
        for (int i = 0; i < 10; i++) {
            new Thread(helloThhread).start();
        }
    }
}

class HelloThhread implements Runnable {
    //    private static List list = Collections.synchronizedList(new ArrayList());
    private static CopyOnWriteArrayList list = new CopyOnWriteArrayList<>();

    static {
        list.add("AAA");
        list.add(("BBB"));
        list.add("CCC");
    }

    @Override
    public void run() {
        Iterator it = list.iterator();
        while (it.hasNext()) {
            System.out.println(it.next());
            list.add("DDD");
        }
    }
}
5. CountDownLatch 闭锁
Java 5.0 在 java.util.concurrent 包中提供了多种并发容器类来改进同步容器的性能。
CountDownLatch 一个同步辅助类,在完成一组正在其他线程中执行的操作之前,它允许一个或多个线程一直等待。
闭锁可以延迟线程的进度直到其到达终止状态,闭锁可以用来确保某些活动直到其他活动都完成才继续执行:
确保某个计算在其需要的所有资源都被初始化之后才继续执行;
确保某个服务在其依赖的所有其他服务都已经启动之后才启动;
等待直到某个操作所有参与者都准备就绪再继续执行
public class Test6 {
    public static void main(String[] args) {
//        CountDownLatch  闭锁:在完成某些运算 只有其他线程的运算全部完成当前运算才继续进行
        final CountDownLatch countDownLatch = new CountDownLatch(5);
        LatchDemo latchDemo = new LatchDemo(countDownLatch);
        long start = System.currentTimeMillis();
        for (int i = 0; i < 5; i++) {
            new Thread(latchDemo).start();
        }
        try {
            countDownLatch.await();
        } catch (InterruptedException e) {
            e.printStackTrace();
        }
        long end = System.currentTimeMillis();
        System.out.println(end - start + " : ms");
    }
}

class LatchDemo implements Runnable {
    private CountDownLatch latch;

    public LatchDemo(CountDownLatch latch) {
        this.latch = latch;
    }

    @Override
    public void run() {
        synchronized (Test6.class) {

            try {
                for (int i = 0; i < 50000; i++) {
                    if (i % 2 == 0) {
                        System.out.println(i);
                    }
                }
            } finally {
                latch.countDown();
            }
        }
    }
}
//.......
49998
1396 : ms
6. 实现 Callable 接口
Java 5.0 在 java.util.concurrent 提供了一个新的创建执行线程的方式:Callable 接口
Callable 接口类似于 Runnable,两者都是为那些其实例可能被另一个线程执行的类设计的。但是 Runnable 不会返回结果,并且无法抛出经过检查的异常。
Callable 需要依赖FutureTask ,FutureTask 也可以用作闭锁。
public class Test7 {
    public static void main(String[] args) {
        //创建线程的第三种方式 实现 Callable 接口 第四种 线程池
        //实现 Callable的接口 相对于 可以抛出异常 有返回值 可以定义返回值类型

        //执行 Callable 接口 需要 FutureTask 的支持  FutureTask 是Callable的实现类

        //FutureTask 也可以用作 闭锁

        ThreadDemo1 threadDemo1 = new ThreadDemo1();

        //需要有个实现类的支持

        FutureTask result = new FutureTask<>(threadDemo1);
        new Thread(result).start();

        //j接收线程计算的结果
        try {
            System.out.println(result.get());
        } catch (InterruptedException e) {
            e.printStackTrace();
        } catch (ExecutionException e) {
            e.printStackTrace();
        }
    }
}

class ThreadDemo1 implements Callable {
    @Override
    public Integer call() throws Exception {
        int sum = 0;
        for (int i = 0; i < 100; i++) {
            sum += i;
        }
        return sum;
    }
}
7. Lock 同步锁
在 Java 5.0 之前,协调共享对象的访问时可以使用的机制只有 synchronized 和 volatile 。Java 5.0 后增加了一些新的机制,但并不是一种替代内置锁的方法,而是当内置锁不适用时,作为一种可选择的高级功能。
ReentrantLock 实现了 Lock 接口,并提供了与synchronized 相同的互斥性和内存可见性。但相较于synchronized 提供了更高的处理锁的灵活性。
public class Test8 {

    /**
     * 用于解决多线程安全问题的方式
     * synchronized :隐式锁
     * 1.同步代码块
     * 2.同步方法
     *
     * JDK5.0 之后
     * 3.同步锁 Lock
     * 注意 这是一个显示锁 需要使用 Lock 方法上锁  unlock方法释放锁
     *
     * @param args
     */
    public static void main(String[] args) {
        Ticket ticket = new Ticket();
        new Thread(ticket).start();
        new Thread(ticket).start();
        new Thread(ticket).start();
    }
}

class Ticket implements Runnable {
    private int tick = 100;
    private Lock lock = new ReentrantLock();

    @Override
    public void run() {
        while (true) {
            lock.lock();
            try {
                if (tick > 0) {
                    try {
                        Thread.sleep(100);
                    } catch (InterruptedException e) {
                        e.printStackTrace();
                    }
                    System.out.println(Thread.currentThread().getName() + ":剩余: " + tick--);
                }
            } catch (Exception e) {
                e.printStackTrace();
            } finally {
                lock.unlock();
            }

        }
    }
}
消费者和生产者案例
public class Test9 {
    public static void main(String[] args) {
        Clerk clerk = new Clerk();
        Product product = new Product(clerk);
        Consumer consumer = new Consumer(clerk);
        new Thread(product).start();
        new Thread(consumer).start();
    }
}

class Clerk {
    private int product = 0;

    //进货
    public synchronized void get() {
        if (product >= 10) {
            System.out.println("够了够了");
            try {
                this.wait();
            } catch (InterruptedException e) {
                e.printStackTrace();
            }
        } else {
            System.out.println(Thread.currentThread().getName() + " : " + ++product);
            this.notifyAll();
        }
    }

    //卖货
    public synchronized void sale() {
        if (product <= 0) {
            System.out.println("缺货");
            try {
                this.wait();
            } catch (InterruptedException e) {
                e.printStackTrace();
            }
        } else {
            System.out.println(Thread.currentThread().getName() + " : " + --product);
            this.notifyAll();
        }
    }
}

/**
 * 生产者
 */
class Product implements Runnable {
    private Clerk clerk;


    public Product(Clerk clerk) {
        this.clerk = clerk;
    }

    @Override
    public void run() {
        for (int i = 0; i < 20; i++) {
            clerk.get();
        }
    }
}

//消费者
class Consumer implements Runnable {
    private Clerk clerk;

    public Consumer(Clerk clerk) {
        this.clerk = clerk;
    }

    @Override
    public void run() {
        for (int i = 0; i < 20; i++) {
            clerk.sale();
        }

    }
}
打印
Thread-0 : 1
Thread-1 : 0
缺货
Thread-0 : 1
Thread-1 : 0
缺货
Thread-0 : 1
Thread-1 : 0
缺货
Thread-0 : 1
Thread-1 : 0
缺货
Thread-0 : 1
Thread-1 : 0
缺货
Thread-0 : 1
Thread-1 : 0
缺货
Thread-0 : 1
Thread-1 : 0
缺货
Thread-0 : 1
Thread-1 : 0
缺货
Thread-0 : 1
Thread-1 : 0
缺货
Thread-0 : 1
Thread-1 : 0
缺货
Thread-0 : 1
Thread-0 : 2
Thread-0 : 3
Thread-0 : 4
Thread-0 : 5
Thread-0 : 6
Thread-0 : 7
Thread-0 : 8
Thread-0 : 9
Thread-0 : 10
但是最后还是停止了 此为 虚假唤醒
为了避免 虚假唤醒 此时 this.wait(); 应该放在while中
public class Test9 {
    public static void main(String[] args) {
        Clerk clerk = new Clerk();
        Product product = new Product(clerk);
        Consumer consumer = new Consumer(clerk);
        new Thread(product).start();
        new Thread(consumer).start();


    }
}

class Clerk {
    private int product = 0;

    //进货
    public synchronized void get() {
        while (product >= 10) {
            System.out.println("够了够了");
            try {
                this.wait();
            } catch (InterruptedException e) {
                e.printStackTrace();
            }
        }
        System.out.println(Thread.currentThread().getName() + " : " + ++product);
        this.notifyAll();
    }

    //卖货
    public synchronized void sale() {
        while (product <= 0) {
            System.out.println("缺货");
            try {
                this.wait();
            } catch (InterruptedException e) {
                e.printStackTrace();
            }
        }
        System.out.println(Thread.currentThread().getName() + " : " + --product);
        this.notifyAll();
    }
}

/**
 * 生产者
 */
class Product implements Runnable {
    private Clerk clerk;


    public Product(Clerk clerk) {
        this.clerk = clerk;
    }

    @Override
    public void run() {
        for (int i = 0; i < 20; i++) {
            try {
                Thread.sleep(200);
            } catch (InterruptedException e) {
            }
            clerk.get();
        }
    }
}

//消费者
class Consumer implements Runnable {
    private Clerk clerk;

    public Consumer(Clerk clerk) {
        this.clerk = clerk;
    }

    @Override
    public void run() {
        for (int i = 0; i < 20; i++) {
            try {
                Thread.sleep(200);
            } catch (InterruptedException e) {
            }
            clerk.sale();
        }

    }
}
8. Condition 控制线程通信
Condition 接口描述了可能会与锁有关联的条件变量。这些变量在用法上与使用 Object.wait 访问的隐式监视器类似,但提供了更强大的功能。需要特别指出的是,单个 Lock 可能与多个 Condition 对象关联。为了避免兼容性问题,Condition 方法的名称与对应的 Object 版本中的不同。
在 Condition 对象中,与 wait、notify 和 notifyAll 方法对应的分别是await、signal 和 signalAll。
Condition 实例实质上被绑定到一个锁上。要为特定 Lock 实例获得Condition 实例,请使用其 newCondition() 方法。
public class Test10 {
    public static void main(String[] args) {
        Clerk clerk = new Clerk();

        Productor pro = new Productor(clerk);
        Consumer cus = new Consumer(clerk);

        new Thread(pro, "生产者 A").start();
        new Thread(cus, "消费者 B").start();

        new Thread(pro, "生产者 C").start();
        new Thread(cus, "消费者 D").start();
    }

}

//店员

class Clerk {
    private int product = 0;
    private Lock lock = new ReentrantLock();
    private Condition condition = lock.newCondition();
    //进货
    //循环次数:0
    //为了避免虚假唤醒问题,应该总是使用在循环中

    public void get() {
        lock.lock();
        try {
            while (product >= 10) {
                System.out.println("产品已满!");

                try {
                    condition.await();
                } catch (InterruptedException e) {
                }

            }

            System.out.println(Thread.currentThread().getName() + " : " + ++product);
            condition.signalAll();
        } finally {
            lock.unlock();
        }

    }

    //卖货

    public void sale() {//product = 0; 循环次数:0
        lock.lock();
        try {
            while (product <= 0) {
                System.out.println("缺货!");

                try {
                    condition.await();
                } catch (InterruptedException e) {
                }
            }

            System.out.println(Thread.currentThread().getName() + " : " + --product);
            condition.signalAll();
        } finally {
            lock.unlock();
        }
    }
}

//生产者

class Productor implements Runnable {
    private Clerk clerk;

    public Productor(Clerk clerk) {
        this.clerk = clerk;
    }

    @Override
    public void run() {
        for (int i = 0; i < 20; i++) {
            try {
                Thread.sleep(200);
            } catch (InterruptedException e) {
            }

            clerk.get();
        }
    }
}

//消费者

class Consumer implements Runnable {
    private Clerk clerk;

    public Consumer(Clerk clerk) {
        this.clerk = clerk;
    }

    @Override
    public void run() {
        for (int i = 0; i < 20; i++) {
            clerk.sale();
        }
    }
}
9. 线程按序交替
编写一个程序,开启 3 个线程,这三个线程的 ID 分别为A、B、C,每个线程将自己的 ID 在屏幕上打印 10 遍,要求输出的结果必须按顺序显示。
如:ABCABCABC…… 依次递归
package cn.icanci.juc;

import java.util.concurrent.locks.Condition;
import java.util.concurrent.locks.Lock;
import java.util.concurrent.locks.ReentrantLock;

/**
 * @Author: icanci
 * @ProjectName: jichu
 * @PackageName: cn.icanci.juc
 * @Date: Created in 2020/2/5 23:22
 * @ClassAction:
 */
public class Test11 {
    public static void main(String[] args) {
        AlterDemo alterDemo = new AlterDemo();
        System.out.println(alterDemo.getNumber());
        new Thread(new Runnable() {
            @Override
            public void run() {
                for (int i = 1; i <=10; i++) {
                    alterDemo.loopA(i);
                }
            }
        },"A").start();

        new Thread(new Runnable() {
            @Override
            public void run() {
                for (int i = 1; i <=10; i++) {
                    alterDemo.loopB(i);
                }
            }
        },"B").start();

        new Thread(new Runnable() {
            @Override
            public void run() {
                for (int i = 1; i <=10; i++) {
                    alterDemo.loopC(i);
                }
            }
        },"C").start();
    }
}

class AlterDemo {

    //当前正在操作线程的标识

    private int number = 1;

    private Lock lock = new ReentrantLock();
    private Condition condition1 = lock.newCondition();
    private Condition condition2 = lock.newCondition();
    private Condition condition3 = lock.newCondition();

    public int getNumber() {
        return number;
    }

    public void loopA(int num) {
        lock.lock();
        try {
            //1.判断当前线程是不是1
            if (number != 1) {
                condition1.await();
            }
            //2.打印
            for (int i = 1; i <= 1; i++) {
                System.out.println(Thread.currentThread().getName() + "\t" + i + "\t"+num);
            }
            //3.唤醒
            number = 2;
            condition2.signal();
        } catch (Exception e){
            e.printStackTrace();
        } finally{
            lock.unlock();
        }
    }


    public void loopB(int num) {
        lock.lock();
        try {
            //1.判断当前线程是不是1
            if (number != 2) {
                condition2.await();
            }
            //2.打印
            for (int i = 1; i <= 1; i++) {
                System.out.println(Thread.currentThread().getName() + "\t" + i + "\t"+num);
            }
            //3.唤醒
            number = 3;
            condition3.signal();
        } catch (Exception e){
            e.printStackTrace();
        } finally{
            lock.unlock();
        }
    }
    public void loopC(int num) {
        lock.lock();
        try {
            //1.判断当前线程是不是1
            if (number != 3) {
                condition3.await();
            }
            //2.打印
            for (int i = 1; i <= 1; i++) {
                System.out.println(Thread.currentThread().getName() + "\t" + i + "\t"+num);
            }
            //3.唤醒
            number = 1;
            condition1.signal();
        } catch (Exception e){
            e.printStackTrace();
        } finally{
            lock.unlock();
        }
    }
}
10. ReadWriteLock 读写锁
ReadWriteLock 维护了一对相关的锁,一个用于只读操作,另一个用于写入操作。只要没有 writer,读取锁可以由多个 reader 线程同时保持。写入锁是独占的。。
ReadWriteLock 读取操作通常不会改变共享资源,但执行写入操作时,必须独占方式来获取锁。对于读取操作占多数的数据结构。 ReadWriteLock 能提供比独占锁更高的并发性。而对于只读的数据结构,其中包含的不变性可以完全不需要考虑加锁操作。
package cn.icanci.juc;

import java.util.concurrent.locks.ReadWriteLock;
import java.util.concurrent.locks.ReentrantReadWriteLock;

/**
 * @Author: icanci
 * @ProjectName: jichu
 * @PackageName: cn.icanci.juc
 * @Date: Created in 2020/2/5 23:45
 * @ClassAction:
 */
public class Test12 {
    public static void main(String[] args) {
        //互斥
        //1.ReadWriterLock
//        /读写锁   读读  写写  读写
        ReadWriterLockDemo readWriterLockDemo = new ReadWriterLockDemo();
        new Thread(new Runnable() {
            @Override
            public void run() {
                readWriterLockDemo.set((int)(Math.random()*101));
            }
        },"写").start();

        for (int i = 0; i < 100; i++) {
            new Thread(new Runnable() {
                @Override
                public void run() {
                   readWriterLockDemo.get();
                }
            },"读").start();
        }
    }
}

class ReadWriterLockDemo {
    private int number = 0;
    private ReadWriteLock lock = new ReentrantReadWriteLock();


    //读取
    public void get() {
        //上
        lock.readLock().lock();
       try {
           System.out.println(Thread.currentThread().getName() + ":" + number);
       }finally {
           lock.readLock().unlock();
       }
    }

    //写
    public void  set(int number){
        lock.writeLock().lock();
        try {
            System.out.println(Thread.currentThread().getName());
            this.number = number;
        }finally {
            lock.writeLock().unlock();
        }

    }
}
11. 线程八锁
• 一个对象里面如果有多个synchronized方法,某一个时刻内,只要一个线程去调用其中的一个synchronized方法了,其它的线程都只能等待,换句话说,某一个时刻内,只能有唯一一个线程去访问这些synchronized方法
• 锁的是当前对象this,被锁定后,其它的线程都不能进入到当前对象的其它的synchronized方法
• 加个普通方法后发现和同步锁无关
• 换成两个对象后,不是同一把锁了,情况立刻变化。
• 都换成静态同步方法后,情况又变化
• 所有的非静态同步方法用的都是同一把锁——实例对象本身,也就是说如果一个实例对象的非静态同步方法获取锁后,该实例对象的其他非静态同步方法必须等待获取锁的方法释放锁后才能获取锁,可是别的实例对象的非静态同步方法因为跟该实例对象的非静态同步方法用的是不同的锁,所以毋须等待该实例对象已获取锁的非静态同步方法释放锁就可以获取他们自己的锁。
• 所有的静态同步方法用的也是同一把锁——类对象本身,这两把锁是两个不同的对象,所以静态同步方法与非静态同步方法之间是不会有竞态条件的。但是一旦一个静态同步方法获取锁后,其他的静态同步方法都必须等待该方法释放锁后才能获取锁,而不管是同一个实例对象的静态同步方法之间,还是不同的实例对象的静态同步方法之间,只要它们同一个类的实例对象!
public class Test13 {
    /**
     * 判断打印的是 "one" 还是 "two"
     * @param args
     *
     * 1.两个同步方法,两个线程 打印 one two
     * 2.新增 Thread.sleep(100) 给 getOne 打印 one two
     * 3.新增不同步方法 getThree() 打印 three one two
     * 4.两个普通方法 两个NumberDemo 对象 打印 two one
     * 5.修改 getOne 为 静态    打印  two one
     * 6.修改两个方法都是静态方法 一个 NumberDemo对象 打印  one two
     * 7.一个静态同步方法 一个非静态同步方法 两个 NumberDemo对象 打印  two one
     * 8.两个都是静态同步 两个NumberDemo对象 打印  one two
     *
     * 线程八锁的关键
     * 1.非静态方法的锁默认为 this 静态方法的锁为对应对象的 Class 实例
     * 2.某一个时刻内,只能有一个线程持有锁 无论 几个方法
     */


    public static void main(String[] args) {
        NumberDemo numberDemo = new NumberDemo();
        NumberDemo numberDemo1 = new NumberDemo();
        new Thread(new Runnable() {
            @Override
            public void run() {
                numberDemo.getOne();
            }
        },"one").start();
        new Thread(new Runnable() {
            @Override
            public void run() {
                numberDemo1.getTwo();
            }
        },"two").start();
//        new Thread(new Runnable() {
//            @Override
//            public void run() {
//                numberDemo.getThree();
//            }
//        },"three").start();
    }
}

class NumberDemo{
    public static synchronized void getOne(){
        try {
            Thread.sleep(100);
        } catch (InterruptedException e) {
            e.printStackTrace();
        }
        System.out.println(Thread.currentThread().getName()+": one");
    }

    public static synchronized void getTwo(){
        try {
            Thread.sleep(100);
        } catch (InterruptedException e) {
            e.printStackTrace();
        }
        System.out.println(Thread.currentThread().getName()+": two");
    }

    public void getThree(){
        try {
            Thread.sleep(100);
        } catch (InterruptedException e) {
            e.printStackTrace();
        }
        System.out.println(Thread.currentThread().getName()+": three");
    }
}
12. 线程池
第四种获取线程的方法:线程池,一个 ExecutorService,它使用可能的几个池线程之一执行每个提交的任务,通常使用 Executors 工厂方法配置。
线程池可以解决两个不同问题:由于减少了每个任务调用的开销,它们通常可以在执行大量异步任务时提供增强的性能,并且还可以提供绑定和管理资源(包括执行任务集时使用的线程)的方法。每个 ThreadPoolExecutor 还维护着一些基本的统计数据,如完成的任务数。
为了便于跨大量上下文使用,此类提供了很多可调整的参数和扩展钩子 (hook)。但
是,强烈建议程序员使用较为方便的 Executors 工厂方法 :
Executors.newCachedThreadPool()(无界线程池,可以进行自动线程回收)
Executors.newFixedThreadPool(int)(固定大小线程池)
Executors.newSingleThreadExecutor()(单个后台线程)
它们均为大多数使用场景预定义了设置
package cn.icanci.juc;

import java.util.ArrayList;
import java.util.List;
import java.util.concurrent.*;

public class Test14 {
    /**
     * 1.线程池提供了一个线程队列,队列中保存者所有的等待状态 避免了创建与销毁额外开销,提高了响应的速度
     * 2.线程池的体系结构
     * java.util.concurrent.Executor : 负责线程的使用与调度的根接口
     * |--**ExecutorService 子接口: 线程池的主要接口
     * |--ThreadPoolExecutor 线程池的实现类
     * |--ScheduledExecutorService 子接口:负责线程的调度
     * |--ScheduledThreadPoolExecutor :继承 ThreadPoolExecutor, 实现 ScheduledExecutorService
     * 3.工具类 : Executors
     * ExecutorService newFixedThreadPool() : 创建固定大小的线程池
     * ExecutorService newCachedThreadPool() : 缓存线程池,线程池的数量不固定,可以根据需求自动的更改数量。
     * ExecutorService newSingleThreadExecutor() : 创建单个线程池。线程池中只有一个线程
     *
     * ScheduledExecutorService newScheduledThreadPool() : 创建固定大小的线程,可以延迟或定时的执行任务。
     *
     * @param args
     */
    public static void main(String[] args) {
        //1.创建线程池
        ExecutorService pool = Executors.newFixedThreadPool(5);
        List list = new ArrayList<>();
        for (int i = 0; i < 10; i++) {
            Future submit = pool.submit(new Callable() {
                @Override
                public Integer call() throws Exception {
                    int sum = 0;
                    for (int i = 0; i < 100; i++) {
                        sum += i;
                    }
                    return sum;
                }
            });
            try {
                System.out.println(submit.get());
                list.add(submit.get());
            } catch (InterruptedException e) {
                e.printStackTrace();
            } catch (ExecutionException e) {
                e.printStackTrace();
            }
        }
        pool.shutdown();
        System.out.println("-------------------------");
        for(Integer integer :list){
            System.out.println(integer);
        }
    }

    public static void test1() {
        //1.创建线程池
        ExecutorService pool = Executors.newFixedThreadPool(15);
        ThreadPoolDemo tpd = new ThreadPoolDemo();
        //2.为线程池分配任务

        for (int i = 0; i < 10; i++) {
            pool.submit(tpd);
        }
        //3.关闭线程池
        pool.shutdown();
    }
}

class ThreadPoolDemo implements Runnable {
    private int i = 0;

    @Override
    public void run() {
        /**
         * 此处数量较少的情况下可能看不出效果
         */
        while (i <= 1000000) {
            System.out.println(Thread.currentThread().getName() + " : " + i++);
        }
    }
}
13. 线程调度
ScheduledExecutorService
一个 ExecutorService,可安排在给定的延迟后运行或定期执行的命令
package cn.icanci.juc;

import java.util.ArrayList;
import java.util.List;
import java.util.Random;
import java.util.concurrent.*;

public class Test14 {
    /**
     * 1.线程池提供了一个线程队列,队列中保存者所有的等待状态 避免了创建与销毁额外开销,提高了响应的速度
     * 2.线程池的体系结构
     * java.util.concurrent.Executor : 负责线程的使用与调度的根接口
     * |--**ExecutorService 子接口: 线程池的主要接口
     * |--ThreadPoolExecutor 线程池的实现类
     * |--ScheduledExecutorService 子接口:负责线程的调度
     * |--ScheduledThreadPoolExecutor :继承 ThreadPoolExecutor, 实现 ScheduledExecutorService
     * 3.工具类 : Executors
     * ExecutorService newFixedThreadPool() : 创建固定大小的线程池
     * ExecutorService newCachedThreadPool() : 缓存线程池,线程池的数量不固定,可以根据需求自动的更改数量。
     * ExecutorService newSingleThreadExecutor() : 创建单个线程池。线程池中只有一个线程
     *
     * ScheduledExecutorService newScheduledThreadPool() : 创建固定大小的线程,可以延迟或定时的执行任务。
     *
     * @param args
     */
    public static void main(String[] args) {
        //1.创建线程池
        ScheduledExecutorService pool = Executors.newScheduledThreadPool(5);
        for (int i = 0; i < 5; i++) {
            ScheduledFuture schedule = pool.schedule(new Callable() {
                @Override
                public Integer call() throws Exception {
                    int num = new Random().nextInt(100);
                    System.out.println(Thread.currentThread().getName() + " : " + num);
                    return num;
                }
            }, 3, TimeUnit.SECONDS);
            try {
                System.out.println(schedule.get());
            } catch (InterruptedException e) {
                e.printStackTrace();
            } catch (ExecutionException e) {
                e.printStackTrace();
            }
            pool.shutdown();
        }

    }

    public static void test2(){
        //1.创建线程池
        ExecutorService pool = Executors.newFixedThreadPool(5);
        List list = new ArrayList<>();
        for (int i = 0; i < 10; i++) {
            Future submit = pool.submit(new Callable() {
                @Override
                public Integer call() throws Exception {
                    int sum = 0;
                    for (int i = 0; i < 100; i++) {
                        sum += i;
                    }
                    return sum;
                }
            });
            try {
                System.out.println(submit.get());
                list.add(submit.get());
            } catch (InterruptedException e) {
                e.printStackTrace();
            } catch (ExecutionException e) {
                e.printStackTrace();
            }
        }
        pool.shutdown();
        System.out.println("-------------------------");
        for(Integer integer :list){
            System.out.println(integer);
        }
    }
    public static void test1() {
        //1.创建线程池
        ExecutorService pool = Executors.newFixedThreadPool(15);
        ThreadPoolDemo tpd = new ThreadPoolDemo();
        //2.为线程池分配任务

        for (int i = 0; i < 10; i++) {
            pool.submit(tpd);
        }
        //3.关闭线程池
        pool.shutdown();
    }
}

class ThreadPoolDemo implements Runnable {
    private int i = 0;

    @Override
    public void run() {
        /**
         * 此处数量较少的情况下可能看不出效果
         */
        while (i <= 1000000) {
            System.out.println(Thread.currentThread().getName() + " : " + i++);
        }
    }
}
14. ForkJoinPool 分支/合并框架 工作窃取

Fork/Join 框架与线程池的区别
采用 “工作窃取”模式(work-stealing):
当执行新的任务时它可以将其拆分分成更小的任务执行,并将小任务加到线程队列中,然后再从一个随机线程的队列中偷一个并把它放在自己的队列中。
相对于一般的线程池实现,fork/join框架的优势体现在对其中包含的任务的处理方式上.在一般的线程池中,如果一个线程正在执行的任务由于某些原因无法继续运行,那么该线程会处于等待状态。而在fork/join框架实现中,如果某个子问题由于等待另外一个子问题的完成而无法继续运行。那么处理该子问题的线程会主动寻找其他尚未运行的子问题来执行.这种方式减少了线程的等待时间,提高了性能
package cn.icanci.juc;

import java.util.concurrent.ForkJoinPool;
import java.util.concurrent.ForkJoinTask;
import java.util.concurrent.RecursiveTask;

/**
 * @Author: icanci
 * @ProjectName: jichu
 * @PackageName: cn.icanci.juc
 * @Date: Created in 2020/2/6 10:50
 * @ClassAction:
 */
public class Test16 {
    public static void main(String[] args) {
        Long start = System.currentTimeMillis();
        ForkJoinPool pool = new ForkJoinPool(20);
        ForkJoinTask task = new ForkJoinSumCalculate(0L, 10000000000L);
        Long invoke = pool.invoke(task);
        System.out.println(invoke);
        Long end = System.currentTimeMillis();
        System.out.println(end - start + " ms");
    }
}

class ForkJoinSumCalculate extends RecursiveTask {
    private static final long serialVersionUID = 1L;
    private long start;
    private long end;

    //临界值
    private static final long THRSHOLD = 1000000L;

    public ForkJoinSumCalculate(long start, long end) {
        this.start = start;
        this.end = end;
    }

    @Override
    protected Long compute() {
        Long length = end - start;
        if (length <= THRSHOLD) {
            long sum = 0L;
            for (long i = start; i <= end; i++) {
                sum += i;
            }
            return sum;
        } else {
            long middle = (start + end) / 2;
            ForkJoinSumCalculate left = new ForkJoinSumCalculate(start, middle);
            left.fork();
            ForkJoinSumCalculate right = new ForkJoinSumCalculate(middle + 1, end);
            right.fork();
            return left.join() + right.join();
        }
    }
}
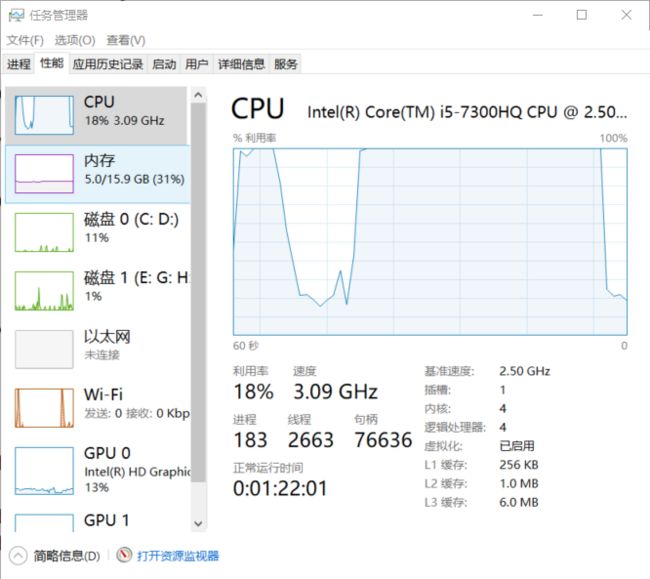
此时的我的CPU已经饱满了
使用JDK新特性计算 和 自己拆分计算对比
package cn.icanci.juc;

import java.time.Duration;
import java.time.Instant;
import java.util.concurrent.ForkJoinPool;
import java.util.concurrent.ForkJoinTask;
import java.util.concurrent.RecursiveTask;
import java.util.stream.LongStream;

/**
 * @Author: icanci
 * @ProjectName: jichu
 * @PackageName: cn.icanci.juc
 * @Date: Created in 2020/2/6 10:50
 * @ClassAction:
 */
public class Test16 {
    public static void main(String[] args) {
        //JDK8新特性计算
        System.out.println("JDK8新特性计算");
        Instant start = Instant.now();
        Long sum = LongStream.rangeClosed(0L, 5000000000L)
                    .parallel()
                    .reduce(0L, Long::sum);
        System.out.println(sum);
        Instant end = Instant.now();
        System.out.println(Duration.between(start, end).toMillis()+" ms");
        System.out.println("-----------------------");
        System.out.println("自己拆分计算");
        test1();
    }

    public static void test1() {
        Long start = System.currentTimeMillis();
        ForkJoinPool pool = new ForkJoinPool(20);
        ForkJoinTask task = new ForkJoinSumCalculate(0L, 5000000000L);
        Long invoke = pool.invoke(task);
        System.out.println(invoke);
        Long end = System.currentTimeMillis();
        System.out.println(end - start + " ms");
    }
}


class ForkJoinSumCalculate extends RecursiveTask {
    private static final long serialVersionUID = 1L;
    private long start;
    private long end;

    //临界值
    private static final long THRSHOLD = 100000L;

    public ForkJoinSumCalculate(long start, long end) {
        this.start = start;
        this.end = end;
    }

    @Override
    protected Long compute() {
        Long length = end - start;
        if (length <= THRSHOLD) {
            long sum = 0L;
            for (long i = start; i <= end; i++) {
                sum += i;
            }
            return sum;
        } else {
            long middle = (start + end) / 2;
            ForkJoinSumCalculate left = new ForkJoinSumCalculate(start, middle);
            left.fork();
            ForkJoinSumCalculate right = new ForkJoinSumCalculate(middle + 1, end);
            right.fork();
            return left.join() + right.join();
        }
    }
}
打印结果 测试1 计算数据大小 5000000000L
JDK8新特性计算
-5946744071209551616
1260 ms
-----------------------
自己拆分计算
-5946744071209551616
2333 ms
打印结果 测试2 计算数据大小 50000000000L
JDK8新特性计算
-4378596987249509888
9040 ms
-----------------------
自己拆分计算
-4378596987249509888
16106 ms
15.ThreadLocal
ThreadLocal 的使用 参见 @ThreadLocal
简单来说,ThreadLocal就是用来设计线程上的参数数据以及设置数据的,那也就是说再地区A使用此线程设置了数据,在地区可以通过线程拿到数据等
具体解释:ThreadLocal提供了线程内存储变量的能力,这些变量不同之处在于每一个线程读取的变量是对应的互相独立的。通过get和set方法就可以得到当前线程对应的值。
16. 线程池之ThreadPoolExecutor概述
推荐文章 @线程池之ThreadPoolExecutor使用
在进行编写代码的时候,阿里的代码检测工具会在这这里红色大波浪
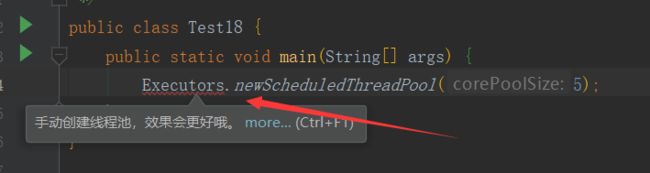
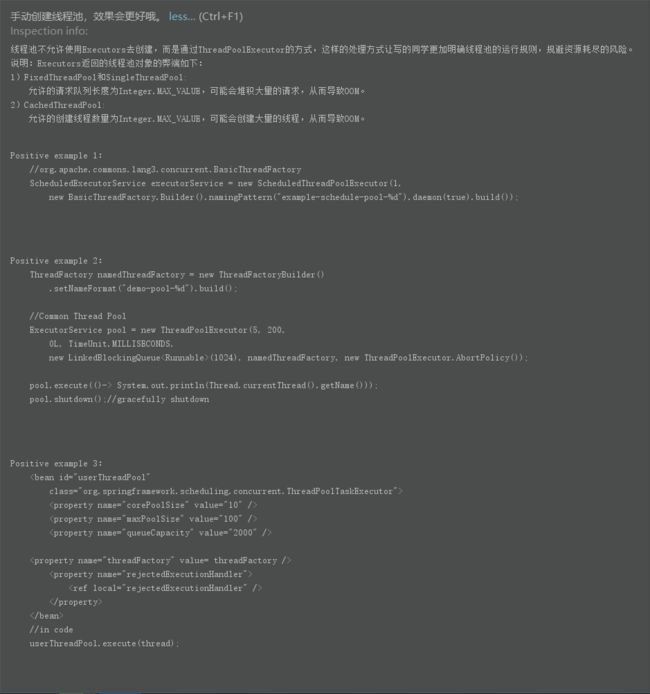
到底啥意思呢?因为这是JDK提供的线程池方案,你只能提供一个参数,具体业务具体分析的时候,可能不适合自己系统业务,所以需要自己手动创建具有参数的线程池以满足不同条件的要求