struts2和spring3.2的整合 详细演示
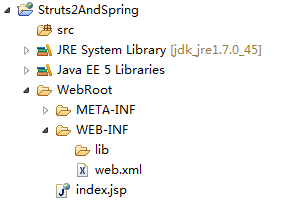
1、首先我们新建一个Web工程,如下:
2、导入Spring和Struts2的jar包。
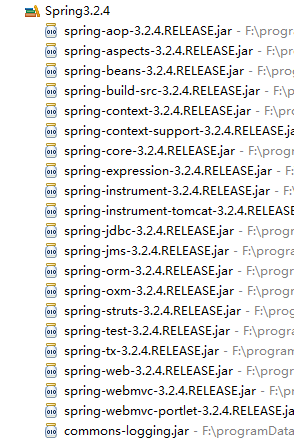
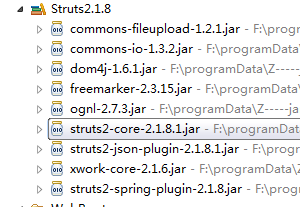
其中,struts2-spring-plugin-2.1.8.jar是struts2、spring整合的关键。
3、首先新建一个业务代码LoginAction,演示登录处理。
package action;


import server.MyServer;

import server.MyServerImpl;


import com.opensymphony.xwork2.Action;


public class LoginAction implements Action {


    private String username;

    private String password;

    private String tip;

    private MyServer ms;


    public String getUsername() {

        return username;

    }


    public void setUsername(String username) {

        this.username = username;

    }


    public String getPassword() {

        return password;

    }


    public void setPassword(String password) {

        this.password = password;

    }


    public String getTip() {

        return tip;

    }


    public void setTip(String tip) {

        this.tip = tip;

    }


    public void setMs(MyServer ms) {

        this.ms = ms;

    }


    public String execute() throws Exception {

        //setMs(new MyServerImpl());

        if (ms.valid(getUsername(), getPassword())) {

            setTip("登录成功");

            return "success";

        } else {

            return "error";

        }

    }


}
4、然后新建一个接口MyServer,如下:
package server;


public interface MyServer {


    public boolean valid(String username,String password);


}
5、然后新建一个实现类,如下:(这里为了演示方便,没有分包)
package server;


public class MyServerImpl implements MyServer {


    public boolean valid(String username, String password) {

        if(username.equals("cat")&&password.equals("123")){

            return true;

        }

        return false;

    }


}
6、在web.xml文件中对struts2和spring进行配置,如下:
<?xml version="1.0" encoding="UTF-8"?>

<web-app version="3.0"

    xmlns="http://java.sun.com/xml/ns/javaee"

    xmlns:xsi="http://www.w3.org/2001/XMLSchema-instance"

    xsi:schemaLocation="http://java.sun.com/xml/ns/javaee

    http://java.sun.com/xml/ns/javaee/web-app_3_0.xsd">

  <welcome-file-list>

    <welcome-file>index.jsp</welcome-file>

  </welcome-file-list>

  <filter>

      <filter-name>struts2</filter-name>

      <filter-class>org.apache.struts2.dispatcher.ng.filter.StrutsPrepareAndExecuteFilter</filter-class>

  </filter>

  <filter-mapping>

      <filter-name>struts2</filter-name>

      <url-pattern>/*</url-pattern>

  </filter-mapping>


  <listener>

      <listener-class>org.springframework.web.context.ContextLoaderListener</listener-class>

  </listener>


</web-app>
7、在WebRoot中的WEB-INF下新建一个applicationContext.xml文件,配置spring,如下:
(注意,这个文件不能直接在src下配置,必须在这里配置,不然web容器找不到)
<?xml version="1.0" encoding="UTF-8"?>


<beans xmlns="http://www.springframework.org/schema/beans"

    xmlns:xsi="http://www.w3.org/2001/XMLSchema-instance"

    xmlns:aop="http://www.springframework.org/schema/aop"

    xmlns:tx="http://www.springframework.org/schema/tx"

    xsi:schemaLocation="

            http://www.springframework.org/schema/beans

            http://www.springframework.org/schema/beans/spring-beans-3.2.xsd">


    <bean id="myServer" class="server.MyServerImpl"></bean>

    <bean id="loginAction" class="action.LoginAction" scope="prototype">

        <property name="ms" ref="myServer"></property>

    </bean>

</beans>
8、然后在src下新建一个struts.xml,配置struts2,如下:
(注意文件中action的class属性,不是一个类,而是spring配置中bean的id,属性由spring来注入)
<?xml version="1.0" encoding="UTF-8"?>

<!DOCTYPE struts PUBLIC

    "-//Apache Software Foundation//DTD Struts Configuration 2.1.7//EN"

    "http://struts.apache.org/dtds/struts-2.1.7.dtd">


<struts>

    <package name="login" namespace="/login" extends="struts-default">


        <action name="loginPro" class="loginAction">

            <result name="success">

                /WEB-INF/content/welcome.jsp

            </result>

            <result name="error">

                /WEB-INF/content/error.jsp

            </result>

        </action>

        <!-- 让用户直接访问该应用时列出所有视图页面 -->

        <action name="*">

            <result name="success">/WEB-INF/content/{1}.jsp</result>

        </action>

    </package>

</struts>
9、至此,基本配置完毕,再加上三个视图文件login.jsp、welcome.jsp、error.jsp,如下:
login.jsp
<%@ page language="java" contentType="text/html; charset=utf-8"

    pageEncoding="utf-8"%>

<!DOCTYPE html PUBLIC "-//W3C//DTD HTML 4.01 Transitional//EN" "http://www.w3.org/TR/html4/loose.dtd">

<html>

<head>

<meta http-equiv="Content-Type" content="text/html; charset=utf-8">

<title>登录</title>

</head>

<body>

    <form action="loginPro" method="post">

    <table>

        <caption>用户登录</caption>

        <tr>

            <td>用户名:</td>

            <td><input type="text" name="username"/></td>

        </tr>

        <tr>

            <td>密码:</td>

            <td><input type="text" name="password"/></td>

        </tr>

        <tr>

            <td><input value="提交" type="submit"/></td>

            <td><input value="重置" type="reset"/></td>

        </tr>

    </table>

    </form>

</body>

</html>
welcome.jsp
<%@ page language="java" contentType="text/html; charset=utf-8"

    pageEncoding="utf-8"%>

<%@taglib uri="/struts-tags" prefix="s"%>

<!DOCTYPE html PUBLIC "-//W3C//DTD HTML 4.01 Transitional//EN" "http://www.w3.org/TR/html4/loose.dtd">

<html>

    <head>

        <meta http-equiv="Content-Type"

            content="text/html; charset=ISO-8859-1">

        <title>welcome</title>

    </head>

    <body>

        这是欢迎页面。

        <s:property value="tip" />

    </body>

</html>
error.jsp
<%@ page language="java" contentType="text/html; charset=utf-8"

    pageEncoding="utf-8"%>

<!DOCTYPE html PUBLIC "-//W3C//DTD HTML 4.01 Transitional//EN" "http://www.w3.org/TR/html4/loose.dtd">

<html>

<head>

<meta http-equiv="Content-Type" content="text/html; charset=ISO-8859-1">

<title>Insert title here</title>

</head>

<body>

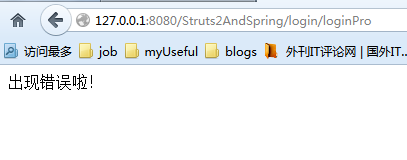
    出现错误啦!

</body>

</html>
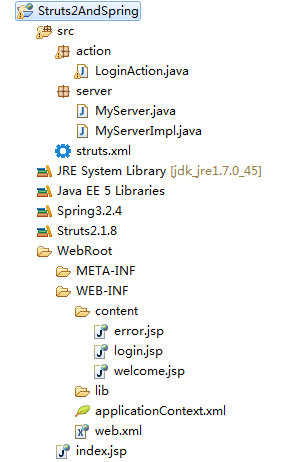
10、整个工程结构如下:
11、测试如下:
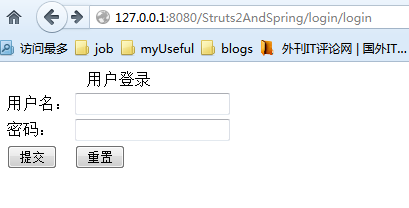
启动服务器,地址栏输入:http://127.0.0.1:8080/Struts2AndSpring/login/login
页面如下:
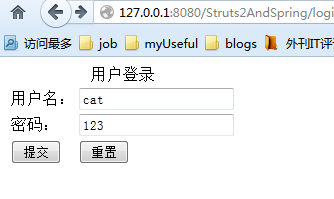
输入用户名和密码:
提交后如下:
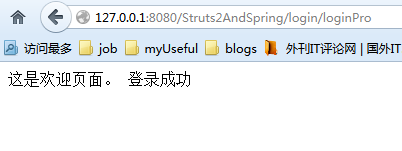
参数传递正确。
输入错误用户名和密码:
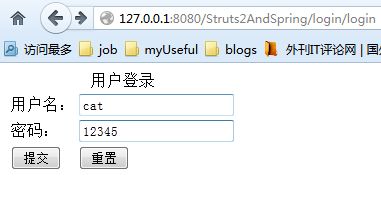
显示如下:
至此,演示成功。