IntelliJIDEA Getting+Started+with+Spring+MVC,+Hibernate+and+JSON
https://confluence.jetbrains.com/display/IntelliJIDEA/Getting+Started+with+Spring+MVC,+Hibernate+and+JSON
In this tutorial we will create a simple web application using Spring MVC, Hibernate and JSON. We will use Maven to manage dependencies and IntelliJ IDEA to create, run and debug an application on local Tomcat application server.
| Make sure that Spring, Maven and Tomcat plugins are enabled in IntelliJ IDEA Ultimate before you perform this tutorial. |
1. Create a project
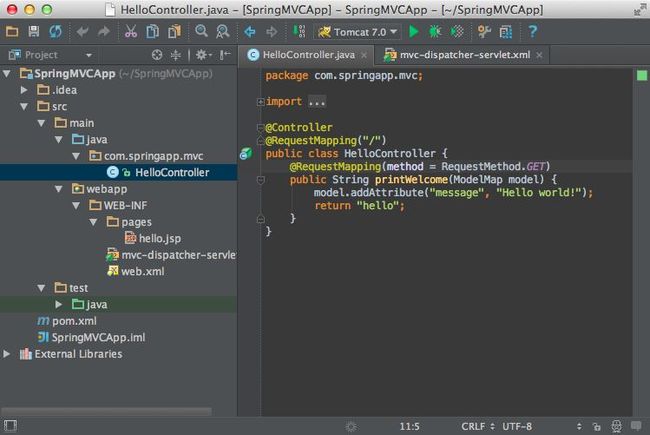
Open Project Wizard and select Spring MVC in Spring section. If you have already configured the application server, you can select it in theApplication Server field. With IntelliJ IDEA you can deploy applications to Tomcat, TomEE, Glassfish, JBoss, WebSphere, Jetty,Geronimo, Resin, Cloud Foundry and CloudBees.
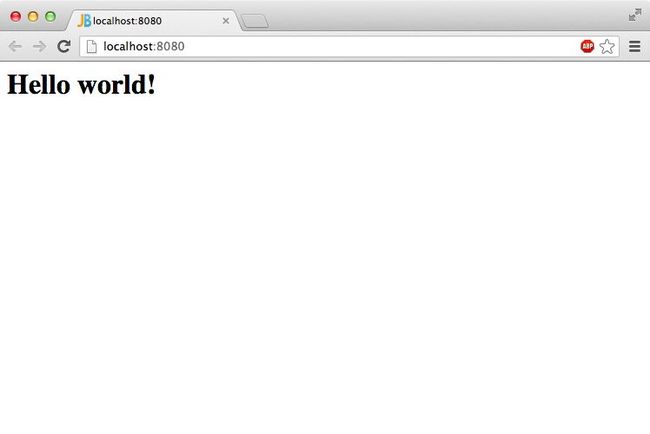
Change Project name, Project location and Base package if necessary. The IDE will create a "Hello world" project with a simple controller and view.
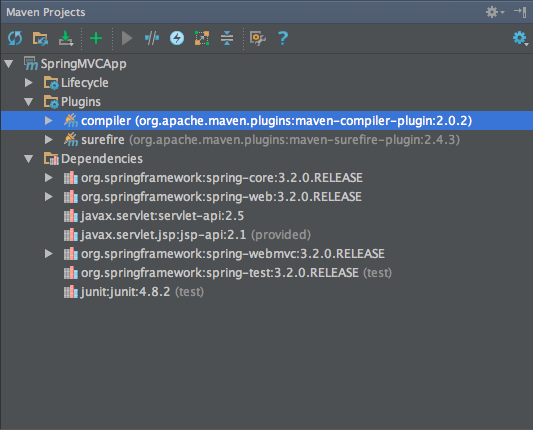
The new project comes with Maven's pom.xml file. You can manage project dependencies through this file or through the dedicated Maventool window.
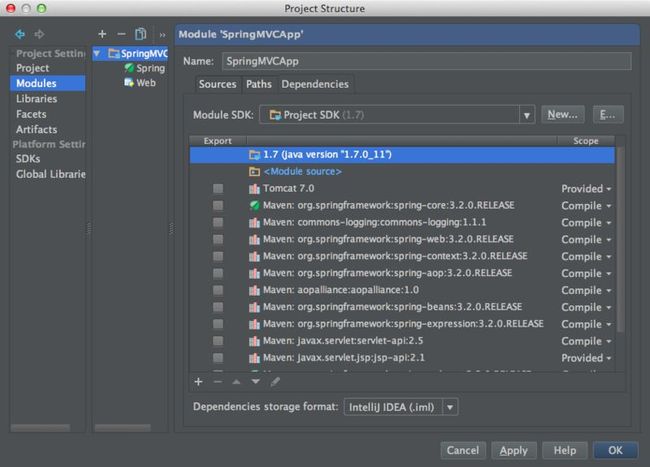
When you change Maven's dependencies, IntelliJ IDEA applies the corresponding changes to the project automatically. You can check it in the
Project Structure → Modules dialog.
Besides dependencies, IntelliJ IDEA also imports the artifacts definition from pom.xml. You can check the artifacts settings in the
Project Structure → Artifacts dialog.
The artifacts define the structure of what will be deployed to the application server when you click Run → Run 'Tomcat 7.0'.
2. Create run configuration
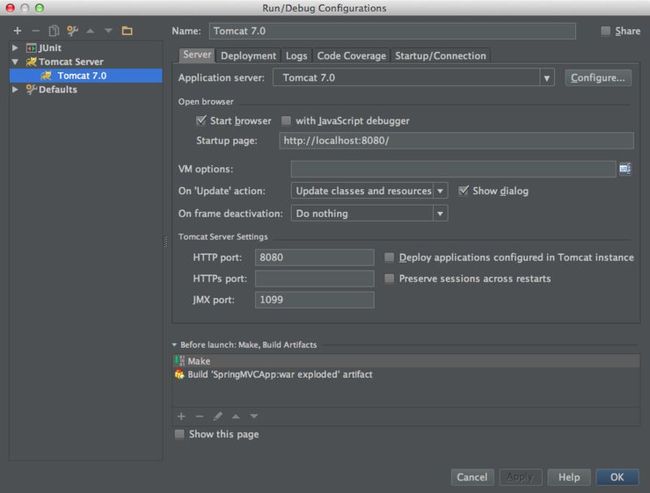
If you haven't specified Application server in Project Wizard you can do it now via Run → Edit Configurations....
Don't forget to specify the artifacts to deploy for this run configuration via the
Deployment tab.
If you have configured at least one run configuration for an application server, IntelliJ IDEA shows the Application Servers tool window to manage the application state on the application server. You can see the list of application servers, start or stop servers, see deployed applications, manage artifacts to deploy, and manage the application state.
3. Run the application
After the artifacts and run configurations are defined, you can deploy the application by simply running your configuration or via a shortcut right from the Application Servers tool window.
4. Add dependencies
Since we are going to create a database for our application, we need Spring Data, Hibernate and HSQLDB libraries. In order to implement JSON API for our application we need JSON library. Finally, we will need JSTL library to use in application's view.
We have to define all these dependencies in our pom.xml file. The IDE will automatically download the corresponding libraries and add to the artifact.
<
dependency
>
<
groupId
>jstl</
groupId
>
<
artifactId
>jstl</
artifactId
>
<
version
>1.2</
version
>
</
dependency
>
<
dependency
>
<
groupId
>org.springframework.data</
groupId
>
<
artifactId
>spring-data-jpa</
artifactId
>
<
version
>1.2.0.RELEASE</
version
>
</
dependency
>
<
dependency
>
<
groupId
>org.hibernate.javax.persistence</
groupId
>
<
artifactId
>hibernate-jpa-2.0-api</
artifactId
>
<
version
>1.0.0.Final</
version
>
</
dependency
>
<
dependency
>
<
groupId
>org.hibernate</
groupId
>
<
artifactId
>hibernate-entitymanager</
artifactId
>
<
version
>3.6.10.Final</
version
>
</
dependency
>
<
dependency
>
<
groupId
>org.hsqldb</
groupId
>
<
artifactId
>hsqldb</
artifactId
>
<
version
>2.2.9</
version
>
</
dependency
>
<
dependency
>
<
groupId
>org.json</
groupId
>
<
artifactId
>json</
artifactId
>
<
version
>20080701</
version
>
</
dependency
>
|
5. Create persistence.xml
Now let's define resources/META-INF/persistence.xml file to initialize Hibernate's entity manager over JPA.
<?
xml
version
=
"1.0"
encoding
=
"UTF-8"
?>
<
persistence
version
=
"2.0"
xmlns
=
"http://java.sun.com/xml/ns/persistence"
xmlns:xsi
=
"http://www.w3.org/2001/XMLSchema-instance"
xsi:schemaLocation
=
"http://java.sun.com/xml/ns/persistence http://java.sun.com/xml/ns/persistence/persistence_2_0.xsd"
>
<
persistence-unit
name
=
"defaultPersistenceUnit"
transaction-type
=
"RESOURCE_LOCAL"
>
<
provider
>org.hibernate.ejb.HibernatePersistence</
provider
>
<
properties
>
<
property
name
=
"hibernate.dialect"
value
=
"org.hibernate.dialect.HSQLDialect"
/>
<
property
name
=
"hibernate.connection.url"
value
=
"jdbc:hsqldb:mem:spring"
/>
<
property
name
=
"hibernate.connection.driver_class"
value
=
"org.hsqldb.jdbcDriver"
/>
<
property
name
=
"hibernate.connection.username"
value
=
"sa"
/>
<
property
name
=
"hibernate.connection.password"
value
=
""
/>
<
property
name
=
"hibernate.hbm2ddl.auto"
value
=
"create-drop"
/>
</
properties
>
</
persistence-unit
>
</
persistence
>
|
6. Define model classes
Define a model class for user entity using JPA annotations.
package
com.springapp.mvc;
import
javax.persistence.*;
@Entity
(name =
"account"
)
public
class
User {
@Id
@GeneratedValue
(strategy = GenerationType.AUTO)
private
Long id;
@Basic
private
String firstName;
@Basic
private
String lastName;
@Basic
private
String email;
public
Long getId() {
return
id;
}
public
void
setId(Long id) {
this
.id = id;
}
public
String getFirstName() {
return
firstName;
}
public
void
setFirstName(String name) {
this
.firstName = name;
}
public
String getLastName() {
return
lastName;
}
public
void
setLastName(String lastName) {
this
.lastName = lastName;
}
public
String getEmail() {
return
email;
}
public
void
setEmail(String email) {
this
.email = email;
}
}
|
Define a Spring repository for the user entity.
package
com.springapp.mvc;
import
org.springframework.data.jpa.repository.JpaRepository;
public
interface
UserRepository
extends
JpaRepository<User, Long> {
}
|
7. Register repository, entity manager factory and transaction manager
Now we have to register the user repository, an entity manager factory and a transaction manager in webapp/WEB-INF/mvc-dispatcher-servlet.xmlfile.
<
jpa:repositories
base-package
=
"com.springapp.mvc"
/>
<
bean
id
=
"entityManagerFactory"
class
=
"org.springframework.orm.jpa.LocalEntityManagerFactoryBean"
>
<
property
name
=
"persistenceUnitName"
value
=
"defaultPersistenceUnit"
/>
</
bean
>
<
bean
id
=
"transactionManager"
class
=
"org.springframework.orm.jpa.JpaTransactionManager"
>
<
property
name
=
"entityManagerFactory"
ref
=
"entityManagerFactory"
/>
</
bean
>
<
tx:annotation-driven
transaction-manager
=
"transactionManager"
/>
|
The model for our application is ready, so we can implement the controller.
8. Define controller
Let's rename HelloController to UserController and add the following code:
package
com.springapp.mvc;
import
org.springframework.beans.factory.annotation.Autowired;
import
org.springframework.stereotype.Controller;
import
org.springframework.ui.ModelMap;
import
org.springframework.validation.BindingResult;
import
org.springframework.web.bind.annotation.ModelAttribute;
import
org.springframework.web.bind.annotation.PathVariable;
import
org.springframework.web.bind.annotation.RequestMapping;
import
org.springframework.web.bind.annotation.RequestMethod;
@Controller
public
class
UserController {
@Autowired
private
UserRepository userRepository;
@RequestMapping
(value =
"/"
, method = RequestMethod.GET)
public
String listUsers(ModelMap model) {
model.addAttribute(
"user"
,
new
User());
model.addAttribute(
"users"
, userRepository.findAll());
return
"users"
;
}
@RequestMapping
(value =
"/add"
, method = RequestMethod.POST)
public
String addUser(
@ModelAttribute
(
"user"
) User user, BindingResult result) {
userRepository.save(user);
return
"redirect:/"
;
}
@RequestMapping
(
"/delete/{userId}"
)
public
String deleteUser(
@PathVariable
(
"userId"
) Long userId) {
userRepository.delete(userRepository.findOne(userId));
return
"redirect:/"
;
}
}
|
As you can see, we have defined three methods for listing, adding and deleting user entities. The methods are mapped to the corresponding URLs.
9. Define view
Let's rename hello view (and corresponding hello.jsp file) to users (and users.jsp , respectively). If you rename the view name from usage,IntelliJ IDEA applies the corresponding changes to JSP files automatically.
<!doctype html>
<%@taglib uri="http://www.springframework.org/tags" prefix="spring" %>
<%@taglib uri="http://www.springframework.org/tags/form" prefix="form" %>
<%@taglib uri="http://java.sun.com/jsp/jstl/core" prefix="c" %>
<
html
>
<
head
>
<
meta
charset
=
"utf-8"
>
<
title
>Spring MVC Application</
title
>
<
meta
content
=
"IE=edge,chrome=1"
http-equiv
=
"X-UA-Compatible"
>
<
meta
name
=
"viewport"
content
=
"width=device-width, initial-scale=1.0"
>
<
link
href
=
"http://twitter.github.io/bootstrap/assets/css/bootstrap-responsive.css"
rel
=
"stylesheet"
>
</
head
>
<
body
>
<
div
class
=
"container"
>
<
div
class
=
"row"
>
<
div
class
=
"span8 offset2"
>
<
h1
>Users</
h1
>
<
form:form
method
=
"post"
action
=
"add"
commandName
=
"user"
class
=
"form-horizontal"
>
<
div
class
=
"control-group"
>
<
form:label
cssClass
=
"control-label"
path
=
"firstName"
>First Name:</
form:label
>
<
div
class
=
"controls"
>
<
form:input
path
=
"firstName"
/>
</
div
>
</
div
>
<
div
class
=
"control-group"
>
<
form:label
cssClass
=
"control-label"
path
=
"lastName"
>Last Name:</
form:label
>
<
div
class
=
"controls"
>
<
form:input
path
=
"lastName"
/>
</
div
>
</
div
>
<
div
class
=
"control-group"
>
<
form:label
cssClass
=
"control-label"
path
=
"email"
>Email:</
form:label
>
<
div
class
=
"controls"
>
<
form:input
path
=
"email"
/>
</
div
>
</
div
>
<
div
class
=
"control-group"
>
<
div
class
=
"controls"
>
<
input
type
=
"submit"
value
=
"Add User"
class
=
"btn"
/>
</
form:form
>
</
div
>
</
div
>
<
c:if
test
=
"${!empty users}"
>
<
h3
>Users</
h3
>
<
table
class
=
"table table-bordered table-striped"
>
<
thead
>
<
tr
>
<
th
>Name</
th
>
<
th
>Email</
th
>
<
th
> </
th
>
</
tr
>
</
thead
>
<
tbody
>
<
c:forEach
items
=
"${users}"
var
=
"user"
>
<
tr
>
<
td
>${user.lastName}, ${user.firstName}</
td
>
<
td
>${user.email}</
td
>
<
td
>
<
form
action
=
"delete/${user.id}"
method
=
"post"
><
input
type
=
"submit"
class
=
"btn btn-danger btn-mini"
value
=
"Delete"
/></
form
>
</
td
>
</
tr
>
</
c:forEach
>
</
tbody
>
</
table
>
</
c:if
>
</
div
>
</
div
>
</
div
>
</
body
>
</
html
>
|
10. Run the application
The application should be ready now.
11. Debug application
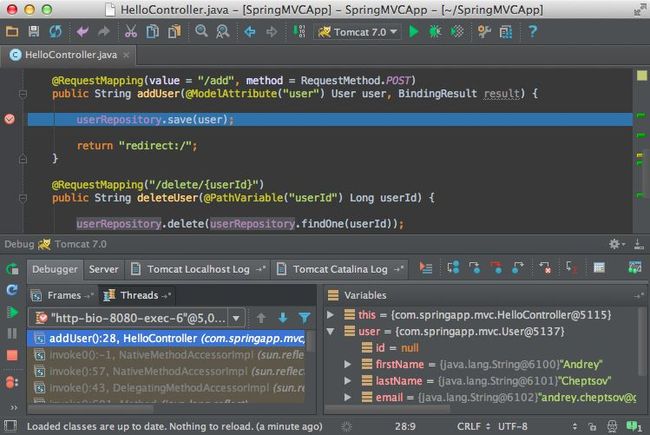
If you need to debug your application, just add a breakpoint and re-run the application in debug mode via Run → Debug 'Tomcat 7.0'....
12. Add JSON API
Finally, let's output the created users via JSON by implementing this simple Controller's method:
@RequestMapping
(value =
"/api/users"
, method = RequestMethod.GET)
public
@ResponseBody
String listUsersJson(ModelMap model)
throws
JSONException {
JSONArray userArray =
new
JSONArray();
for
(User user : userRepository.findAll()) {
JSONObject userJSON =
new
JSONObject();
userJSON.put(
"id"
, user.getId());
userJSON.put(
"firstName"
, user.getFirstName());
userJSON.put(
"lastName"
, user.getLastName());
userJSON.put(
"email"
, user.getEmail());
userArray.put(userJSON);
}
return
userArray.toString();
}
|
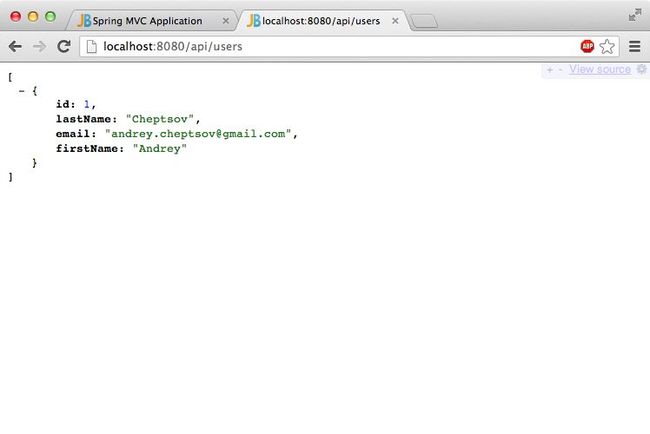
Run the application and open http://localhost:8080/api/users.
| Download the final code and IntelliJ IDEA's project files from GitHub. |

