Vue 学习总结笔记 (八)
文章目录
- 1. 消息订阅与发布
-
- 1.1 消息订阅与发布的流程
- 1.2 pubsub-js库
- 2. $nextTick用法
- 3. todoList 案例添加一个编译按钮
- 4. Vue的 过度与动画
-
- 4.1 CSS3的@keyframes 和 Vue的transition标签
- 4.2 Vue中的 .hello-enter-active , .hello-leave-active , .hello-enter , .hello-leave-to , .hello-enter-to , .hello-leave的用法
- 4.3 多个元素过度(transition-group标签)
- 4.4 Vue 集成第三方动画
- 4.5 过度和动画总结
- 4.6 修改todoList的MyItem组件,添加过度和动画效果
1. 消息订阅与发布
1.1 消息订阅与发布的流程
消息订阅与发布,两个过程:
- 第一步:订阅消息:消息名。
- 第二步:发布消息:消息内容。

1.2 pubsub-js库
pubsub-js的名字就对应了publish(发布),subscribe(订阅)两个英文单词。
想要实现消息订阅与发布就必须导入外库,实现消息订阅发布的库有很多,这里就是用pubsub-js库。
npm i pubsub-js命令安装

pubsub-js库的使用:
app.vue文件:
<template>
	<div class="app">
		<h1>{{msg}}h1>
		<School/>
		<Student/>
	div>
template>

<script>
	import School from "./components/School.vue"
	import Student from "./components/Student.vue"
	export default{
		name:'App',
		components:{Student,School},
		data(){
			return {
				msg:"你好啊!",
				studentName:""
			}
		},
	}
script>

<style>
	.app{
		background-color: gray;
		padding: 5px;
	}
style>
School.vue文件:
<template>
	<div class="school">
		<h2>学校姓名: {{name}}h2>
		<h2>学校地址: {{address}}h2>
	div>
template>

<script>
	import pubsub from 'pubsub-js'
	export default{
		name:"School",
		data(){
			return {
				name:"清华大学",
				address:"北京"
			}
		},
		mounted(){
			//使用pubsub订阅一个消息
			this.pubId = pubsub.subscribe('hello',function(messageName,data){
				console.log("有人发布了hello消息,hello消息的回调执行了。")
				console.log('订阅的名字:',messageName)
				console.log('拿到value数值:',data)
				//这里的this是undefined,想要拿到vc组件对象,就可以使用箭头函数来操作。
				console.log(this)
			})
		},
		beforeDestroy(){
			//组件销毁,取消订阅。
			//这里需要拿到订阅的变量名。我们可以通过this来拿到。
			pubsub.unsubscribe(this.pubId)
		}
	}
script>

<style>
	.school{
		background-color: skyblue;
	}
style>
Student.vue文件:
<template>
	<div class="student">
		<h2>学生姓名: {{name}}h2>
		<h2>学生性别: {{sex}}h2>
		<button @click="sendStudentName">把学生名给School组件button>
	div>
template>

<script>
	import pubsub from 'pubsub-js'
	export default{
		name:"Student",
		data(){
			return {
				name:"张三",
				sex:"男"
			}
		},
		methods:{
			sendStudentName(){
				pubsub.publish('hello',666)
			}
		}
	}
script>

<style>
	.student{
		background-color: pink;
		padding: 5px;
		margin-top: 30px;
	}
style>
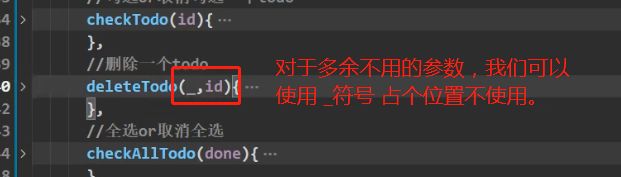
像上面的subscribe的messageName可以用_来替代:
总结:

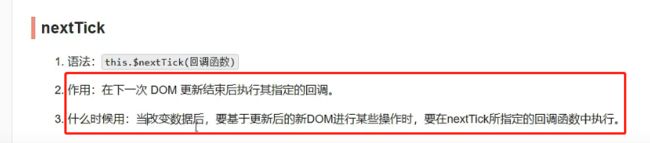
2. $nextTick用法
可以使用Vue的nextTick()来操作。
$nextTick函数所指定的函数会在模板dom元素刷新完成后进行回调。
所以一般$nextTick的回调函数放置的是dom元素之后要执行的命令属性,例如:focus获取焦点。

3. todoList 案例添加一个编译按钮
需要修改的就只有App.vue和MyItem.vue的内容:
App.vue文件:
<template>
	<div id="root">
		<div class="todo-container">
			<div class="todo-wrap">
				<Header1 @receive="receive">Header1>
				<List1 :todoList="todoList" >List1>
				<Footer1 :todoList="todoList" @checkAllTodoObj="checkAllTodoObj" @clearAllTodoObj="clearAllTodoObj">Footer1>
			div>
		div>
	div>
template>

<script>
	import pubsub from 'pubsub-js'
	import Header1 from "./components/MyHeader.vue"
	import Footer1 from "./components/MyFooter.vue"
	import List1 from "./components/MyList.vue"

	export default{
		name:'App',
		components:{
			Header1,
			List1,
			Footer1,
		},
		data(){
			return {
				//获取当前页面已经存储的localStorage数据。
				//如果localStorage.getItem('todoList')没有数据返回就返回了null,并且JSON解析出来也是null,这样就报错了!
				//所以我们要加一个||或,前面赋值报错就只用后面的[]空数组。
				todoList:JSON.parse(localStorage.getItem('todoList')) || []
			}
		},
		methods:{
			//从MyHeader中获取数据,添加todoObj对象
			receive(todoObj){
				//这样将值传给添加到todoList末尾中。
				this.todoList.unshift(todoObj);
			},
			//勾选或者取消勾选一个todo
			checkTodoObj(id){
				this.todoList.forEach((todoObj)=>{
					if(todoObj.id == id)
						todoObj.done = !todoObj.done
				})
			},
			//删除一个TodoObj
			deleteTodoObj(_,id){
				//注意:过滤出来的是一个新数组,并不是改变了data中的todoList。
				//因此,要重新赋值一下。
				// console.log(id)
				this.todoList = this.todoList.filter((todoObj)=>{
					return todoObj.id !== id
				})
			},
			//全选or取消全选
			checkAllTodoObj(done){
				this.todoList.forEach((todo)=>{
					todo.done = done
				})
			},
			//清除所有已经完成的todoObj
			clearAllTodoObj(){
				this.todoList = this.todoList.filter((todo)=>{
					return !todo.done
				})
			},
			updateTodoObj(id,title){
				this.todoList.forEach((todoObj)=>{
					if(todoObj.id == id)
						todoObj.title = title
				})
			},

		}
		,
		//实现本地存储
		watch:{
			todoList:{
				//开启深度监视,确保对象中的内容被修改了也能重新定义localStorage中的todoList。
				deep:true,
				handler(newValue,oldValue){
					localStorage.setItem('todoList',JSON.stringify(newValue));
				}
			}
		},
		mounted(){
			this.$bus.$on('checkTodoObj',this.checkTodoObj)
			this.pubId = pubsub.subscribe('deleteTodoObj',this.deleteTodoObj)
			this.$bus.$on('updateTodeObj',this.updateTodoObj)
		},
		beforeDestroy(){
			this.$bus.$off('checkTodoObj')
			this.$bus.$off('updateTodeObj')
			pubsub.unsubscribe(this.pubId)
		}
	}
script>

<style>
	body{
		background-color: #fff;
	}
	.btn{
		display: inline-block;
		padding: 4px 12px;
		margin-bottom: 0;
		font-size: 14px;
		line-height: 20px;
		text-align: center;
		vertical-align: middle;
		cursor: pointer;
		box-shadow: inset 0 1px 0 rgba(255,255,255,0.2), 0 1px 2px rgba(0,0,0,0.05);
		border-radius: 4px;
	}
	.btn-edit{
		color: #fff;
		background-color: skyblue;
		border: 1px solid wheat;
		margin-right: 10px;
	}

	.btn-danger{
		color: #fff;
		background-color: #da4f49;
		border: 1px solid #bd362f;
	}
	.btn-danger:hover{
		color: #fff;
		background-color: #BD362F;
	}
	.btn:focus{
		outline: none;
	}
	.todo-container{
		width:600px;
		margin: 0 auto;
	}
	.todo-container .todo-wrap {
		padding: 10px;
		border: 1px solid #ddd;
		border-radius: 5px;
	}
style>
MyItem.vue文件:
<template>
	<li>
		<label>

			<input type="checkbox" :checked="itemPro.done" @click="handleCheck(itemPro.id)"/>
			<span v-show="!itemPro.isEdit">{{itemPro.title}}span>
			<input
				v-show="itemPro.isEdit"
				type="text"
				:value="itemPro.title"
				@blur="handleBlur(itemPro,$event)"
				ref="inputTitle"/>
		label>
		<button class="btn btn-danger" @click="handleDelete(itemPro.id)">删除button>
		<button v-show="!itemPro.isEdit" class="btn btn-edit" @click="handlerEdit(itemPro)">编辑button>
	li>
template>

<script>
import pubsub from 'pubsub-js'
export default {
	name:"MyItem",
	//声明接受todo对象
	props:['itemPro'],
	mounted(){
		// console.log(this.itemPro);
	},
	methods:{
		//勾选or取消
		handleCheck(id){
			//通知App组件将对应的itemPro对象的done值取反
			this.$bus.$emit('checkTodoObj',id)
		},
		//删除
		handleDelete(id){
			//根据用户
			if(confirm('确定删除吗?')){
				// this.$bus.$emit("deleteTodoObj",id)
				pubsub.publish('deleteTodoObj',id)
			}
		},
		handlerEdit(itemPro){
			//先判断itemPro中是否有$set函数
			if(!itemPro.hasOwnProperty('isEdit')){
				//使用$set函数来给itemPro对象添加isEdit属性,这样就会触发vue的响应式获取get和set方法。
				this.$set(itemPro,'isEdit',true)
				// console.log("没有isEdit,创建一个")
			}else{
				itemPro.isEdit = true
				// console.log("有isEdit,直接设置为true")
			}

			//单纯的走focus是不可以的,因为页面会重新刷新响应的!
			// this.$refs.inputTitle.focus() //因此使用focus()的函数在vue中是不可以的。

			//可以使用Vue的nextTick()来操作
			//$nextTick函数所指定的函数会在模板dom元素刷新完成后进行回调。
			this.$nextTick(function(){
				this.$refs.inputTitle.focus()
			})

		},
		//失去焦点回调
		handleBlur(itemPro,e){
			itemPro.isEdit = false
			if(!e.target.value.trim())
				return alert('输入不能为空!')
			this.$bus.$emit('updateTodeObj',itemPro.id,e.target.value)
			console.log(e.target.value)
		},
	}
}
script>

<style scoped>
	li{
		list-style: none;
		height: 36px;
		line-height: 36px;
		padding: 0 5px;
		border-bottom: 1px solid #ddd;
	}
	li label {
		float: left;
		cursor: pointer;
	}
	li label li input {
		vertical-align: middle;
		margin-right: 6px;
		position: relative;
		top: -1px;
	}
	li button{
		float: right;
		display: none;
		margin-top: 3px;
	}
	li:before{
		content: initial;
	}
	li:last-child{
		border-bottom: none;
	}
	li:hover{
		background-color: #ddd;
	}
	li:hover button{
		display: block;
	}
style>
4. Vue的 过度与动画
4.1 CSS3的@keyframes 和 Vue的transition标签
style样式用到了css3中的@keyframes关键帧。
vue中,需要进行过度和动画效果的内容。必须放到transition标签中。
这里的transition标签值专门用来给vue使用的,负责过度和动画效果。
test.vue文件:
<template>
	<div>
		<button @click="isShow=!isShow">显示/隐藏button>

		<transition name="hello" appear>
			<h1 v-show="isShow">你好啊!h1>
		transition>
	div>
template>

<script>
	export default {
		name:'Test',
		data(){
			return{
				isShow:true
			}
		},
	}
script>

<style scoped="scoped">

	h1{
		background-color: orange;
	}

	/*
		vue规定的名字:
			进入的时候实现v-enter-active的动画效果。(就是显示到页面的时候执行该动画效果)
			离开的时候实现v-leave-active的动画效果。(不显示到页面的时候执行该动画效果)
		注意:
			如果给transition标签赋予了name属性值为hello,那么对应样式的v也要变成hello。
			hello-enter-active
			hello-leave-active
	 */
	.hello-enter-active{
		animation: itholmes 1s linear;
	}
	.hello-leave-active{
		animation: itholmes 1s linear reverse;
	}

	/*
		@keyframes:
			关键帧 @keyframes at-rule 规则通过在动画序列中定义关键帧(或waypoints)
			的样式来控制CSS动画序列中的中间步骤。
	*/
	@keyframes itholmes{
		from{
			transform: translateX(-100%);
		}
		to{
			transform: translateX(0px);
		}
	}

style>
4.2 Vue中的 .hello-enter-active , .hello-leave-active , .hello-enter , .hello-leave-to , .hello-enter-to , .hello-leave的用法
<template>
	<div>
		<button @click="isShow=!isShow">显示/隐藏button>
		<transition name="hello" appear>
			<h1 v-show="isShow">你好啊!h1>
		transition>
	div>
template>

<script>
	export default {
		name:'Test',
		data(){
			return{
				isShow:true
			}
		},
	}
script>

<style scoped="scoped">

	h1{
		background-color: orange;
		/*
			这里的属性transition就是过度。
			一般我们写在.hello-enter-active , .hello-leave-active中。
		 */
		/* transition: 1s linear; */
	}

	/*
	进入的起点
	.hello-enter{
		transform:translateX(-100%);
	}
	进入的终点
	.hello-enter-to{
		transform: translateX(0);
	}
	*/
	/*
	离开的起点
	.hello-leave{
		transform:translateX(0);
	}
	离开的终点
	.hello-leave-to{
		transform: translateX(-100%);
	}*/

	/*
		.hello-enter-active: 是整个进入的过程。
		.hello-leave-active:是整个离开的过程。
	*/
	.hello-enter-active , .hello-leave-active{
		transition: 1s linear;
	}

	/* 上面就可以整合为 */
	/* 进入的起点,离开的终点 */
	.hello-enter,.hello-leave-to{
		transform:translateX(-100%);
	}
	/* 进入的终点,离开的起点*/
	.hello-enter-to,.hello-leave{
		transform: translateX(0);
	}

style>
4.3 多个元素过度(transition-group标签)

transition-group标签:里面可以存放多个元素标签。
- 注意:每一个元素标签必须要设置key属性和属性值。

test.vue案例:
<template>
	<div>
		<button @click="isShow=!isShow">显示/隐藏button>
		<transition-group name="hello" appear>
			<h1 v-show="isShow" key="1">你好啊!h1>
			<h1 v-show="!isShow" key="2">hello,world!h1>
		transition-group>
	div>
template>

<script>
	export default {
		name:'Test',
		data(){
			return{
				isShow:true
			}
		},
	}
script>

<style scoped="scoped">

	h1{
		background-color: orange;
		/*
			这里的属性transition就是过度。
			一般我们写在.hello-enter-active , .hello-leave-active中。
		 */
		/* transition: 1s linear; */
	}

	/*
	进入的起点
	.hello-enter{
		transform:translateX(-100%);
	}
	进入的终点
	.hello-enter-to{
		transform: translateX(0);
	}
	*/
	/*
	离开的起点
	.hello-leave{
		transform:translateX(0);
	}
	离开的终点
	.hello-leave-to{
		transform: translateX(-100%);
	}*/

	/*
		.hello-enter-active: 是整个进入的过程。
		.hello-leave-active:是整个离开的过程。
	*/
	.hello-enter-active , .hello-leave-active{
		transition: 1s linear;
	}

	/* 上面就可以整合为 */
	/* 进入的起点,离开的终点 */
	.hello-enter,.hello-leave-to{
		transform:translateX(-100%);
	}
	/* 进入的终点,离开的起点*/
	.hello-enter-to,.hello-leave{
		transform: translateX(0);
	}

style>
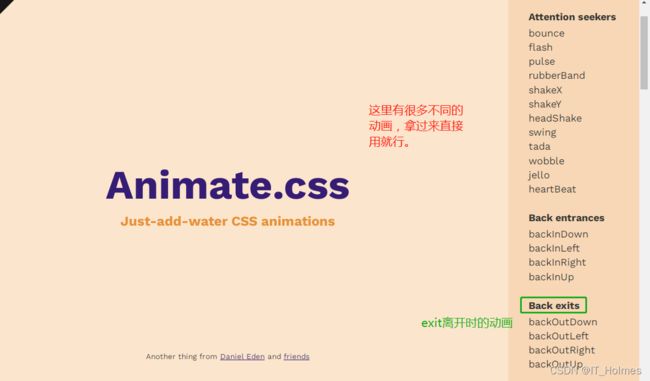
4.4 Vue 集成第三方动画
第三方npm.js网站
搜索animate.css这个就是常用的第三方动画。


安装后,导入css包。直接使用就可以,它很多的动画都在HostPage上面右侧栏目都有!
test3.vue使用效果:
<template>
	<div>
		<button @click="isShow=!isShow">显示/隐藏button>

		<transition-group
			appear
			name="animate__animated animate__bounce"
			enter-active-class="animate__swing"
			leave-active-class="animate__backOutDown"
		>
			<h1 v-show="isShow" key="1">你好啊!h1>
			<h1 v-show="!isShow" key="2">hello,world!h1>
		transition-group>
	div>
template>

<script>
	//这是一个样式,我们不需要form什么什么东西。
	import 'animate.css'
	export default {
		name:'Test',
		data(){
			return{
				isShow:true
			}
		},
	}
script>

<style scoped="scoped">
	h1{
		background-color: orange;
	}
style>
4.5 过度和动画总结
在CSS中的过度和动画解释:
- 过度就是在那个时间段内,做什么事情。
- 动画就是一个效果,我们经常是在这个过度时间内,进行这个动画效果。二者是相互依存的关系。

在Vue中的过度与动画操作:
- 过度:通过transition或者transition-group标签。它有两种方式:一种是通过name(没有声明,在style中声明v)在style中声明;一种是直接在特定的属性上面指定。
- 动画:我们可以自定义动画,提供给过度使用;但是一般有第三方库animate.css,我们可以通过第三方库来操作这些东西,很方便。

4.6 修改todoList的MyItem组件,添加过度和动画效果
<template>
	<transition name="todo" appear>
		<li>
			<label>
				<input type="checkbox" :checked="itemPro.done" @click="handleCheck(itemPro.id)"/>
				<span v-show="!itemPro.isEdit">{{itemPro.title}}span>
				<input
					v-show="itemPro.isEdit"
					type="text"
					:value="itemPro.title"
					@blur="handleBlur(itemPro,$event)"
					ref="inputTitle"/>
			label>
			<button class="btn btn-danger" @click="handleDelete(itemPro.id)">删除button>
			<button v-show="!itemPro.isEdit" class="btn btn-edit" @click="handlerEdit(itemPro)">编辑button>
		li>
	transition>
template>

<script>
import 'animate.css'
import pubsub from 'pubsub-js'
export default {
	name:"MyItem",
	props:['itemPro'],
	methods:{
		handleCheck(id){
			this.$bus.$emit('checkTodoObj',id)
		},
		handleDelete(id){
			if(confirm('确定删除吗?')){
				// this.$bus.$emit("deleteTodoObj",id)
				pubsub.publish('deleteTodoObj',id)
			}
		},
		handlerEdit(itemPro){
			if(!itemPro.hasOwnProperty('isEdit')){
				this.$set(itemPro,'isEdit',true)
			}else{
				itemPro.isEdit = true
			}
			this.$nextTick(function(){
				this.$refs.inputTitle.focus()
			})

		},
		handleBlur(itemPro,e){
			itemPro.isEdit = false
			if(!e.target.value.trim())
				return alert('输入不能为空!')
			this.$bus.$emit('updateTodeObj',itemPro.id,e.target.value)
			console.log(e.target.value)
		},
	}
}
script>

<style scoped>

	@keyframes itholmes{
		from{
			transform: translateX(100%);
		}
		to{
			transform: translateX(0px);
		}
	}

	.todo-enter-active{
		animation: itholmes 0.5s linear;
	}

	.todo-leave-active{
		animation: itholmes 0.5s linear reverse;
	}

	li{
		list-style: none;
		height: 36px;
		line-height: 36px;
		padding: 0 5px;
		border-bottom: 1px solid #ddd;
	}
	li label {
		float: left;
		cursor: pointer;
	}
	li label li input {
		vertical-align: middle;
		margin-right: 6px;
		position: relative;
		top: -1px;
	}
	li button{
		float: right;
		display: none;
		margin-top: 3px;
	}
	li:before{
		content: initial;
	}
	li:last-child{
		border-bottom: none;
	}
	li:hover{
		background-color: #ddd;
	}
	li:hover button{
		display: block;
	}
style>