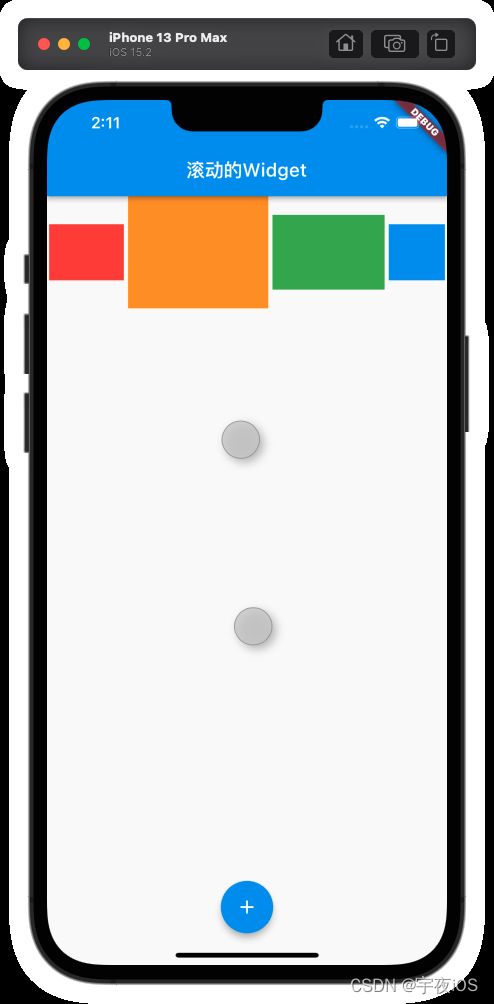
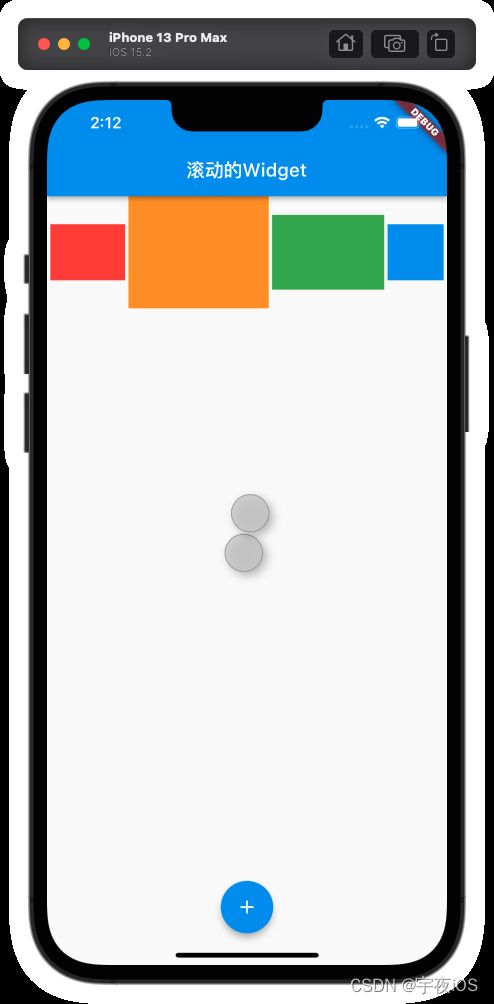
【Flutter从入门到实战】 ⑧、FlexWidget、Flex的主轴和交叉轴、Row和Column的使用、Expanded的FlexFit和flex的使用、Stack、Positioned的使用
Flutter从入门到实战
一共分为23个系列
①(Flutter、Dart环境搭建篇) 共3个内容 已更新
②(Dart语法1 篇) 共4个内容 已更新
③(Dart语法2 篇) 共2个内容 已更新
④(Flutter案例开发篇) 共4个内容 已更新
⑤(Flutter的StatelessWidget 共3个内容 已更新
⑥(Flutter的基础Widget篇) 共2个内容 已更新
⑦(布局Widget篇) 共1个内容 已更新
⑧(滚动Widget篇) 共1个内容 已更新
官方文档说明
官方视频教程
Flutter的YouTube视频教程-小部件
⑧、滚动Widget篇
-
- ①、FlexWidget
-
- 1.Flex源码
- 1.1 Flex属性表
-
- 1.2 Row(行)/Column(列)和Flex关系
- 2. ✨Row(行)
- 3. Row的使用
- 4.Flex的属性`mainAxisAlignment`(主轴方向)
-
- 4.1 Row的`mainAxisAlignment`案例
-
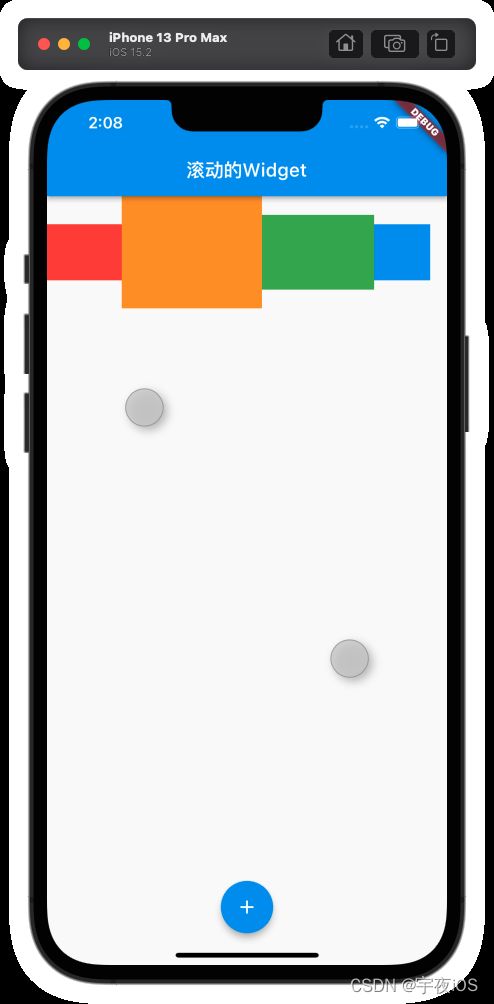
- 4.1.1 (默认情况)mainAxisAlignment.sart
- 4.1.1 效果图
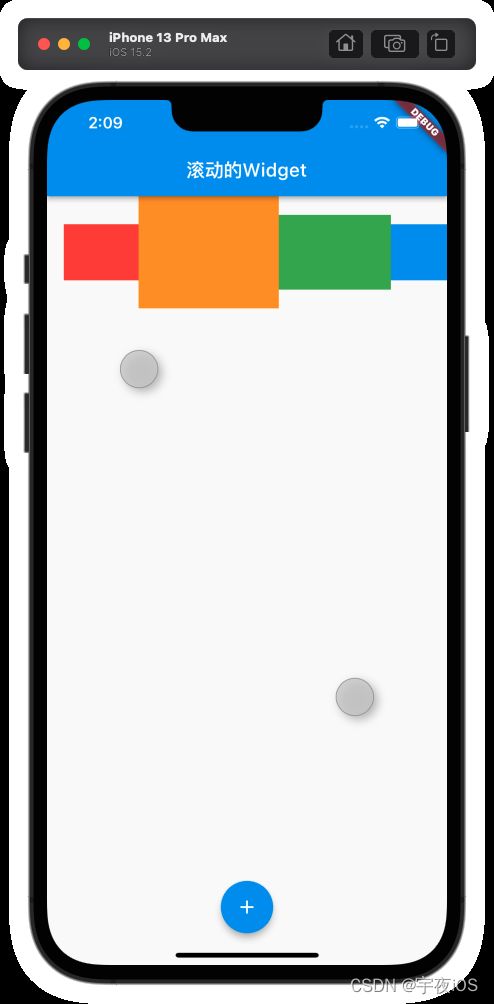
- 4.1.2 mainAxisAlignment.end
- 4.1.2 效果图
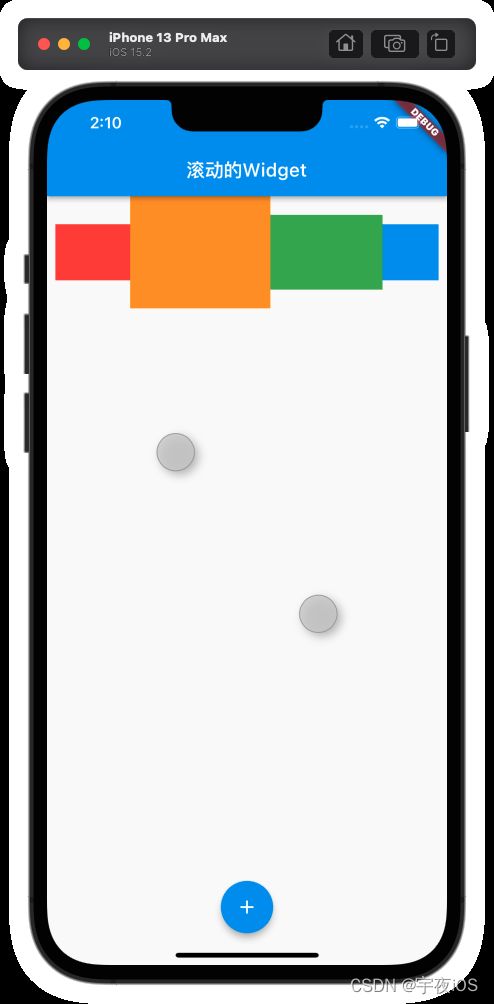
- 4.1.3 mainAxisAlignment.center
- 4.1.3 效果图
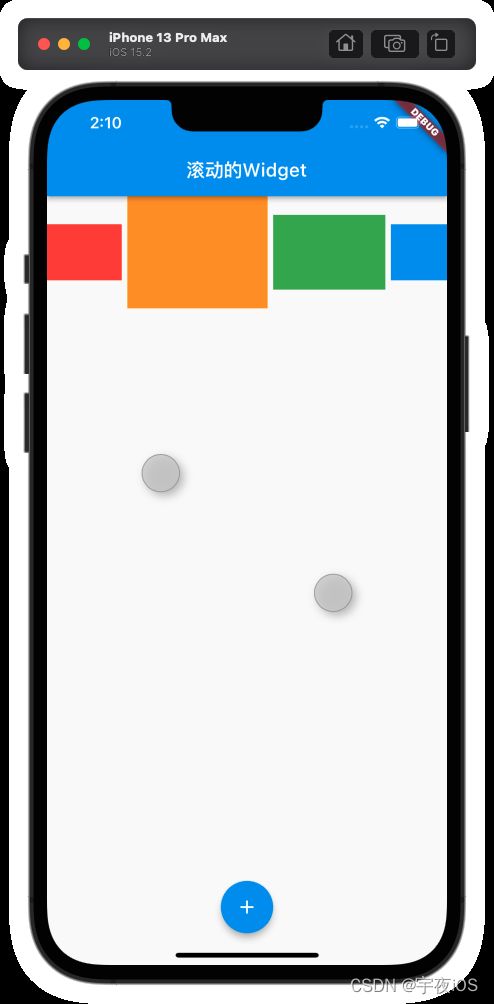
- 4.1.4 mainAxisAlignment.spaceBetween
- 4.1.4 效果图
- 4.1.5 mainAxisAlignment.spaceAround
- 4.1.5 效果图
- 4.1.6 ⭐️mainAxisAlignment.spaceEvenly
- 4.1.6 效果图
- 5.Flex的属性`MainAxisSize`(主轴大小)
-
- 5.1 设置`MainAxisSize`效果
- 6.Flex的属性`CrossAxisAlignment`(交叉轴)
-
- 6.1 以Row的交叉轴为例
- 6.2 以Row的CrossAxisAlignment.start
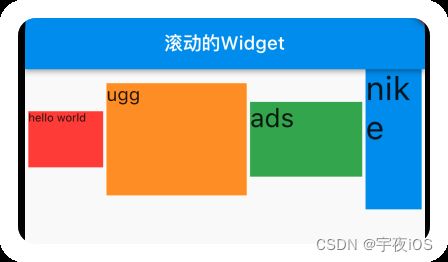
- 6.2 效果图
- 6.3 以Row的CrossAxisAlignment.end
- 6.3 效果图
- 6.4 (默认情况)以Row的CrossAxisAlignment.center
- 6.4 效果图
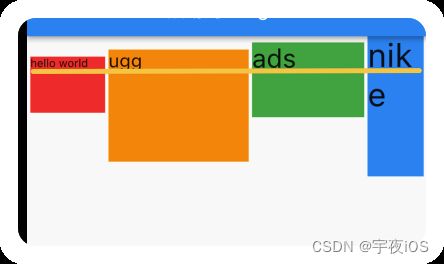
- 6.5 (基线对齐 必须要包含字体才能做出效果)以Row的CrossAxisAlignment.baseline `并且需要设置textBaseline 属性`
- 6.5 效果图
- 6.6 以Row的CrossAxisAlignment.stretch
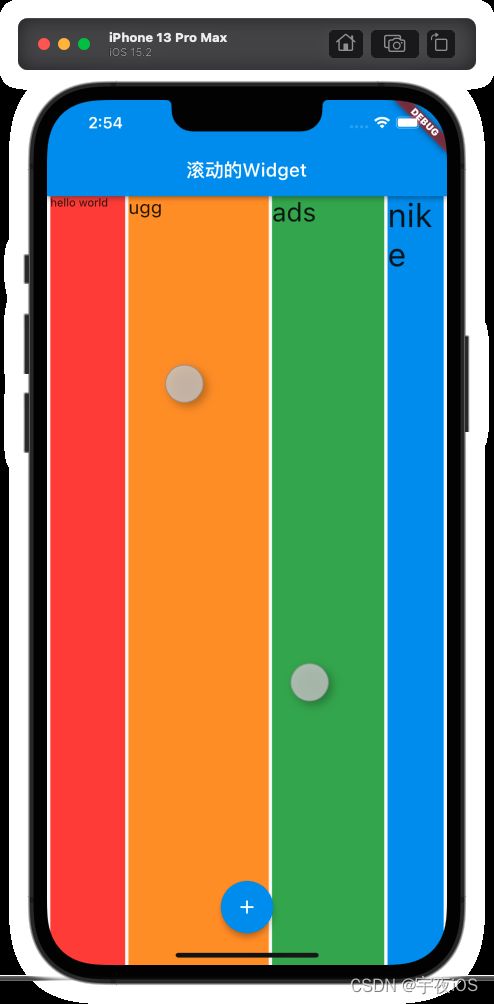
- 6.6 效果图
- 7.✨Column(列)
-
- 7.1 Column和Row基本相似 只不过只是主轴方向不同而已
- 8. Flexible的使用`拉伸操作`
- 9. Flexible中的`flex`的说明
-
- 9.1 Flexible使用
- 10. ⭐️Expanded `开发使用多一点`
-
- 10.1 Expanded的`fit`使用
- 10.2 Expanded的`收缩功能`使用
-
- 10.2.1 未处理收缩情况
- 10.2.2 处理收缩情况
- 11.Stack Widget
-
- 11.Stack Widget 效果图
- 12.Stack Positioned Widget
- 12.Stack属性overflow 以及 Positioned使用的效果图
- 13.Stack Positioned 的注意点
-
- 13.1 使用 Positioned 将Text文本放到最底部
- 13.1 效果图-使用 Positioned 将Text文本放到最底部
- 小贴士
①、FlexWidget
1.Flex源码
继承关系 class Flex extends
MultiChildRenderObjectWidget
1.1 Flex属性表
 Flex({
    Key? key,
    required this.direction,
    this.mainAxisAlignment = MainAxisAlignment.start,
    this.mainAxisSize = MainAxisSize.max,
    this.crossAxisAlignment = CrossAxisAlignment.center,
    this.textDirection,
    this.verticalDirection = VerticalDirection.down,
    this.textBaseline, // NO DEFAULT: we don't know what the text's baseline should be
    this.clipBehavior = Clip.none,
    List<Widget> children = const <Widget>[],
  }) : assert(direction != null),
       assert(mainAxisAlignment != null),
       assert(mainAxisSize != null),
       assert(crossAxisAlignment != null),
       assert(verticalDirection != null),
       assert(crossAxisAlignment != CrossAxisAlignment.baseline || textBaseline != null, 'textBaseline is required if you specify the crossAxisAlignment with CrossAxisAlignment.baseline'),
       assert(clipBehavior != null),
       super(key: key, children: children);
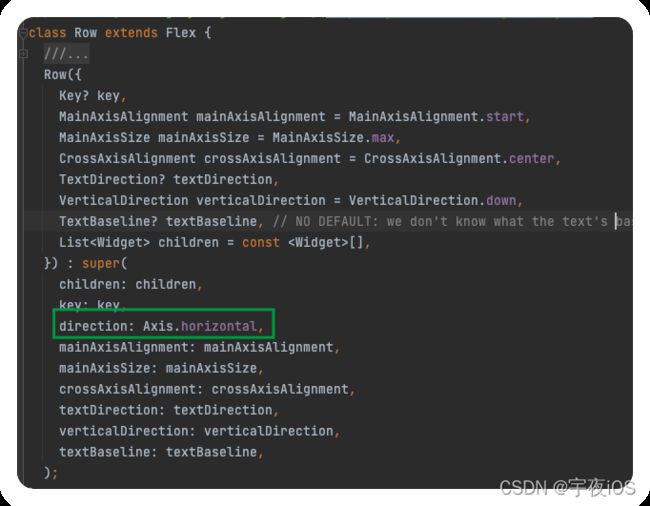
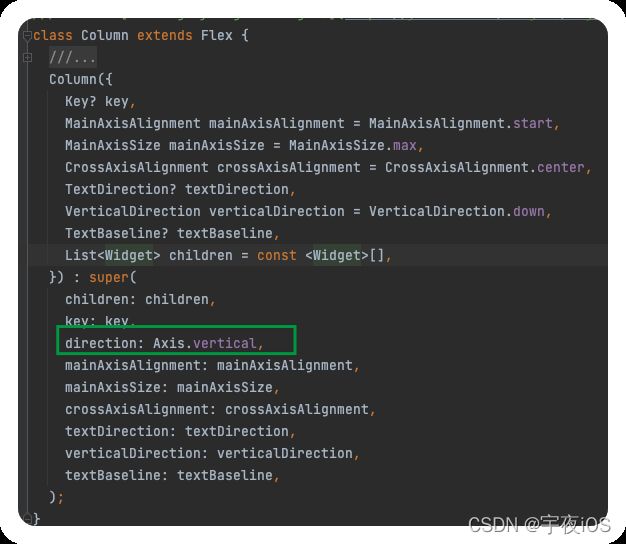
1.2 Row(行)/Column(列)和Flex关系
 Flex(
      direction: Axis.horizontal,
    ) == Row

 Flex(
      direction: Axis.vertical,
) == Column
2. ✨Row(行)
Row的主轴是 以横向为主
属性是mainAxisAlignment 是水平
对应的另外一个方向叫做交叉轴
属性是crossAxisAlignment
3. Row的使用
平分Widget的间距
方式1 通过屏幕计算方式 - 计算过程比较复杂
比如5个控件 拿到屏幕宽度 - 5个控件的宽度 的差 除以 5+1的控件
方式2 通过浮动方式
方式3 ⭐️使用主轴对齐方式mainAxisAlignment
4.Flex的属性mainAxisAlignment(主轴方向)
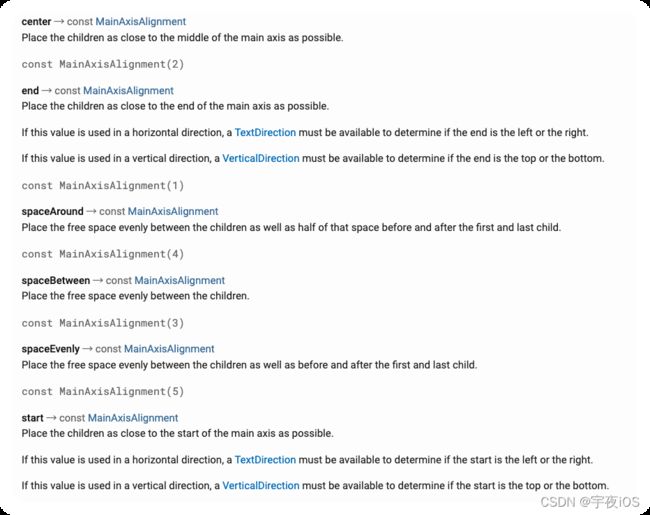
属性的作用 具体可以了解MainAxisAlignment的枚举属性
/**
* MainAxisAlignment:
* start : 主轴的开始位置 挨个摆放元素
* end : 主轴的结束位置 挨个摆放位置
* center : 主轴的中心点对齐
* spaceBetween: 左右两边的间距为0,其他元素之间平分间距
* spaceAround: 左右两边的间距是其他元素之间的间距的一半
* spaceEvenly: 所有的间距平分空间
* */
4.1 Row的mainAxisAlignment案例
4.1.1 (默认情况)mainAxisAlignment.sart
Row(
      mainAxisAlignment:MainAxisAlignment.start,
      children: [
      Container(width: 80,height: 60,color: Colors.red),
      Container(width: 150,height: 120,color: Colors.orange),
      Container(width: 120,height: 80,color: Colors.green),
      Container(width: 60,height: 60,color: Colors.blue)
      ],
    );
4.1.1 效果图
4.1.2 mainAxisAlignment.end
Row(
      mainAxisAlignment:MainAxisAlignment.end,
      children: [
      Container(width: 80,height: 60,color: Colors.red),
      Container(width: 150,height: 120,color: Colors.orange),
      Container(width: 120,height: 80,color: Colors.green),
      Container(width: 60,height: 60,color: Colors.blue)
      ],
    );
4.1.2 效果图
4.1.3 mainAxisAlignment.center
Row(
      mainAxisAlignment:MainAxisAlignment.center,
      children: [
      Container(width: 80,height: 60,color: Colors.red),
      Container(width: 150,height: 120,color: Colors.orange),
      Container(width: 120,height: 80,color: Colors.green),
      Container(width: 60,height: 60,color: Colors.blue)
      ],
    );
4.1.3 效果图
4.1.4 mainAxisAlignment.spaceBetween
Row(
      mainAxisAlignment:MainAxisAlignment.spaceBetween,
      children: [
      Container(width: 80,height: 60,color: Colors.red),
      Container(width: 150,height: 120,color: Colors.orange),
      Container(width: 120,height: 80,color: Colors.green),
      Container(width: 60,height: 60,color: Colors.blue)
      ],
    );
4.1.4 效果图
4.1.5 mainAxisAlignment.spaceAround
Row(
      mainAxisAlignment:MainAxisAlignment.spaceAround,
      children: [
      Container(width: 80,height: 60,color: Colors.red),
      Container(width: 150,height: 120,color: Colors.orange),
      Container(width: 120,height: 80,color: Colors.green),
      Container(width: 60,height: 60,color: Colors.blue)
      ],
    );
4.1.5 效果图
4.1.6 ⭐️mainAxisAlignment.spaceEvenly
Row(
      mainAxisAlignment:MainAxisAlignment.spaceEvenly,
      children: [
      Container(width: 80,height: 60,color: Colors.red),
      Container(width: 150,height: 120,color: Colors.orange),
      Container(width: 120,height: 80,color: Colors.green),
      Container(width: 60,height: 60,color: Colors.blue)
      ],
    );
4.1.6 效果图
5.Flex的属性MainAxisSize(主轴大小)
默认情况下按钮是会占据整一行的空间的
如何设置大小自适应
可以使用row的MainAxisSize
5.1 设置MainAxisSize效果
return RaisedButton(onPressed: (){},
      color: Colors.red,
      child: Row(
        // mainAxisSize:MainAxisSize.min,
        children: [
          Icon(Icons.bug_report),
          Text("bug报告")
        ],

      ),
    );
6.Flex的属性CrossAxisAlignment(交叉轴)
6.1 以Row的交叉轴为例
Row的交叉轴是垂直的方向
CrossAxisAlignment 属性说明
CrossAxisAlignment:
start : 交叉轴的起始位置对齐
end : 交叉轴的结束位置对齐
center : 交叉轴的中心位置对齐
baseline : 基线对齐(必须有文本的时候才会有效果) 设置基线必须设置 textBaseline属性
stretch: 先让Row占据交叉轴尽可能大的空间,将所有的子Widget交叉轴的高度,拉伸最大
  return Row(
      mainAxisAlignment:MainAxisAlignment.spaceEvenly,
      crossAxisAlignment: CrossAxisAlignment.baseline, // Row的交叉轴是垂直 。如果设置start 那么就是从顶部
      mainAxisSize: MainAxisSize.max,
      textBaseline: TextBaseline.ideographic,
      children: [
      Container(width: 80,height: 60,color: Colors.red,child: Text("hello world",style: TextStyle(fontSize: 12),)),
      Container(width: 150,height: 120,color: Colors.orange,child: Text("ugg",style: TextStyle(fontSize: 20),)),
      Container(width: 120,height: 80,color: Colors.green,child: Text("ads",style: TextStyle(fontSize: 28),)),
      Container(width: 60,height: 150,color: Colors.blue,child: Text("nike",style: TextStyle(fontSize: 35),))
      ],
    );
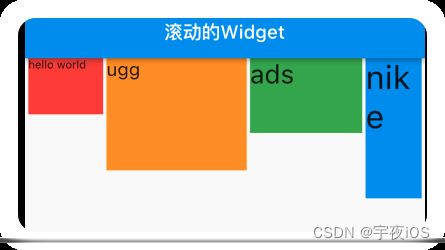
6.2 以Row的CrossAxisAlignment.start
    return Row(
      mainAxisAlignment:MainAxisAlignment.spaceEvenly,
      crossAxisAlignment: CrossAxisAlignment.start, // Row的交叉轴是垂直 。如果设置start 那么就是从顶部
      mainAxisSize: MainAxisSize.max,
      children: [
      Container(width: 80,height: 60,color: Colors.red,child: Text("hello world",style: TextStyle(fontSize: 12),)),
      Container(width: 150,height: 120,color: Colors.orange,child: Text("ugg",style: TextStyle(fontSize: 20),)),
      Container(width: 120,height: 80,color: Colors.green,child: Text("ads",style: TextStyle(fontSize: 28),)),
      Container(width: 60,height: 150,color: Colors.blue,child: Text("nike",style: TextStyle(fontSize: 35),))
      ],
    );
6.2 效果图
6.3 以Row的CrossAxisAlignment.end
    return Row(
      mainAxisAlignment:MainAxisAlignment.spaceEvenly,
      crossAxisAlignment: CrossAxisAlignment.end, // Row的交叉轴是垂直 。如果设置start 那么就是从顶部
      mainAxisSize: MainAxisSize.max,
      children: [
      Container(width: 80,height: 60,color: Colors.red,child: Text("hello world",style: TextStyle(fontSize: 12),)),
      Container(width: 150,height: 120,color: Colors.orange,child: Text("ugg",style: TextStyle(fontSize: 20),)),
      Container(width: 120,height: 80,color: Colors.green,child: Text("ads",style: TextStyle(fontSize: 28),)),
      Container(width: 60,height: 150,color: Colors.blue,child: Text("nike",style: TextStyle(fontSize: 35),))
      ],
    );
6.3 效果图
6.4 (默认情况)以Row的CrossAxisAlignment.center
    return Row(
      mainAxisAlignment:MainAxisAlignment.spaceEvenly,
      crossAxisAlignment: CrossAxisAlignment.center, // Row的交叉轴是垂直 。如果设置start 那么就是从顶部
      mainAxisSize: MainAxisSize.max,
      children: [
      Container(width: 80,height: 60,color: Colors.red,child: Text("hello world",style: TextStyle(fontSize: 12),)),
      Container(width: 150,height: 120,color: Colors.orange,child: Text("ugg",style: TextStyle(fontSize: 20),)),
      Container(width: 120,height: 80,color: Colors.green,child: Text("ads",style: TextStyle(fontSize: 28),)),
      Container(width: 60,height: 150,color: Colors.blue,child: Text("nike",style: TextStyle(fontSize: 35),))
      ],
    );
6.4 效果图
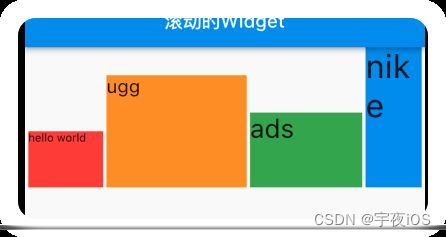
6.5 (基线对齐 必须要包含字体才能做出效果)以Row的CrossAxisAlignment.baseline 并且需要设置textBaseline 属性
  return Row(
      mainAxisAlignment:MainAxisAlignment.spaceEvenly,
      crossAxisAlignment: CrossAxisAlignment.baseline, // Row的交叉轴是垂直 。如果设置start 那么就是从顶部
      mainAxisSize: MainAxisSize.max,
      textBaseline: TextBaseline.ideographic,
      children: [
      Container(width: 80,height: 60,color: Colors.red,child: Text("hello world",style: TextStyle(fontSize: 12),)),
      Container(width: 150,height: 120,color: Colors.orange,child: Text("ugg",style: TextStyle(fontSize: 20),)),
      Container(width: 120,height: 80,color: Colors.green,child: Text("ads",style: TextStyle(fontSize: 28),)),
      Container(width: 60,height: 150,color: Colors.blue,child: Text("nike",style: TextStyle(fontSize: 35),))
      ],
    );
6.5 效果图
6.6 以Row的CrossAxisAlignment.stretch
如何设置Row的最大高度 。可以通过Container包裹Row 并且设置Container的高度即可
    return Row(
      mainAxisAlignment:MainAxisAlignment.spaceEvenly,
      crossAxisAlignment: CrossAxisAlignment.stretch, // Row的交叉轴是垂直 。如果设置start 那么就是从顶部
      mainAxisSize: MainAxisSize.max,
      textBaseline: TextBaseline.ideographic,
      children: [
      Container(width: 80,height: 60,color: Colors.red,child: Text("hello world",style: TextStyle(fontSize: 12),)),
      Container(width: 150,height: 120,color: Colors.orange,child: Text("ugg",style: TextStyle(fontSize: 20),)),
      Container(width: 120,height: 80,color: Colors.green,child: Text("ads",style: TextStyle(fontSize: 28),)),
      Container(width: 60,height: 150,color: Colors.blue,child: Text("nike",style: TextStyle(fontSize: 35),))
      ],
    );
6.6 效果图
7.✨Column(列)
Column的主轴是 以垂直方向排列为主
属性是mainAxisAlignment 是垂直
对应的另外一个方向叫做交叉轴
属性是crossAxisAlignment
7.1 Column和Row基本相似 只不过只是主轴方向不同而已
    return Column(
        mainAxisAlignment: MainAxisAlignment.spaceEvenly,
        crossAxisAlignment: CrossAxisAlignment.stretch,
        textBaseline: TextBaseline.alphabetic,
        verticalDirection: VerticalDirection.down, // 默认是 down
        mainAxisSize: MainAxisSize.min,


        children: [
          Container(width: 80,height: 60,color: Colors.red,child: Text("hello world",style: TextStyle(fontSize: 12),)),
          Container(width: 150,height: 120,color: Colors.orange,child: Text("ugg",style: TextStyle(fontSize: 20),)),
          Container(width: 120,height: 80,color: Colors.green,child: Text("ads",style: TextStyle(fontSize: 28),)),
          Container(width: 60,height: 150,color: Colors.blue,child: Text("nike",style: TextStyle(fontSize: 35),))
        ],
      );
8. Flexible的使用拉伸操作
Flexible是
- 控制Row、Column或Flex的子项如何弯曲的小部件。
- 使用Flexible小部件使Row、Column或Flex 的子级可以灵活地扩展以填充主轴中的可用空间(例如,水平地用于Row或垂直地用于Column),但与 Expanded不同的是,Flexible不会要求孩子填满可用空间。
- Flexible小部件必须是Row、Column或Flex的后代,并且从Flexible小部件到其封闭Row、Column或 Flex的路径必须仅包含StatelessWidget或StatefulWidget(而不是其他类型的小部件,如RenderObjectWidget s )。
9. Flexible中的flex的说明
具体可以看一下官方文档说明 也可查看下面的YouTube的教程说明
考虑有些朋友不能访问外网 也可以查看我B站的视频
或者可以直接看下面的视频也可以
大概意思就是 比如有3个Widget
- 使用Row Column 包裹 并且 设置3个Widget 并且使用
fit: FlexFit.tight来填充整个屏幕- 假设3个Widget是等宽等高的情况下
- 第1个Widget 设置了 flex:1
第2个Widget 设置了 flex:2
第3个Widget 设置了 flex:3- 那么会将屏幕分成6等分
那么 第1个Widget占据屏幕的1/6
第2个Widget占据屏幕的1/3
第3个Widget占据屏幕的1/2
不管你设置哪个Widget的宽度 都不会算Widget的宽度的
9.1 Flexible使用
   Flexible(
            fit: FlexFit.tight, // loose 默认情况
              flex:2,
              child: Container(width: 150,height: 50,color: Colors.red)
          ),
Flexible
10. ⭐️Expanded 开发使用多一点
Expanded 继承于Flexible
Expanded的作用相当于帮我们操作了FlexFit.tight
可以使用拉伸或者收缩
10.1 Expanded的fit使用
     Expanded(
              flex:2,
              child: Container(width: 150,height: 50,color: Colors.red)
          ),
10.2 Expanded的收缩功能使用
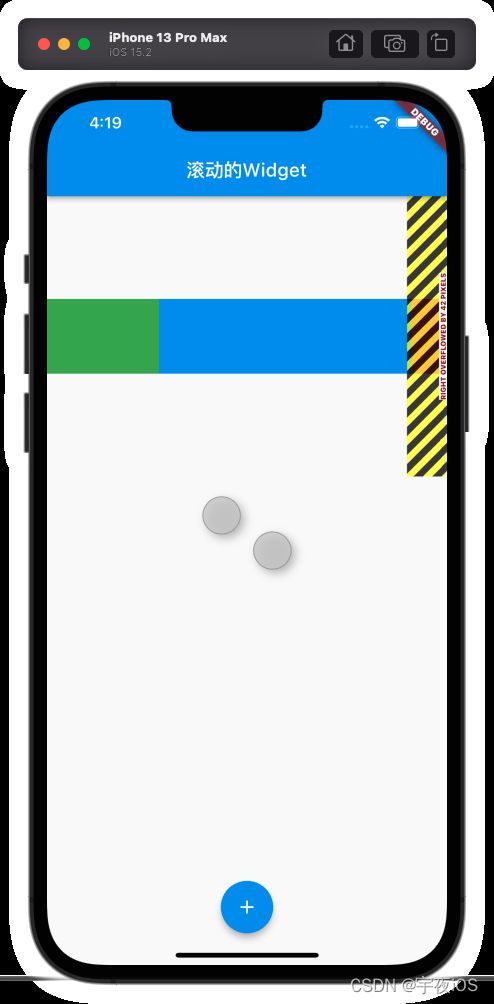
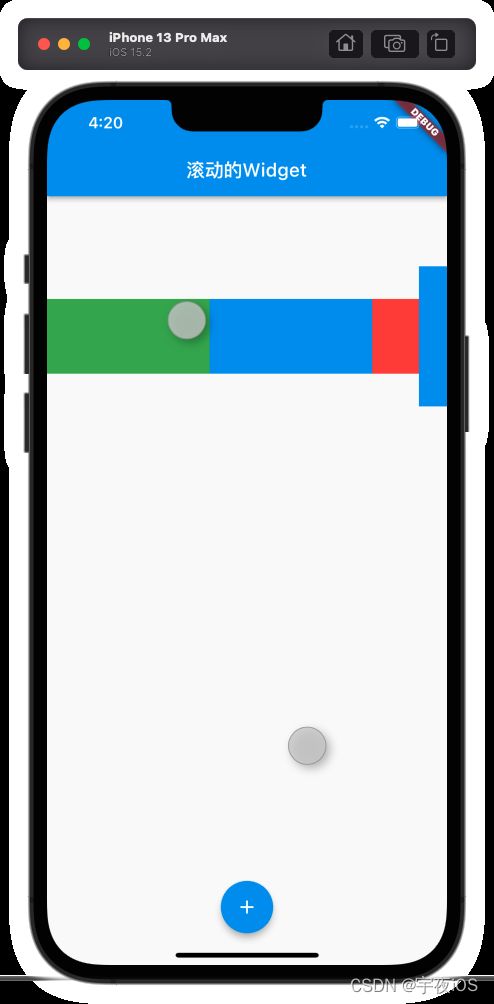
当我们创建出来的Widget超出屏幕时。如果不处理会出现一个警告
这时候可以使用我们的Expanded 进行一个收缩
10.2.1 未处理收缩情况
       Expanded(child:  Container(width: 120,height: 80,color: Colors.green)),
          Expanded(child: Container(width: 270,height: 80,color: Colors.blue)),
          Container(width: 50,height: 80,color: Colors.red),
          Container(width: 30,height: 150,color: Colors.blue)
10.2.2 处理收缩情况
11.Stack Widget
官方文档 : https://api.flutter.dev/flutter/vm_service/Stack-class.html
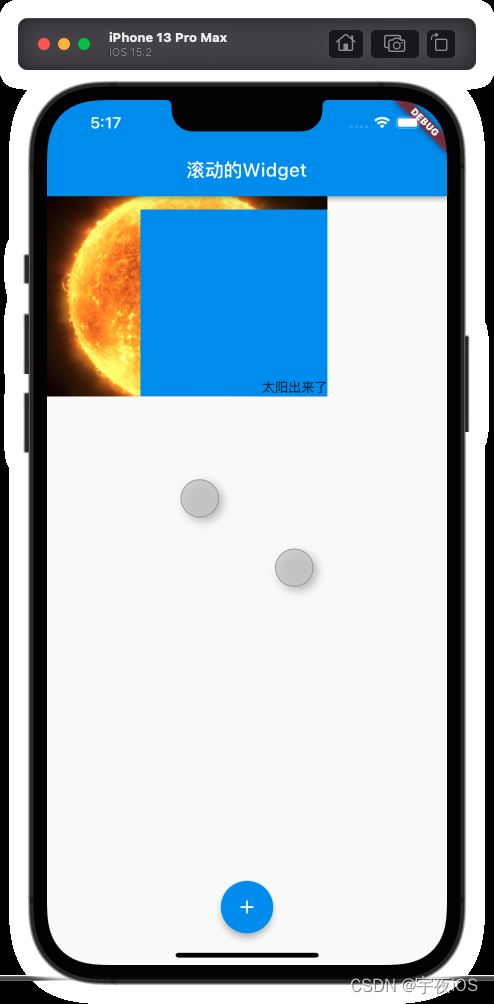
简介: Stack 默认的大小是包裹内容的
排布是从左上角开始排布的
  /**
     * Stack 默认的大小是包裹内容的
     * alignment : 从什么位置开始排布所有的子Widget
     * fit :  expand(很少用到) 将子元素拉伸尽可能大
     * overflow : 超出部分如何处理
     * */
     return Stack(
       alignment: AlignmentDirectional.bottomEnd,
       // fit: StackFit.expand,
       children: [
         //  BoxFit.cover 拉伸非常大
         Image.asset("assets/images/ty.jpeg",width: 300,fit: BoxFit.cover,),
         Container(width: 200,height: 200,color: Colors.blue),
         Text("太阳出来了")
       ],
     );
11.Stack Widget 效果图
12.Stack Positioned Widget
官方文档说明 : https://api.flutter.dev/flutter/widgets/Positioned-class.html
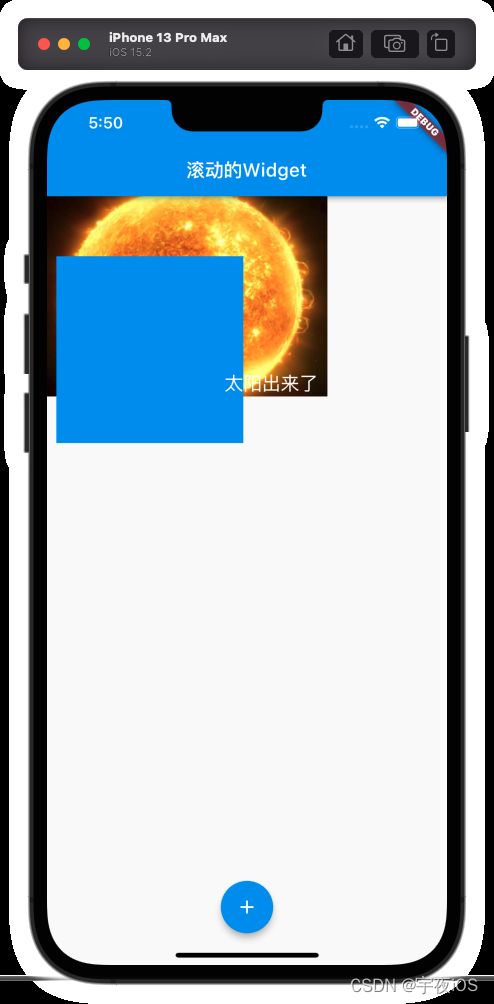
1.控制Stack的子级位置的小部件。
2.Positioned小部件必须是Stack的后代,并且从Positioned小部件到其封闭Stack的路径必须仅包含 StatelessWidget或StatefulWidget(而不是其他类型的小部件,如 RenderObjectWidget)。
作用是用来定位的
     return Stack(
       alignment: AlignmentDirectional.bottomEnd,
       overflow: Overflow.visible,
       // fit: StackFit.expand,
       children: [
         //  BoxFit.cover 拉伸非常大
         Image.asset("assets/images/ty.jpeg",width: 300,fit: BoxFit.cover,),
         Positioned(
           left: 10,
             bottom: -50,
             child: Container(width: 200,height: 200,color: Colors.blue)),
         Positioned(
           right: 10,
             child: Text("太阳出来了",style: TextStyle(fontSize: 20,color: Colors.white),)
         )
       ],
     );
12.Stack属性overflow 以及 Positioned使用的效果图
13.Stack Positioned 的注意点
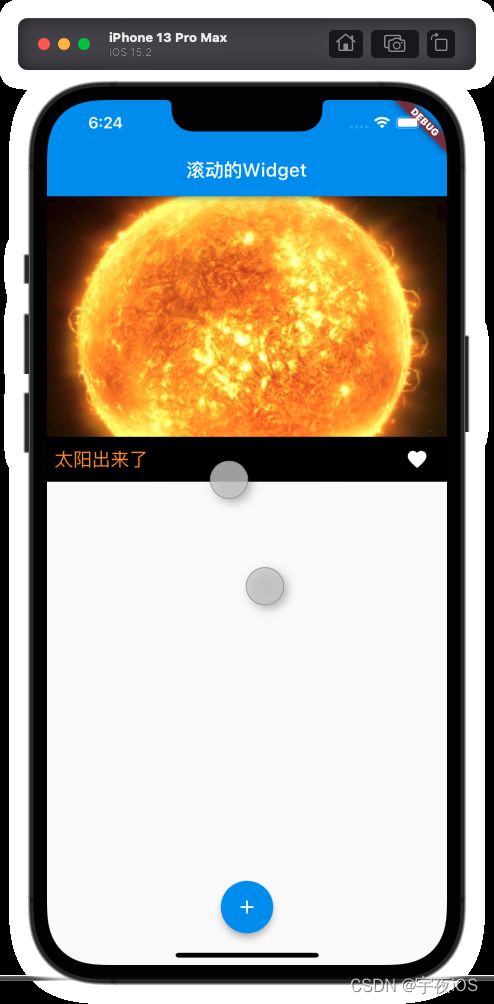
Positioned的子Widget自适应的情况下 必须能确定位置
13.1 使用 Positioned 将Text文本放到最底部
class PositionedWidget extends StatelessWidget {
  const PositionedWidget({
    Key? key,
  }) : super(key: key);

  @override
  Widget build(BuildContext context) {
    return Stack(
      children: [
        Image.asset("assets/images/gtr.png"),
        // 有文本设置了 width: double.infinity 并且外面使用Positioned 那么位置必须确定下来
        Positioned(
            left: 0,
            right: 0,
            bottom: 0,
            child: Container(
              padding: EdgeInsets.symmetric(horizontal: 8),
              // 使用到 double.infinity  必须设置能确定Container widget的位置
              // width: double.infinity,
              color: Color.fromARGB(255, 0, 0, 0),
              child: Row(
                mainAxisAlignment: MainAxisAlignment.spaceBetween,
                children: [
                  Text(
                    "太阳出来了",
                    style: TextStyle(fontSize: 20, color: Colors.orange),
                  ),
                  IconButton(
                    icon: Icon(Icons.favorite, color: Colors.white),
                    onPressed: () => print("点击了收藏"),
                  ),
                ],
              ),
            ))
      ],
    );
  }
}
13.1 效果图-使用 Positioned 将Text文本放到最底部
小贴士
格式化代码: command + option + l
