史上最简单的Spring Security总结——认证篇
转载自:https://www.jianshu.com/p/24c6a65c3913
Spring Security是一款强大的安全认证服务框架,它的原理就是在访问我们的系统前加了一系列的过滤器,可以称为过滤器链。它的两大核心就是认证和授权,本文主要描述的是认证篇,授权篇请看https://www.jianshu.com/p/cba56572fec5。那废话不多说,我用一个例子介绍怎么去用,然后基于源码分析他具体的实现过程。好吧那我们接下来就开始开车吧(新手司机,请坐稳!)
搭建工程
新建一个springboot工程,pom里添加springsecurity的依赖。
    org.springframework.boot
    spring-boot-starter-security
然后新建一个html页面,我这里建的是hello.html
SpringSecurity
登录页面
目录结构:

image.png
在SpringSecurityApplication里配置访问html的controller
@SpringBootApplication
@RestController
public class SpringSecurityApplication {

    public static void main(String[] args) {
        SpringApplication.run(SpringSecurityApplication.class, args);
    }
    @GetMapping("/hello")
    public String hello(){
        return "hello";
    }
}
然后访问http://localhost:8080/hello会出现如下的身份验证框

image.png
这就是springsecurity加的默认的拦截,在不进行配置的情况下,默认拦截所有的请求。那在实际中这种默认配置肯定满足不了我们的业务需求,所以我们需要根据自己业务来进行一些配置。接下来我就模拟一个表单登录的例子。
新建一个配置类MySecurityConfig,这个类需要继承WebSecurityConfigurerAdapter,然后重写他的configure方法,代码如下
@Configuration
public class MySecurityConfig extends WebSecurityConfigurerAdapter {
    @Override
    protected void configure(HttpSecurity http) throws Exception {
        http.formLogin()
                .and()
                .authorizeRequests()
                .anyRequest()
                .authenticated();
    }
}
接下来我们在启动项目访问http://localhost:8080/user,可以看到springsecurity会给我们跳到一个路径是http://localhost:8080/login的页面,如下
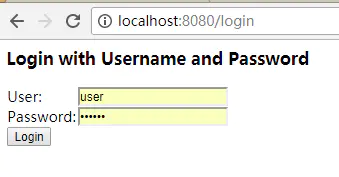
image.png
自定义认证逻辑
这个页面是springsecurity默认的一个登录页面,我们可以配置自己的登录页面,以及自己的校验逻辑。配置自己的登录页面需要在配置类MySecurityConfig中指定登录页面,如下
@Configuration
public class MySecurityConfig extends WebSecurityConfigurerAdapter {
    @Override
    protected void configure(HttpSecurity http) throws Exception {
//        http.httpBasic()
        http.authorizeRequests()
                .antMatchers("/hello.html")
                .permitAll()//注意这里hello.html需要配置成不需要身份认证,否则会报重定向次数过多
                .and()
                .formLogin()
                .loginPage("/hello.html")//指定我们自己的登录页面
                .loginProcessingUrl("/admin/login")//指定让UsernamePasswordAuthenticationFilter拦截器拦截的路径
                .defaultSuccessUrl("/index")//默认登录成功后跳转的页面
                .and()
                .authorizeRequests()
                .anyRequest()
                .authenticated();
        http.csrf().disable();
        http.headers().frameOptions().sameOrigin();
    }
    @Bean
    public PasswordEncoder passwordEncoder(){
        return new BCryptPasswordEncoder();
    }
添加用户自己的处理逻辑,需要实现UserDetailsService接口
@Component
public class MyUserDetailService implements UserDetailsService {
    @Autowired
    private PasswordEncoder passwordEncoder;
    @Override
    public UserDetails loadUserByUsername(String name) throws UsernameNotFoundException {
        return new User(name,passwordEncoder.encode("123456"), AuthorityUtils.commaSeparatedStringToAuthorityList("admin"));
    }
}
这里实际项目应该是从数据库查询用户信息,然后封装在UserDetails里,这里用户信息我就写死在这里了。注意这里UserDetails是一个接口,这里我返回的是springsecurity里的一个User类,User类实现了UserDetail接口,实际项目中我们也可以自己写相应的UserDetials实现类处理自己的业务逻辑。
自定义登录成功处理
自定义登录成功处理需要实现AuthenticationSuccessHandler接口,AuthenticationSuccessHandler里面只有一个onAuthenticationSuccess方法,参数有个Authentication,我们可以拿到这个Authentication 然后自定义自己的处理逻辑。
public interface AuthenticationSuccessHandler {
    void onAuthenticationSuccess(HttpServletRequest var1, HttpServletResponse var2, Authentication var3) throws IOException, ServletException;
}
springsecurity里面也是有一个默认的成功处理类 SavedRequestAwareAuthenticationSuccessHandler
public class SavedRequestAwareAuthenticationSuccessHandler extends SimpleUrlAuthenticationSuccessHandler {
    protected final Log logger = LogFactory.getLog(this.getClass());
    private RequestCache requestCache = new HttpSessionRequestCache();

    public SavedRequestAwareAuthenticationSuccessHandler() {
    }

    public void onAuthenticationSuccess(HttpServletRequest request, HttpServletResponse response, Authentication authentication) throws ServletException, IOException {
        SavedRequest savedRequest = this.requestCache.getRequest(request, response);
        if (savedRequest == null) {
            super.onAuthenticationSuccess(request, response, authentication);
        } else {
            String targetUrlParameter = this.getTargetUrlParameter();
            if (!this.isAlwaysUseDefaultTargetUrl() && (targetUrlParameter == null || !StringUtils.hasText(request.getParameter(targetUrlParameter)))) {
                this.clearAuthenticationAttributes(request);
                String targetUrl = savedRequest.getRedirectUrl();
                this.logger.debug("Redirecting to DefaultSavedRequest Url: " + targetUrl);
                this.getRedirectStrategy().sendRedirect(request, response, targetUrl);
            } else {
                this.requestCache.removeRequest(request, response);
                super.onAuthenticationSuccess(request, response, authentication);
            }
        }
    }

    public void setRequestCache(RequestCache requestCache) {
        this.requestCache = requestCache;
    }
}
可以看到这里面主要就是重定向我们之前的请求页面。
自定义登录失败处理
自定以失败处理同样需要实现AuthenticationFailureHandler接口,里面有一个onAuthenticationFailure方法,不同的是参数是一个AuthenticationException
public interface AuthenticationFailureHandler {
    void onAuthenticationFailure(HttpServletRequest var1, HttpServletResponse var2, AuthenticationException var3) throws IOException, ServletException;
}
而springsecurity默认的登录失败处理类是SimpleUrlAuthenticationFailureHandler部分源码如下:
 public void onAuthenticationFailure(HttpServletRequest request, HttpServletResponse response, AuthenticationException exception) throws IOException, ServletException {
        if (this.defaultFailureUrl == null) {
            this.logger.debug("No failure URL set, sending 401 Unauthorized error");
            response.sendError(401, "Authentication Failed: " + exception.getMessage());
        } else {
            this.saveException(request, exception);
            if (this.forwardToDestination) {
                this.logger.debug("Forwarding to " + this.defaultFailureUrl);
                request.getRequestDispatcher(this.defaultFailureUrl).forward(request, response);
            } else {
                this.logger.debug("Redirecting to " + this.defaultFailureUrl);
                this.redirectStrategy.sendRedirect(request, response, this.defaultFailureUrl);
            }
        }

    }
可以看挑战到一个错误页面。
认证源码解析
到这里已经简单的实现了表单登录的功能,我们来分析一下源码,首先,点击登录,会进入UsernamePasswordAuthenticationFilter类,源码如下
public class UsernamePasswordAuthenticationFilter extends AbstractAuthenticationProcessingFilter {
    public static final String SPRING_SECURITY_FORM_USERNAME_KEY = "username";
    public static final String SPRING_SECURITY_FORM_PASSWORD_KEY = "password";
    private String usernameParameter = "username";
    private String passwordParameter = "password";
    private boolean postOnly = true;

    public UsernamePasswordAuthenticationFilter() {
        super(new AntPathRequestMatcher("/login", "POST"));
    }

    public Authentication attemptAuthentication(HttpServletRequest request, HttpServletResponse response) throws AuthenticationException {
        if (this.postOnly && !request.getMethod().equals("POST")) {
            throw new AuthenticationServiceException("Authentication method not supported: " + request.getMethod());
        } else {
            String username = this.obtainUsername(request);
            String password = this.obtainPassword(request);
            if (username == null) {
                username = "";
            }

            if (password == null) {
                password = "";
            }

            username = username.trim();
            //--------注释1----------
            UsernamePasswordAuthenticationToken authRequest = new UsernamePasswordAuthenticationToken(username, password);
            this.setDetails(request, authRequest);
            //-------注释2----------
            return this.getAuthenticationManager().authenticate(authRequest);
        }
    }

    protected String obtainPassword(HttpServletRequest request) {
        return request.getParameter(this.passwordParameter);
    }

    protected String obtainUsername(HttpServletRequest request) {
        return request.getParameter(this.usernameParameter);
    }

    protected void setDetails(HttpServletRequest request, UsernamePasswordAuthenticationToken authRequest) {
        authRequest.setDetails(this.authenticationDetailsSource.buildDetails(request));
    }

    public void setUsernameParameter(String usernameParameter) {
        Assert.hasText(usernameParameter, "Username parameter must not be empty or null");
        this.usernameParameter = usernameParameter;
    }

    public void setPasswordParameter(String passwordParameter) {
        Assert.hasText(passwordParameter, "Password parameter must not be empty or null");
        this.passwordParameter = passwordParameter;
    }

    public void setPostOnly(boolean postOnly) {
        this.postOnly = postOnly;
    }

    public final String getUsernameParameter() {
        return this.usernameParameter;
    }

    public final String getPasswordParameter() {
        return this.passwordParameter;
    }
注释1处跟进到UsernamePasswordAuthenticationToken
public class UsernamePasswordAuthenticationToken extends AbstractAuthenticationToken {
    private static final long serialVersionUID = 420L;
    private final Object principal;
    private Object credentials;

    public UsernamePasswordAuthenticationToken(Object principal, Object credentials) {
        super((Collection)null);//父类构造函数需要一组权限,此时还没有校验不知道权限,所以传的是null
        this.principal = principal;
        this.credentials = credentials;
        this.setAuthenticated(false);//这个构造器这里设为false,因为此时还不知道用户的权限
    }

    public UsernamePasswordAuthenticationToken(Object principal, Object credentials, Collection authorities) {
        super(authorities);
        this.principal = principal;
        this.credentials = credentials;
        super.setAuthenticated(true);
    }

    public Object getCredentials() {
        return this.credentials;
    }

    public Object getPrincipal() {
        return this.principal;
    }

    public void setAuthenticated(boolean isAuthenticated) throws IllegalArgumentException {
        if (isAuthenticated) {
            throw new IllegalArgumentException("Cannot set this token to trusted - use constructor which takes a GrantedAuthority list instead");
        } else {
            super.setAuthenticated(false);
        }
    }

    public void eraseCredentials() {
        super.eraseCredentials();
        this.credentials = null;
    }
}
跟进注释2处进入ProviderManager的authenticate方法,这个方法就是从一堆的AuthenticationProvider 中选择与当前匹配的AuthenticationProvider ,再去调authenticate方法,部分源码如下:
public Authentication authenticate(Authentication authentication) throws AuthenticationException {
        Class toTest = authentication.getClass();
        AuthenticationException lastException = null;
        Authentication result = null;
        boolean debug = logger.isDebugEnabled();
        Iterator var6 = this.getProviders().iterator();

        while(var6.hasNext()) {
            AuthenticationProvider provider = (AuthenticationProvider)var6.next();
            if (provider.supports(toTest)) {
                if (debug) {
                    logger.debug("Authentication attempt using " + provider.getClass().getName());
                }

                try {
                    result = provider.authenticate(authentication);//选出当前匹配的AuthenticationProvider调authenticate
                    if (result != null) {
                        this.copyDetails(authentication, result);
                        break;
                    }
                } catch (AccountStatusException var11) {
                    this.prepareException(var11, authentication);
                    throw var11;
                } catch (InternalAuthenticationServiceException var12) {
                    this.prepareException(var12, authentication);
                    throw var12;
                } catch (AuthenticationException var13) {
                    lastException = var13;
                }
            }
        }
进入到authenticate方法,这个方法先会去调我们之前自己写的MyUserDetailService实现类的loadUserByUsername方法,然后进行一系列的检查,包括用户名,密码,是否过期,是否锁定等等,部分源码如下:
public Authentication authenticate(Authentication authentication) throws AuthenticationException {
        Assert.isInstanceOf(UsernamePasswordAuthenticationToken.class, authentication, this.messages.getMessage("AbstractUserDetailsAuthenticationProvider.onlySupports", "Only UsernamePasswordAuthenticationToken is supported"));
        String username = authentication.getPrincipal() == null ? "NONE_PROVIDED" : authentication.getName();
        boolean cacheWasUsed = true;
        UserDetails user = this.userCache.getUserFromCache(username);
        if (user == null) {
            cacheWasUsed = false;

            try {
                user = this.retrieveUser(username, (UsernamePasswordAuthenticationToken)authentication);
            } catch (UsernameNotFoundException var6) {
                this.logger.debug("User '" + username + "' not found");
                if (this.hideUserNotFoundExceptions) {
                    throw new BadCredentialsException(this.messages.getMessage("AbstractUserDetailsAuthenticationProvider.badCredentials", "Bad credentials"));
                }

                throw var6;
            }

            Assert.notNull(user, "retrieveUser returned null - a violation of the interface contract");
        }

        try {
            this.preAuthenticationChecks.check(user);
            this.additionalAuthenticationChecks(user, (UsernamePasswordAuthenticationToken)authentication);
        } catch (AuthenticationException var7) {
            if (!cacheWasUsed) {
                throw var7;
            }

            cacheWasUsed = false;
            user = this.retrieveUser(username, (UsernamePasswordAuthenticationToken)authentication);
            this.preAuthenticationChecks.check(user);
            this.additionalAuthenticationChecks(user, (UsernamePasswordAuthenticationToken)authentication);
        }

        this.postAuthenticationChecks.check(user);
        if (!cacheWasUsed) {
            this.userCache.putUserInCache(user);
        }

        Object principalToReturn = user;
        if (this.forcePrincipalAsString) {
            principalToReturn = user.getUsername();
        }

        return this.createSuccessAuthentication(principalToReturn, authentication, user);
    }
最后进入createSuccessAuthentication方法,可以看到这里有重新new 了一个带权限的UsernamePasswordAuthenticationToken,这个构造器把Authenticated设置了true,也就是验证通过
protected Authentication createSuccessAuthentication(Object principal, Authentication authentication, UserDetails user) {
        UsernamePasswordAuthenticationToken result = new UsernamePasswordAuthenticationToken(principal, authentication.getCredentials(), this.authoritiesMapper.mapAuthorities(user.getAuthorities()));
        result.setDetails(authentication.getDetails());
        return result;
    }
到此认证流程结束最后回到AbstractAuthenticationProcessingFilter这个抽象类里的doFilter方法
 public void doFilter(ServletRequest req, ServletResponse res, FilterChain chain) throws IOException, ServletException {
        HttpServletRequest request = (HttpServletRequest)req;
        HttpServletResponse response = (HttpServletResponse)res;
        if (!this.requiresAuthentication(request, response)) {
            chain.doFilter(request, response);
        } else {
            if (this.logger.isDebugEnabled()) {
                this.logger.debug("Request is to process authentication");
            }

            Authentication authResult;
            try {
                authResult = this.attemptAuthentication(request, response);
                if (authResult == null) {
                    return;
                }

                this.sessionStrategy.onAuthentication(authResult, request, response);
            } catch (InternalAuthenticationServiceException var8) {
                this.logger.error("An internal error occurred while trying to authenticate the user.", var8);
                this.unsuccessfulAuthentication(request, response, var8);
                return;
            } catch (AuthenticationException var9) {
                this.unsuccessfulAuthentication(request, response, var9);
                return;
            }

            if (this.continueChainBeforeSuccessfulAuthentication) {
                chain.doFilter(request, response);
            }

            this.successfulAuthentication(request, response, chain, authResult);
        }
    }
这里面最后调了successfulAuthentication方法,部分源码如下:
    protected void successfulAuthentication(HttpServletRequest request, HttpServletResponse response, FilterChain chain, Authentication authResult) throws IOException, ServletException {
        if (this.logger.isDebugEnabled()) {
            this.logger.debug("Authentication success. Updating SecurityContextHolder to contain: " + authResult);
        }

        SecurityContextHolder.getContext().setAuthentication(authResult);
        this.rememberMeServices.loginSuccess(request, response, authResult);
        if (this.eventPublisher != null) {
            this.eventPublisher.publishEvent(new InteractiveAuthenticationSuccessEvent(authResult, this.getClass()));
        }

        this.successHandler.onAuthenticationSuccess(request, response, authResult);
    }
这里就是在调我们自己写的登陆成功处理器了。
这系列流程可以总结如下的流程图:

image.png
接着看上面successfulAuthentication方法的源码里有这样一句
SecurityContextHolder.getContext().setAuthentication(authResult);
这里把我们认证的Authentication放到了SecurityContextHolder里。而springsecurity在所有拦截器链的最前端有个叫
SecurityContextPersistenceFilter这样的一个拦截器,源码如下:
 public void doFilter(ServletRequest req, ServletResponse res, FilterChain chain) throws IOException, ServletException {
        HttpServletRequest request = (HttpServletRequest)req;
        HttpServletResponse response = (HttpServletResponse)res;
        if (request.getAttribute("__spring_security_scpf_applied") != null) {
            chain.doFilter(request, response);
        } else {
            boolean debug = this.logger.isDebugEnabled();
            request.setAttribute("__spring_security_scpf_applied", Boolean.TRUE);
            if (this.forceEagerSessionCreation) {
                HttpSession session = request.getSession();
                if (debug && session.isNew()) {
                    this.logger.debug("Eagerly created session: " + session.getId());
                }
            }

            HttpRequestResponseHolder holder = new HttpRequestResponseHolder(request, response);
            SecurityContext contextBeforeChainExecution = this.repo.loadContext(holder);
            boolean var13 = false;

            try {
                var13 = true;
                SecurityContextHolder.setContext(contextBeforeChainExecution);
                chain.doFilter(holder.getRequest(), holder.getResponse());
                var13 = false;
            } finally {
                if (var13) {
                    SecurityContext contextAfterChainExecution = SecurityContextHolder.getContext();
                    SecurityContextHolder.clearContext();
                    this.repo.saveContext(contextAfterChainExecution, holder.getRequest(), holder.getResponse());
                    request.removeAttribute("__spring_security_scpf_applied");
                    if (debug) {
                        this.logger.debug("SecurityContextHolder now cleared, as request processing completed");
                    }

                }
            }

            SecurityContext contextAfterChainExecution = SecurityContextHolder.getContext();
            SecurityContextHolder.clearContext();
            this.repo.saveContext(contextAfterChainExecution, holder.getRequest(), holder.getResponse());
            request.removeAttribute("__spring_security_scpf_applied");
            if (debug) {
                this.logger.debug("SecurityContextHolder now cleared, as request processing completed");
            }

        }
    }
这个拦截器的作用是每次请求进来先去session里拿SecurityContext放到SecurityContextHolder里,这样在程序任何地方我们都能通过SecurityContextHolder拿到相应的Authentication,从而保证认证信息的共享问题。
获取认证信息可以在controller中这样写:
@GetMapping("/authentication")
    public Object getCurrentUser(@AuthenticationPrincipal UserDetails user) {
        return user;
    }
转载自:https://www.jianshu.com/p/24c6a65c3913