本人配置:window10+GTX 1650+tensorflow-gpu 1.14+keras-gpu 2.2.5+python 3.6,亲测可行
一.Anaconda安装
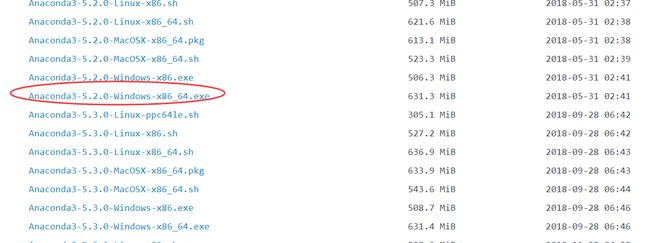
直接到清华镜像网站下载(什么版本都可以):https://mirrors.tuna.tsinghua.edu.cn/anaconda/archive/
这是我下载的版本,自带python版本为3.6
下载后直接安装即可,可参考:https://www.cnblogs.com/maxiaodoubao/p/9854595.html
二.建立开发环境
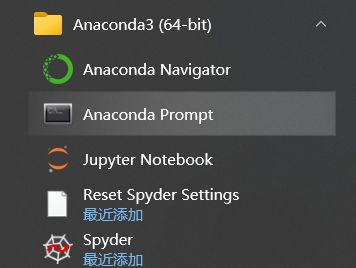
1.打开Prompt
点击开始,选择Anaconda Prompt(anaconda3)
2.更换conda源
conda config --add channels https://mirrors.tuna.tsinghua.edu.cn/anaconda/pkgs/free/
conda config --add channels https://mirrors.tuna.tsinghua.edu.cn/anaconda/pkgs/main/
conda config --append channels https://mirrors.tuna.tsinghua.edu.cn/anaconda/cloud/pytorch/
conda config --set show_channel_urls yes
按照这么写的话,后续创建环境会报错:
所以直接打开.condarc文件,改为如下(将https改为http,去掉了default,末尾添加了/win-64/):
ssl_verify: true
show_channel_urls: true
channels:
  - http://mirrors.tuna.tsinghua.edu.cn/anaconda/pkgs/main/win-64/
  - http://mirrors.tuna.tsinghua.edu.cn/anaconda/pkgs/free/win-64/
  - http://mirrors.tuna.tsinghua.edu.cn/anaconda/cloud/pytorch/win-64/
3.创建虚拟环境
创建一个名为tensorflow ,python版本为3.6的虚拟环境
conda create -n tensorflow python=3.6
查看虚拟环境
conda info -e
激活开发环境
activate tensorflow
三.安装tensorflow-gpu和keras-gpu
首先,这里有两种安装方式,一种是conda,一种是pip,conda下载较慢,但会自动安装适合的CUDA和CuDnn,pip安装快,但是需要手动安装CUDA和CuDnn,这里重点介绍pip安装方式
1.conda安装
输入命令,需要下载一些包,直到done,自动下载了gpu,直接可以使用,比较方便和简单
conda install tensorflow-gpu==xxx.xxx.xx你想要的版本号
本人一开始使用这种方法,结果在下载时经常卡住,中断,主要还是因为网络问题,需要多试几次,可以安装成功,因此需要使用国内镜像,但是使用镜像后,依然安装不成功,所以放弃了这种方法。
2.pip安装(有很多坑)
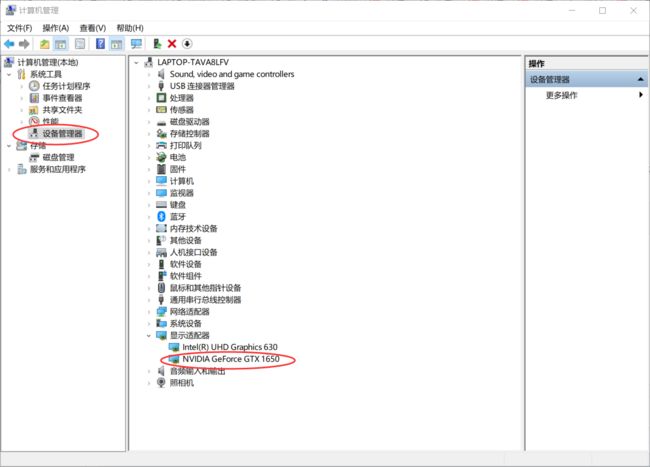
(1)打开计算机管理
点击查看gpu算力:CUDA GPUs | NVIDIA Developer
算力高于3.1就行,就可以跑深度程序。
(2)打开NVIDIV控制面板
可以看到最大支持CUDA版本是11.4,只要下载的版本没有超过最大值即可。
(3)安装CUDA
CUDA下载地址:CUDA Toolkit Archive | NVIDIA Developer (亲测,官网下载不慢)
注意:cuda和cudnn安装要注意版本搭配,以及和python版本的搭配,然后根据自己的需要安装
以下是我的下载
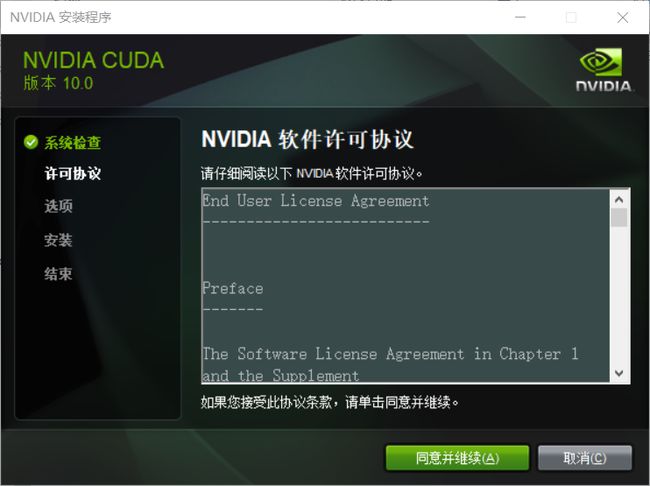
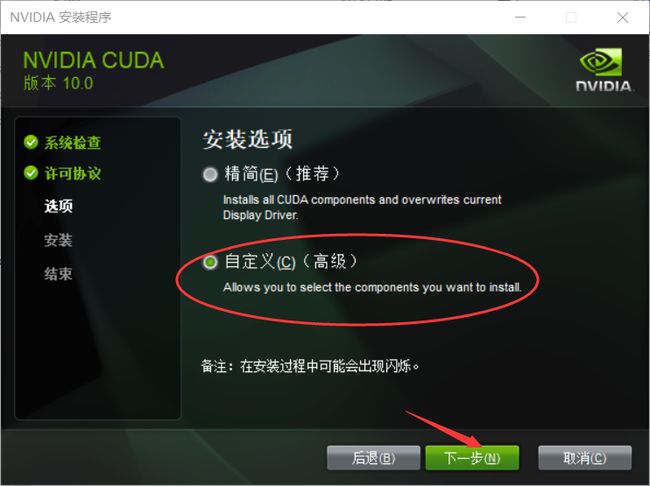
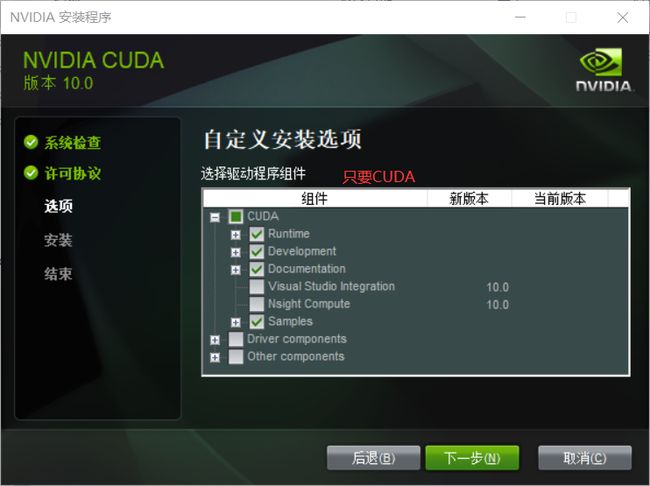
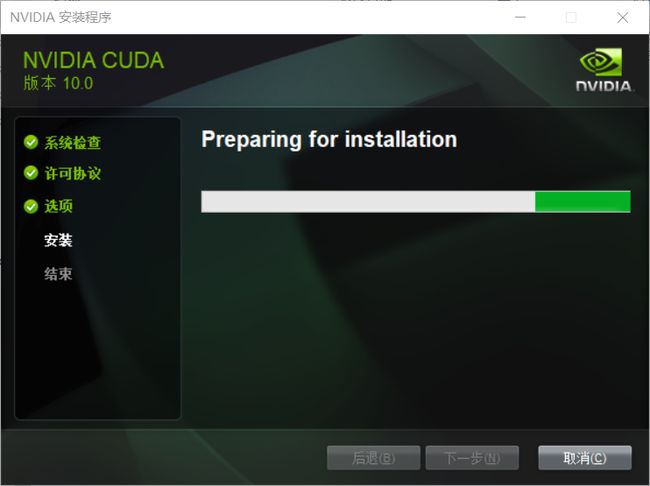
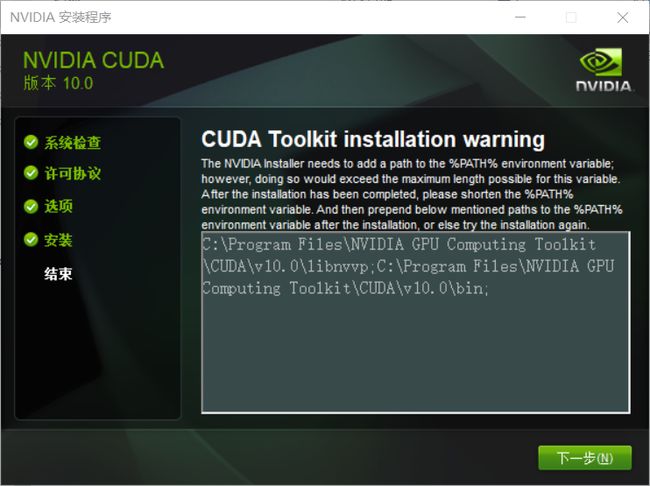
下载之后:按照步骤安装
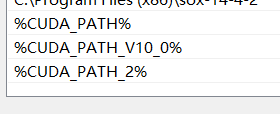
配置环境变量:
C:\Program Files\NVIDIA GPU Computing Toolkit\CUDA\v10.0\bin
C:\Program Files\NVIDIA GPU Computing Toolkit\CUDA\v10.0\extras\CUPTI\libx64
C:\Program Files\NVIDIA GPU Computing Toolkit\CUDA\v10.0\libnvvp
不要直接在path里面配置,会显示太大
(4)安装cuDNN:
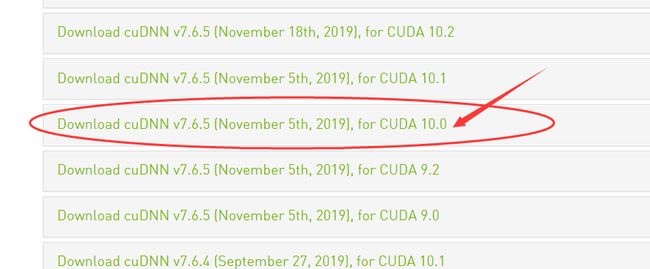
cuDNN下载地址:cuDNN Archive | NVIDIA Developer(亲测,官网下载不慢)
注意:cuDNN要跟CUDA版本搭配好,不能随便下载
安装时,可能需要注册NVIDIA账户,花一点时间注册一下即可下载。
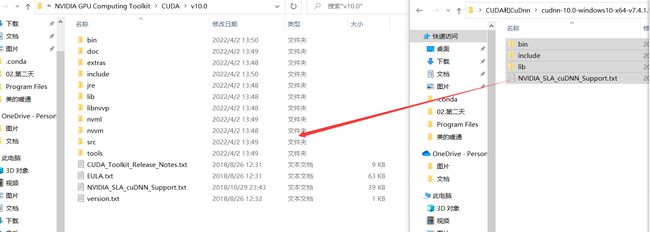
下载完后,将文件解压,将里面的文件全部导入到CUDA/v10.0路径下。
(5)安装tensorflow-gpu和keras-gpu
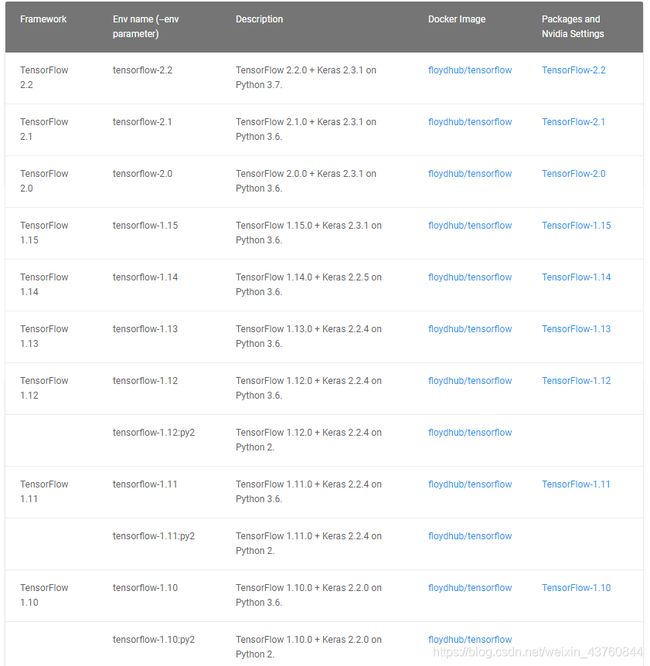
可以对照表格安装对应版本tensorflow和keras
pip install tensorflow-gpu==1.14.0 -i https://pypi.tuna.tsinghua.edu.cn/simple
pip install keras-gpu==2.2.5 -i https://pypi.tuna.tsinghua.edu.cn/simple
(6)安装其他库
pip install -i https://pypi.doubanio.com/simple/ opencv-python
pip install -i https://pypi.doubanio.com/simple/ pillow
pip install -i https://pypi.doubanio.com/simple/ matplotlib
pip install -i https://pypi.doubanio.com/simple/ sklearn
四.测试是否使用了GPU
进入python编译环境,输入一下代码,如果结果是True,表示GPU可用
import tensorflow as tf
print(tf.test.is_gpu_available())
若为True,使用命令查看gpu是否在运行
nvidia-smi
五.jupyter使用虚拟环境
其实使用虚拟环境非常简单,只需要安装一个nb_conda包就可以直接使用了
conda install nb_conda
在你的新环境上安装ipykernel,重启jupyter之后就可以用了
conda install -n tensorflow ipykernel
正好可以测试tensorflow和keras是否在GPU上运行
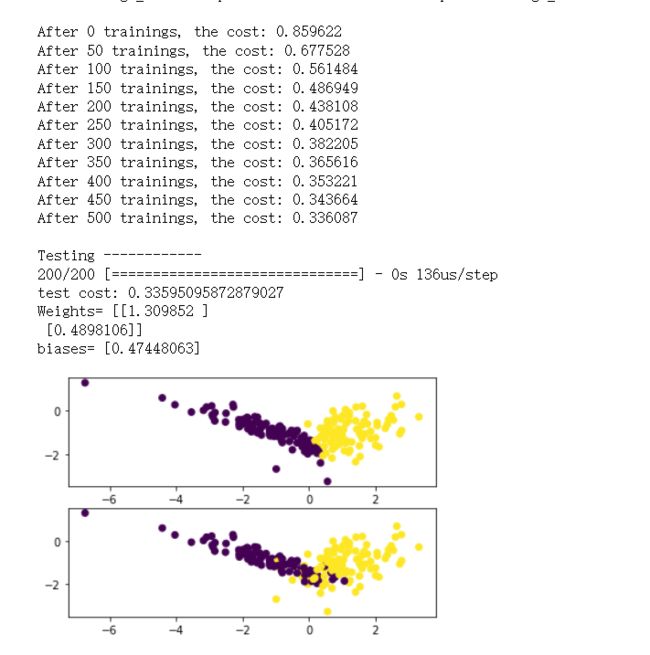
来段代码测试一下:
import numpy as np

from keras.models import Sequential
from keras.layers import Dense, Dropout, Activation, Flatten
import matplotlib.pyplot as plt
from sklearn import datasets

# 样本数据集,两个特征列,两个分类二分类不需要onehot编码,直接将类别转换为0和1,分别代表正样本的概率。
X,y=datasets.make_classification(n_samples=200, n_features=2, n_informative=2, n_redundant=0,n_repeated=0, n_classes=2, n_clusters_per_class=1)

# 构建神经网络模型
model = Sequential()
model.add(Dense(input_dim=2, units=1))
model.add(Activation('sigmoid'))

# 选定loss函数和优化器
model.compile(loss='binary_crossentropy', optimizer='sgd')

# 训练过程
print('Training -----------')
for step in range(501):
    cost = model.train_on_batch(X, y)
    if step % 50 == 0:
        print("After %d trainings, the cost: %f" % (step, cost))

# 测试过程
print('\nTesting ------------')
cost = model.evaluate(X, y, batch_size=40)
print('test cost:', cost)
W, b = model.layers[0].get_weights()
print('Weights=', W, '\nbiases=', b)

# 将训练结果绘出
Y_pred = model.predict(X)
Y_pred = (Y_pred*2).astype('int')  # 将概率转化为类标号,概率在0-0.5时,转为0,概率在0.5-1时转为1
# 绘制散点图 参数:x横轴 y纵轴
plt.subplot(2,1,1).scatter(X[:,0], X[:,1], c=Y_pred[:,0])
plt.subplot(2,1,2).scatter(X[:,0], X[:,1], c=y)
plt.show()
结果:
到此说明已经彻底成功安装上tensorflow和keras了
七.可能的问题
1.安装1.14.0版本的tensorflow后,运行时出现了错误
Using TensorFlow backend.
D:\tools\_virtualenv_dir\myproject_2_quchumasaike\env2_py36_quchumasaike\lib\site-packages\tensorflow\python\framework\dtypes.py:516: FutureWarning: Passing (type, 1) or '1type' as a synonym of type is deprecated; in a future version of numpy, it will be understood as (type, (1,)) / '(1,)type'.
  _np_qint8 = np.dtype([("qint8", np.int8, 1)])
D:\tools\_virtualenv_dir\myproject_2_quchumasaike\env2_py36_quchumasaike\lib\site-packages\tensorflow\python\framework\dtypes.py:517: FutureWarning: Passing (type, 1) or '1type' as a synonym of type is deprecated; in a future version of numpy, it will be understood as (type, (1,)) / '(1,)type'.
  _np_quint8 = np.dtype([("quint8", np.uint8, 1)])
D:\tools\_virtualenv_dir\myproject_2_quchumasaike\env2_py36_quchumasaike\lib\site-packages\tensorflow\python\framework\dtypes.py:518: FutureWarning: Passing (type, 1) or '1type' as a synonym of type is deprecated; in a future version of numpy, it will be understood as (type, (1,)) / '(1,)type'.
  _np_qint16 = np.dtype([("qint16", np.int16, 1)])
D:\tools\_virtualenv_dir\myproject_2_quchumasaike\env2_py36_quchumasaike\lib\site-packages\tensorflow\python\framework\dtypes.py:519: FutureWarning: Passing (type, 1) or '1type' as a synonym of type is deprecated; in a future version of numpy, it will be understood as (type, (1,)) / '(1,)type'.
  _np_quint16 = np.dtype([("quint16", np.uint16, 1)])
D:\tools\_virtualenv_dir\myproject_2_quchumasaike\env2_py36_quchumasaike\lib\site-packages\tensorflow\python\framework\dtypes.py:520: FutureWarning: Passing (type, 1) or '1type' as a synonym of type is deprecated; in a future version of numpy, it will be understood as (type, (1,)) / '(1,)type'.
  _np_qint32 = np.dtype([("qint32", np.int32, 1)])
D:\tools\_virtualenv_dir\myproject_2_quchumasaike\env2_py36_quchumasaike\lib\site-packages\tensorflow\python\framework\dtypes.py:525: FutureWarning: Passing (type, 1) or '1type' as a synonym of type is deprecated; in a future version of numpy, it will be understood as (type, (1,)) / '(1,)type'.
  np_resource = np.dtype([("resource", np.ubyte, 1)])
D:\tools\_virtualenv_dir\myproject_2_quchumasaike\env2_py36_quchumasaike\lib\site-packages\tensorboard\compat\tensorflow_stub\dtypes.py:541: FutureWarning: Passing (type, 1) or '1type' as a synonym of type is deprecated; in a future version of numpy, it will be understood as (type, (1,)) / '(1,)type'.
  _np_qint8 = np.dtype([("qint8", np.int8, 1)])
D:\tools\_virtualenv_dir\myproject_2_quchumasaike\env2_py36_quchumasaike\lib\site-packages\tensorboard\compat\tensorflow_stub\dtypes.py:542: FutureWarning: Passing (type, 1) or '1type' as a synonym of type is deprecated; in a future version of numpy, it will be understood as (type, (1,)) / '(1,)type'.
  _np_quint8 = np.dtype([("quint8", np.uint8, 1)])
D:\tools\_virtualenv_dir\myproject_2_quchumasaike\env2_py36_quchumasaike\lib\site-packages\tensorboard\compat\tensorflow_stub\dtypes.py:543: FutureWarning: Passing (type, 1) or '1type' as a synonym of type is deprecated; in a future version of numpy, it will be understood as (type, (1,)) / '(1,)type'.
  _np_qint16 = np.dtype([("qint16", np.int16, 1)])
D:\tools\_virtualenv_dir\myproject_2_quchumasaike\env2_py36_quchumasaike\lib\site-packages\tensorboard\compat\tensorflow_stub\dtypes.py:544: FutureWarning: Passing (type, 1) or '1type' as a synonym of type is deprecated; in a future version of numpy, it will be understood as (type, (1,)) / '(1,)type'.
  _np_quint16 = np.dtype([("quint16", np.uint16, 1)])
D:\tools\_virtualenv_dir\myproject_2_quchumasaike\env2_py36_quchumasaike\lib\site-packages\tensorboard\compat\tensorflow_stub\dtypes.py:545: FutureWarning: Passing (type, 1) or '1type' as a synonym of type is deprecated; in a future version of numpy, it will be understood as (type, (1,)) / '(1,)type'.
  _np_qint32 = np.dtype([("qint32", np.int32, 1)])
D:\tools\_virtualenv_dir\myproject_2_quchumasaike\env2_py36_quchumasaike\lib\site-packages\tensorboard\compat\tensorflow_stub\dtypes.py:550: FutureWarning: Passing (type, 1) or '1type' as a synonym of type is deprecated; in a future version of numpy, it will be understood as (type, (1,)) / '(1,)type'.
  np_resource = np.dtype([("resource", np.ubyte, 1)])
解决方法:
这个问题意思就是numpy的版本过低或者过高都会出现警告,只需要先卸载重新指定版本的numpy即可解决此问题
pip uninstall numpy
pip install numpy==1.16.4
2.anaconda卸载不干净:
解决办法:
(1)执行命令
conda config --remove-key channels
conda install anaconda-clean
anaconda-clean --yes
(2)运行安装目录下的 Uninstall-Anaconda3.exe 程序即可,这样就成功地将anaconda完全卸载干净了
3.利用镜像安装tensorflow-gpu
pip install -i https://pypi.tuna.tsinghua.edu.cn/simple tensorflow-gpu
4.高版本可能出现错误:AttributeError: module ‘tensorflow_core._api.v2.config’ has no attribute ‘experimental_list_devices’
解决方法:解决module ‘tensorflow_core._api.v2.config‘ has no attribute ‘experimental_list_devices‘_sinysama的博客 (亲测有效)
八.网盘下载
1.anaconda下载(5.2.0和5.3.1):
链接:https://pan.baidu.com/s/1-iw1hjfL2u4CumCW0b0Zvg
提取码:hort
2.cuDNN和CUDA下载(10.0,10.1,11.4):
链接:https://pan.baidu.com/s/1-06nzKI8CrlWOsKfeuY3Gw
提取码:8v05
参考文章:
FutureWarning: Passing (type, 1) or '1type' as a synonym of type is deprecated; in a future version
如何完全卸载Anaconda(如何下载Anaconda-Clean package)_托马斯-酷涛的博客
利用镜像安装tensorflow_不知方向的鸵鸟的博客
怎么查看keras 或者 tensorflow 正在使用的GPU_Thinker_and_FKer的博客
Jupyter Notebook运行指定的conda虚拟环境_我是天才很好的博客
Anaconda镜像安装tensorflow-gpu1.14及Keras超详细版_Xnion的博客
win10完整Tensorflow-GPU环境搭建教程-附CUDA+cuDNN安装过程_尤利乌斯.X的博客
cuda安装教程+cudnn安装教程_hw@c14h10的博客
tensorflow版本对应关系_蠕动的爬虫的博客
