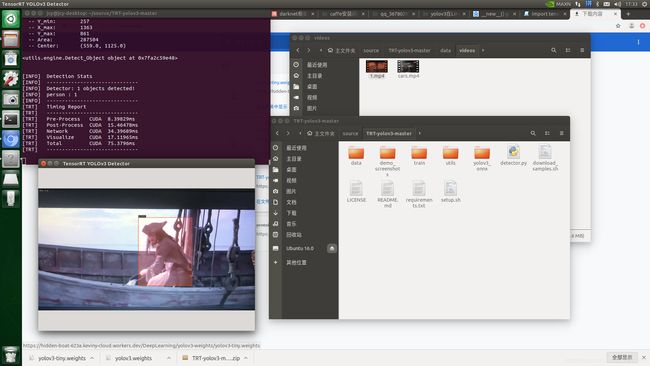
yolov3在Linux主机端和jetson nano开发板上的部署,使用,以及tensorrt加速yolov3-tiny
Linux 主机端上
darknet识别
图片识别:./darknet detect cfg/yolov3.cfg yolov3.weights data/dog.jpg
视频识别:./darknet detector demo cfg/coco.data cfg/yolov3.cfg yolov3.weights /home/jetbot/source/2.MP4(视频路径自行替换)
相机识别:./darknet detector demo cfg/coco.data cfg/yolov3.cfg yolov3.weights
使用opencv的dnn模块调用yolov3模型
在python中使用opencv的dnn模块调用yolov3模型识别:
代码:
import numpy as np
import cv2 as cv
import os
import time

def yolo_class(img):
    yolo_dir = '/home/jcy/darknet/'          #自行更改路径
    weightsPath =yolo_dir+'yolov3.weights'
    configPath = yolo_dir+ 'cfg/yolov3.cfg'
    labelsPath = yolo_dir+ 'data/coco.names'
    THRESHOLD = 0.4
    CONFIDENCE = 0.5
    net = cv.dnn.readNetFromDarknet(configPath, weightsPath)
    blobImg = cv.dnn.blobFromImage(img, 1.0/255.0, (416, 416), None, True, False)
    net.setInput(blobImg)
    outInfo = net.getUnconnectedOutLayersNames()
    start = time.time()
    layerOutputs = net.forward(outInfo)
    (H, W) = img.shape[:2]
    boxes = []
    confidences = []
    classIDs = []
    for out in layerOutputs:
        for detection in out:
            scores = detection[5:]
            classID = np.argmax(scores)
            confidence = scores[classID]
            if confidence > CONFIDENCE:
                box = detection[0:4] * np.array([W, H, W, H])
                (centerX, centerY, width, height) = box.astype("int")
                x = int(centerX - (width / 2))
                y = int(centerY - (height / 2))
                boxes.append([x, y, int(width), int(height)])
                confidences.append(float(confidence))
                classIDs.append(classID)
    idxs = cv.dnn.NMSBoxes(boxes, confidences, CONFIDENCE, THRESHOLD)
    with open(labelsPath, 'rt') as f:
        labels = f.read().rstrip('\n').split('\n')
    np.random.seed(42)
    COLORS = np.random.randint(0, 255, size=(len(labels), 3), dtype="uint8")
    if len(idxs) > 0:
        for i in idxs.flatten():
            (x, y) = (boxes[i][0], boxes[i][1])
            (w, h) = (boxes[i][2], boxes[i][3])
            color = [int(c) for c in COLORS[classIDs[i]]]
            cv.rectangle(img, (x, y), (x+w, y+h), color, 2)
            text = "{}: {:.4f}".format(labels[classIDs[i]], confidences[i])
            cv.putText(img, text, (x, y-5), cv.FONT_HERSHEY_SIMPLEX, 0.5, color, 2)
    cv.imshow('detected image', img)
    cv.waitKey(1)
(代码参考自:https://www.cnblogs.com/hesse-summer/p/11335865.html做了一些修改,核心代码原文章中代码都有注解,这里不做过多解释)
识别图片:
#把yolo_class最后的cv.waitKey(1)改成cv.waitKey(0)
image_path='a.jpg'
img=cv.imread(image_path)
yolo_class(img)
视频:
video_path = 'a.mp4'
cap = cv.VideoCapture(video_path)
while(True):
    ret, frame = cap.read()
    yolo_class(frame)
    if not ret:
        break
cv.destroyAllWindows()
相机拍摄:
cap = cv.VideoCapture(1)
while(True):
    ret, frame = cap.read()
    yolo_class(frame)
    if cv2.waitKey(100) & 0xff == ord('q'):
        break
cap.release()
cv.destroyAllWindows()
似乎也可以用os.system()来运行 darknet 。
在python中使用opencv的dnn模块调用模型来一帧一帧识别视频时,可以感受到明显的卡顿,看到网上有一些代码是等所有帧都是别完以后再播放出来,但是这样做开始会等待很长时间。
我之后在代码之间加入了time.time(),来查看关键性的代码的执行时间,每一帧的执行时间大概在0.3秒左右,而net.forward()这一句就占到了90%的时间。单步执行,发现net.forward()输出了一个多维数组,往后的代码正是将这个数组里的元素挨个取来,取出的元素正是指向后面的标签、置信度、画长方形的目标位置,这一句话是在根据模型预测这一帧的图像。想要加速这一步,是否得从算法上改进,或者想办法使用TensorRT来加速。后来我又想到了一个关键的问题,我使用nvidia-smi来查看GPU的使用,运行程序,发现GPU占用了150MB左右,不高不低,我产生了一个怀疑,这150MB的占用仅仅是用来显示视频图像的,而非在跑预测。所以我上网查了一下,发现opencv中dnn模块使用gpu加速是opencv4.2以上才支持的,才出来没多久。
寻找资料的时候发现了两篇不错的英文文章,都是讲述如何给opencv的dnn模块配置gpu的:
1、https://cuda-chen.github.io/image%20processing/programming/2020/02/22/build-opencv-dnn-module-with-nvidia-gpu-support-on-ubuntu-1804.html
2、https://www.pyimagesearch.com/2020/02/03/how-to-use-opencvs-dnn-module-with-nvidia-gpus-cuda-and-cudnn/
等我配置完成以后再添加到文章中。
Jetson nano 开发板上
注:以下是踩坑日志,记录了一些遇到的bug等,关于在jetson nano上的使用移步: https://blog.csdn.net/qq_36780295/article/details/108496746
jetnano上内存较小,只能使用简化版的yolov3-tiny,相应的准确度下降很多。与Linux主机上所有区别性的操作都是为了简化算法,减少内存的占用,tiny版的darknet和权重文件都要另外下载,配置时与yolov3一样,使用时加上tiny。
图片识别:./darknet detect cfg/yolov3-tiny.cfg yolov3-tiny.weights data/dog.jpg
视频识别:./darknet detector demo cfg/coco.data cfg/yolov3-tiny.cfg yolov3-tiny.weights /home/jetbot/source/2.MP4
相机识别:./darknet detector demo cfg/coco.data cfg/yolov3-tiny.cfg yolov3-tiny.weights(首先要已经安装好了相机模块)
(注:以下提供了两种Tensorrt加速yolo的方法,由于各种各样的问题,均未得到很好的解决,用以参考)
由于内存太小,即使使用了tiny版本,使用了GPU,视频识别时卡顿还是很严重,这里就需要用TensorRT来加速了。
TensorRT并不直接支持yolov3的模型,所以这里先将yolov3-tiny模型转换为onnx模型,然后再进行后续操作。
具体的流程为:
yolov3-tiny.weights —> model.onnx
model.onnx —> model.trt
TensorRT加速CNN部分,执行detection模块得到最终结果
生成的各种文件我会上传到资源和百度云盘上,最好还是自己一步一步把环境搭好最重要,上传的那些生成的文件除了用来测试,其他并没有任何意义,想要在实际运用中使用,还是要自行训练yolov3模型,然后一步一步转换。
将yolov3-tiny模型转换为onnx模型
新建 yolov3_to_onnx.py 。
代码如下:
# -*- coding:utf-8 -*-
from __future__ import print_function
from collections import OrderedDict
import hashlib
import os.path
import wget
import onnx #我装的1.4.1版本
from onnx import helper
from onnx import TensorProto
import numpy as np
import sys
class DarkNetParser(object):
"""Definition of a parser for DarkNet-based YOLOv3-608 (only tested for this topology)."""
def __init__(self, supported_layers):
"""Initializes a DarkNetParser object.
Keyword argument:
supported_layers -- a string list of supported layers in DarkNet naming convention,
parameters are only added to the class dictionary if a parsed layer is included.
"""
# A list of YOLOv3 layers containing dictionaries with all layer
# parameters:
self.layer_configs = OrderedDict()
self.supported_layers = supported_layers
self.layer_counter = 0
def parse_cfg_file(self, cfg_file_path):
"""Takes the yolov3.cfg file and parses it layer by layer,
appending each layer's parameters as a dictionary to layer_configs.
Keyword argument:
cfg_file_path -- path to the yolov3.cfg file as string
"""
with open(cfg_file_path, 'rb') as cfg_file:
remainder = cfg_file.read()
remainder = remainder.decode('utf-8')
print('remainder', remainder)
while remainder is not None:
layer_dict, layer_name, remainder = self._next_layer(remainder)
if layer_dict is not None:
self.layer_configs[layer_name] = layer_dict
return self.layer_configs
def _next_layer(self, remainder):
"""Takes in a string and segments it by looking for DarkNet delimiters.
Returns the layer parameters and the remaining string after the last delimiter.
Example for the first Conv layer in yolo.cfg ...
[convolutional]
batch_normalize=1
filters=32
size=3
stride=1
pad=1
activation=leaky
... becomes the following layer_dict return value:
{'activation': 'leaky', 'stride': 1, 'pad': 1, 'filters': 32,
'batch_normalize': 1, 'type': 'convolutional', 'size': 3}.
'001_convolutional' is returned as layer_name, and all lines that follow in yolo.cfg
are returned as the next remainder.
Keyword argument:
remainder -- a string with all raw text after the previously parsed layer
"""
remainder = remainder.split('[', 1)
if len(remainder) == 2:
remainder = remainder[1]
else:
return None, None, None
remainder = remainder.split(']', 1)
if len(remainder) == 2:
layer_type, remainder = remainder
else:
return None, None, None
if remainder.replace(' ', '')[0] == '#':
remainder = remainder.split('\n', 1)[1]
layer_param_block, remainder = remainder.split('\n\n', 1)
layer_param_lines = layer_param_block.split('\n')[1:]
layer_name = str(self.layer_counter).zfill(3) + '_' + layer_type
layer_dict = dict(type=layer_type)
if layer_type in self.supported_layers:
for param_line in layer_param_lines:
if param_line[0] == '#':
continue
param_type, param_value = self._parse_params(param_line)
layer_dict[param_type] = param_value
self.layer_counter += 1
return layer_dict, layer_name, remainder
def _parse_params(self, param_line):
"""Identifies the parameters contained in one of the cfg file and returns
them in the required format for each parameter type, e.g. as a list, an int or a float.
Keyword argument:
param_line -- one parsed line within a layer block
"""
param_line = param_line.replace(' ', '')
param_type, param_value_raw = param_line.split('=')
param_value = None
if param_type == 'layers':
layer_indexes = list()
for index in param_value_raw.split(','):
layer_indexes.append(int(index))
param_value = layer_indexes
elif isinstance(param_value_raw, str) and not param_value_raw.isalpha():
condition_param_value_positive = param_value_raw.isdigit()
condition_param_value_negative = param_value_raw[0] == '-' and \
param_value_raw[1:].isdigit()
if condition_param_value_positive or condition_param_value_negative:
param_value = int(param_value_raw)
else:
param_value = float(param_value_raw)
else:
param_value = str(param_value_raw)
return param_type, param_value
class MajorNodeSpecs(object):
"""Helper class used to store the names of ONNX output names,
corresponding to the output of a DarkNet layer and its output channels.
Some DarkNet layers are not created and there is no corresponding ONNX node,
but we still need to track them in order to set up skip connections.
"""
def __init__(self, name, channels):
""" Initialize a MajorNodeSpecs object.
Keyword arguments:
name -- name of the ONNX node
channels -- number of output channels of this node
"""
self.name = name
self.channels = channels
self.created_onnx_node = False
if name is not None and isinstance(channels, int) and channels > 0:
self.created_onnx_node = True
class ConvParams(object):
"""Helper class to store the hyper parameters of a Conv layer,
including its prefix name in the ONNX graph and the expected dimensions
of weights for convolution, bias, and batch normalization.
Additionally acts as a wrapper for generating safe names for all
weights, checking on feasible combinations.
"""
def __init__(self, node_name, batch_normalize, conv_weight_dims):
"""Constructor based on the base node name (e.g. 101_convolutional), the batch
normalization setting, and the convolutional weights shape.
Keyword arguments:
node_name -- base name of this YOLO convolutional layer
batch_normalize -- bool value if batch normalization is used
conv_weight_dims -- the dimensions of this layer's convolutional weights
"""
self.node_name = node_name
self.batch_normalize = batch_normalize
assert len(conv_weight_dims) == 4
self.conv_weight_dims = conv_weight_dims
def generate_param_name(self, param_category, suffix):
"""Generates a name based on two string inputs,
and checks if the combination is valid."""
assert suffix
assert param_category in ['bn', 'conv']
assert (suffix in ['scale', 'mean', 'var', 'weights', 'bias'])
if param_category == 'bn':
assert self.batch_normalize
assert suffix in ['scale', 'bias', 'mean', 'var']
elif param_category == 'conv':
assert suffix in ['weights', 'bias']
if suffix == 'bias':
assert not self.batch_normalize
param_name = self.node_name + '_' + param_category + '_' + suffix
return param_name
class UpsampleParams(object):
# Helper class to store the scale parameter for an Upsample node.
def __init__(self, node_name, value):
"""Constructor based on the base node name (e.g. 86_Upsample),
and the value of the scale input tensor.
Keyword arguments:
node_name -- base name of this YOLO Upsample layer
value -- the value of the scale input to the Upsample layer as a numpy array
"""
self.node_name = node_name
self.value = value
def generate_param_name(self):
"""Generates the scale parameter name for the Upsample node."""
param_name = self.node_name + '_' + "scale"
return param_name
class WeightLoader(object):
"""Helper class used for loading the serialized weights of a binary file stream
and returning the initializers and the input tensors required for populating
the ONNX graph with weights.
"""
def __init__(self, weights_file_path):
"""Initialized with a path to the YOLOv3 .weights file.
Keyword argument:
weights_file_path -- path to the weights file.
"""
self.weights_file = self._open_weights_file(weights_file_path)
def load_upsample_scales(self, upsample_params):
"""Returns the initializers with the value of the scale input
tensor given by upsample_params.
Keyword argument:
upsample_params -- a UpsampleParams object
"""
initializer = list()
inputs = list()
name = upsample_params.generate_param_name()
shape = upsample_params.value.shape
data = upsample_params.value
scale_init = helper.make_tensor(
name, TensorProto.FLOAT, shape, data)
scale_input = helper.make_tensor_value_info(
name, TensorProto.FLOAT, shape)
initializer.append(scale_init)
inputs.append(scale_input)
return initializer, inputs
def load_conv_weights(self, conv_params):
"""Returns the initializers with weights from the weights file and
the input tensors of a convolutional layer for all corresponding ONNX nodes.
Keyword argument:
conv_params -- a ConvParams object
"""
initializer = list()
inputs = list()
if conv_params.batch_normalize:
bias_init, bias_input = self._create_param_tensors(
conv_params, 'bn', 'bias')
bn_scale_init, bn_scale_input = self._create_param_tensors(
conv_params, 'bn', 'scale')
bn_mean_init, bn_mean_input = self._create_param_tensors(
conv_params, 'bn', 'mean')
bn_var_init, bn_var_input = self._create_param_tensors(
conv_params, 'bn', 'var')
initializer.extend(
[bn_scale_init, bias_init, bn_mean_init, bn_var_init])
inputs.extend([bn_scale_input, bias_input,
bn_mean_input, bn_var_input])
else:
bias_init, bias_input = self._create_param_tensors(
conv_params, 'conv', 'bias')
initializer.append(bias_init)
inputs.append(bias_input)
conv_init, conv_input = self._create_param_tensors(
conv_params, 'conv', 'weights')
initializer.append(conv_init)
inputs.append(conv_input)
return initializer, inputs
def _open_weights_file(self, weights_file_path):
"""Opens a YOLOv3 DarkNet file stream and skips the header.
Keyword argument:
weights_file_path -- path to the weights file.
"""
weights_file = open(weights_file_path, 'rb')
length_header = 5
np.ndarray(
shape=(length_header,), dtype='int32', buffer=weights_file.read(
length_header * 4))
return weights_file
def _create_param_tensors(self, conv_params, param_category, suffix):
"""Creates the initializers with weights from the weights file together with
the input tensors.
Keyword arguments:
conv_params -- a ConvParams object
param_category -- the category of parameters to be created ('bn' or 'conv')
suffix -- a string determining the sub-type of above param_category (e.g.,
'weights' or 'bias')
"""
param_name, param_data, param_data_shape = self._load_one_param_type(
conv_params, param_category, suffix)
initializer_tensor = helper.make_tensor(
param_name, TensorProto.FLOAT, param_data_shape, param_data)
input_tensor = helper.make_tensor_value_info(
param_name, TensorProto.FLOAT, param_data_shape)
return initializer_tensor, input_tensor
def _load_one_param_type(self, conv_params, param_category, suffix):
"""Deserializes the weights from a file stream in the DarkNet order.
Keyword arguments:
conv_params -- a ConvParams object
param_category -- the category of parameters to be created ('bn' or 'conv')
suffix -- a string determining the sub-type of above param_category (e.g.,
'weights' or 'bias')
"""
param_name = conv_params.generate_param_name(param_category, suffix)
channels_out, channels_in, filter_h, filter_w = conv_params.conv_weight_dims
if param_category == 'bn':
param_shape = [channels_out]
elif param_category == 'conv':
if suffix == 'weights':
param_shape = [channels_out, channels_in, filter_h, filter_w]
elif suffix == 'bias':
param_shape = [channels_out]
param_size = np.product(np.array(param_shape))
param_data = np.ndarray(
shape=param_shape,
dtype='float32',
buffer=self.weights_file.read(param_size * 4))
param_data = param_data.flatten().astype(float)
return param_name, param_data, param_shape
class GraphBuilderONNX(object):
"""Class for creating an ONNX graph from a previously generated list of layer dictionaries."""
def __init__(self, output_tensors):
"""Initialize with all DarkNet default parameters used creating YOLOv3,
and specify the output tensors as an OrderedDict for their output dimensions
with their names as keys.
Keyword argument:
output_tensors -- the output tensors as an OrderedDict containing the keys'
output dimensions
"""
self.output_tensors = output_tensors
self._nodes = list()
self.graph_def = None
self.input_tensor = None
self.epsilon_bn = 1e-5
self.momentum_bn = 0.99
self.alpha_lrelu = 0.1
self.param_dict = OrderedDict()
self.major_node_specs = list()
self.batch_size = 1
def build_onnx_graph(
self,
layer_configs,
weights_file_path,
verbose=True):
"""Iterate over all layer configs (parsed from the DarkNet representation
of YOLOv3-608), create an ONNX graph, populate it with weights from the weights
file and return the graph definition.
Keyword arguments:
layer_configs -- an OrderedDict object with all parsed layers' configurations
weights_file_path -- location of the weights file
verbose -- toggles if the graph is printed after creation (default: True)
"""
for layer_name in layer_configs.keys():
layer_dict = layer_configs[layer_name]
major_node_specs = self._make_onnx_node(layer_name, layer_dict)
if major_node_specs.name is not None:
self.major_node_specs.append(major_node_specs)
outputs = list()
for tensor_name in self.output_tensors.keys():
output_dims = [self.batch_size, ] + \
self.output_tensors[tensor_name]
output_tensor = helper.make_tensor_value_info(
tensor_name, TensorProto.FLOAT, output_dims)
outputs.append(output_tensor)
inputs = [self.input_tensor]
weight_loader = WeightLoader(weights_file_path)
initializer = list()
# If a layer has parameters, add them to the initializer and input lists.
for layer_name in self.param_dict.keys():
_, layer_type = layer_name.split('_', 1)
params = self.param_dict[layer_name]
if layer_type == 'convolutional':
initializer_layer, inputs_layer = weight_loader.load_conv_weights(
params)
initializer.extend(initializer_layer)
inputs.extend(inputs_layer)
elif layer_type == "upsample":
initializer_layer, inputs_layer = weight_loader.load_upsample_scales(
params)
initializer.extend(initializer_layer)
inputs.extend(inputs_layer)
del weight_loader
self.graph_def = helper.make_graph(
nodes=self._nodes,
name='YOLOv3-tiny-416', ##!!!!!!
inputs=inputs,
outputs=outputs,
initializer=initializer
)
if verbose:
print(helper.printable_graph(self.graph_def))
model_def = helper.make_model(self.graph_def,
producer_name='NVIDIA TensorRT sample')
return model_def
def _make_onnx_node(self, layer_name, layer_dict):
"""Take in a layer parameter dictionary, choose the correct function for
creating an ONNX node and store the information important to graph creation
as a MajorNodeSpec object.
Keyword arguments:
layer_name -- the layer's name (also the corresponding key in layer_configs)
layer_dict -- a layer parameter dictionary (one element of layer_configs)
"""
layer_type = layer_dict['type']
if self.input_tensor is None:
if layer_type == 'net':
major_node_output_name, major_node_output_channels = self._make_input_tensor(
layer_name, layer_dict)
major_node_specs = MajorNodeSpecs(major_node_output_name,
major_node_output_channels)
else:
raise ValueError('The first node has to be of type "net".')
else:
node_creators = dict()
node_creators['convolutional'] = self._make_conv_node
node_creators['shortcut'] = self._make_shortcut_node
node_creators['route'] = self._make_route_node
node_creators['upsample'] = self._make_upsample_node
node_creators['maxpool'] = self._make_maxpool_node
if layer_type in node_creators.keys():
major_node_output_name, major_node_output_channels = \
node_creators[layer_type](layer_name, layer_dict)
major_node_specs = MajorNodeSpecs(major_node_output_name,
major_node_output_channels)
else:
print(
'Layer of type %s not supported, skipping ONNX node generation.' %
layer_type)
major_node_specs = MajorNodeSpecs(layer_name,
None)
return major_node_specs
def _make_input_tensor(self, layer_name, layer_dict):
"""Create an ONNX input tensor from a 'net' layer and store the batch size.
Keyword arguments:
layer_name -- the layer's name (also the corresponding key in layer_configs)
layer_dict -- a layer parameter dictionary (one element of layer_configs)
"""
print(layer_dict)
batch_size = layer_dict['batch']
channels = layer_dict['channels']
height = layer_dict['height']
width = layer_dict['width']
self.batch_size = batch_size
input_tensor = helper.make_tensor_value_info(
str(layer_name), TensorProto.FLOAT, [
batch_size, channels, height, width])
self.input_tensor = input_tensor
return layer_name, channels
def _get_previous_node_specs(self, target_index=-1):
"""Get a previously generated ONNX node (skip those that were not generated).
Target index can be passed for jumping to a specific index.
Keyword arguments:
target_index -- optional for jumping to a specific index (default: -1 for jumping
to previous element)
"""
previous_node = None
for node in self.major_node_specs[target_index::-1]:
if node.created_onnx_node:
previous_node = node
break
assert previous_node is not None
return previous_node
def _make_conv_node(self, layer_name, layer_dict):
"""Create an ONNX Conv node with optional batch normalization and
activation nodes.
Keyword arguments:
layer_name -- the layer's name (also the corresponding key in layer_configs)
layer_dict -- a layer parameter dictionary (one element of layer_configs)
"""
previous_node_specs = self._get_previous_node_specs()
inputs = [previous_node_specs.name]
previous_channels = previous_node_specs.channels
kernel_size = layer_dict['size']
stride = layer_dict['stride']
filters = layer_dict['filters']
batch_normalize = False
if 'batch_normalize' in layer_dict.keys(
) and layer_dict['batch_normalize'] == 1:
batch_normalize = True
kernel_shape = [kernel_size, kernel_size]
weights_shape = [filters, previous_channels] + kernel_shape
conv_params = ConvParams(layer_name, batch_normalize, weights_shape)
strides = [stride, stride]
dilations = [1, 1]
weights_name = conv_params.generate_param_name('conv', 'weights')
inputs.append(weights_name)
if not batch_normalize:
bias_name = conv_params.generate_param_name('conv', 'bias')
inputs.append(bias_name)
conv_node = helper.make_node(
'Conv',
inputs=inputs,
outputs=[layer_name],
kernel_shape=kernel_shape,
strides=strides,
auto_pad='SAME_LOWER',
dilations=dilations,
name=layer_name
)
self._nodes.append(conv_node)
inputs = [layer_name]
layer_name_output = layer_name
if batch_normalize:
layer_name_bn = layer_name + '_bn'
bn_param_suffixes = ['scale', 'bias', 'mean', 'var']
for suffix in bn_param_suffixes:
bn_param_name = conv_params.generate_param_name('bn', suffix)
inputs.append(bn_param_name)
batchnorm_node = helper.make_node(
'BatchNormalization',
inputs=inputs,
outputs=[layer_name_bn],
epsilon=self.epsilon_bn,
momentum=self.momentum_bn,
name=layer_name_bn
)
self._nodes.append(batchnorm_node)
inputs = [layer_name_bn]
layer_name_output = layer_name_bn
if layer_dict['activation'] == 'leaky':
layer_name_lrelu = layer_name + '_lrelu'
lrelu_node = helper.make_node(
'LeakyRelu',
inputs=inputs,
outputs=[layer_name_lrelu],
name=layer_name_lrelu,
alpha=self.alpha_lrelu
)
self._nodes.append(lrelu_node)
inputs = [layer_name_lrelu]
layer_name_output = layer_name_lrelu
elif layer_dict['activation'] == 'linear':
pass
else:
print('Activation not supported.')
self.param_dict[layer_name] = conv_params
return layer_name_output, filters
def _make_shortcut_node(self, layer_name, layer_dict):
"""Create an ONNX Add node with the shortcut properties from
the DarkNet-based graph.
Keyword arguments:
layer_name -- the layer's name (also the corresponding key in layer_configs)
layer_dict -- a layer parameter dictionary (one element of layer_configs)
"""
shortcut_index = layer_dict['from']
activation = layer_dict['activation']
assert activation == 'linear'
first_node_specs = self._get_previous_node_specs()
second_node_specs = self._get_previous_node_specs(
target_index=shortcut_index)
assert first_node_specs.channels == second_node_specs.channels
channels = first_node_specs.channels
inputs = [first_node_specs.name, second_node_specs.name]
shortcut_node = helper.make_node(
'Add',
inputs=inputs,
outputs=[layer_name],
name=layer_name,
)
self._nodes.append(shortcut_node)
return layer_name, channels
def _make_route_node(self, layer_name, layer_dict):
"""If the 'layers' parameter from the DarkNet configuration is only one index, continue
node creation at the indicated (negative) index. Otherwise, create an ONNX Concat node
with the route properties from the DarkNet-based graph.
Keyword arguments:
layer_name -- the layer's name (also the corresponding key in layer_configs)
layer_dict -- a layer parameter dictionary (one element of layer_configs)
"""
route_node_indexes = layer_dict['layers']
if len(route_node_indexes) == 1:
split_index = route_node_indexes[0]
assert split_index < 0
# Increment by one because we skipped the YOLO layer:
split_index += 1
self.major_node_specs = self.major_node_specs[:split_index]
layer_name = None
channels = None
else:
inputs = list()
channels = 0
for index in route_node_indexes:
if index > 0:
# Increment by one because we count the input as a node (DarkNet
# does not)
index += 1
route_node_specs = self._get_previous_node_specs(
target_index=index)
inputs.append(route_node_specs.name)
channels += route_node_specs.channels
assert inputs
assert channels > 0
route_node = helper.make_node(
'Concat',
axis=1,
inputs=inputs,
outputs=[layer_name],
name=layer_name,
)
self._nodes.append(route_node)
return layer_name, channels
def _make_upsample_node(self, layer_name, layer_dict):
"""Create an ONNX Upsample node with the properties from
the DarkNet-based graph.
Keyword arguments:
layer_name -- the layer's name (also the corresponding key in layer_configs)
layer_dict -- a layer parameter dictionary (one element of layer_configs)
"""
upsample_factor = float(layer_dict['stride'])
# Create the scales array with node parameters
scales = np.array([1.0, 1.0, upsample_factor, upsample_factor]).astype(np.float32)
previous_node_specs = self._get_previous_node_specs()
inputs = [previous_node_specs.name]
channels = previous_node_specs.channels
assert channels > 0
upsample_params = UpsampleParams(layer_name, scales)
scales_name = upsample_params.generate_param_name()
# For ONNX opset >= 9, the Upsample node takes the scales array as an input.
inputs.append(scales_name)
upsample_node = helper.make_node(
'Upsample',
mode='nearest',
inputs=inputs,
outputs=[layer_name],
name=layer_name,
)
self._nodes.append(upsample_node)
self.param_dict[layer_name] = upsample_params
return layer_name, channels
def _make_maxpool_node(self, layer_name, layer_dict):
stride = layer_dict['stride']
kernel_size = layer_dict['size']
previous_node_specs = self._get_previous_node_specs()
inputs = [previous_node_specs.name]
channels = previous_node_specs.channels
kernel_shape = [kernel_size, kernel_size]
strides = [stride, stride]
assert channels > 0
maxpool_node = helper.make_node(
'MaxPool',
inputs=inputs,
outputs=[layer_name],
kernel_shape=kernel_shape,
strides=strides,
auto_pad='SAME_UPPER',
name=layer_name,
)
self._nodes.append(maxpool_node)
return layer_name, channels
def generate_md5_checksum(local_path):
"""Returns the MD5 checksum of a local file.
Keyword argument:
local_path -- path of the file whose checksum shall be generated
"""
with open(local_path) as local_file:
data = local_file.read()
return hashlib.md5(data).hexdigest()
def download_file(local_path, link, checksum_reference=None):
"""Checks if a local file is present and downloads it from the specified path otherwise.
If checksum_reference is specified, the file's md5 checksum is compared against the
expected value.
Keyword arguments:
local_path -- path of the file whose checksum shall be generated
link -- link where the file shall be downloaded from if it is not found locally
checksum_reference -- expected MD5 checksum of the file
"""
if not os.path.exists(local_path):
print('Downloading from %s, this may take a while...' % link)
wget.download(link, local_path)
print()
if checksum_reference is not None:
checksum = generate_md5_checksum(local_path)
if checksum != checksum_reference:
raise ValueError(
'The MD5 checksum of local file %s differs from %s, please manually remove \
the file and try again.' %
(local_path, checksum_reference))
return local_path
def main():
"""Run the DarkNet-to-ONNX conversion for YOLOv3-tiny-416."""
img_size = 416 # !!!!!!
# Have to use python 2 due to hashlib compatibility
'''
if sys.version_info[0] > 2:
raise Exception("This script is only compatible with python2, please re-run this script with python2. The rest of this sample can be run with either version of python.")
'''
# Download the config for YOLOv3 if not present yet, and analyze the checksum:
cfg_file_path = '/home/jcy/source/yolo2onnx/yolov3/yolov3.cfg' # !!!!!
# These are the only layers DarkNetParser will extract parameters from. The three layers of
# type 'yolo' are not parsed in detail because they are included in the post-processing later:
supported_layers = ['net', 'convolutional', 'shortcut',
'route', 'upsample', 'maxpool']
# Create a DarkNetParser object, and the use it to generate an OrderedDict with all
# layer's configs from the cfg file:
parser = DarkNetParser(supported_layers)
layer_configs = parser.parse_cfg_file(cfg_file_path)
# We do not need the parser anymore after we got layer_configs:
del parser
# In above layer_config, there are three outputs that we need to know the output
# shape of (in CHW format):
output_tensor_dims = OrderedDict()
kernel_size_1 = int(img_size / 32)
kernel_size_2 = int(img_size / 16)
output_tensor_dims['016_convolutional'] = [255, kernel_size_1, kernel_size_1]
output_tensor_dims['023_convolutional'] = [255, kernel_size_2, kernel_size_2]
# Create a GraphBuilderONNX object with the known output tensor dimensions:
builder = GraphBuilderONNX(output_tensor_dims)
# We want to populate our network with weights later, that's why we download those from
# the official mirror (and verify the checksum):
weights_file_path = '/home/jcy/source/yolo2onnx/yolov3/yolov3.weights' # !!!!!!
# Now generate an ONNX graph with weights from the previously parsed layer configurations
# and the weights file:
yolov3_model_def = builder.build_onnx_graph(
layer_configs=layer_configs,
weights_file_path=weights_file_path,
verbose=True)
# Once we have the model definition, we do not need the builder anymore:
del builder
# Perform a sanity check on the ONNX model definition:
onnx.checker.check_model(yolov3_model_def)
# Serialize the generated ONNX graph to this file:
output_file_path = '/home/jcy/source/yolo2onnx/yolov3/yolov3.onnx' # !!!!!!
onnx.save(yolov3_model_def, output_file_path)
if __name__ == '__main__':
main()
(代码参考自:https://blog.csdn.net/weixin_38106878/article/details/106349036)
其中,代码的720、747、762需要自己的修改的路径:
    cfg_file_path = '/home/jcy/source/yolo2onnx/yolov3-tiny.cfg'
    weights_file_path = '/home/jcy/source/yolo2onnx/yolov3-tiny.weights'
    output_file_path = '/home/jcy/source/yolo2onnx/yolov3-tiny.onnx'
其次,看一下cfg文件中最后的classes是多少,我的是80,739-740行修改一下
    output_tensor_dims['016_convolutional'] = [255, kernel_size_1, kernel_size_1]
    output_tensor_dims['023_convolutional'] = [255, kernel_size_2, kernel_size_2]
这里的255 = 3×(classes + 4 + 1),如果classes不是80,则计算一下,并修改代码,怕出错直接换cfg文件,文件地址下面会给出。
接着运行程序,在jetson nano上可以使用notebook或者vscode运行python程序,vscode在arm是code-oss。也可以在终端使用touch yolo2onnx.py新建python程序,修改后,再用终端来运行。
arm版vscode(code-oss)下载地址:
链接:https://pan.baidu.com/s/1wb8L-zLRd-M_O4m6_u2Efw
提取码:gghc
运行结果:
这里附上yolov3-tiny的cfg、weights以及转换好的onnx模型下载地址:
链接:https://pan.baidu.com/s/1rHuePiLyUS_jiWZlmIcmug
提取码:yctj
同时我也会上传到我的资源当中,不差积分的去那里下载吧。
遇到的问题:
报错1:not enough values to unpack (expected 2, got 1)
报错2:TypeError: buffer is too small for requested array
这两个报错可以尝试参考:https://blog.csdn.net/qq_36780295/article/details/108233760
报错3:安装onnx失败时,先确认又没有安装其依赖protobuf-compiler、libprotoc-dev。如果存在 sudo apt-get install protobuf-compiler libprotoc-dev无法定位软件包,把镜像源换成清华大学的镜像即可。
测试转换好的onnx模型:
(由于jetson nano可能会出现一些问题,所以以下步骤我是在linux主机端完成的,准备等模型转换完毕所有准备工作都完成以后,再移植到jetson nano上来调用)
以下测试部分代码,参考自:https://blog.csdn.net/weixin_38106878/article/details/106349036
在yolov3_to_onnx.py同目录新建 darknet.py 和 onnx_inference.py 。
代码如下:
darknet.py:
# coding: utf-8
"""
YOlo相关的预处理api;
"""
import cv2
import time
import numpy as np


# 加载label names;
def get_labels(names_file):
    names = list()
    with open(names_file, 'r') as f:
        lines = f.read()
        for name in lines.splitlines():
            names.append(name)
    f.close()
    return names


# 照片预处理
def process_img(img_path, input_shape):
    ori_img = cv2.imread(img_path)
    img = cv2.resize(ori_img, input_shape)
    image = img[:, :, ::-1].transpose((2, 0, 1))
    image = image[np.newaxis, :, :, :] / 255
    image = np.array(image, dtype=np.float32)
    return ori_img, ori_img.shape, image


# 视频预处理
def frame_process(frame, input_shape):
    image = cv2.cvtColor(frame, cv2.COLOR_BGR2RGB)
    image = cv2.resize(image, input_shape)
    # image = cv2.resize(image, (640, 480))
    image_mean = np.array([127, 127, 127])
    image = (image - image_mean) / 128
    image = np.transpose(image, [2, 0, 1])
    image = np.expand_dims(image, axis=0)
    image = image.astype(np.float32)
    return image


# sigmoid函数
def sigmoid(x):
    s = 1 / (1 + np.exp(-1 * x))
    return s


# 获取预测正确的类别,以及概率和索引;
def get_result(class_scores):
    class_score = 0
    class_index = 0
    for i in range(len(class_scores)):
        if class_scores[i] > class_score:
            class_index += 1
            class_score = class_scores[i]
    return class_score, class_index


# 通过置信度筛选得到bboxs
def get_bbox(feat, anchors, image_shape, confidence_threshold=0.25):
    box = list()
    for i in range(len(anchors)):
        for cx in range(feat.shape[0]):
            for cy in range(feat.shape[1]):
                tx = feat[cx][cy][0 + 85 * i]
                ty = feat[cx][cy][1 + 85 * i]
                tw = feat[cx][cy][2 + 85 * i]
                th = feat[cx][cy][3 + 85 * i]
                cf = feat[cx][cy][4 + 85 * i]
                cp = feat[cx][cy][5 + 85 * i:8 + 85 * i]

                bx = (sigmoid(tx) + cx) / feat.shape[0]
                by = (sigmoid(ty) + cy) / feat.shape[1]
                bw = anchors[i][0] * np.exp(tw) / image_shape[0]
                bh = anchors[i][1] * np.exp(th) / image_shape[1]
                b_confidence = sigmoid(cf)
                b_class_prob = sigmoid(cp)
                b_scores = b_confidence * b_class_prob
                b_class_score, b_class_index = get_result(b_scores)

                if b_class_score >= confidence_threshold:
                    box.append([bx, by, bw, bh, b_class_score, b_class_index])

    return box


# 采用nms算法筛选获取到的bbox
def nms(boxes, nms_threshold=0.6):
    l = len(boxes)
    if l == 0:
        return []
    else:
        b_x = boxes[:, 0]
        b_y = boxes[:, 1]
        b_w = boxes[:, 2]
        b_h = boxes[:, 3]
        scores = boxes[:, 4]
        areas = (b_w + 1) * (b_h + 1)
        order = scores.argsort()[::-1]
        keep = list()
        while order.size > 0:
            i = order[0]
            keep.append(i)
            xx1 = np.maximum(b_x[i], b_x[order[1:]])
            yy1 = np.maximum(b_y[i], b_y[order[1:]])
            xx2 = np.minimum(b_x[i] + b_w[i], b_x[order[1:]] + b_w[order[1:]])
            yy2 = np.minimum(b_y[i] + b_h[i], b_y[order[1:]] + b_h[order[1:]])
            # 相交面积,不重叠时面积为0
            w = np.maximum(0.0, xx2 - xx1 + 1)
            h = np.maximum(0.0, yy2 - yy1 + 1)
            inter = w * h
            # 相并面积,面积1+面积2-相交面积
            union = areas[i] + areas[order[1:]] - inter
            # 计算IoU:交 /(面积1+面积2-交)
            IoU = inter / union
            # 保留IoU小于阈值的box
            inds = np.where(IoU <= nms_threshold)[0]
            order = order[inds + 1]

        final_boxes = [boxes[i] for i in keep]
        return final_boxes


# 绘制预测框
def draw_box(boxes, img, img_shape):
    label = ["background", "car", "pedestrian", "face"]
    for box in boxes:
        x1 = int((box[0] - box[2] / 2) * img_shape[1])
        y1 = int((box[1] - box[3] / 2) * img_shape[0])
        x2 = int((box[0] + box[2] / 2) * img_shape[1])
        y2 = int((box[1] + box[3] / 2) * img_shape[0])
        cv2.rectangle(img, (x1, y1), (x2, y2), (0, 255, 0), 2)
        cv2.putText(img, label[int(box[5])] + ":" + str(round(box[4], 3)), (x1 + 5, y1 + 10), cv2.FONT_HERSHEY_SIMPLEX,
                    0.5, (0, 0, 255), 1)
        print(label[int(box[5])] + ":" + "概率值:%.3f" % box[4])


# 获取预测框
def get_boxes(prediction, anchors, img_shape, confidence_threshold=0.25, nms_threshold=0.6):
    boxes = []
    for i in range(len(prediction)):
        feature_map = prediction[i][0].transpose((2, 1, 0))
        box = get_bbox(feature_map, anchors[i], img_shape, confidence_threshold)
        boxes.extend(box)
    Boxes = nms(np.array(boxes), nms_threshold)

    return Boxes
其中,67到72行的代码:
                tx = feat[cx][cy][0 + 85 * i]
                ty = feat[cx][cy][1 + 85 * i]
                tw = feat[cx][cy][2 + 85 * i]
                th = feat[cx][cy][3 + 85 * i]
                cf = feat[cx][cy][4 + 85 * i]
                cp = feat[cx][cy][5 + 85 * i:8 + 85 * i]
这里所有*i前面的 85 改为cfg文件中的 classes+4+1 ,例如我的是80,就是85。改完以后保存。
onnx_inference.py:
# -*-coding: utf-8-*-
import cv2
import time
import logging
import numpy as np
import onnxruntime
from darknet_api import get_boxes


# load onnx model
def load_model(onnx_model):
    sess = onnxruntime.InferenceSession(onnx_model)
    in_name = [input.name for input in sess.get_inputs()][0]
    out_name = [output.name for output in sess.get_outputs()]
    logging.info("输入的name:{}, 输出的name:{}".format(in_name, out_name))

    return sess, in_name, out_name


# process frame
def frame_process(frame, input_shape=(416, 416)):
    img = cv2.resize(frame, input_shape)
    image = img[:, :, ::-1].transpose((2, 0, 1))
    image = image[np.newaxis, :, :, :] / 255
    image = np.array(image, dtype=np.float32)
    return image


# 视屏预处理
def stream_inference():
    # 基本的参数设定
    label = ["background", "car", "pedestrian", "face"]
    anchors_yolo_tiny = [[(81, 82), (135, 169), (344, 319)], [(10, 14), (23, 27), (37, 58)]]
    # anchors_yolo = [[(116, 90), (156, 198), (373, 326)], [(30, 61), (62, 45), (59, 119)],
    #                [(10, 13), (16, 30), (33, 23)]]
    session, in_name, out_name = load_model(onnx_model='/home/jcy/source/yolo2onnx/yolov3-tiny.onnx')
    cap = cv2.VideoCapture('/home/jcy/source/1.MP4')
    while True:
        _, frame = cap.read()
        input_shape = frame.shape
        s = time.time()
        test_data = frame_process(frame, input_shape=(416, 416))
        logging.info("process per pic spend time is:{}ms".format((time.time() - s) * 1000))
        s1 = time.time()
        prediction = session.run(out_name, {in_name: test_data})
        s2 = time.time()
        print("prediction cost time: %.3fms" % (s2 - s1))
        fps = 1 / (s2 - s1)
        boxes = get_boxes(prediction=prediction,
                          anchors=anchors_yolo_tiny,
                          img_shape=(416, 416))
        print("get box cost time:{}ms".format((time.time() - s2) * 1000))
        for box in boxes:
            x1 = int((box[0] - box[2] / 2) * input_shape[1])
            y1 = int((box[1] - box[3] / 2) * input_shape[0])
            x2 = int((box[0] + box[2] / 2) * input_shape[1])
            y2 = int((box[1] + box[3] / 2) * input_shape[0])
            logging.info(label[int(box[5])] + ":" + str(round(box[4], 3)))
            cv2.rectangle(frame, (x1, y1), (x2, y2), (0, 255, 0), 1)
            cv2.putText(frame, label[int(box[5])] + ":" + str(round(box[4], 3)),
                        (x1 + 5, y1 + 10),
                        cv2.FONT_HERSHEY_SIMPLEX,
                        0.5,
                        (0, 0, 255),
                        1)
        cv2.putText(frame, str('FPS:%.3f' % fps), (5, 100),
                    cv2.FONT_HERSHEY_SIMPLEX,
                    1, (0, 255, 255), 2)

        frame = cv2.resize(frame, (0, 0), fx=0.7, fy=0.7)

        cv2.imshow("Results", frame)
        if cv2.waitKey(1) & 0xFF == ord('q'):
            break
    cap.release()
    cv2.destroyAllWindows()


if __name__ == '__main__':
    stream_inference()
36行的路径修改为自己生成的onnx模型路径,37行视频路径也改一下,保存并运行。
yolov3-tiny.onnx预测结果:
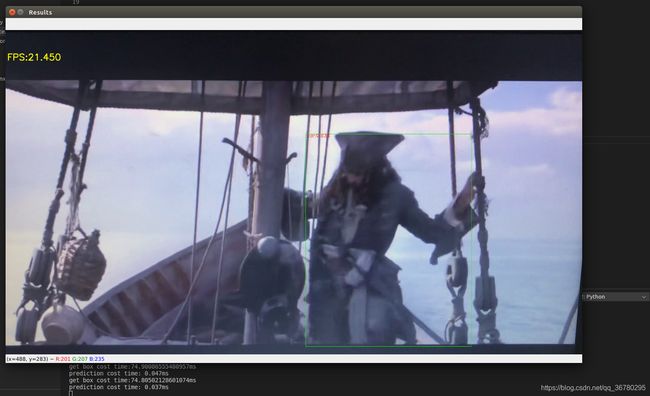 视频是我用手机拍电脑的,有点糊,识别的不是很准,这个暂且不管。
因为还是使用opencv一帧一帧读取的,所以还是很卡,不过因为是tiny版的模型,相比yolov3的预测延迟严重卡顿,tiny版还是流畅了一些。
安装onnx-tensorRT:
网上有些文章中给出了onnx-tensorRT转换的代码,但是我在实际运行时,有非常多的报错,而且这些错误在网上也很难找到解决方案,所以决定安装onnx-tensorRT。(需要安装protobuf的往下拉)
(安装环境:onnx1.4.0,tensorRT5.0.2.6 这两个貌似也有版本匹配要求,tensorrt和onnx-tensorrt版本也要匹配,我这里两个都是5.0版本)
先到github上下载项目,地址为:https://github.com/onnx/onnx-tensorrt/tree/v5.0
下载完以后解压,进入到该文件夹,右击在终端打开,执行以下指令:
mkdir build
cd build
cmake .. -DTENSORRT_ROOT= -DGPU_ARCHS="61"
make -j8
sudo make install
61为gtx1080ti的算力,具体参数参考:https://developer.nvidia.com/cuda-gpus
其中 cmake .. -DTENSORRT_ROOT=/home/jcy/source/jcy/tensorrt/TensorRT-5.0.2.6 -DGPU_ARCHS="61"
执行cmake时,如果遇到CMake Error at CMakeLists.txt:121
third_party目录下的onnx中的文件没有下载下来,下载地址:https://github.com/onnx/onnx/tree/765f5ee823a67a866f4bd28a9860e81f3c811ce8
下载以后解压,并把解压缩的文件放到onnx文件夹中。

重新执行cmake:
 成功!
成功!
整理一下这几据代码的报错:
cmake … -DTENSORRT_ROOT=
其他任何报错,出现Tensorrt字眼的,请检查环境变量路径,可能PATH没有添加或路径写错,导致无法通过环境变量访问tensorrt。如我由于tensorRT3.0.4貌似不匹配,于是就重装了tensorrt5.0.2.6(安装过程可以参考我的另一篇安装3.0.4的博客,安装5.0.2.6差不多),装完以后只配置了环境变量LINBRARY,却忘了配置PATH了。
例如出现如下错误:
 library无法定位就重新导入library环境变量,tensorrt无法定位就重新导入path。如:
export PATH="$PATH:/home/jcy/source/jcy/tensorrt/TensorRT-5.0.2.6
make -j8时的错误
报错1:执行 make -j8 时报错报了一大片
 确认安装了protobuf3.8版本以上(安装过程在下面),我报这个错,后来发现是上一步cmake通过了,后来又重装了一遍tensorrt,没有重新执行上一句。这时请重新配置路径,重新执行上一步的cmake确保通过。
报错2:
 再次执行make -j8,报错信息:
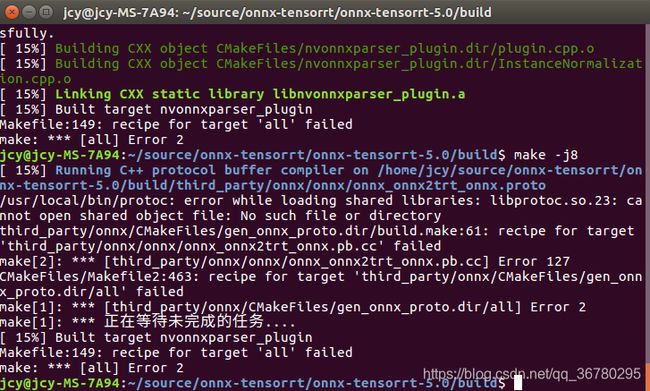 显示未能读取到libprotobuf.so.23,这个文件一般在 /usr/local/lib中,我们需要配置软链接。
使用root用户,执行:
vim /etc/ld.so.conf
出来个空的文本:
 一开始还以为文件名打错了,结果后来发现真的是空的,尴尬!
在ld.so.conf文件中加入: /usr/local/lib
再执行ldconfig
插曲:
执行ldconfig时报错:
 libnvinfer.so.4是老版本的tensorrt中的了,现在是tensorrt5.0.2,所以先将它删掉:
rm -rf /usr/lib/libnvinfer.so.4
然后,找到tensorrt文件夹下的libnvinfer.so.5.0.2,创建新的软链接:
sudo ln -sf /home/jcy/source/jcy/tensorrt/TensorRT-5.0.2.6/lib/libnvinfer.so.5.0.2 /home/jcy/source/jcy/tensorrt/TensorRT-5.0.2.6/lib/libnvinfer.so.5
此时再执行``ldconfig```就不报错了。
再次执行make -j8:
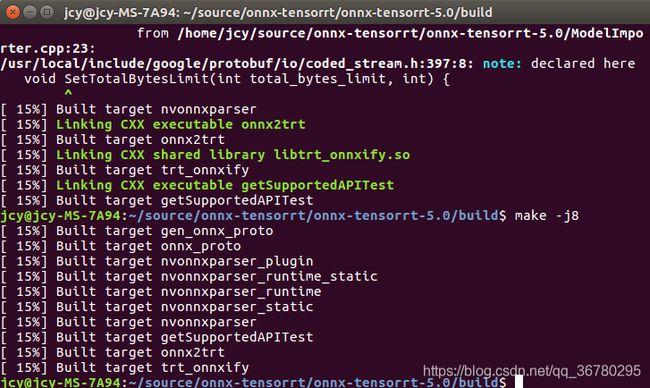 成功!
成功!
虽然报了很多warning,就先不管了。
报错3:
make install如果报错拷贝文件错误,则使用root权限。
至此,onnx-tensorrt安装成功,天知道我才了多少坑!我太南了!
安装protobuf:
onnx-tensorrt7.x要求protobuf版本在3.8以上。
在终端输入protoc --version
输出:libprotoc 2.6.1
版本太老,重新安装吧。
(以下步骤由于未知原因的错误作废了,放在这边用作参考,比如参考bug,不想看的直接下拉,跳过分割线部分)
分割线************************************************************************************************
protobuf-3.11.x github项目下载地址:https://github.com/protocolbuffers/protobuf/tree/3.11.x
下载完以后,自行选择目录,解压缩。
接着打开解压缩的文件夹,进入到 /protobuf-3.11.x/third_party,先把googletest文件夹删除,再右击选择在终端打开,依次输入执行:
git clone https://github.com/google/googletest
cd googletest
cmake CMakeLists.txt
make
cd lib
sudo cp libgtest*.a  /usr/lib
cd ../googletest
sudo cp –a include/gtest /usr/include
遇到的问题:
输入make以后报错一大堆,跟前面make -j8一样情形。
解决方法:
打开CmakeLists.txt,在代码的第二行添加:SET(CMAKE_CXX_FLAGS "-std=c++0x")
然后重新 make
 成功!
成功!
这一步参考自:https://blog.csdn.net/weixin_44401286/article/details/101796958
全部都执行完以后,接着,终端执行以下语句,删去老版本的protobuf:
which protoc
rm /path/protoc
(path中写上一句输出的路径,删除权限不够就root登录)
然后进入到 /protobuf-3.8.x,右击在终端打开,执行以下语句:
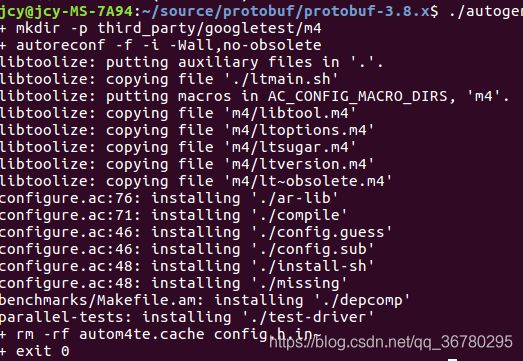
./autogen.sh
./configure --prefix=/usr/local/
make
make check
make install
报错:
报错1、执行 ./autogen.sh报错:

解决方案:
执行
sudo apt-get install autoconf
sudo apt-get install automake
sudo apt-get install libtool
报错2、执行make会跳出来一大堆,好像安装成功了,但是执行make check的时候报错:
 check错误,也不一定代表make失败了。根据网上找到的资料,都说是路径问题,移动了文件夹,但make里面的路径没变,可参照:https://blog.csdn.net/roserose0002/article/details/38397537/
打开protobuf-3.8.x目录下的makefile,由于报错处上一步的 libgmock_main.a 执行成功了,所以将它作为关键字,进行搜索:
 出错的位置就在黄字下方,进入到 third_party/googletest/googletest 目录执行 make的时候报错没有rule指向libgtest.la。
来到 third_party/googletest/googletest 目录下,右击终端执行make lib/libgtest.la,果然:
 一样报错。
一样报错。
经过好几个小时修改makefile,始终没找到把它改正确的方法,参照网上的说法,感觉就是自己安装的googletest和protocbuf中makefile中的路径错乱了,参照外层的makefile,由local check中的代码,执行googletest和googlemock中的makefile报一样的错,使用make -p输出参数,发现一堆文件未找到,回到文件夹看到googlemock中某些文件路径也不对。实在想运行,把makefile中黄字下面make后面的几个la文件目录删掉倒是可以运行了,但我不知道这样运行以后还有什么用,这条路就此作罢,不过可以作为参考。
分割线**************************************************************************************************
安装protocbuf看这里:
首先删除老版本的protocbuf,执行:
which protoc
rm /path/protoc
(path中写上一句输出的路径,删除权限不够就root登录)
然后下载已经附带了googletest的protocbuf,下面这个是 3.12.4版本:
链接:https://pan.baidu.com/s/1UFr8qhXu9SNQ4RlKli0bsw
提取码:bcf5
下载完以后解压,打开文件夹到 protobuf-3.12.4,右击从终端打开。
执行:
./autogen.sh
./configure --prefix=/usr/local/
make
make check
make install
这次执行make check成功!
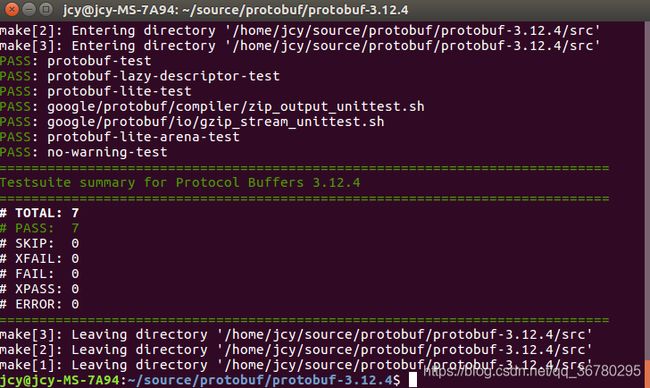
make install结果:
 终端输入:
终端输入:
vim /etc/profile
在profile中添加:
export PATH=$PATH:/usr/local/bin/protoc
export LD_LIBRARY_PATH=/usr/local/lib/
填写自己安装的路径,export PKG_CONFIG_PATH填写的路径,用ls看一下是否存在libprotoc.so.23,如果没有,就找到这个文件并将它所在路径填在export PKG_CONFIG_PATH后面。
执行 source /etc/profile
接着输入:protoc --version
输入结果:
![]()
安装成功!
使用onnx-tensorrt:
按照github项目下方给出的使用方法,通过backend转换:
 运行时onnx_tensorrt不在python的外部模块包中,因此,需要在代码开头添加:
import sys
sys.path.append("/home/jcy/source/onnx-tensorrt/onnx-tensorrt-5.0")
 再次执行,发现报错:
Attribute not found: height_scale
这个问题可以看:https://www.jianshu.com/p/dcd450aa2e41
但是由于讲述的是pytorch转onnx时报的这个错,到yolov3-onnx中就不适用了,文档中描述的几个代码片段在yolov3-转onnx使用的代码中压根就找不到,所以只能自己寻找方法了。
由于github项目下还提供了一种方法,不通过backend来转换:
 尝试这种方法,打开到目录
/home/jcy/source/yolo2onnx(即转换好的yolov3.onnx的位置):
右击在终端打开,执行
onnx2trt yolov3-tiny.onnx -o yolov3-tiny.trt
 执行成功!
执行成功!
可以看到在模型的同目录下 已经生成了一个trt模型文件:
 trt模型我上传到百度网盘,地址:https://pan.baidu.com/s/1j3OXrM-91OvsQ3qMS2K0cA
提取码:wu6l
我也会同步上传到我的资源当中,不差积分的可以去那里下载。
(安装onnx-tensorRT部分参考自:
https://blog.csdn.net/weixin_40232401/article/details/104213428
https://blog.csdn.net/qq_29159273/article/details/99851136)
最后一部分,TensorRT加速CNN部分:
在调用trt模型的时候,出现问题,反复报错Attribute not found:height_scale,经过很长时间的查询和修改,都没能解决,大概就是最近的版本里,pytorch转onnx时改变了打包方式,不知道回退onnx的版本能不能行,如果老版本的转换方式没有改变那说不定可行的。
trt-yolo
以下内容参考自:
https://blog.csdn.net/M_T_M/article/details/105778964
https://blog.csdn.net/BlackLion_zhou/article/details/90049351
https://github.com/NVIDIA-AI-IOT/deepstream_reference_apps/blob/restructure/yolo/README.md(github提供的在yolo上使用的说明书,使用方法与上方博客一致)
感觉原文有些地方需要细化的讲一下,所以自己就再手打一遍。这种方式需要cuda10.0以上的版本,请提前部署好自己的环境,由于我的jetson nano上cuda版本就是10.0的,所以我就直接在这上面进行实验了。
安装环境和yolov3-tiny
先下载trt_yolo,地址:https://github.com/NVIDIA-AI-IOT/deepstream_reference_apps/tree/restructure
解压文件,打开到deepstream_reference_apps/yolo文件夹下,使用vim或者其他文本工具打开prebuild.sh,由于模型文件和cfg文件下载太慢,在不FQ的情况下,我第一次下的时候下了十几个小时,所以这里把Download yolo weights以下的内容全都注释掉,然后保存:
接着右击打开到终端,执行$ sh prebuild.sh,或者手动把prebuild.sh上面的apt-get复制到终端执行。
接着下载yolov3-tiny的模型文件和cfg文件,下载地址我放到了网盘中:
https://pan.baidu.com/s/1rHuePiLyUS_jiWZlmIcmug
提取码:yctj
下载完以后,将两个文件放入到deepstream_reference_apps-restructure/yolo文件夹中。
安装trt-yolo
接着终端执行:
$ cd apps/trt-yolo
$ mkdir build && cd build
$ cmake -D CMAKE_BUILD_TYPE=Release ..
$ make
$ sudo make install
$ cd ../../..
cmake -D CMAKE_BUILD_TYPE=Release ..的执行结果:

make执行结果:
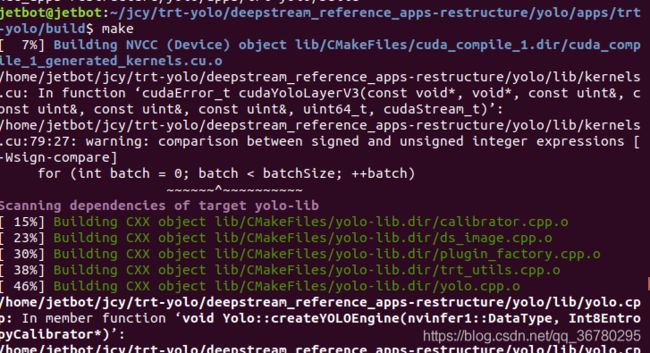
make install执行结果:

期间如果报错可以参考:https://blog.csdn.net/M_T_M/article/details/105778964
修改图片路径
接着,打开deepstream_reference_apps/yolo/data/test_images.txt,先把里面的东西都删掉,然后把自己想预测的图片路径填上去,几张图片就写几个路径:

保存,退出。
进行预测
打开文件夹到/deepstream_reference_apps/yolo,右击从终端打开,执行sudo trt-yolo-app --flagfile=config/yolov3-tiny.txt
运行结果:

两张图片每张预测了149毫秒。
降低精度可以进一步提升效率,打开deepstream_reference_apps/yolo/config/yolov3-tiny.txt文件,将kINT8精度改为kHALF精度:
#--precision=kINT8
改为
--precision=kHALF
这里要注意,先将注释去掉再改。
注:如果想要查看预测结果并保存下来,请将以下三项的注释去掉:

(接着,预测完预测结果就会出现在data的detections文件夹下)
精度改完保存,退出,重新加载模型预测,预测结果:
 反而变慢了?有点不解。
看看预测结果:
 可以!
可以!
我尝试把bath size改为8(默认是4),精度设kHALF:
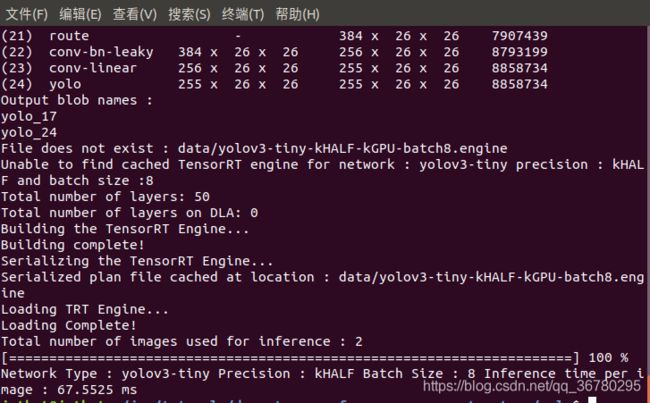 快多了!(kint8却要200多毫秒)
识别视频
识别视频的方法在github和博文中都给出了接口和教程,好像很麻烦的样子,而且并没有看到成功的例子,就不做过多研究了。
trt-yolov3
配置的方法我已经写在了:https://blog.csdn.net/qq_36780295/article/details/108496746


